Drawing like a pro - 106, - Masterclass - Botanical drawing, The geometry of flowers - (#club100)
Hi friends!
I hope these tips can be useful and a source of inspiration when you want to take on this wonderful artistic subject.
The flowers are in most cases very symmetrical, I have a hard time remembering a non-symmetrical flower. In fact, I don't remember any right now.
I believe that plants, trees, flowers and their stems with leaves are very symmetrical, if one leaf, branch or flower petal grows to the right, another will grow to the left and so on. In addition, its growth is slow (slow to our eyes) and proportionate. Maybe we'll talk about proportions later, not now.
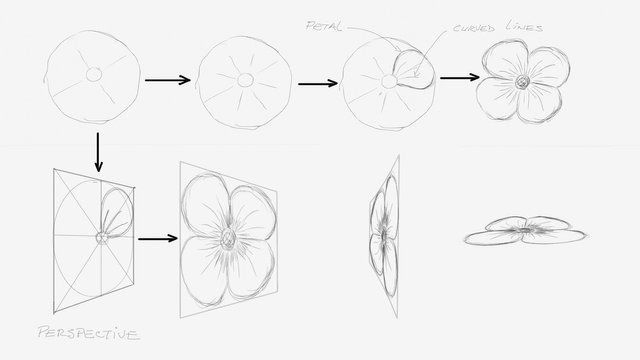
Always keep the symmetry of the flowers in mind when drawing them. You can start by drawing a circle (the circle should not be mathematically perfect) and a small circle or dot placed roughly in the centre.
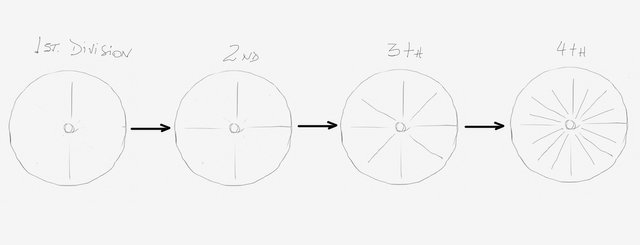
Then divide it, first into two, then into four, and then into eight.
After this, draw the petals, leaving one of the dividing strokes in the middle and using two sides as a meeting point between each petal as shown in the sketches below. This is to draw the four petals of this flower. If you want, you can do more divisions to get five or more petals.
If you want to draw several flowers, each seen from different angles but you don't have a model to look at or you want to draw them from memory, it is very useful to resort to perspective rules like this: 20-Lesson to correctly draw the flowers.
As explained in the lesson, you will find the circle and its centre using the rules of diagonals.
So with the help of perspective rulers, you will be able to draw any flower in any position you want.
To regularly divide any shape, rectangle or circle, as is the case right now, the best and easiest way to start is to divide in half, then into quarters, then divide each quarter into two to get the division into eight, etc. . and so for the division number you want.
If you wanted the division to be odd, start by dividing by three, then dividing each third in half, and so on.
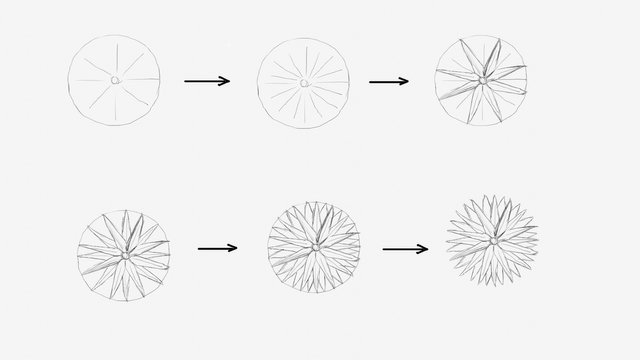
In the example below, you will see the steps to draw a flower that could be a chrysanthemum.
Divide the circle into sixteenths, then draw eight petals leaving a free stroke between each one. Then, draw the next petals as if they were behind the first ones you drew. Continue like this, drawing more petals behind the previous ones until you are satisfied with the amount of them.
You will have already noticed how easy and practical it is to reduce the shapes to basic geometric figures.
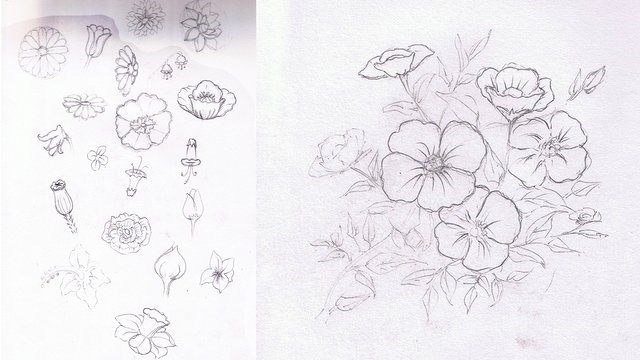
I leave you here as an example some sketches of a Copihue, a wildflower from southern Chile, and the page with the finished colouring page.
As you will see, the first approach to the shape is by drawing two rhombuses and two triangles.

Try drawing different flower shapes from different angles of view and notice how the symmetry is always there.
Try drawing a small flower arrangement like the one below, just to get the shapes.
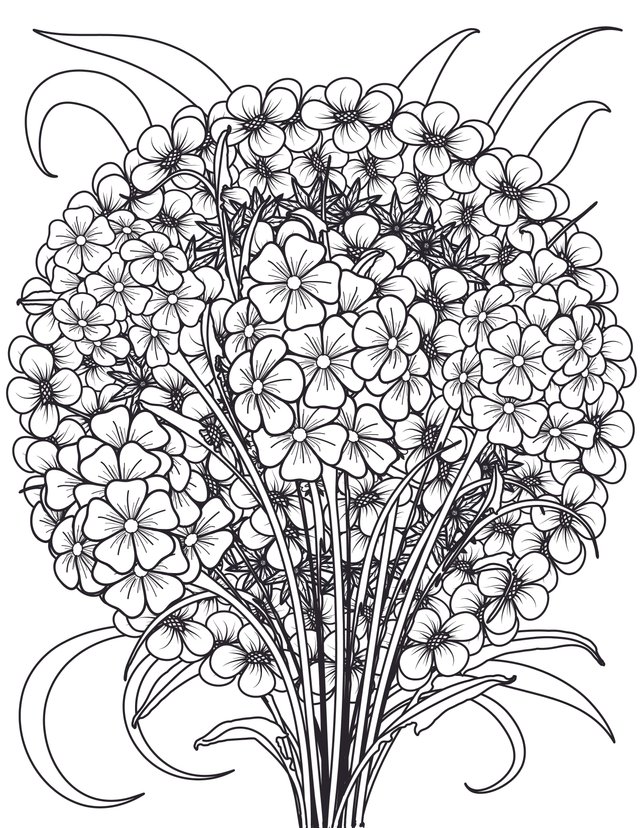
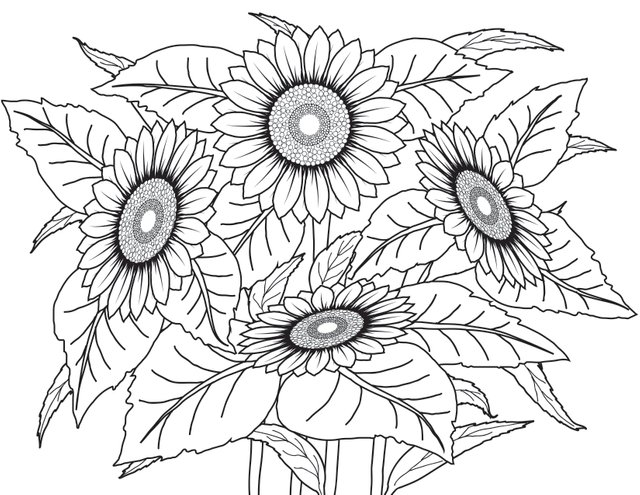
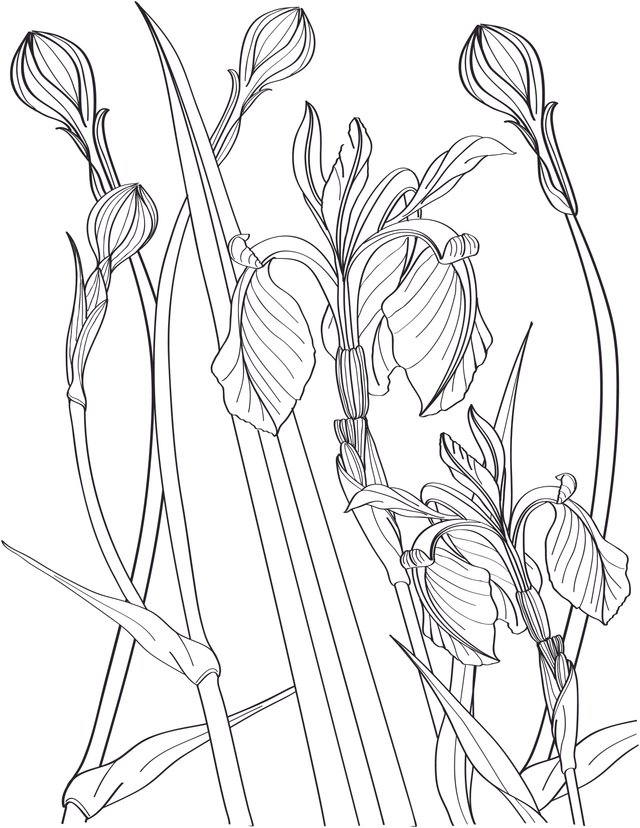
Below, I leave you some floral compositions that I drew as colouring pages.
I wish you a very nice day and good exercise!
Well, our friend @arcoiris is back with his magnificent watercolour lessons.
Here are the links to the previous related posts.
1 - 2 - 3 - 4 - 5 - 6 - 7 - 8 - 9 - 10 - 11 - 12 - 13 14 - 15 - 16 - 17 - 18 - 19 - 20 - 21 - 22 - 23 - 24 - 25 - 26 - 27 - 28 - 29 - 30 - 31 - 32 - 33 - 34 - 35 - 36 - 37 - 38 - 39 - 40 - 41 - 42 - 43 - 44 - 45 - 46 - 47 - 48 - 49 - 50 - 51 - 52 - 53 - 54 - 55 - 56 - 57 - 58 - 59 - 60 - 61 - 62 - 63 - 64 - 65 - 66 - 67 - 68 - 69 - 70 - 71 - 72 - 73 - 74 - 75 - 76 - 77 - 78 - 79 - 80 - 81 - 82 - 83 - 84 - 85 - 86 - 87 - 88 - 89 - 90 - 91 - 92 - 93 - 94 - 95 - 96 - 97 - 98 - 99 - 100 - 101-Lesson - 102-Lesson - 103-Lesson - 104-Lesson - 105-Lesson
Also, thanks to @xpilar for making these initiatives possible with their great support.

Beautiful and helpful guide.
I advise everybody to pay attention to the perspective part, it is super important.
Thank you for the mention.
You are welcome! and thanks to you for stopping by and leaving your kind comment.
My pleasure!
Oh my God. I love these drawings!!
Thank you! I'm glad you liked it and thanks again for stopping by.
This post has been upvoted through steemcurator04.
We support quality posts , good comments anywhere and any tags.
Curated by : @stef1
Thank you very much! I really appreciate your great support.