Drawing like a pro - 52, Masterclass - Understanding the vanishing points (Power up 100%)

Hi friends!
Perhaps you have noticed that some of the drawings that we have made applying the perspective rules sometimes look somewhat distorted, they do not correspond to a very accurate representation of the real vision.
We will now analyze what happens and see how to avoid these problems.
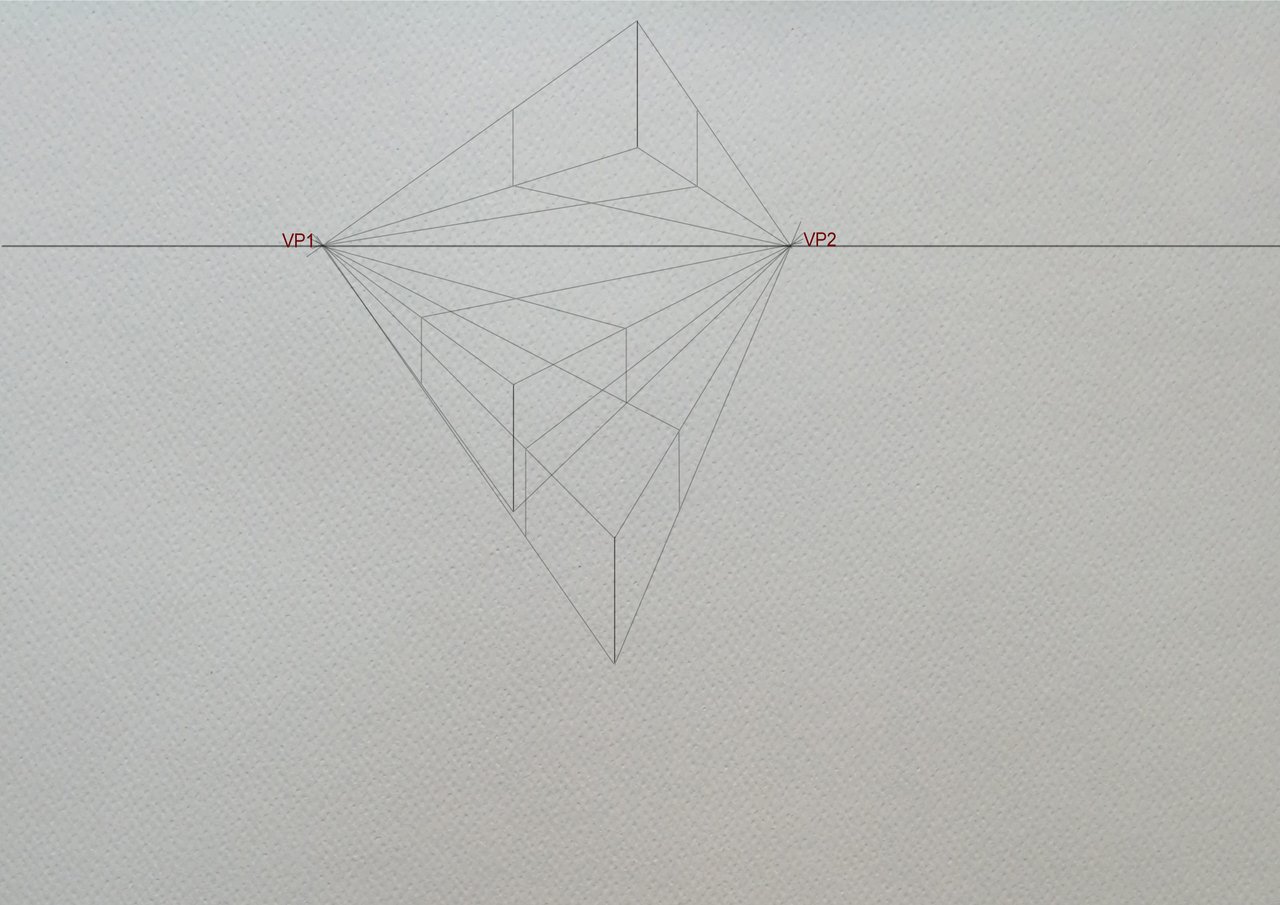
We start by drawing our eye-level line or horizon line, then draw the vertical edge of the cube somewhere below the horizon and slightly offset from the center of the drawing sheet to define the height of the cube. This vertical edge will be the closest edge to our view.

We define VP1 & VP2 on the eye-level line to extend the helplines to these vanishing points as shown below. This process has already been explained in 38-Masterclass and in subsequent posts.

By repeating the same drawing process, we will draw a second and a third cube as shown below.

This is the drawing we have obtained. It is clearly noticeable that the perspective representation is false, it is too forced, too stretched. This occurs due to the position of the vanishing points, which are very close to each other.

To observe the following drawings we must make an effort of imagination (very useful for artists) and we will agree that we are looking in front of the closest edges of the cubes.

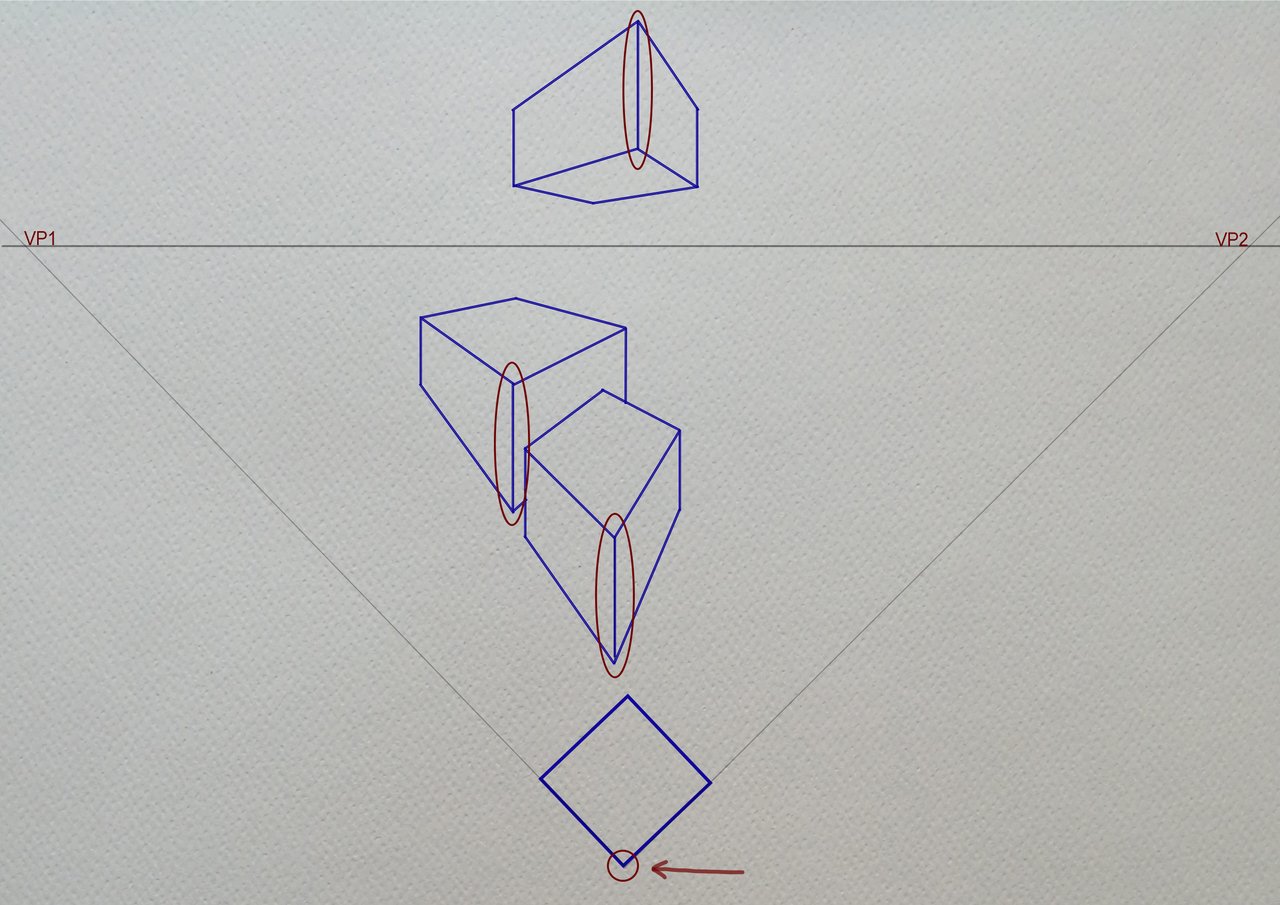
Now we draw a cube at the bottom of the page, but this cube will be seen from the top.

We see here that the only cube that doesn't deform is our last drawing, the one with a top view.
With red ellipses, I show you the closest edges of all the cubes, these also correspond to the edge, circled in the cube of the bottom.
Agreeing that this last cube is the one that is well represented, not deformed, we will extend the lines of the sides of it so that they intersect the horizon line, thus obtaining two new vanishing points as shown below.

We now repeat the exact same drawing process, the only difference is that we will use the new vanishing points that we recently got.
So, we will use the same edge, with the same height and in the same positions as before.
You already know how to draw this, so I wish you good luck.
Here is my drawing.


This is the result. Beautiful, eh!
Compare it with the previous result.

Previous result (not good)
Here are the two drawings overlaid one on top of the other to show you the difference despite their same height, depth and position, just by changing the position of the vanishing points.
I wish you a very nice day and good exercise!
Also, thanks to @xpilar for making these initiatives possible.
Here are the links to the previous related posts.
1-Introduction - 2-Introduction - 3-Introduction - 4-Introduction -
5-Introduction - 6-Lesson - 7-Lesson - 8-Lesson - 9-Lesson - 10-Lesson -
11-Masterclass - 12-HW Contest - 13-Lesson 14-Lesson - 15-Lesson -
16-Lesson - 17-HW results - 18-Masterclass - 19-HW Contest - 20-Lesson - 21-Lesson - 22-Lesson - 23-HW results - 24-Lesson - 25-Lesson -
26-Masterclass - 27-HW Contest - 28-Lesson - 29-Lesson - 30-feedback - 31-Lesson - 32-HW results - 33-Masterclass - 34-HW contest #4 - 35-feedback - 36-feedback - 37-feddback - 38-Masterclass - 39-HW Contest #5 -
40-feedback - 41-feedback - 42-lesson - 43 feedback - 44-feedback - 45-HW feedback - 46-lesson - 47-feedback - 48-feedback - 49-lesson - 50-feedback - 51-feedback
100% SP (manual transfer to SP)
#club100

Hi Jorge,
Thank you for another wonderful exercise, it is really interesting how the shape of cubes are changed when different perspectives are used. Really love it and here is my work:
https://steemit.com/hive-185836/@stef1/drawing-like-a-pro-52-understanding-the-vanishing-points-lesson-by-jorgevandeperre
Congratulations, your post has been upvoted by The Efficient Seven using @steemcurator04. We are supporting quality posts, so keep creating quality posts to get more support. #art theme
Account Used by: @rosz
Thank you very much!
I think this also has to do with the choice of camera angles in photography...I just can't figure out exactly how yet))
Yes bambuka, the principles are the same.
Your post is manually rewarded by the
World of Xpilar Community Curation Trail
STEEM AUTO OPERATED AND MAINTAINED BY XPILAR TEAM
https://steemit.com/~witnesses vote xpilar.witness
Thank you very much!!
Your post is manually rewarded by the
World of Xpilar Community Curation Trail
STEEM AUTO OPERATED AND MAINTAINED BY XPILAR TEAM
https://steemit.com/~witnesses vote xpilar.witness
Thank you very much!!