Drawing like a pro - 70, Masterclass - Eight sided tower (Power up 100%)

Hi friends!
Now we are going to draw a tower based on an octagon shape.
Let's stop for a bit and stop delving into complex perspective methods and techniques for a while, and start drawing using what we've already studied and practised.
We'll see what we can do now, practising our freehand drawing skills.
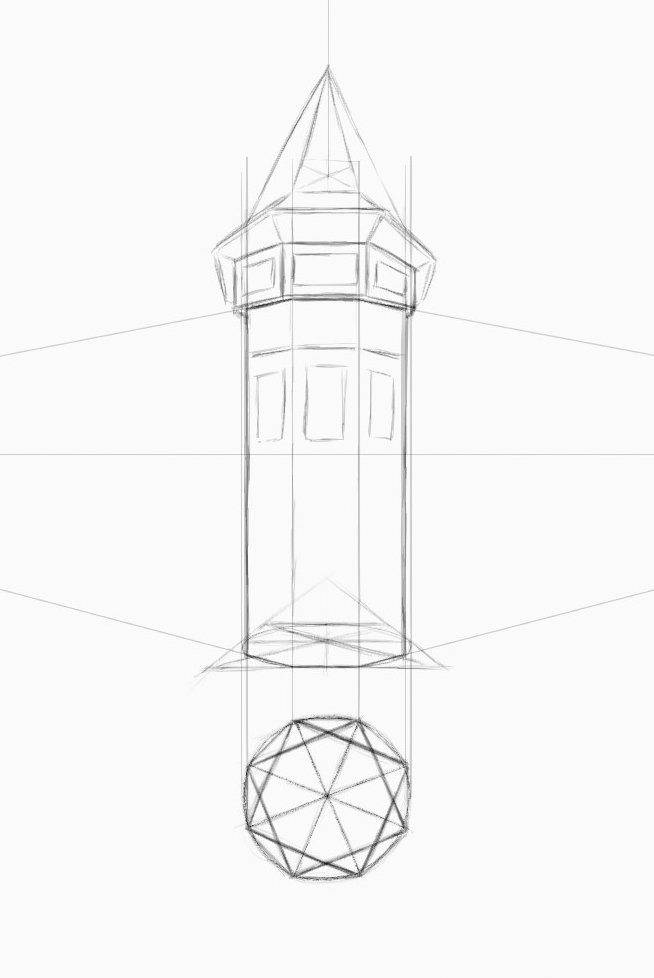
This is an approximation of what an eight-sided tower could be. Our point of interest will be to understand how we can draw these shapes using the techniques and methods that we already know.
Let's start right now!

This is the octagon, the shape we'll use.
Towards the end of this lesson, I show you how to geometrically build an octagon.

This is the projection method that is used in architecture as I showed you in lesson 65 when we use the triangle as the base. We'll start by first drawing an octagon at the bottom of our drawing sheet.
Once the octagon has been drawn, trying to leave its upper face in a horizontal position, draw two vertical lines tangent to the circle that surrounds the shape, as you can see here.
Now, you can draw a square in perspective and then inscribe a circle in it. See lesson 20.

This drawing is the same as the previous one, to highlight the sides of the octagon with red lines. Note also that the ellipse drawn above is the same circumference seen in perspective, so the coincidence of the points where the ellipse touches the vertical lines on the sides is very important.

We project the vertices of the octagon onto the circle in perspective and draw the lines to join the vertices at the points where the vertical lines intersect with the ellipse.

Here I've highlighted the vertices of the shape and the join lines with red to make them more visible to you. These will be the faces of the tower that we are drawing.

We use the side edges to draw the vanishing lines that allow us to define a horizon line and the two vanishing points. Lesson 38

Close up...

We will sketch in rough strokes some characteristic elements of this type of tower, including the roof.

Close up...
Please note that the faces are slightly wider at the top.

See circled how I use the diagonals method to find the centre to trace the vertical to draw the roof.

Global view, you can draw how many helplines you need to draw the tower.


Dividing a straight line into two equal parts.
Using a drawing compass, draw a line across the top by resting the compass on one end of the horizontal line, then do the same process from the opposite side. Draw a vertical line through the crossing point as shown until it intersects the horizontal line.

Dividing the circle in eight.
First, draw a diametric line, then draw a line vertical to it, and then draw the bisector lines to get the eight divisions.
Bisector of an angle.
The process is similar to dividing a line in two. Resting the drawing compass on the end of one edge of the angle, draw the line as shown, the same process from the opposite side, then draw a line through the outer "x" and the centre of the circle.
By joining the angles you will get the octagon.

I wish you a very nice day and good exercise!
Here are the links to the previous related posts.
1 - 2 - 3 - 4 -
5 - 6 - 7 - 8 - 9 - 10 -
11 - 12 - 13 14 - 15 -
16 - 17 - 18 - 19 - 20 - 21 - 22 - 23 - 24 - 25 -
26 - 27 - 28 - 29 - 30 - 31 - 32 - 33 - 34 - 35 - 36 - 37 - 38 - 39 -
40 - 41 - 42 - 43 - 44 - 45 - 46 - 47 - 48 - 49 - 50 - 51-feedback - 52-Masterclass - 53-Homework Contest #6 - 54-Lesson - 55-Lesson - 56-Lesson - 57-Lesson - 58-feedback - 59-feddback - 60 Masterclass - 61-HW Contest #7 - 62-Lesson - 63-Lesson - 64-Lesson - 65-Lesson - Lesson-66 - 67-feedback - 68-feedback - 69-feedback
Also, thanks to @xpilar for making these initiatives possible.
100% SP (manual transfer to SP)
#club100

Your post is manually rewarded by the
World of Xpilar Community Curation Trail
STEEM AUTO OPERATED AND MAINTAINED BY XPILAR TEAM
https://steemit.com/~witnesses vote xpilar.witness
Thank you very much!
Soon participants will be able to assign the title of "freemasons" :)
A great lesson!
😄😄😄 Thank you!
WOW!!!!! 짝짝짝A great lesson! It's amazing. I applaud you.
Thank you!
very impressive art ,you captured it step-by-step and this is very nice.
Thank you! I'm glad you liked it.