Drawing like a pro - 104, - Botanical drawing, beech hedge leaves - (#club100)
Hi friends!
In the post 6-Lesson I told you about exercises to practice different pencil strokes.
We will do now a nice drawing exercise where these skills will be put into practice.
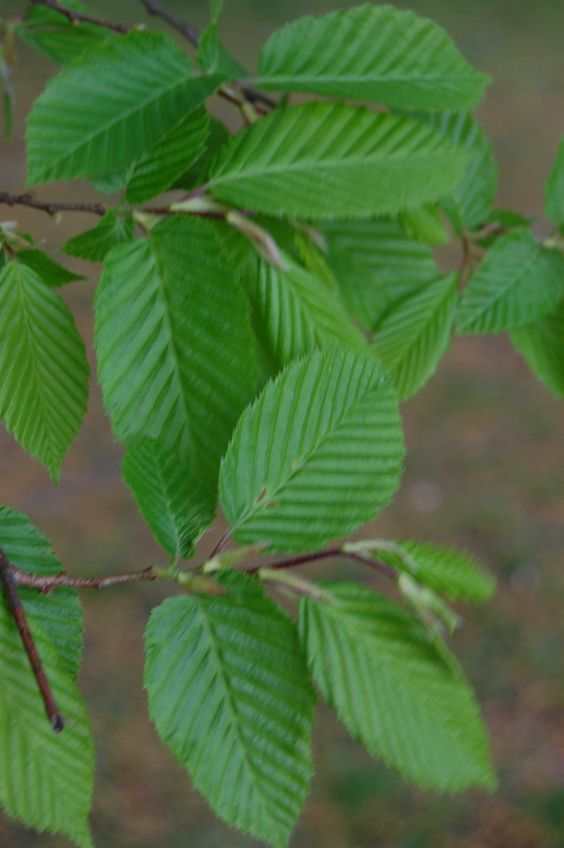
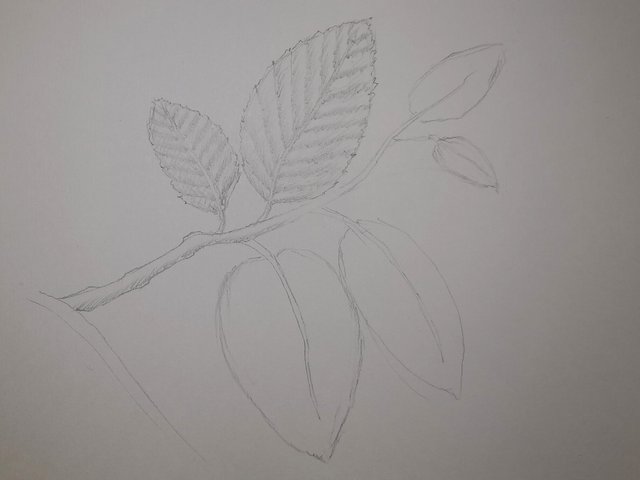
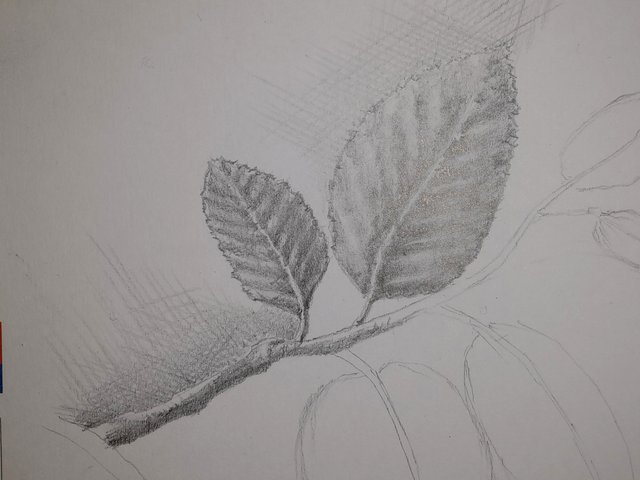
Our model on this occasion will be some hornbeam or beech hedge leaves.
I found this picture in Google Search.
Note the symmetrical oval leaves.
You can see that the leaves are relatively hard and dark.
The drawing paper is the same used in the previous exercise 102-drawing an apple a fine grain bond paper and the size is A5. We will continue with a small format to draw.
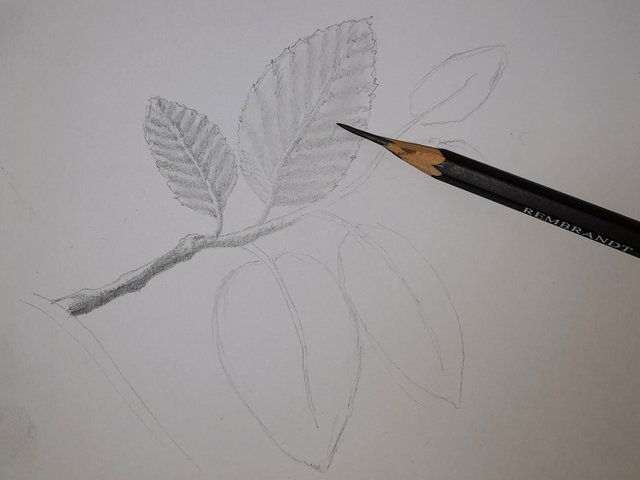
Here the pencil is changed to see the difference. I used two pencils here, first an HB lead pencil, then a 2B lead pencil
A kneadable eraser.
A knife and sandpaper to sharpen the tips of the pencils.
A paper towel.
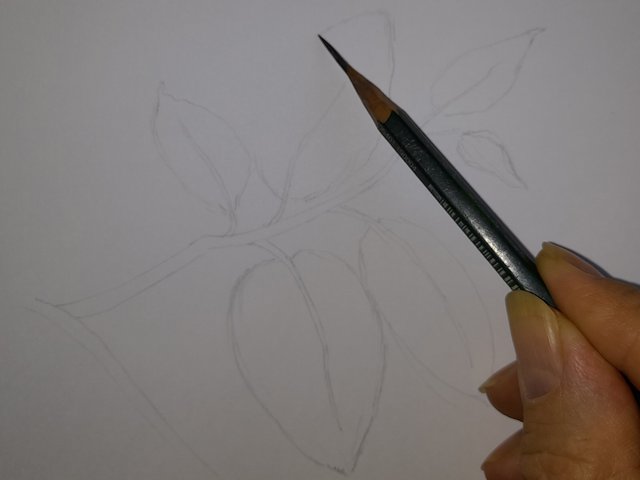
We start by drawing a soft sketch diagonally up, trying to copy the look of the stem and how oval and symmetrical the leaves are as well as the way they are distributed along the stem.
Pay attention to how I hold the pencil. This way the pencil tip stays sharp and I don't put pressure on the drawing paper.
At this stage note the curvature of the leaves and the tiny "teeth" on the margin of the leaves. Also, observe how the veins start from a primary vein diagonally towards the edges in a symmetrical way.
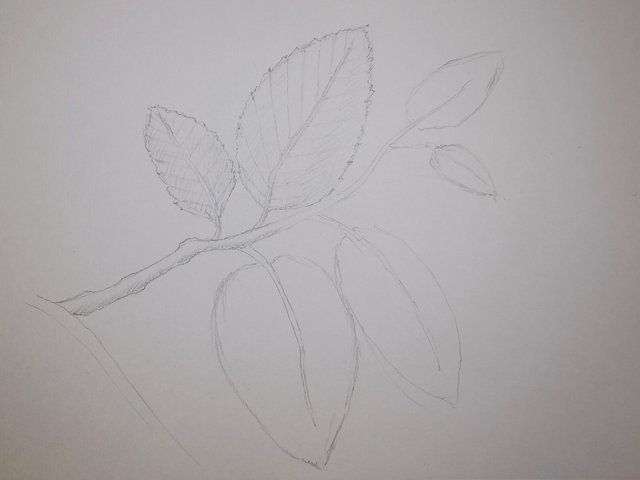
Instead of copying every leaf vein try to interpret what the shadows look like. The same for the stem.
To homogenize the strokes of the drawing you can mix the graphite using a paper towel.
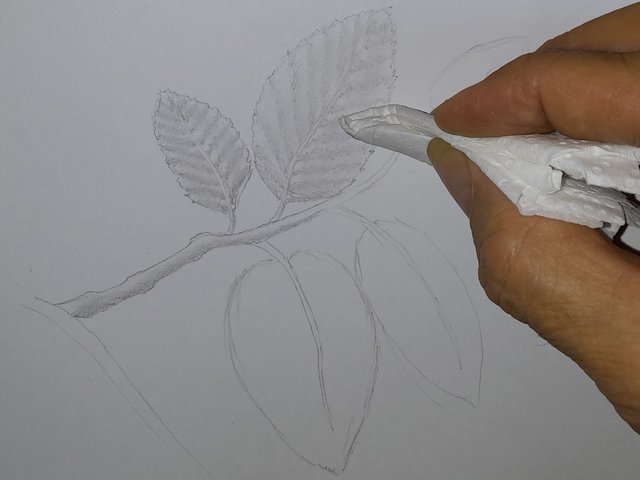
At this stage, I switched to a softer pencil (2B) to increase the darkness to certain shades on the leaves and also the stem.
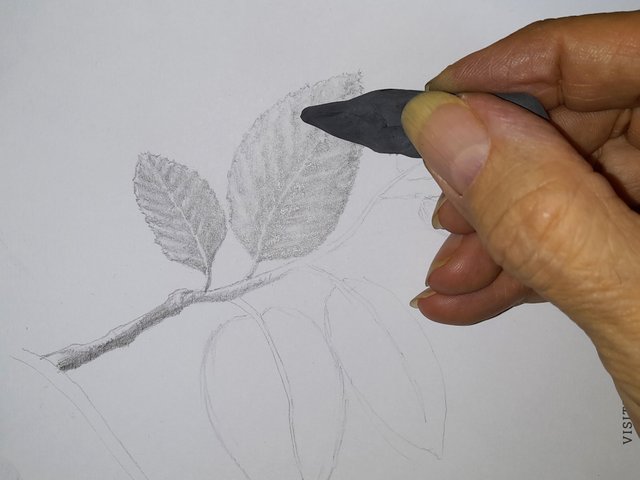
Too dark? With the help of a kneadable eraser, tapping you can remove some of the graphite in the areas that you consider too dark or in those that you want to lighten. With this technique, you can also gain texture.
You can repeat this process several times until you are satisfied with the result, always being careful not to damage the paper. Keep in mind that we're using smooth, thin paper this time around, so we can't expect to delve too much into texture effects.
Finally, by drawing strokes as you can see below, diagonally one way, then diagonally the other way, then perpendicular, then horizontal, you can build a background for contrast in the lighter areas of the drawing, as shown on the left side, over the stem.
Well, I'll let you finish the whole drawing if you want (I hope so).
I wish you a very nice day and good exercise!
Well, our friend @arcoiris is back with his magnificent watercolour lessons.
Here are the links to the previous related posts.
1 - 2 - 3 - 4 - 5 - 6 - 7 - 8 - 9 - 10 - 11 - 12 - 13 14 - 15 - 16 - 17 - 18 - 19 - 20 - 21 - 22 - 23 - 24 - 25 - 26 - 27 - 28 - 29 - 30 - 31 - 32 - 33 - 34 - 35 - 36 - 37 - 38 - 39 - 40 - 41 - 42 - 43 - 44 - 45 - 46 - 47 - 48 - 49 - 50 - 51 - 52 - 53 - 54 - 55 - 56 - 57 - 58 - 59 - 60 - 61 - 62 - 63 - 64 - 65 - 66 - 67 - 68 - 69 - 70 - 71 - 72 - 73 - 74 - 75 - 76 - 77 - 78 - 79 - 80 - 81 - 82 - 83 - 84 - 85 - 86 - 87 - 88 - 89 - 90 - 91 - 92 - 93 - 94 - 95 - 96 - 97 - 98 - 99 - 100 - 101-Lesson - 102-Lesson - 103-Lesson
Also, thanks to @xpilar for making these initiatives possible with their great support.

Saludos amigo Jorge.
Buen trabajo, me gusta cómo vas logrando un buen acabado al dibujo, le quedó muy bien.
Hola José!
Gracias amigo por detenerte a ver mi publicación y por tus amables comentarios. Me alegro que te haya gustado.
At first glance, the drawing may seem simple. But it is not so easy to perform it according to all the rules.
Great lesson)
Hi Bambuka! Thank you, glad to see you.
Likewise, Jorge
Your post is manually rewarded by the
World of Xpilar Community Curation Trail
STEEM AUTO OPERATED AND MAINTAINED BY XPILAR TEAM
https://steemit.com/~witnesses vote xpilar.witness
Thank you very much!!