Drawing like a pro - 102, - Drawing an apple - (#club100)
Hi friends!
Now, I will try to go back to all the lessons with more practical examples, examples that give good results and examples with little success, to analyze them and also learn from what was not successful.
The objective is to see what is behind a drawing and learn to draw knowing the tools and materials we use and through the knowledge of the rules obtained by study, research and practice.
This is also an opportunity for those who are starting to draw or want to improve their skills, but the lessons were already advanced which disappointed them a bit.
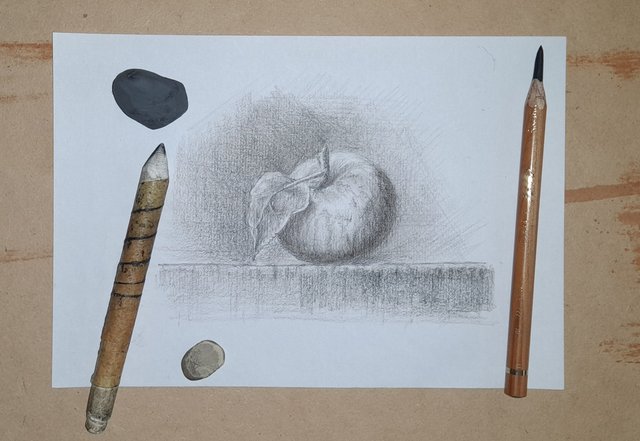
We'll start by drawing the basic shapes of a fruit, an apple, in the centre of the drawing paper, but first, let's look at some important technical aspects:
The drawing paper is fine-grain bond paper and the size is A5.
The pencil I used here is a Conté Charcoal, 3B, very soft.
A kneadable eraser and a little piece of eraser (it can be a pencil eraser if you want).
A knife and sandpaper to sharpen the pencil tip.
A blender stump.
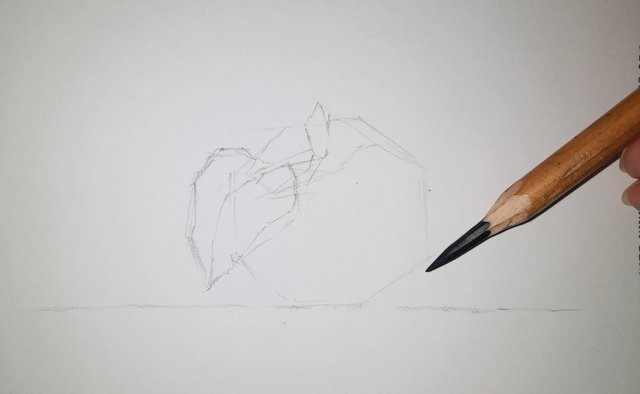
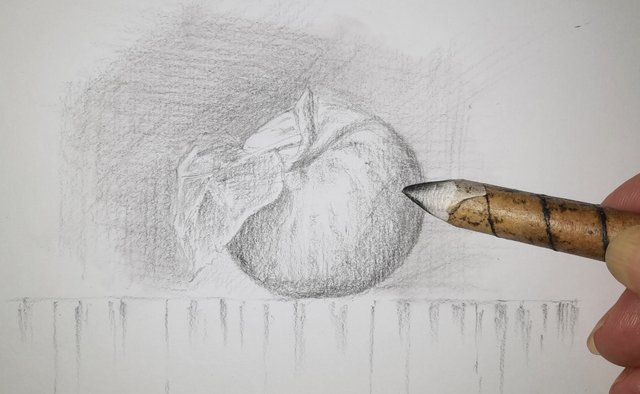
Note the nearly horizontal position of the pencil relative to the drawing paper, which is the best position to hold the pencil for drawing, also note the length of the tip.
You will find more information and tips about this in these lessons: 2 - 3 - 4 - 5 - 8
We define the shape and size of the elements by drawing straight lines, as shown below, taking care of the fair proportions of our model.
Having indicated the size, location and shape of our model with smooth straight lines, we now try to draw a little more precisely the round shape of the model and indicate the shadows. This whole process must be very smooth, without exerting pressure with the pencil on the drawing paper so as not to damage it.
Notice that I haven't used any eraser yet but the straight lines drawn earlier start to disappear.
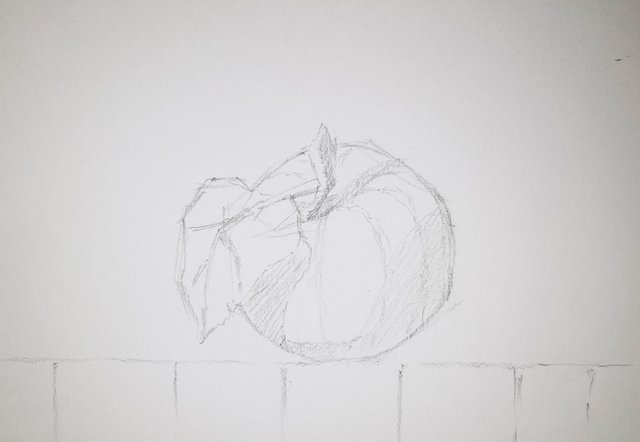
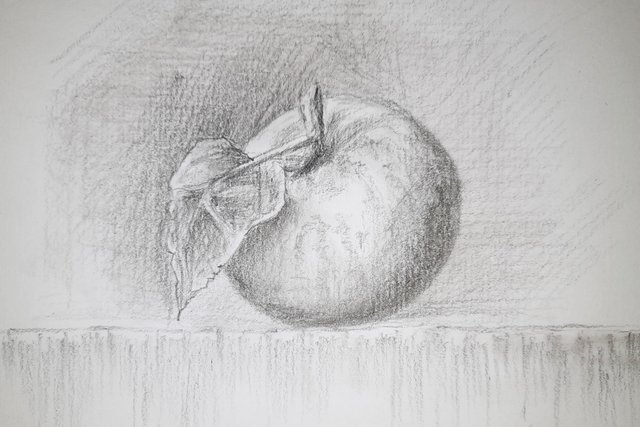
We continue drawing, always gently, step by step we advance in the drawing, adjusting the shape, and darkening the shadows a little more.
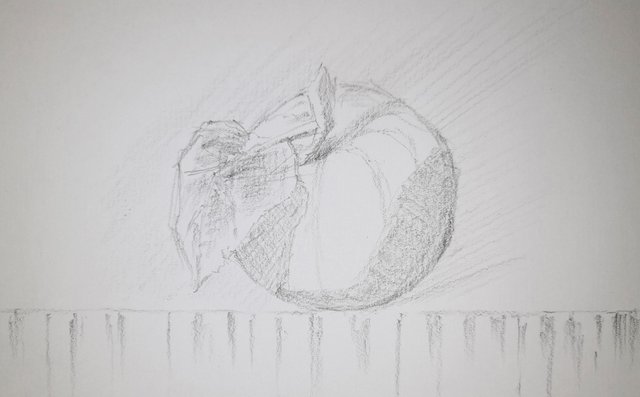
I forgot to tell you that we have defined the direction of the light, so we see the light falling from the top left. We go on to sketch the background, with straight lines all in one direction, and then we draw more lines over these but in the opposite direction in the areas that we want darker.
Notice that to accentuate the lighter areas of our model, (top left in this case), we make the background darker than the other side where the area of the model is in shadow.
See 9 - 16
If you want to blend the strokes, you can use a Blender Stump (see 3)
By repeating this drawing process several times, you will get the shadows and highlights you want. Remember, always gently, do not press the tip of the pencil on the paper. Three reasons: you'll damage the paper, you won't be able to erase to make corrections if necessary, and the black you'll get will have an annoying sheen that's unrelated to the rest of the drawing.
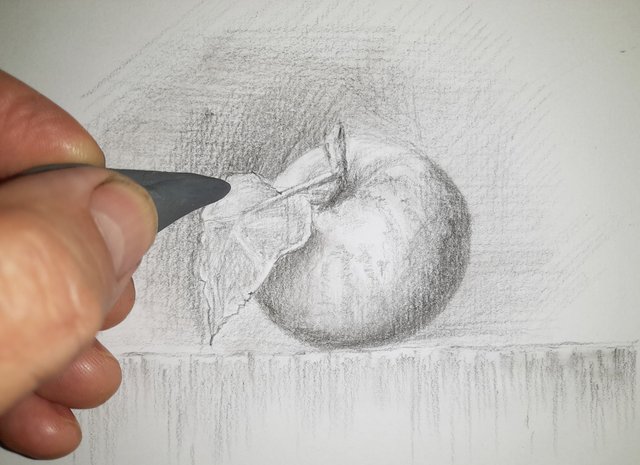
To erase in certain areas where you want more light, use a kneadable eraser, tapping so that the charcoal or graphite adheres to it. This way you won't stain the drawing.
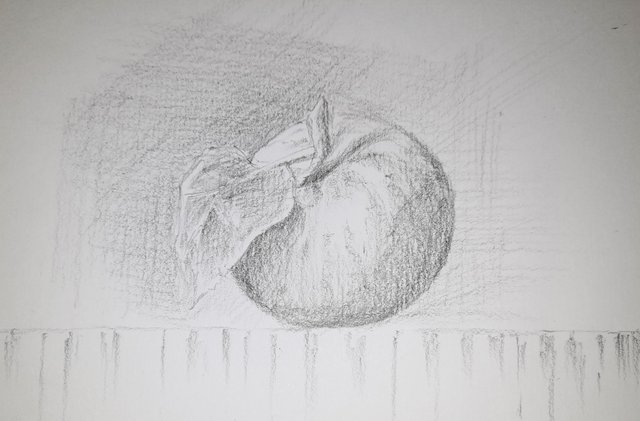
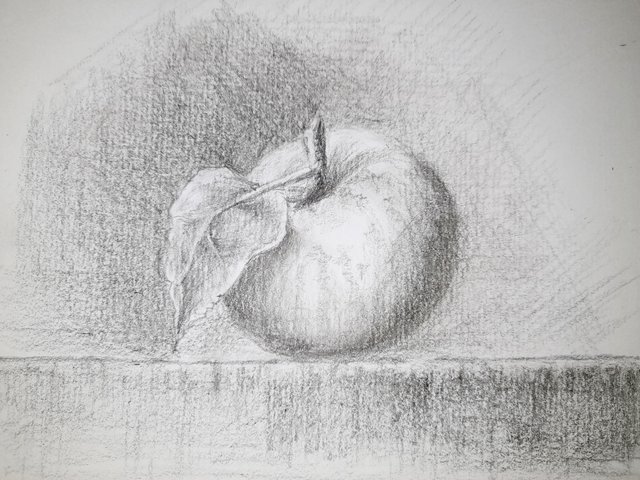
Well, the drawing exercise is finished.
Pay attention to the following observations:
The background is darker on the left side, to accentuate the lighter areas of the model.
The background is lighter on the right side so as not to mix the darker shape with it.
See also the base. This is darker on the right side, opposite the light source.
See how the texture of the paper looks and because a soft pencil was used we can't sharpen the details without risking messing up the drawing.
If we want a more detailed drawing using these materials, we will have to use a larger format of drawing paper or use harder pencils.
I wish you a very nice day and good exercise!
Well, our friend @arcoiris is back with his magnificent watercolour lessons.
Here are the links to the previous related posts.
1 - 2 - 3 - 4 -
5 - 6 - 7 - 8 - 9 - 10 -
11 - 12 - 13 14 - 15 -
16 - 17 - 18 - 19 - 20 - 21 - 22 - 23 - 24 - 25 -
26 - 27 - 28 - 29 - 30 - 31 - 32 - 33 - 34 - 35 - 36 - 37 - 38 - 39 -
40 - 41 - 42 - 43 - 44 - 45 - 46 - 47 - 48 - 49 - 50 - 51-feedback - 52-Masterclass - 53-Homework Contest #6 - 54-Lesson - 55-Lesson - 56-Lesson - 57-Lesson - 58-feedback - 59-feddback - 60 Masterclass - 61-HW Contest #7 - 62-Lesson - 63-Lesson - 64-Lesson - 65-Lesson - Lesson-66 - 67-feedback - 68-feedback - 69-feedback - 70-Masterclass - 71-Homework Contest #8 - 72-Lesson - 73-Lesson - 74-Lesson - 75-Lesson - 76-Masterclass - 77-Homework - 78-Lesson - 79- Lesson - 80-lesson - 81-feedback - 82-lesson - 83-Masterclass - 84-HW contest - 85-feedback - 86-lesson - 87-lesson - 88-lesson - 89-feedback - 90-feedback - 91-lesson - 92-Masterclass - 93-Masterclass II - 94-Masterclass III - 95-feedback - 96-lesson - 97-Masterclass - 98-Masterclass - 99-Masterclass - 100- Masterclass - 101-Lesson
Also, thanks to @xpilar for making these initiatives possible with their great support.

I really love this tutorial. I can remember the first objects when the art classes start are fruites usually made of Papier-mâché. I remember I tried to bite it because our art class was at the end of the day adn I was hungry. So you can imagine my disappointment :)
I love hte texture of leaf, with little viens running thorugh the form but also the way how you showed the light of the light source and shadows to make a contrast. THank you for this tutorial!
😄 Thank you for your kind words Stef, I'm happy that you liked this tutorial and that it brings back good memories.
Great work, good luck. :)
Thank you! I'm glad you liked it.
Congratulations! This post has been upvoted through steemcurator06. We support quality posts , good comments anywhere and any tags.
Thank you very much!!
Saludos amigo @jorgevandeperre
Excelente trabajo, me da gusto ver como va tomando forma éste dibujo, me gusta ésta técnica.
Muchas gracias!! Me alegro que te haya gustado.
nice to see you paint apple @jorgevandeperre
hehe
😄 Thank you!
The materialization of darkness... where there was nothing, everything will be... :)
You showed a lesson in the art of mysticism )
Oh, really? 😄