Beginner Blender Tutorials Episode 1
Hello fellow steemers so this is a change from the hellhound. I had a couple of requests to do beginner tutorials for blender so I figured what the hey. Okay so in the first episode I'm going to go over a couple of things.
1.Changing the user interface and themes
2.Pulling in 3D meshes.
3.Navigation in the 3D View.
4.How to use Rotation Location and Scale.
5.How to reset the 3D cursor.
6.Opening and closing of quick tool tabs.
7.Adding in a material.
8.Going over the location of the widget of rotation location and skill.
Exe.....
This may not be the order in which they are presented this is just a short list of what is being presented.
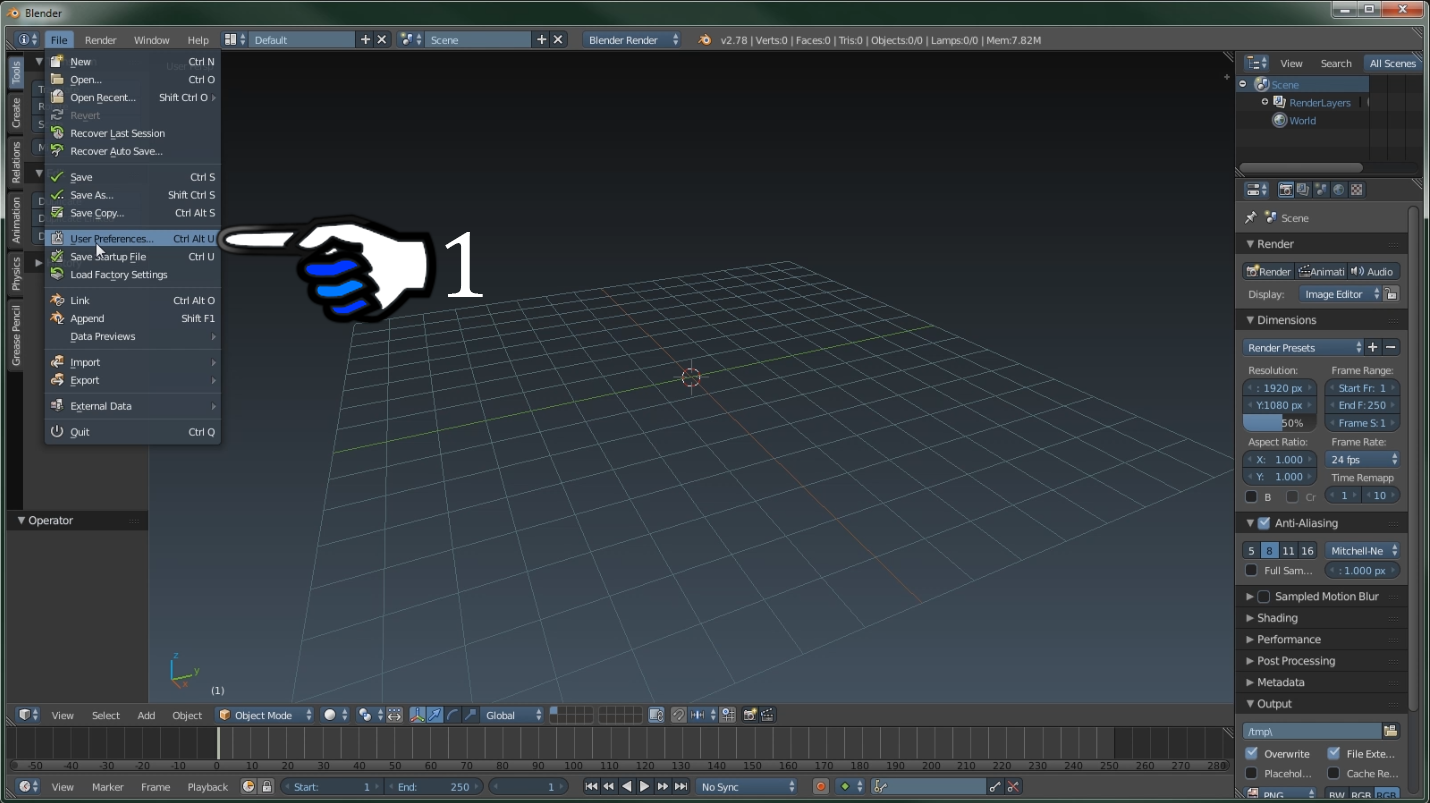
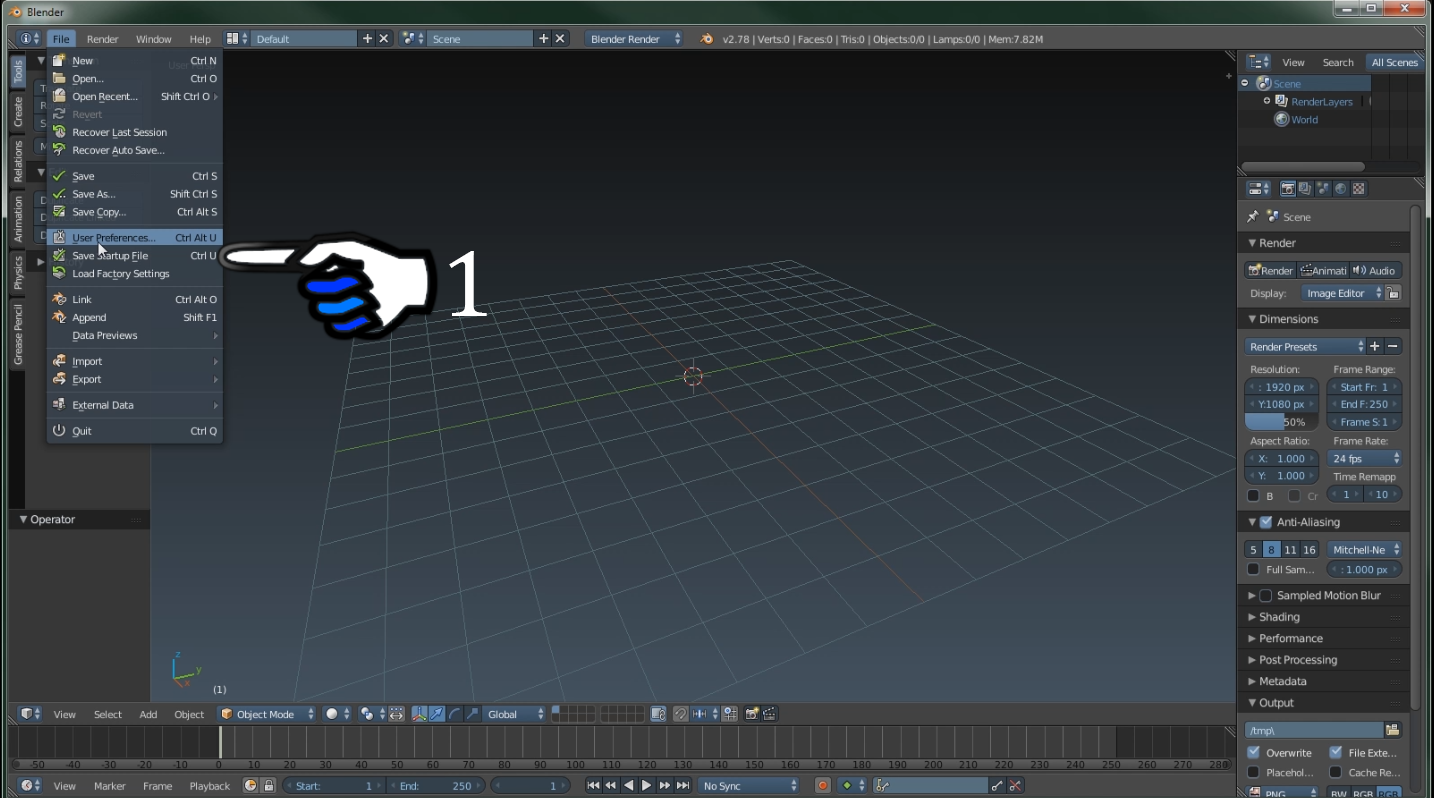
1.Go to file and select user preference.
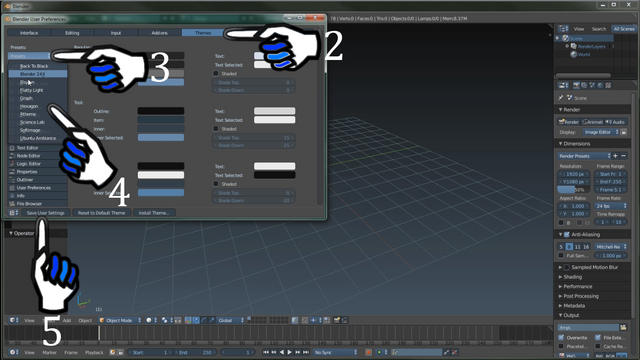
2.Select themes.
3.Select the presets tab
4.Select a preset.
5.Select save user settings.
After you selected the save user settings this theme will load every time you load blender now.
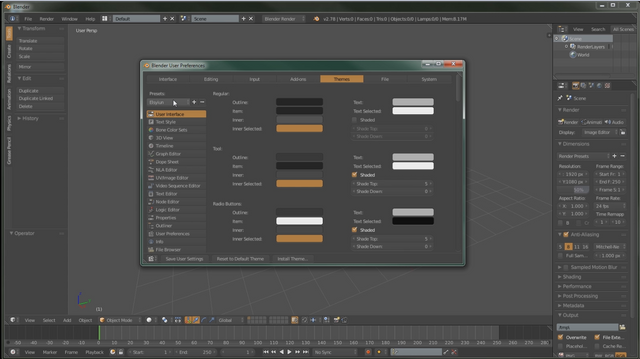
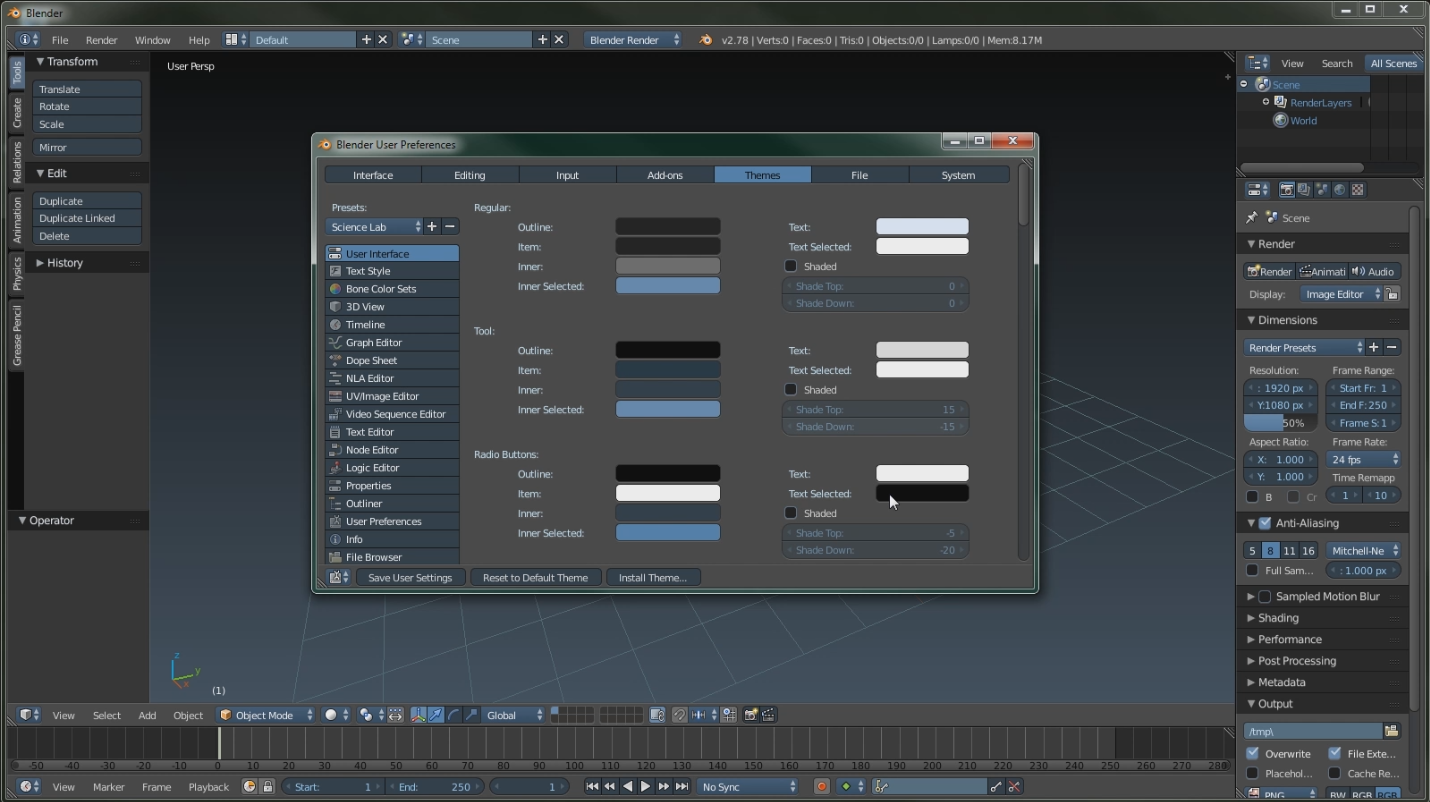
Here are some of the presets that I like for the simple fact that they're easy on the eyes. When you're staring at something for 22 hours straight it tends to hurt your eyes when they're so bright. This are one's that make it a little easier on my eyes.

This is what you'll see when you first open the application of blender as you can see very bright.
1.Blender cube.
2.Blender camera.
3.Blender directional light AKA sun.
This is what my blender setup looks like when I first start it. I'll go ahead and show you how to get it that way.

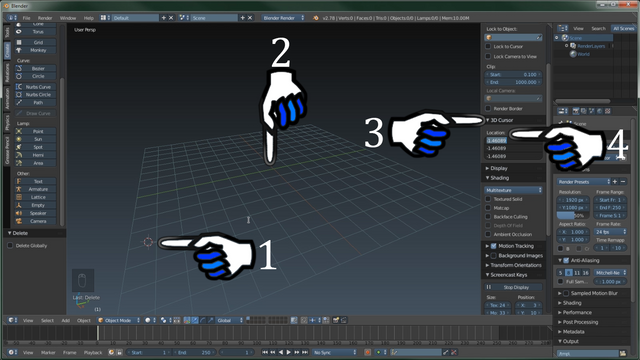
You're going to want to go ahead and push the A button on your keyboard this will select everything in the scene. Then hit the delete button on your keyboard this will delete all objects in the viewport. Before we move on to how to save your startup file let's go over the function of the 3D cursor and how to center it. The importance of the 3D cursors position is massive, it determines the orientation of the object when it's brought into blender. You want the location at zero on all axes X,Y and Z.
1.3D cursor.
2.Desired location of the 3D cursor.
3.3D cursor tab location.
4.Select the top location number and drag to the bottom one then push 0 on your keyboard.
At this point your setup should look exactly like mine except for the theme should be whatever theme you chose. Let's go ahead and move on to saving this for start-up use.
1.Navigate to file and then to save startup file select that.
Now you're done with setting up your startup blender at this point if you follow the instructions correctly you should be able to exit blender and re enter blender and have blender look the exact same as when you just exited it.
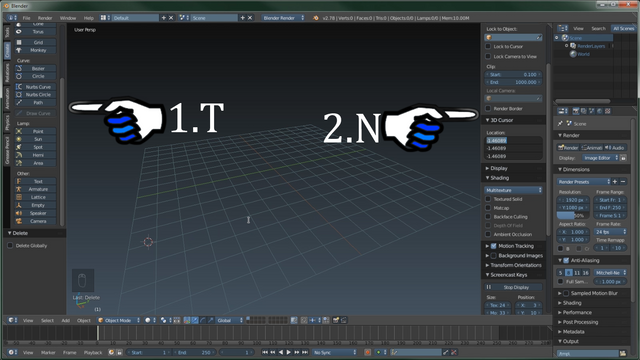
Okay now I'm going to teach you two shortcut keys that allow you to open and close tool tabs.
1.T on your keyboard will open or close the left hand tool tab.
2.N on your keyboard will open or close the right hand tool tab.
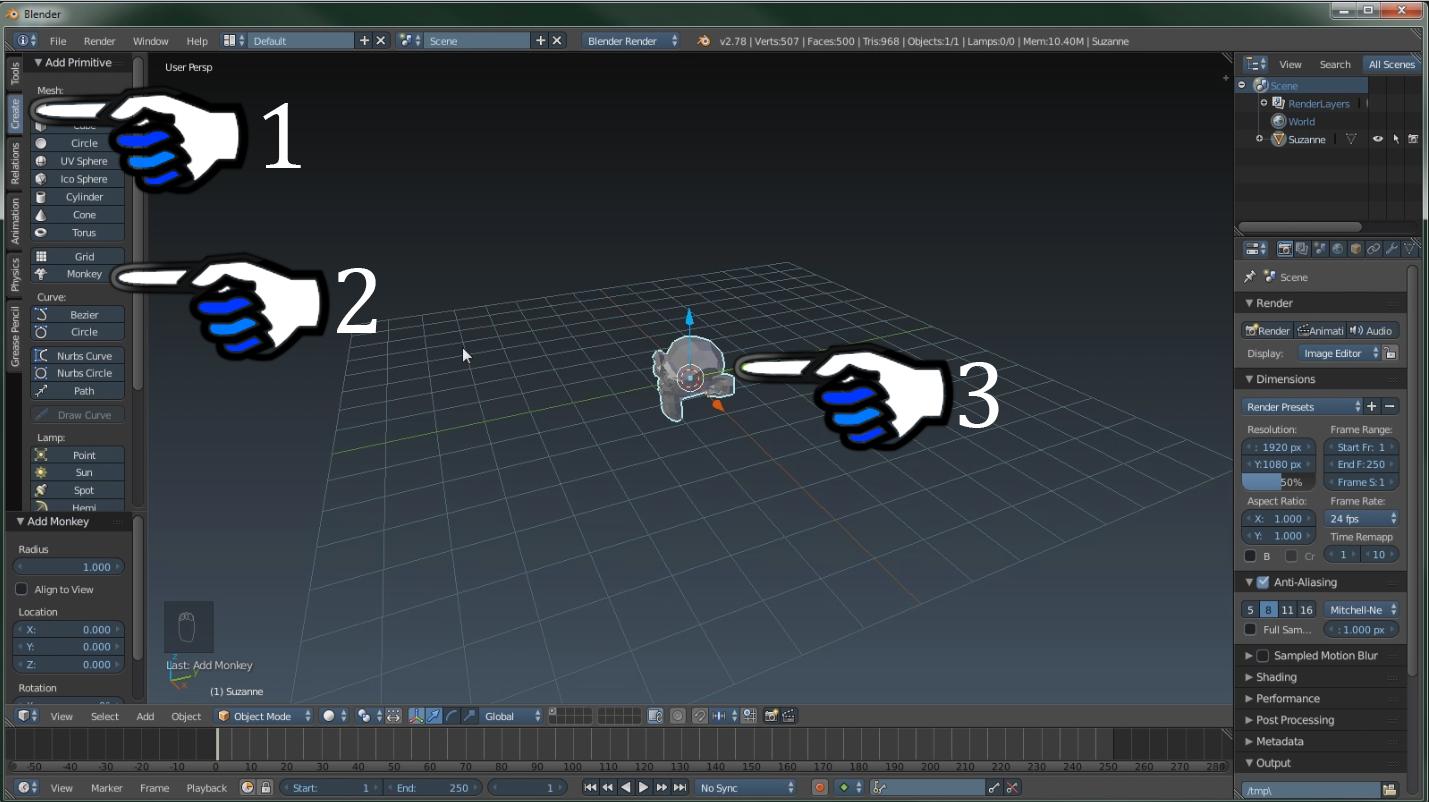
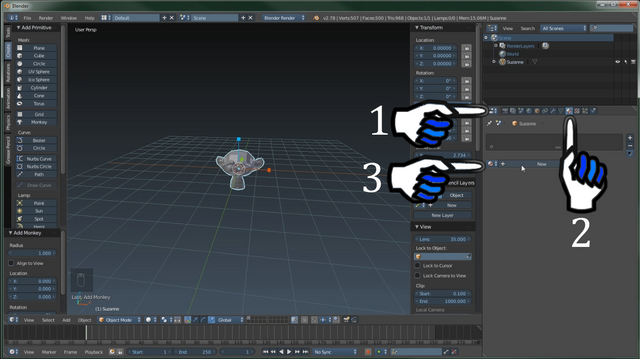
Now I'm going to show you how to pull in a mesh.
1.Navigate to the create tab.
2.Choose a mesh I chose the monkey.
3.Make sure the mesh is selected in the viewport.
Okay we're going to move on to moving around the object. There are a few things that you need to know before we get started. I cannot display them so I will have to tell you.
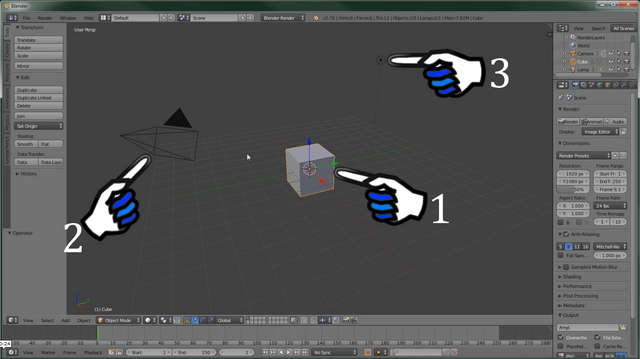
1.By left-clicking you can move the 3D cursor anywhere in the viewport. Just remember that any mesh you bring in will come in at the location of the 3D cursor.
2.By right clicking will allow you to move the mesh in any direction in the viewport.
3.Pressing R on your keyboard will allow you to rotate the object using your mouse.
4.Pressing the S key will allow you to scale your mesh using your mouse.
5.Pressing the G key on the keyboard allows you to move in the location the same as the right Mouse button click.
Now with any one of these pressed you can push any one of the axes letters X,Y or Z on the keyboard and it will move rotate or scale in that axes direction.
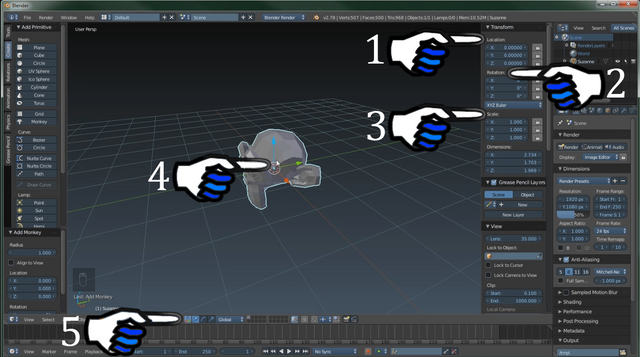
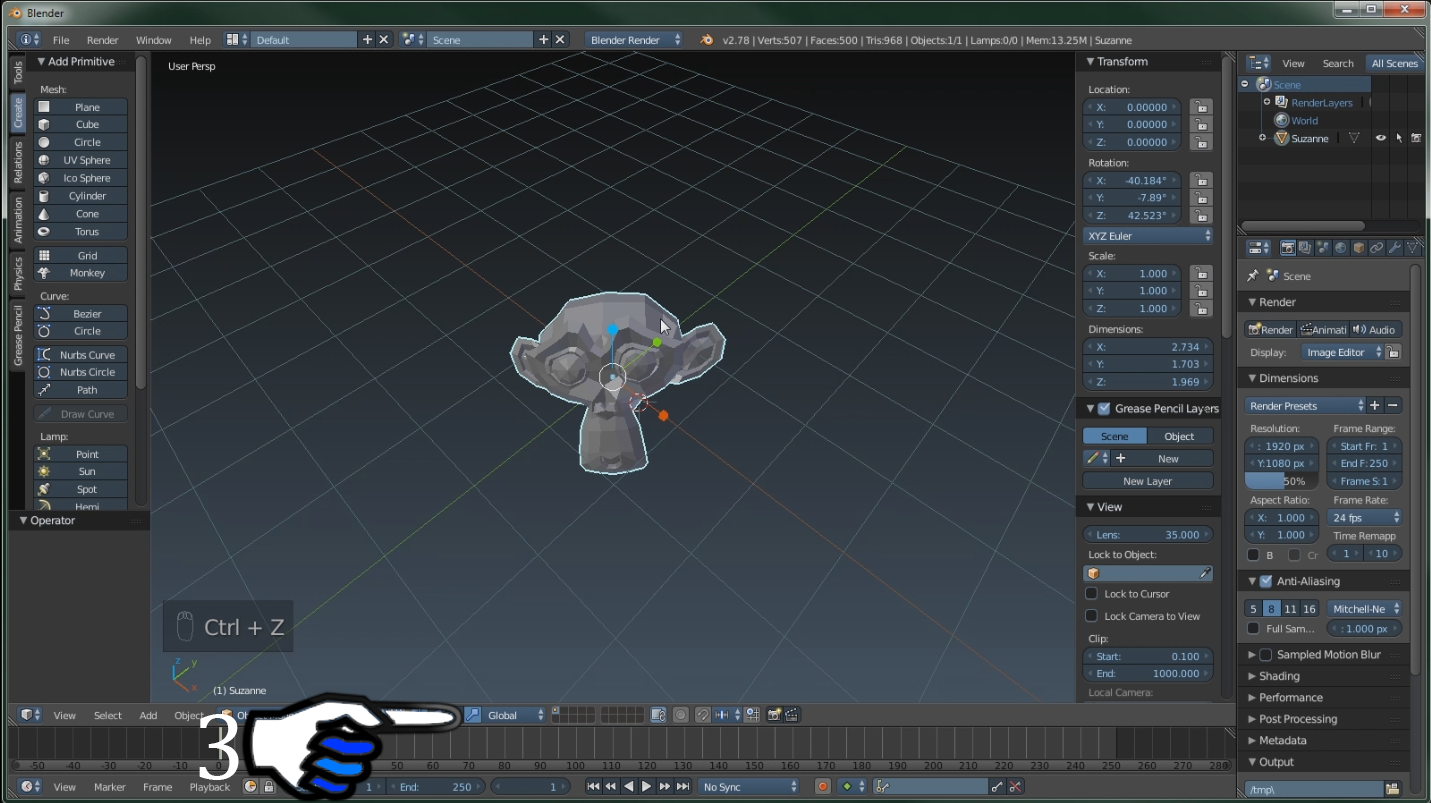
Let's move on to doing these functions without keyboard short.
1.Location on the tool tab.
2.Rotation on the tool tab.
3.Scale on the tool tab.
4.This is the widget it has a green blue and red arrows. The widget allows you to move the object in the viewport. This goes for all three location rotation and scale.
5.Widget selector for rotation location and scale.
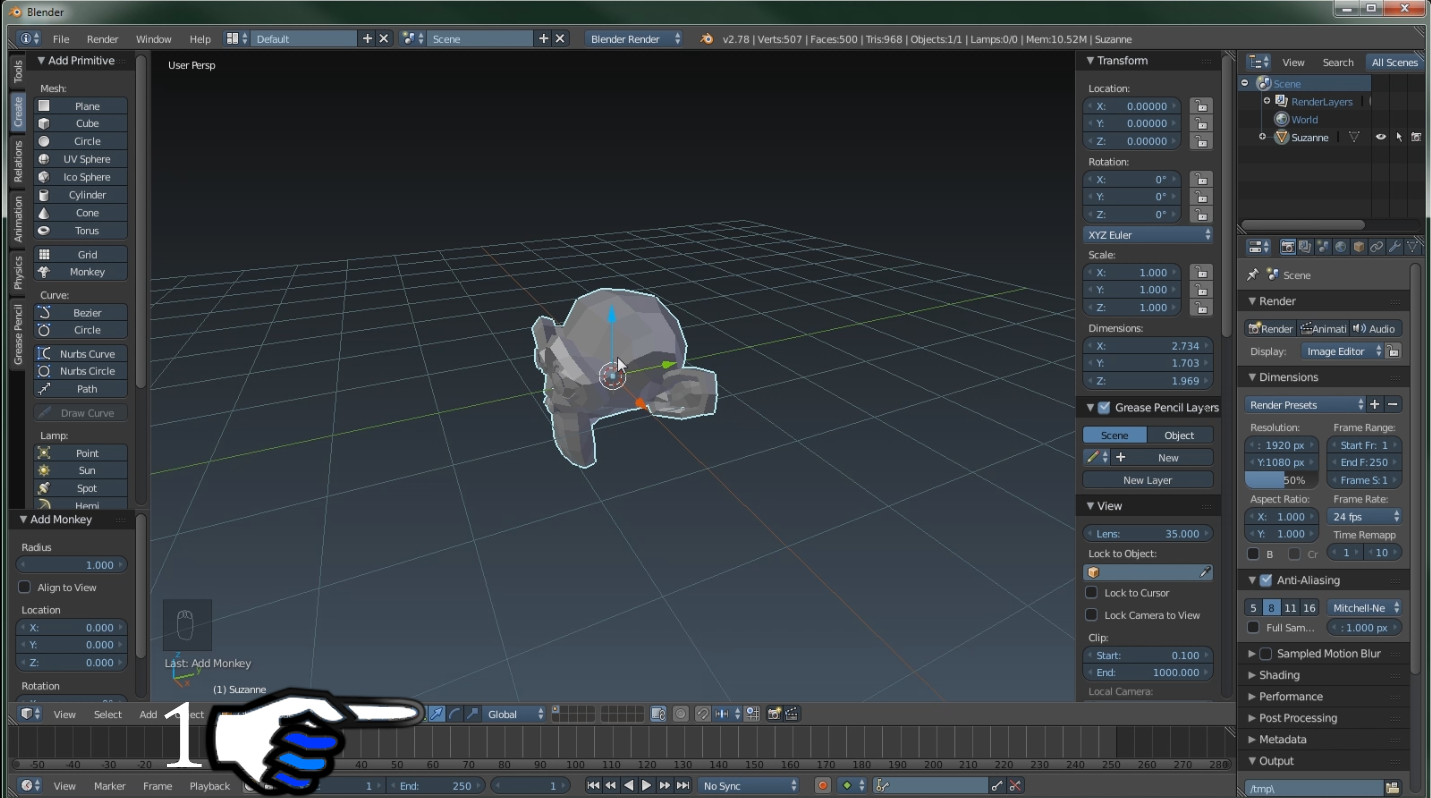
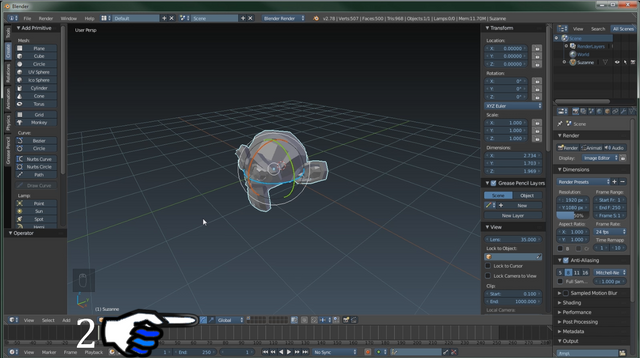
Okay now I'm going to display what each one of the widgets look like inside the viewport as I selected them.
1.Location.
2.Rotation.
3.Scale.
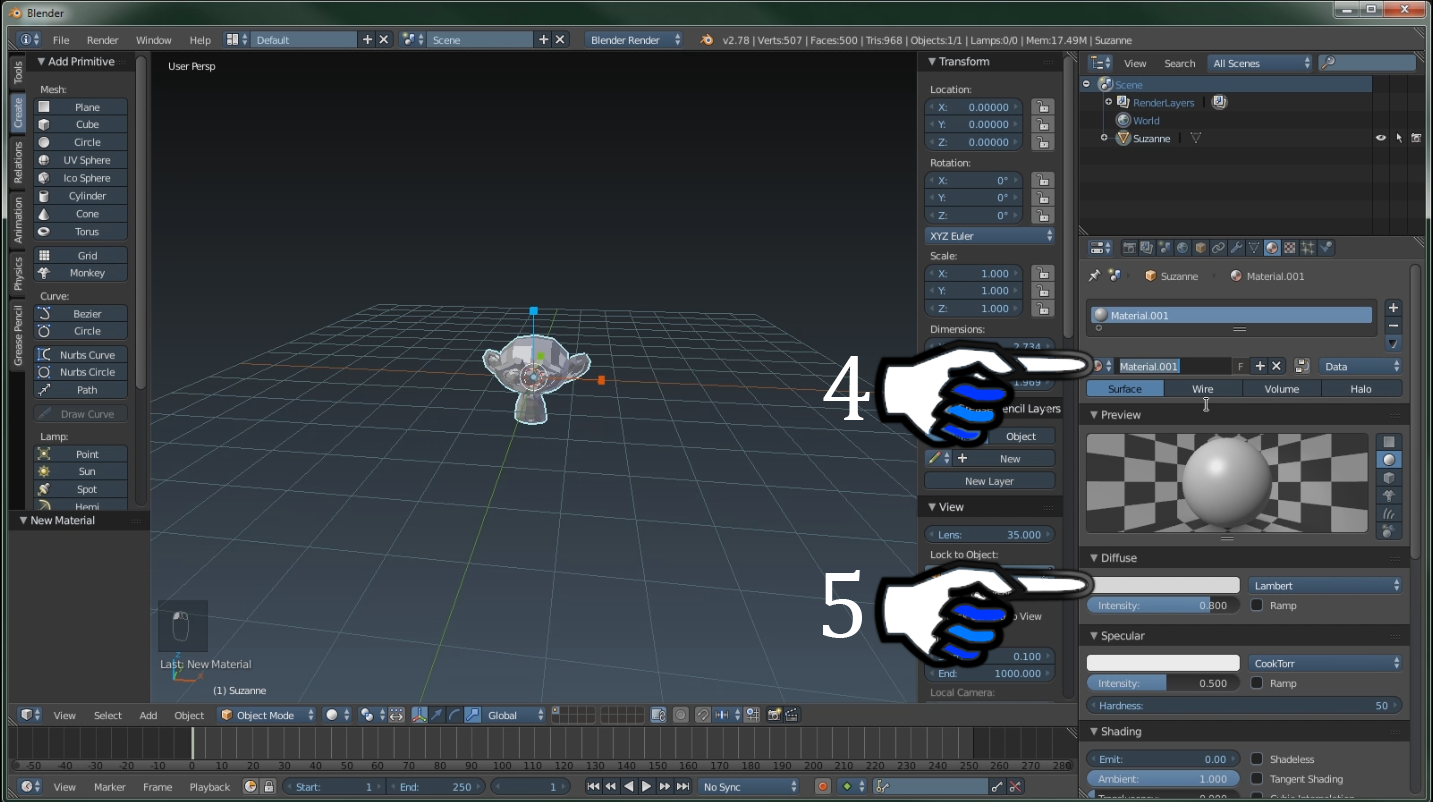
That's it for movement, we're going to move on to materials so that you can play around with changing the color of your mesh.
1.Navigate to the tab on the far middle right.
2.Select the materials widget.
3.Select the new material button.
4.Name your material very important.
5.Now the fun part play with the color.

That's it for this tutorial I hope you folks enjoyed it as usual I will leave a link to all my other tutorials in the bottom.


Bonus.

Thank you and you Steemers keep steeming.
VERY NICE. I love blender and still run into a lot of issues because there are so many features.
Thank you. I love blender to it has been my life for the last five or so years. I've learned a lot in that time but I am still learning to this day. A few fellow Steemers requested this so I decided to do it. I may not know it all but I got a few cool tricks up my sleeve to share with you guys.
Blender is not my cup of tea but I will always support tutorial videos on 3D software. Well done.
Resteemed
Thank you.
I'm learning unity and along the way I realized that I may have to learn Blender sooner or later. Glad that I found beginner friendly tutorials on steemit.
Following you from now on :)
Well I'm glad because both unity and blender are wonderful programs.
Thank you.