ADOBE PHOTOSHOP TUTORIAL -LESSON 18
Dear friends,
I am proud to join myself in this new community. I think I will post my tutorials in this community from now on. So I submit this post to you which contains my eighteenth lesson which I think you will like very much.
Adobe Photoshop Tutorial
I am going to explain the importance of removing the background and its benefits in this lesson
Lesson : 18
Red eye correction
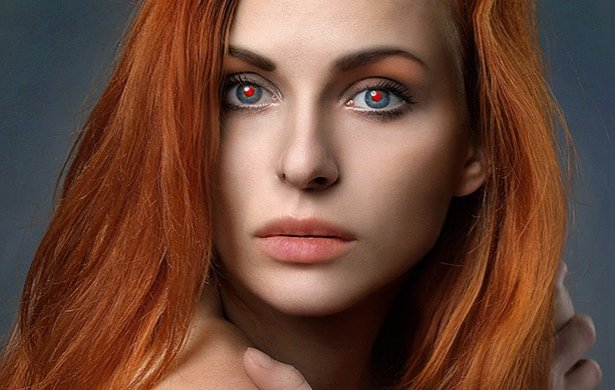
Red-eye appears when we take photos in some cameras, usually, digital cameras produce more photos like this, maybe in this lesson I will tell you how to edit photos like this.
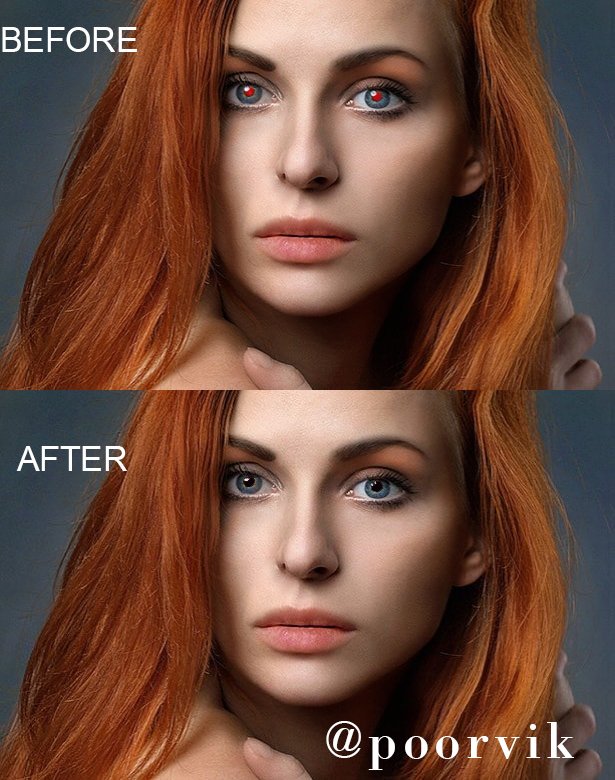
Open Photoshop and the file that you want to remove the red eyes. Here I choose a photo from the internet for example You'll see that the person's retinas in this photo have red eyes because they are reflecting the camera's flash. This is something that we want to get rid of, and the process is fairly straightforward.
The same reasons you would work with a copy of the original image also apply to working with a copy of the layer: it is safer and less likely that you will accidentally delete your image entirely.
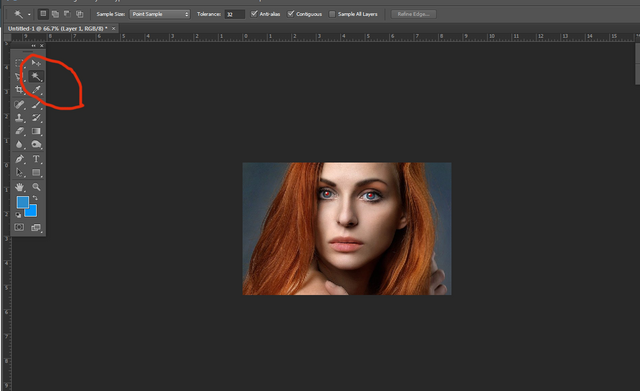
To get a better look at the eye area after duplicating the layer, zoom in by 200%. A new layer named redeye fill is then created. The color that will take the place of the red in the eye's pupil is present in this layer. Again, as a safety measure, we employ a distinct layer. You can never use separate layers too carefully to avoid completely Choosing the magic wand tool next. This will be used to identify red spots in the eye, which we will then fill in with black. To pick the red spots, make sure your background copy layer is active.
Make the paint bucket tool available and activate the redeye fill layer. Fill the chosen area with black (#000000) and change the foreground color. To deselect the currently chosen area, use Ctrl + D. The majority of the red area has now been covered in black, as you can see. There are still some observable red patches, though, that should be made less observable. The smudge tool will be used to accomplish this, as illustrated in the image.
This tool will be used to mix the black and red so that their stark contrast is lessened. In order to have better control over the afflicted area, we will use a little brush, size 3, as this will be a sensitive task that requires a suitable brush size. If higher magnification enables you to view the region we are modifying, feel free to do so. In order to mask and blend with the remaining red parts, start by smearing the black area outwards while making sure the redeye fill layer is active.
The few white pixels that are still visible in the pupil's centre should be left alone so that the image retains a more realistic appearance.
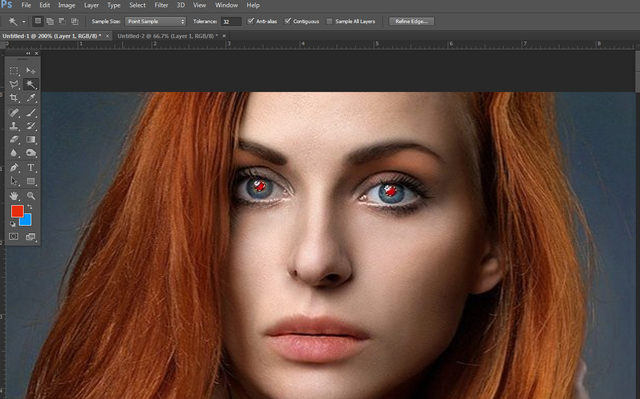
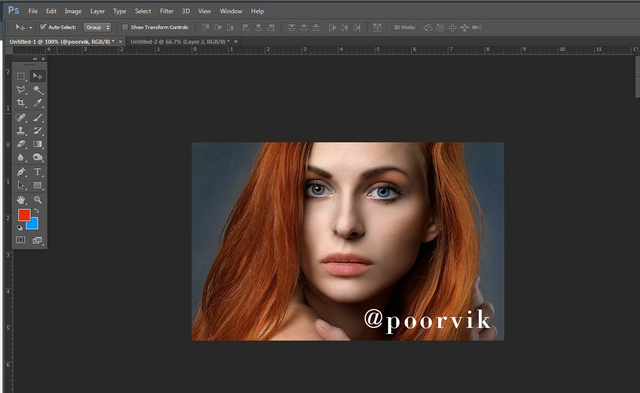
Reduce the magnification to 100% once again after you're done smearing in order to see the outcome. Already, you can tell the difference between the modified eye and the unaltered eye. Clearly, things have improved.
It's very likely that you will make mistakes when operating in a small area like the pupil of the eye. You can use the keyboard shortcut ctrl + z to reverse one error. However, it is recommended to use the History palette if you want to undo an entire batch of commands. This holds a record of the majority of the most recent commands you have issued, such as opening an image or choosing or even employing a specific tool.
Returning to the task at hand, expel the red from the second eye using the same procedure you used for the first eye. As you go, you ought to continuously save your image. When you are certain that you have sufficiently eliminated the red eye, save the picture as a JPEG.
In the following lessons, we will learn about other tools of photoshop. Below are the links I have created for posts of previous studies so far. I hope it will be helpful for you.
LESSON1 | LESSON2 | LESSON3 | LESSON4 | LESSON 5 | LESSON 6 | LESSON 7 | LESSON 8 | LESSON 9 | LESSON 10 | LESSON 11 | lesson12 | Lesson 13 | Lesson 14 | Lesson 15 | LESSON 16 | Lesson 17
Thank you, I will meet you in the next lesson.

We would like to thank you for publishing your article in the Hind Whale Community community today. Based on our review of your article, we have come to the following conclusion:
Regards,
@pathanapsana (Moderator)
Hind Whale Community
Greetings, you have been supported by @hindwhale account for your post. To know more about our community, you can visit our introduction post here. To contact us directly, please visit our discord channel.
Telegram ----- Discord