How I Designed And Built The Magic Mirror for ~Beauty and the Beast~ Part 3
"Self-image, the concept we have of ourselves, must begin not by looking in the mirror but by looking into the face of God."
- Sam Storms -
Follow these links to the first part and the second part of this article.
What had I forgotten in the CAD designs?
When it came to The Mirror, as it turned out, not that much.
Oh, there are always little things that you might want to go back and fix. And that's the beauty of 3D CAD and 3D printing. You can do that rather easily if you really want or need to, as long as you have enough time and printing filament to work with.
But there are a couple more bits of CAD design to tell you about.
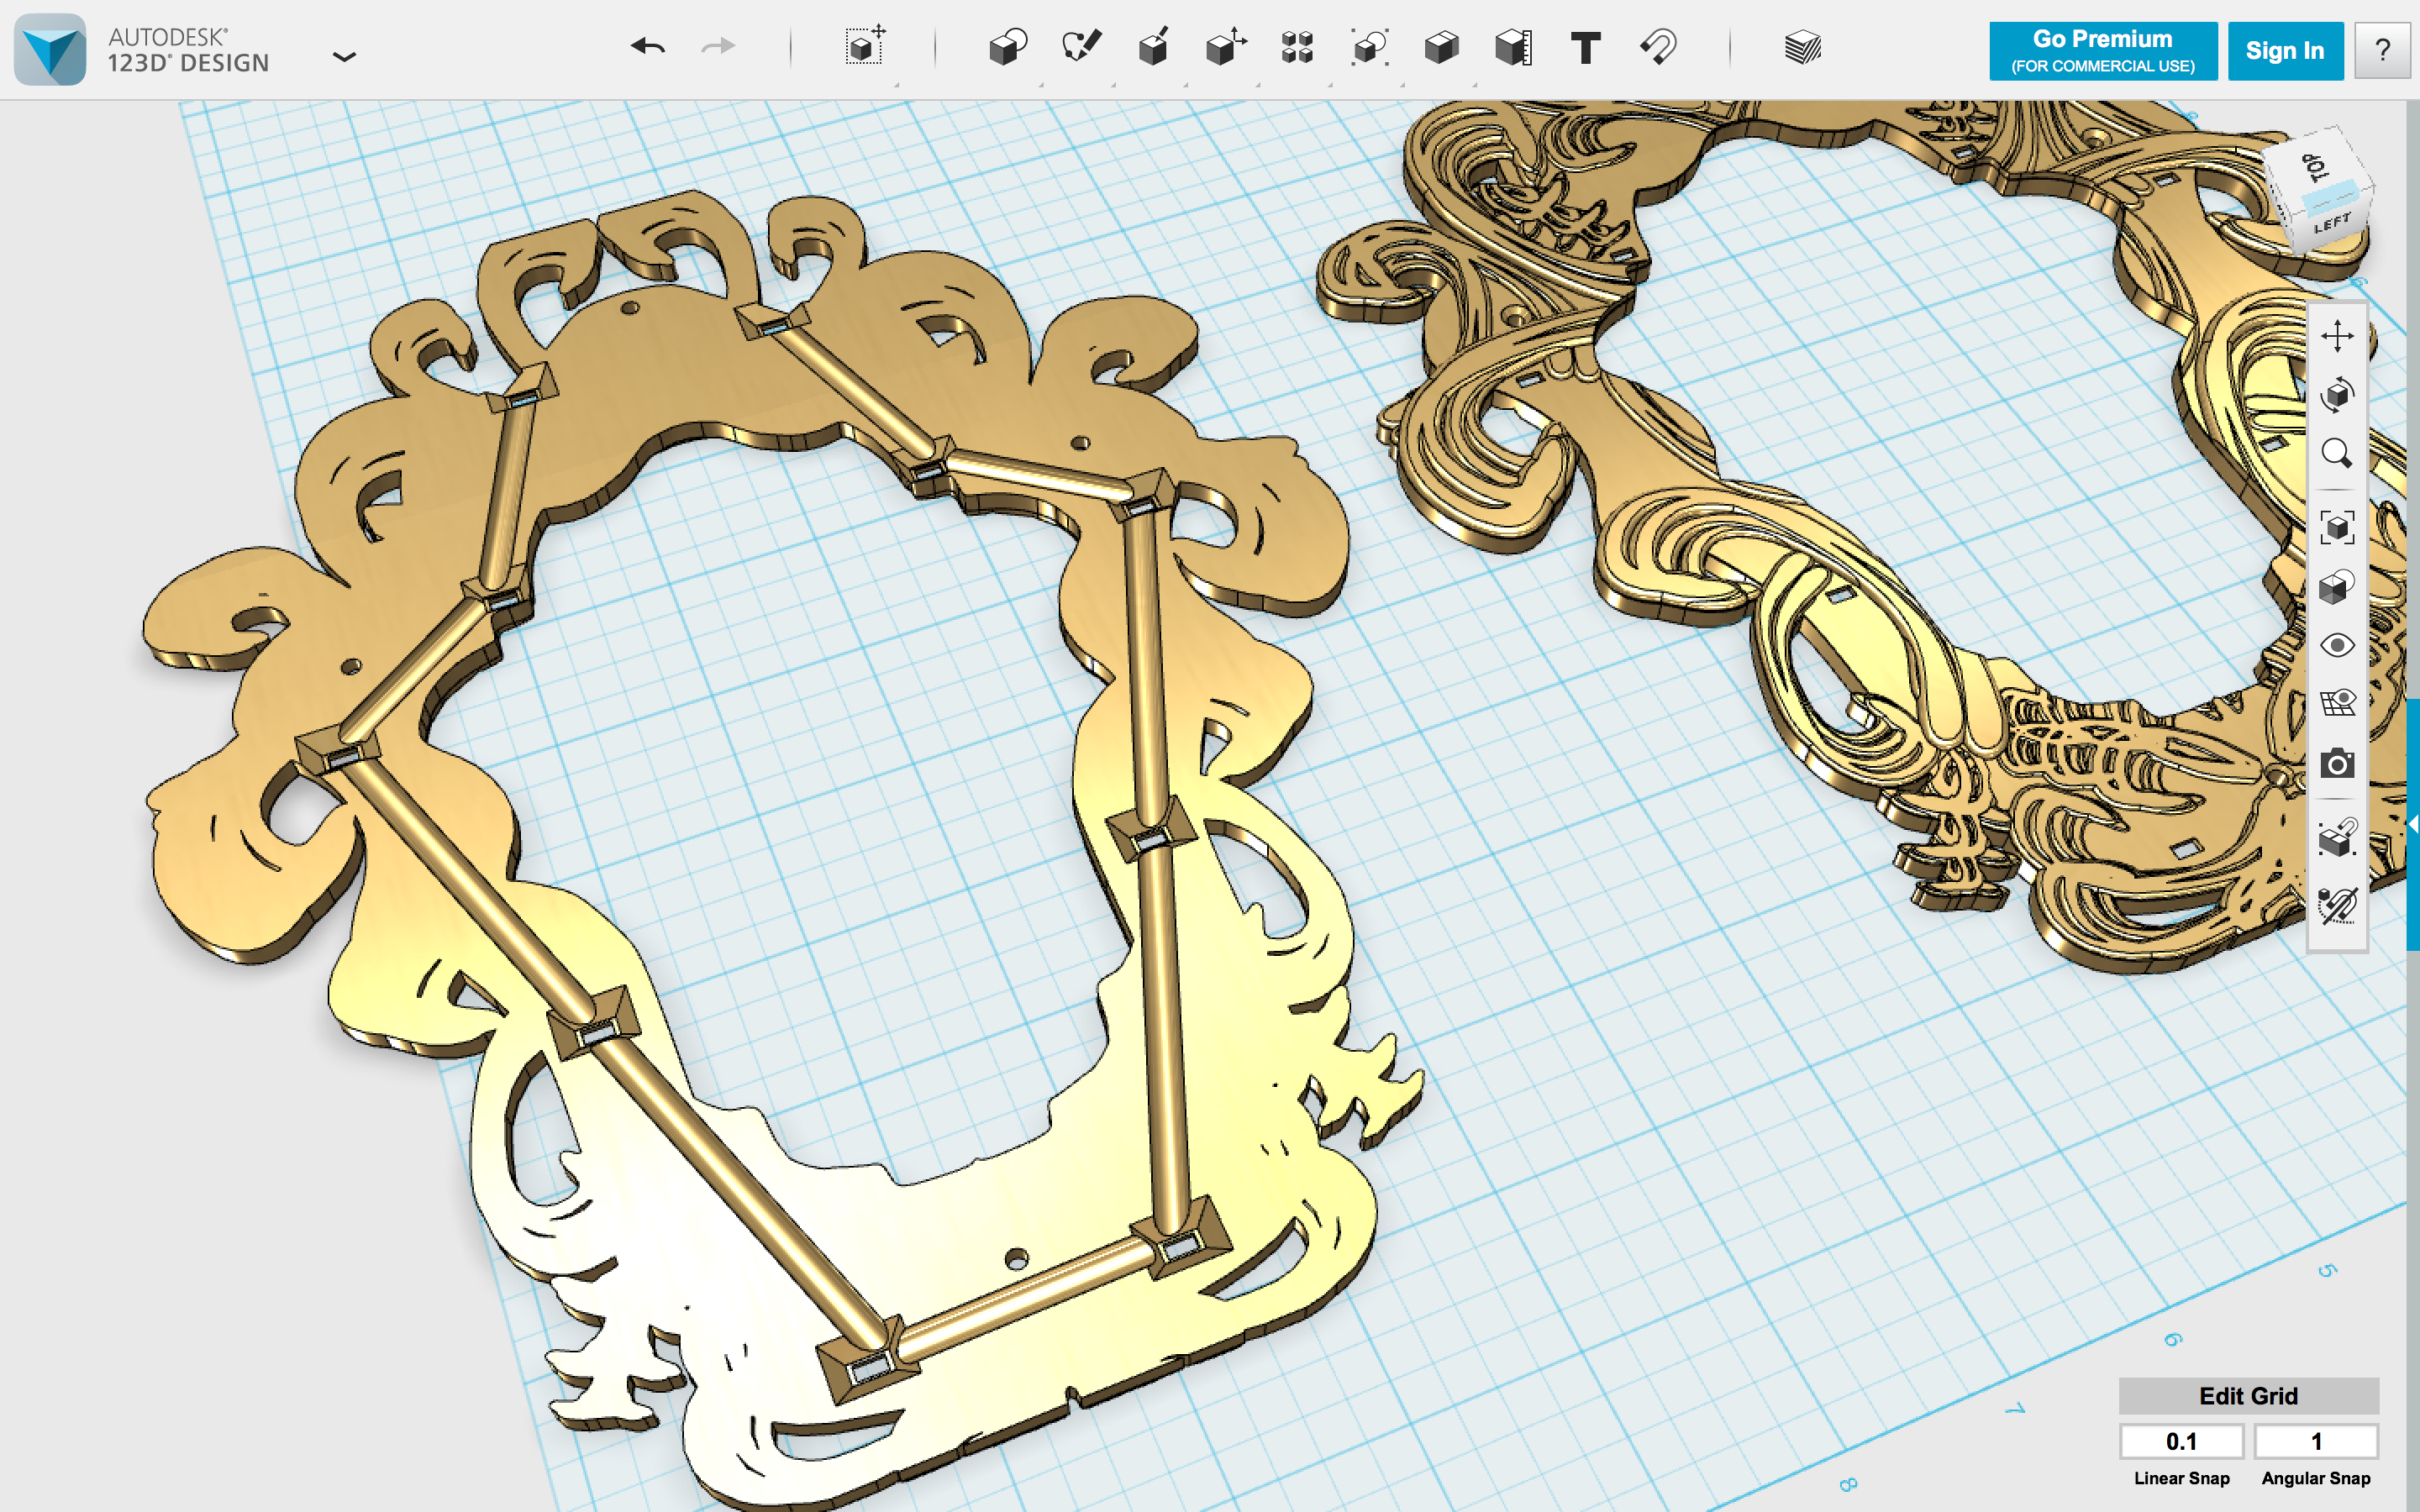
The Magic Mirror faceplate, back and front sides.
Original image by @creatr
NOTE: In this series of articles, clicking an image opens a large scale copy to reveal additional details.
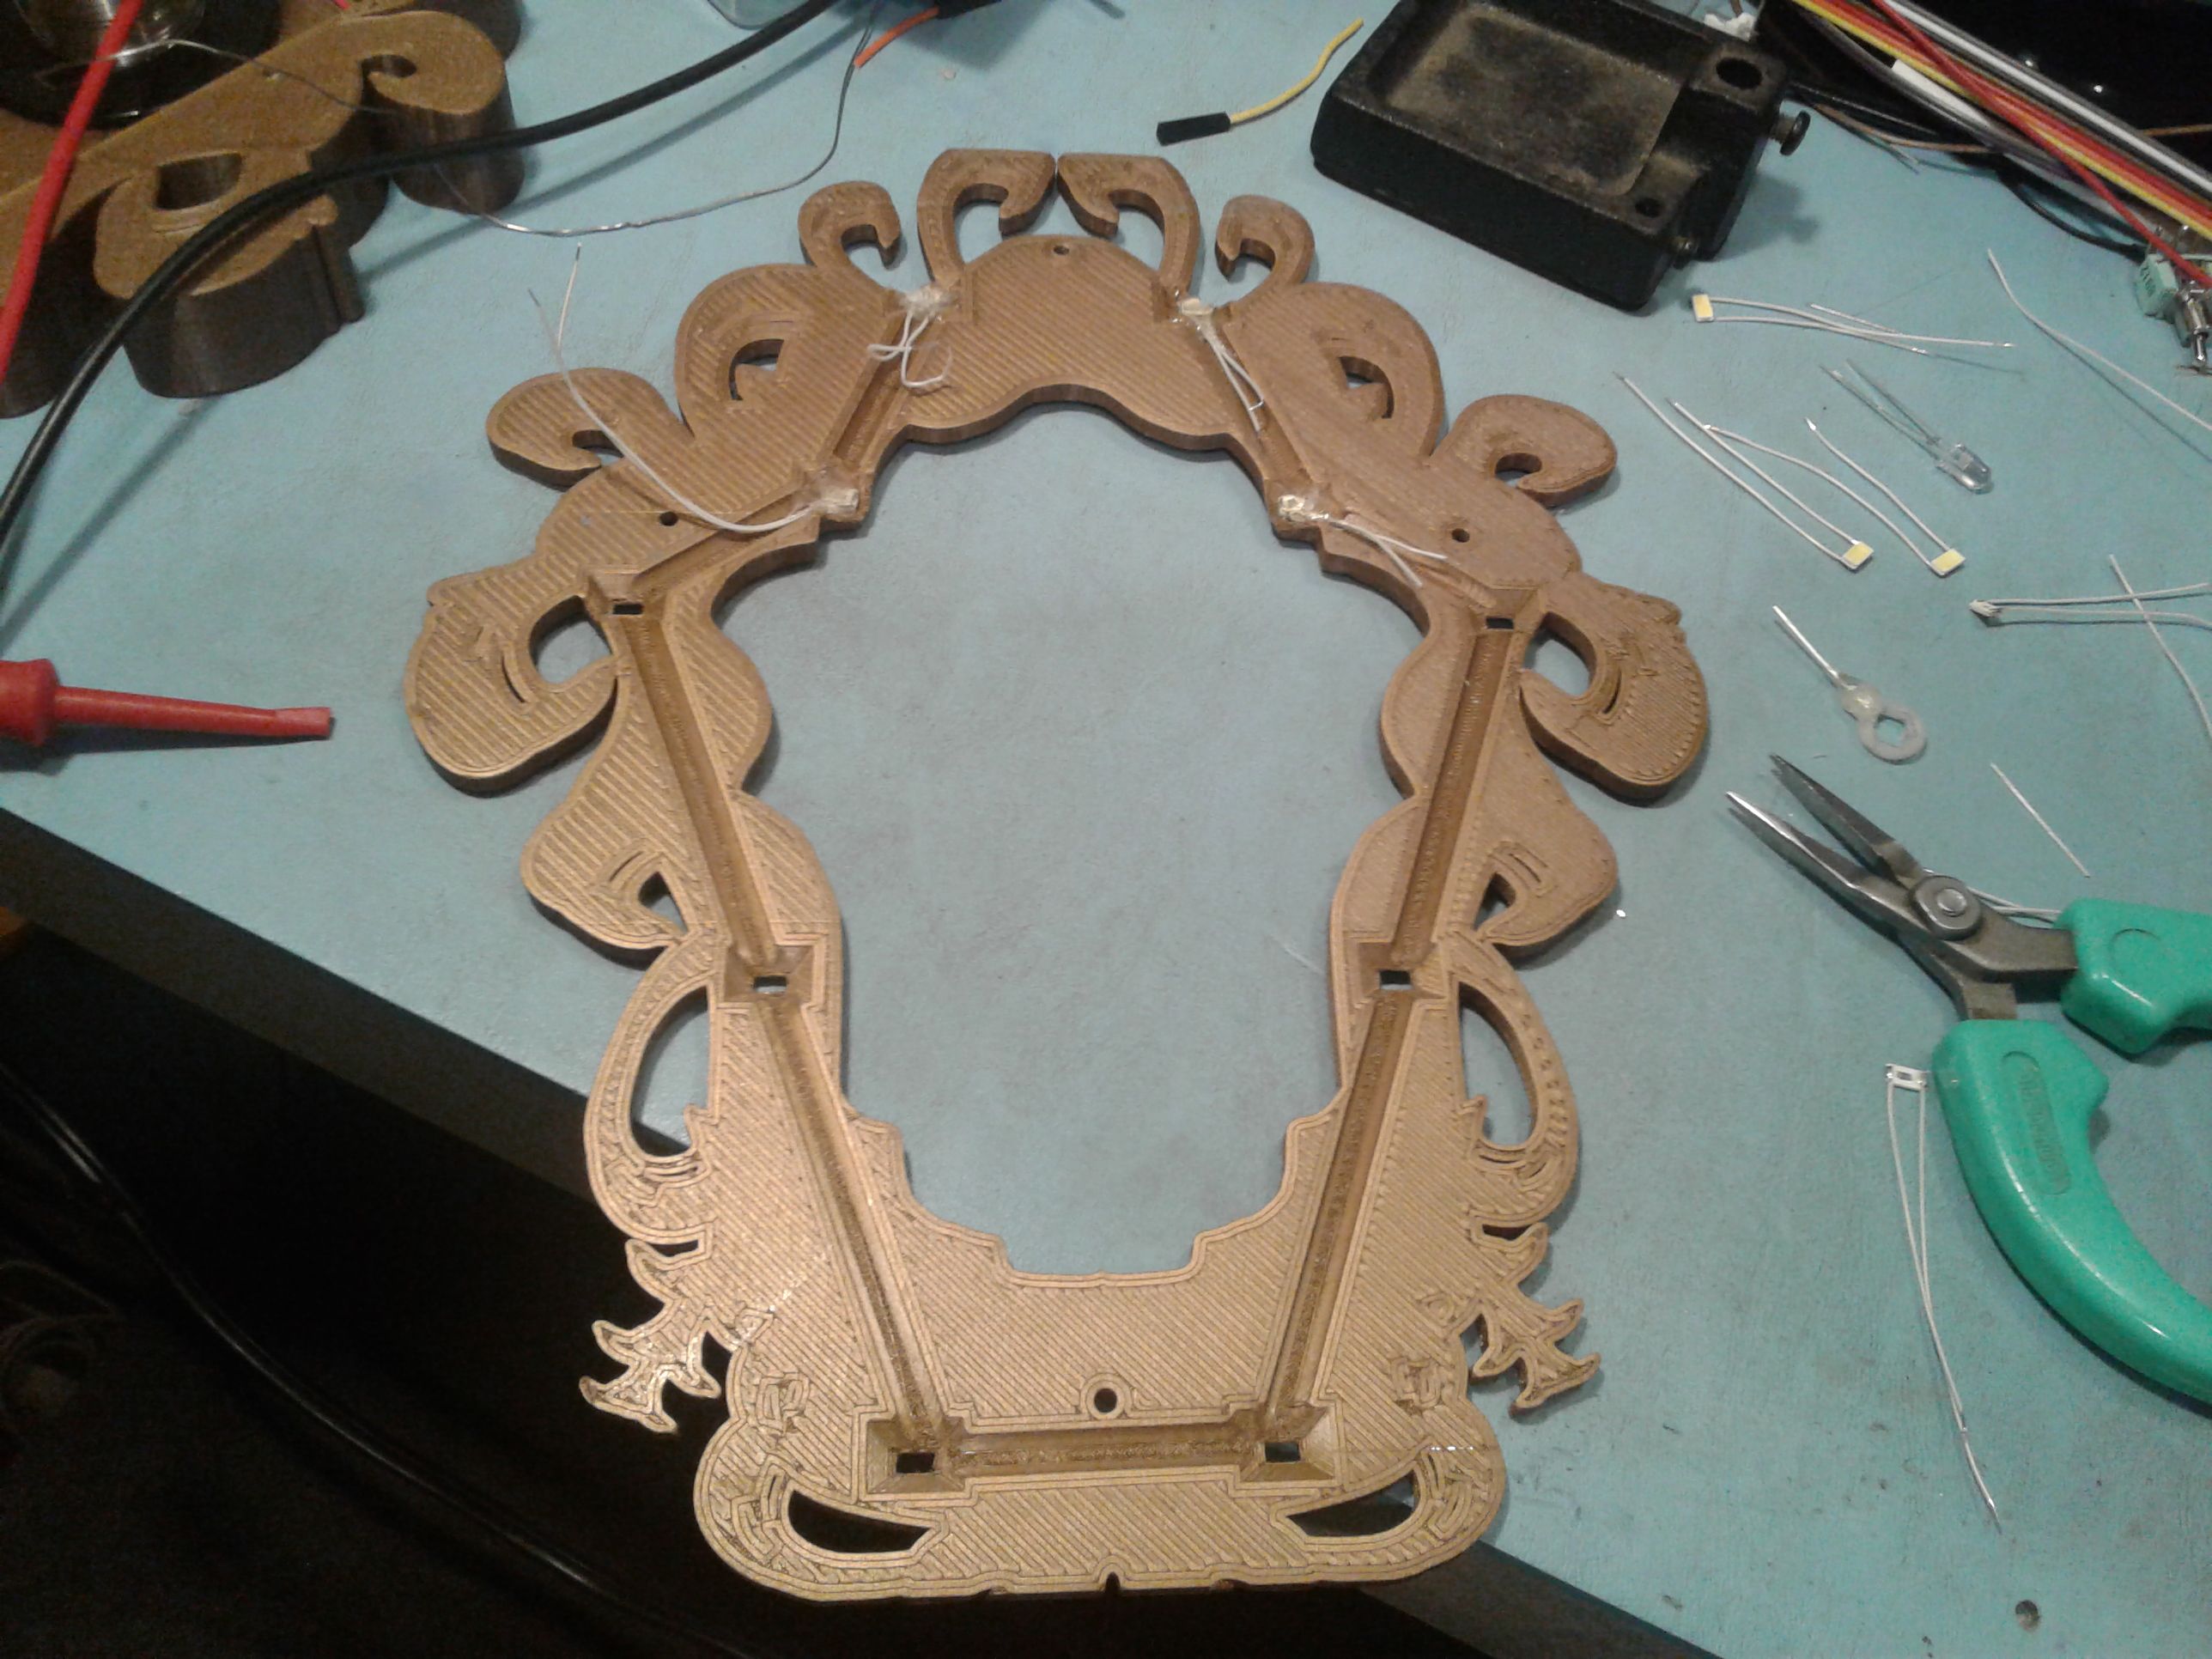
Starting with a copy of the appliqué,
I extended its thickness and carved out sockets for ten high-energy, white LEDs to be embedded in the Mirror face, pointing at Belle's face. I also dug channels in the back of that faceplate in order to be able to run the wires necessary to power up the LEDs.
You can see the wiring channels and LED holes in the image above. You can also see the screw holes used to fasten this faceplate to the main case/body of The Mirror.
The LEDs I chose are amazingly bright devices that operate on 3 volts, and so I wired them in parallel and planned to run them off of two AAA batteries.
This CAD file embodies the handle design.
In the image below, I've included both a front and a back so that you can get an overview of what the pieces look like.
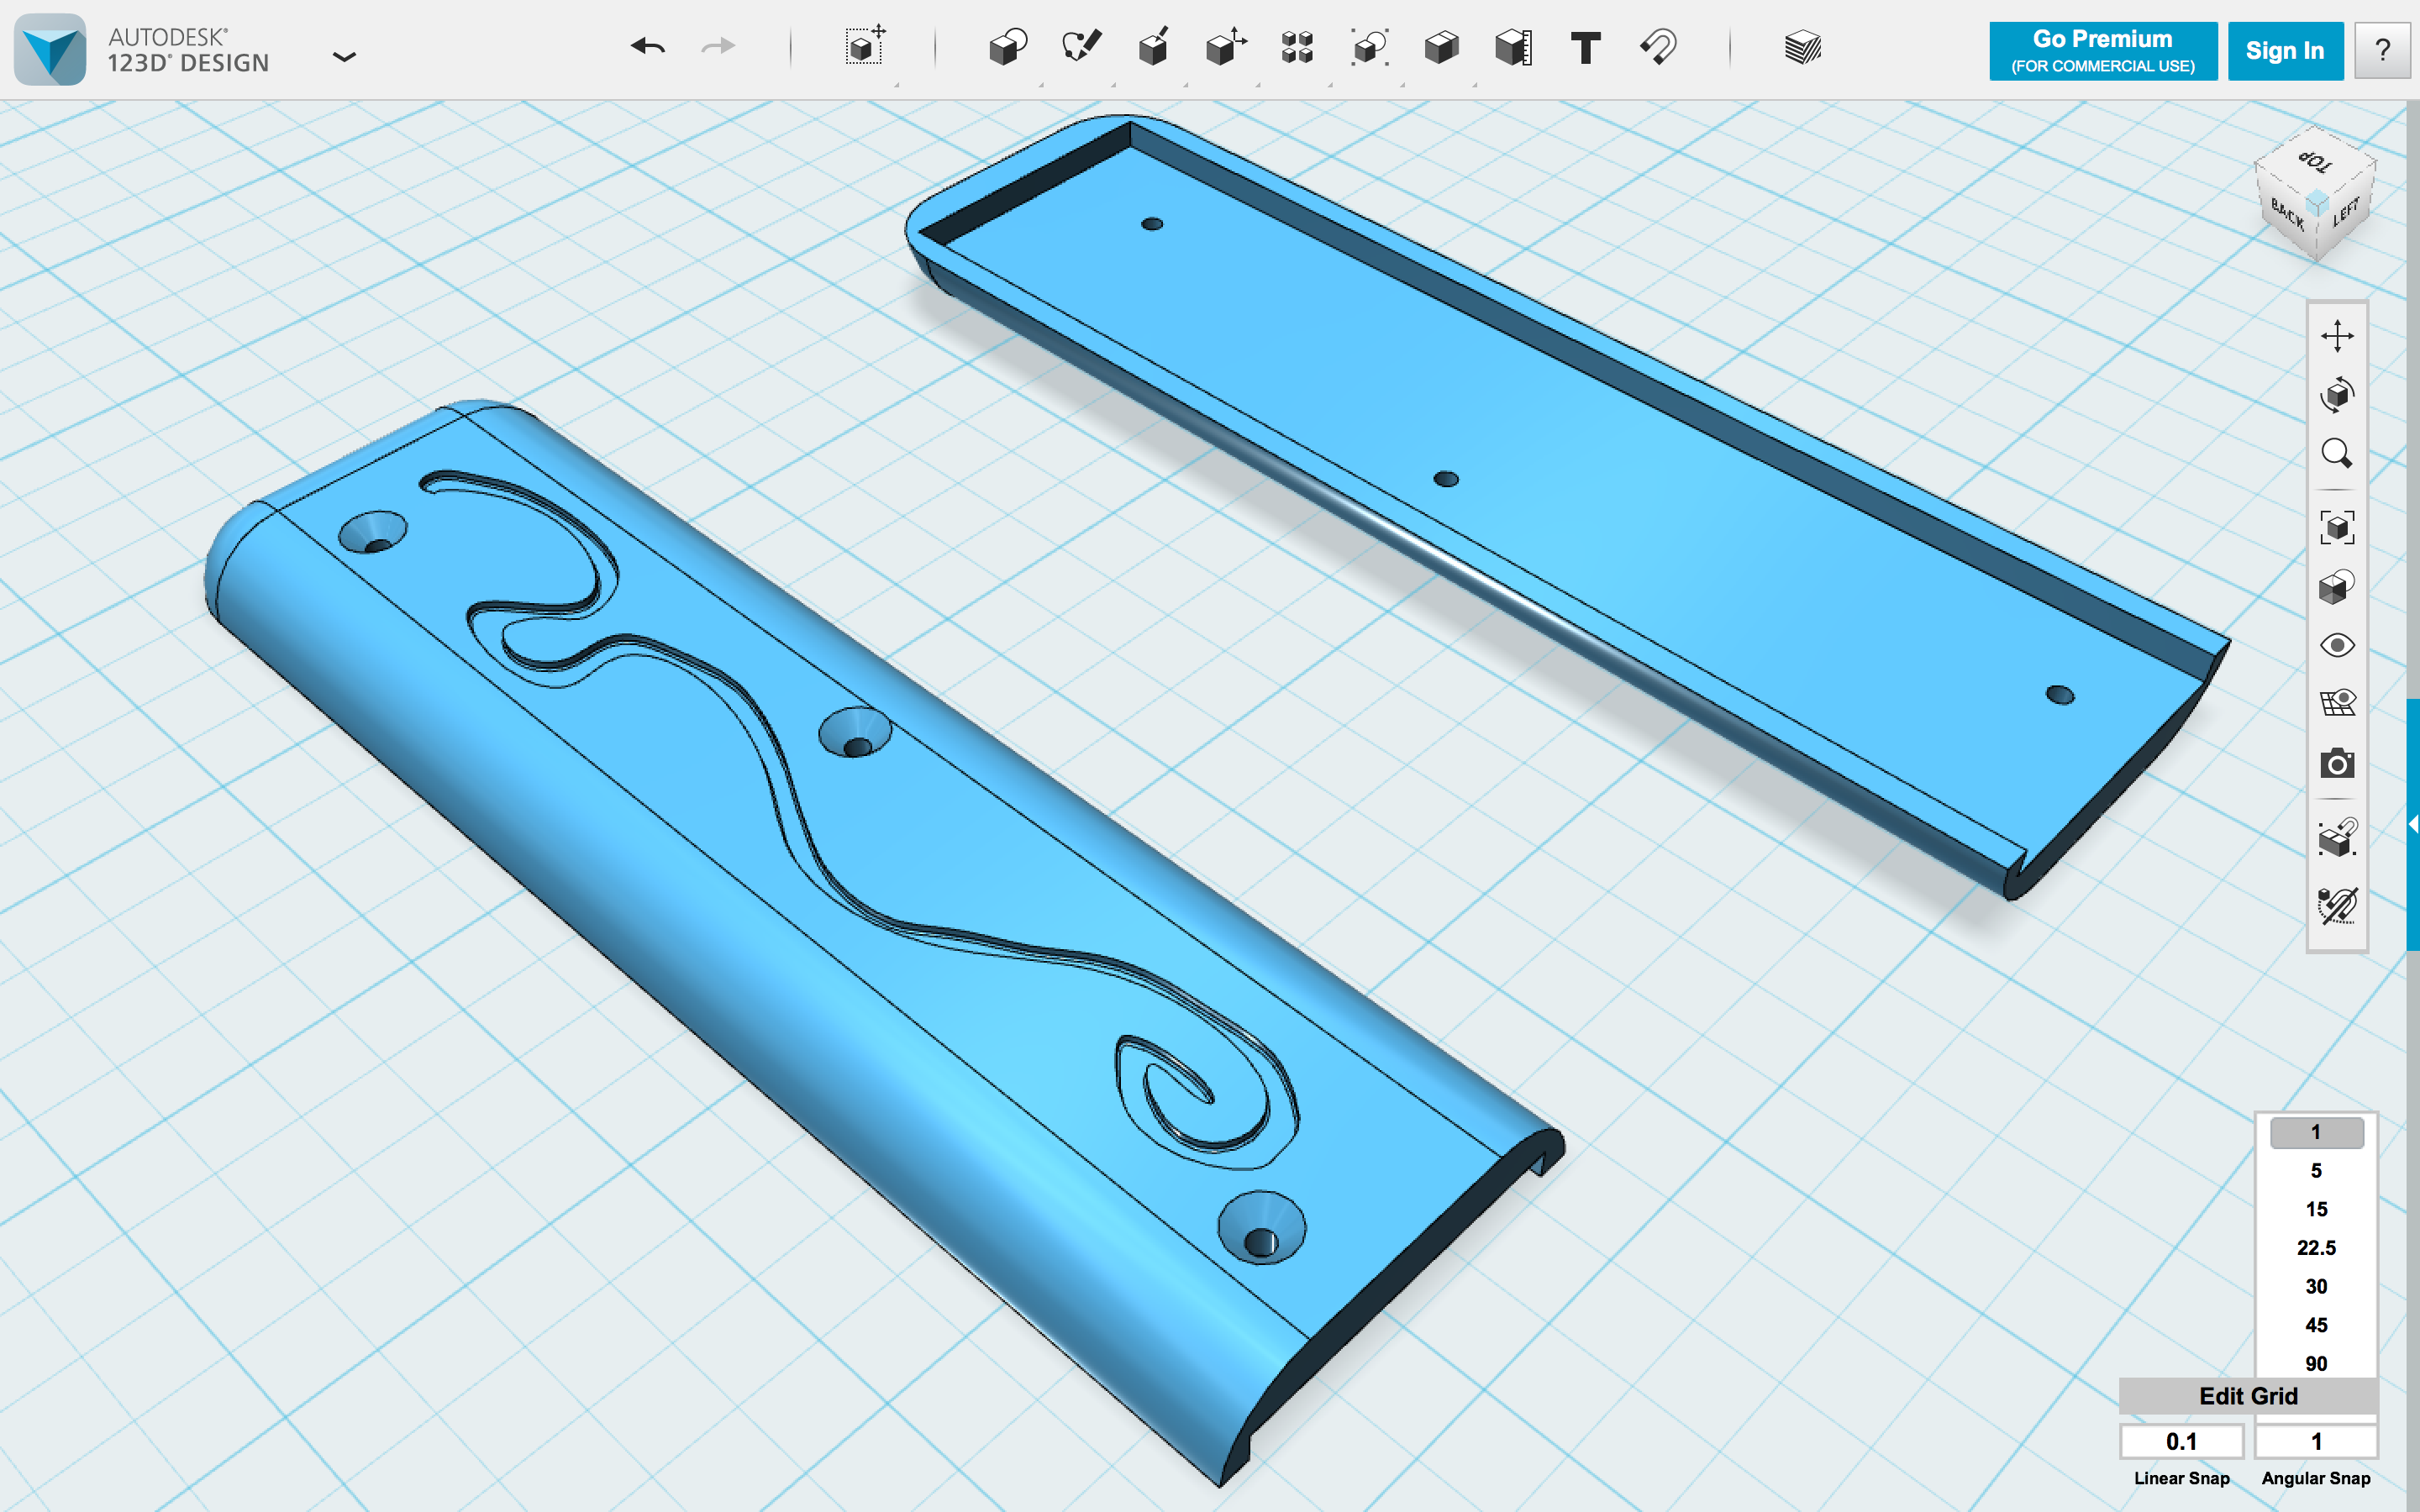
The Magic Mirror handle design.
Original image by @creatr
They are identical,
symmetrical opposites that screw onto either side of the internal hardboard stiffener/integrator piece. Notice how the arrangement of the screw holes prevents the screws from interfering with one another when entering from opposite sides.
What you're looking at is actually the second handle design. The first one was a little more complex, and it gave me fits when I tried to print it as we'll see shortly.
Due to the gradual curves of the handle edges, and to the relatively shallow and narrow bas-relief decoration, this piece can be printed without support material when oriented on the printer bed with the mostly flat decorative side downward.
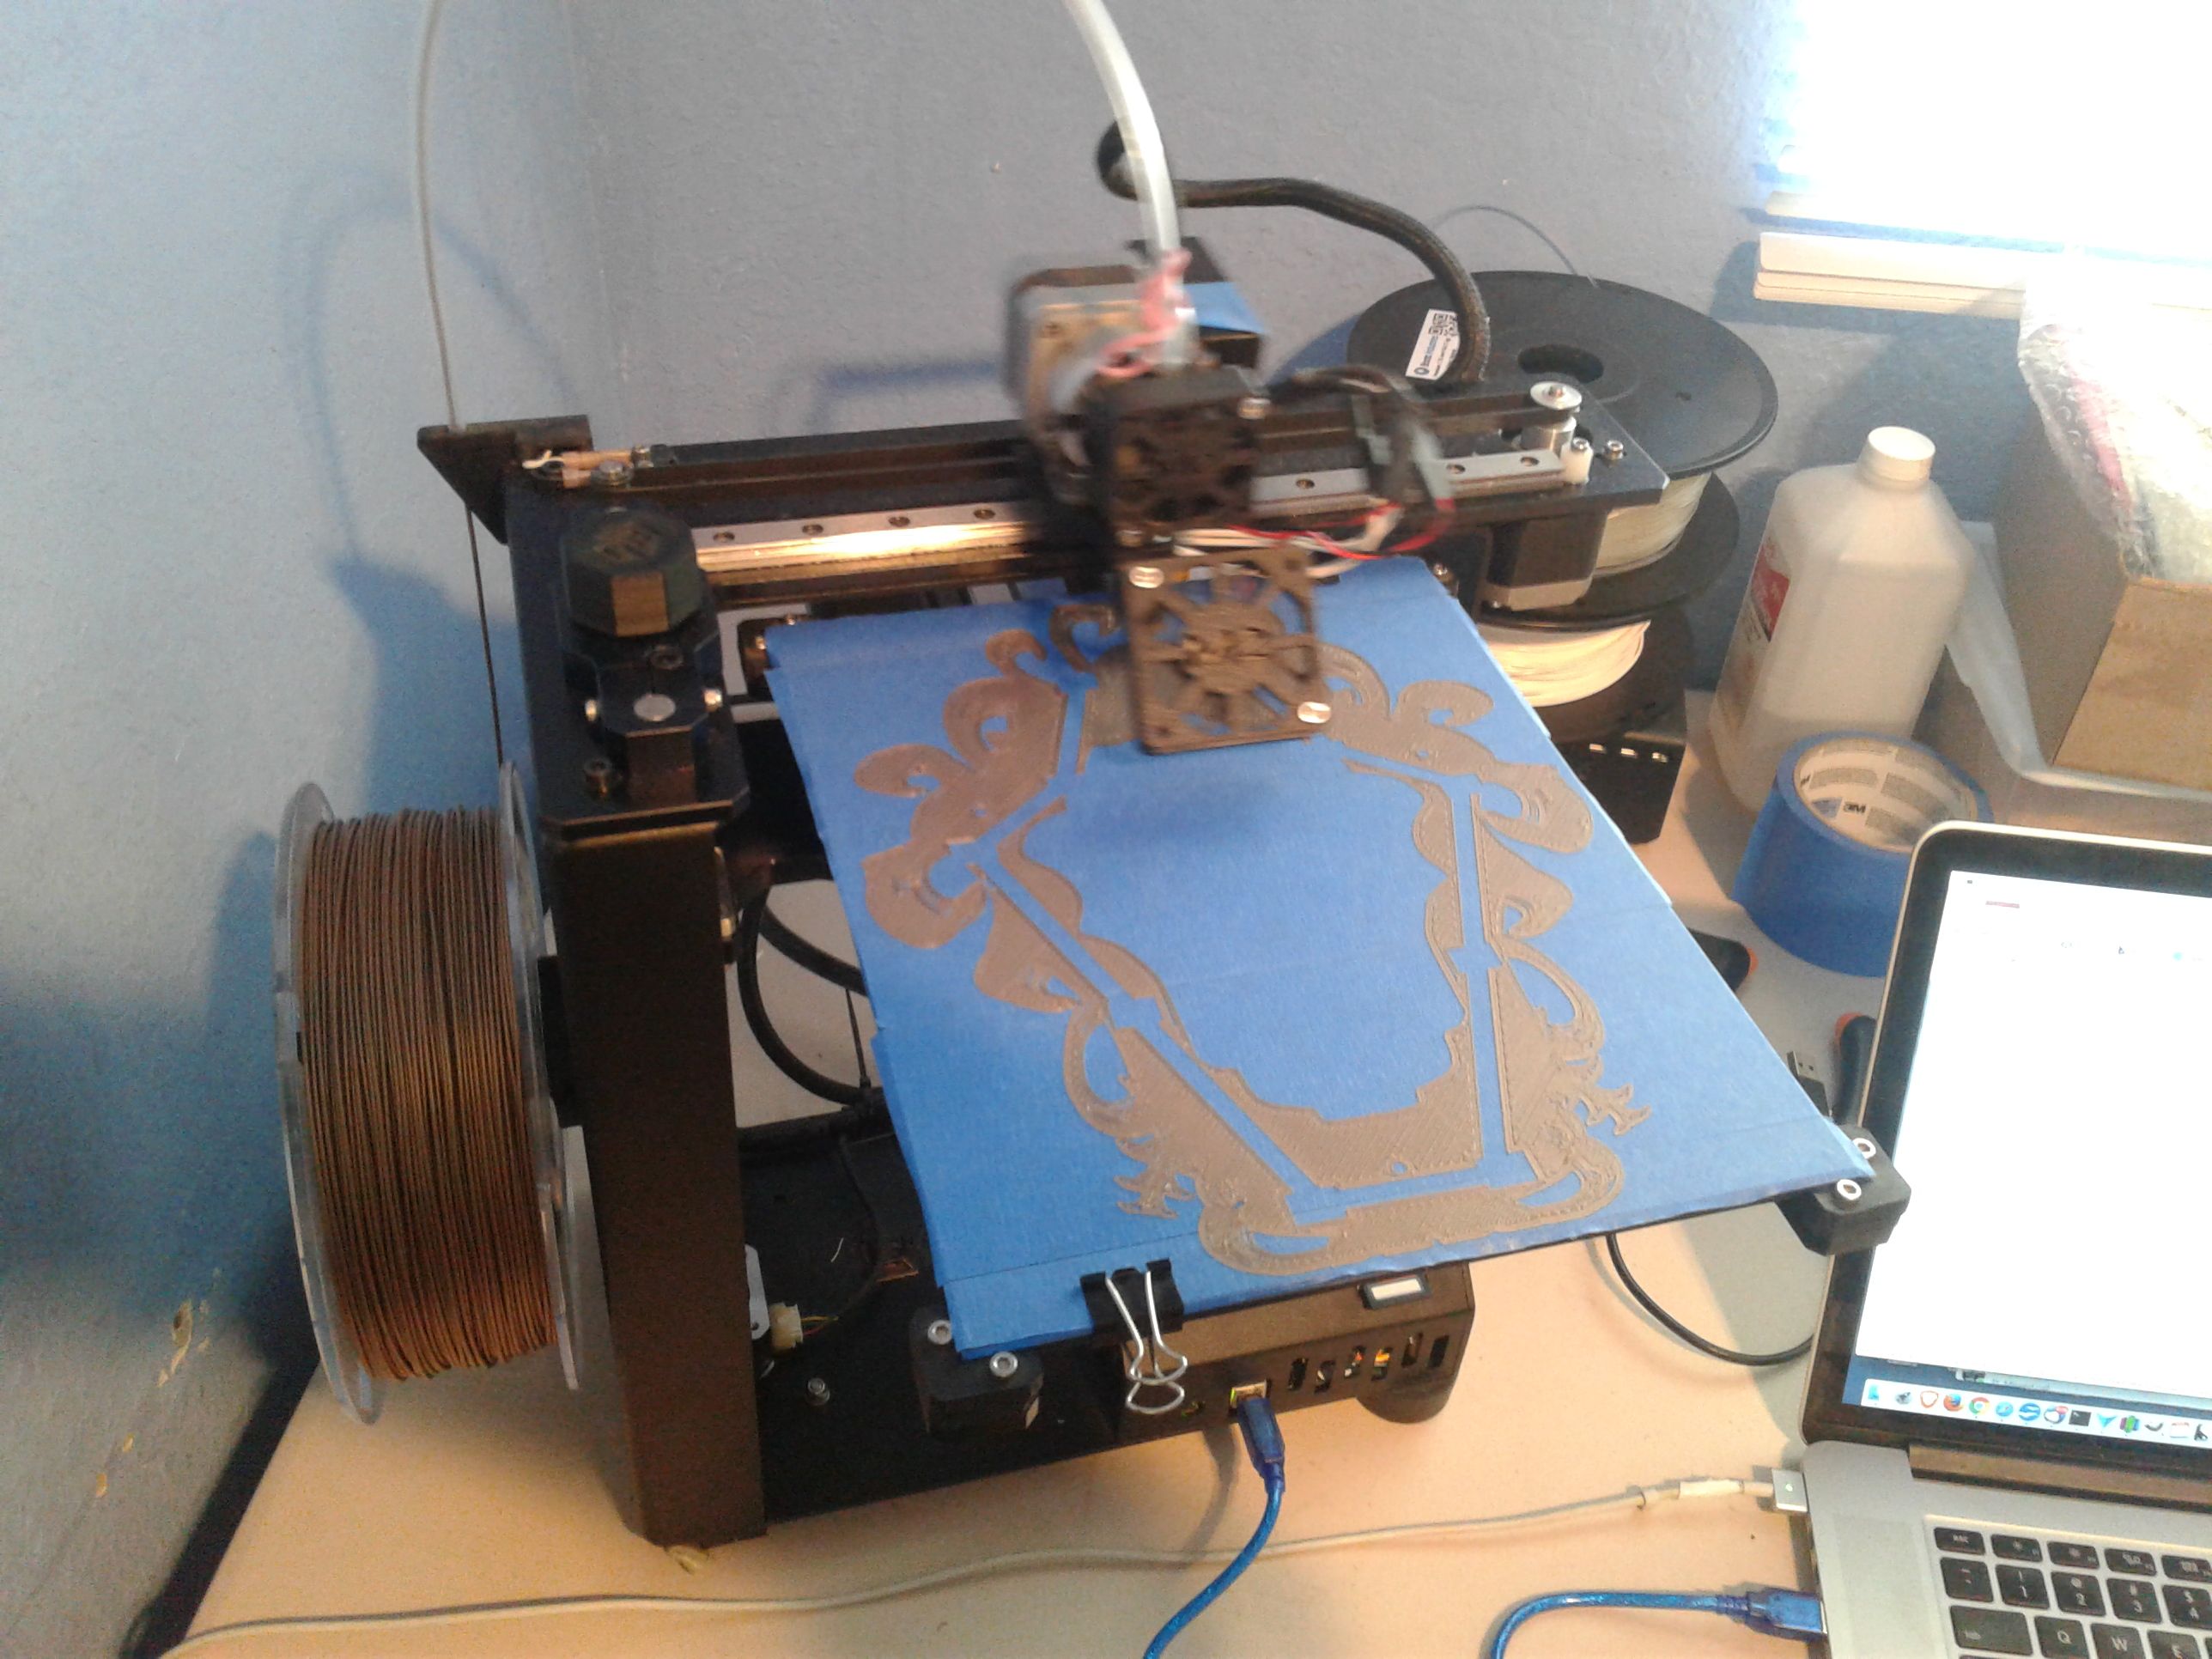
It was time to do some printing.
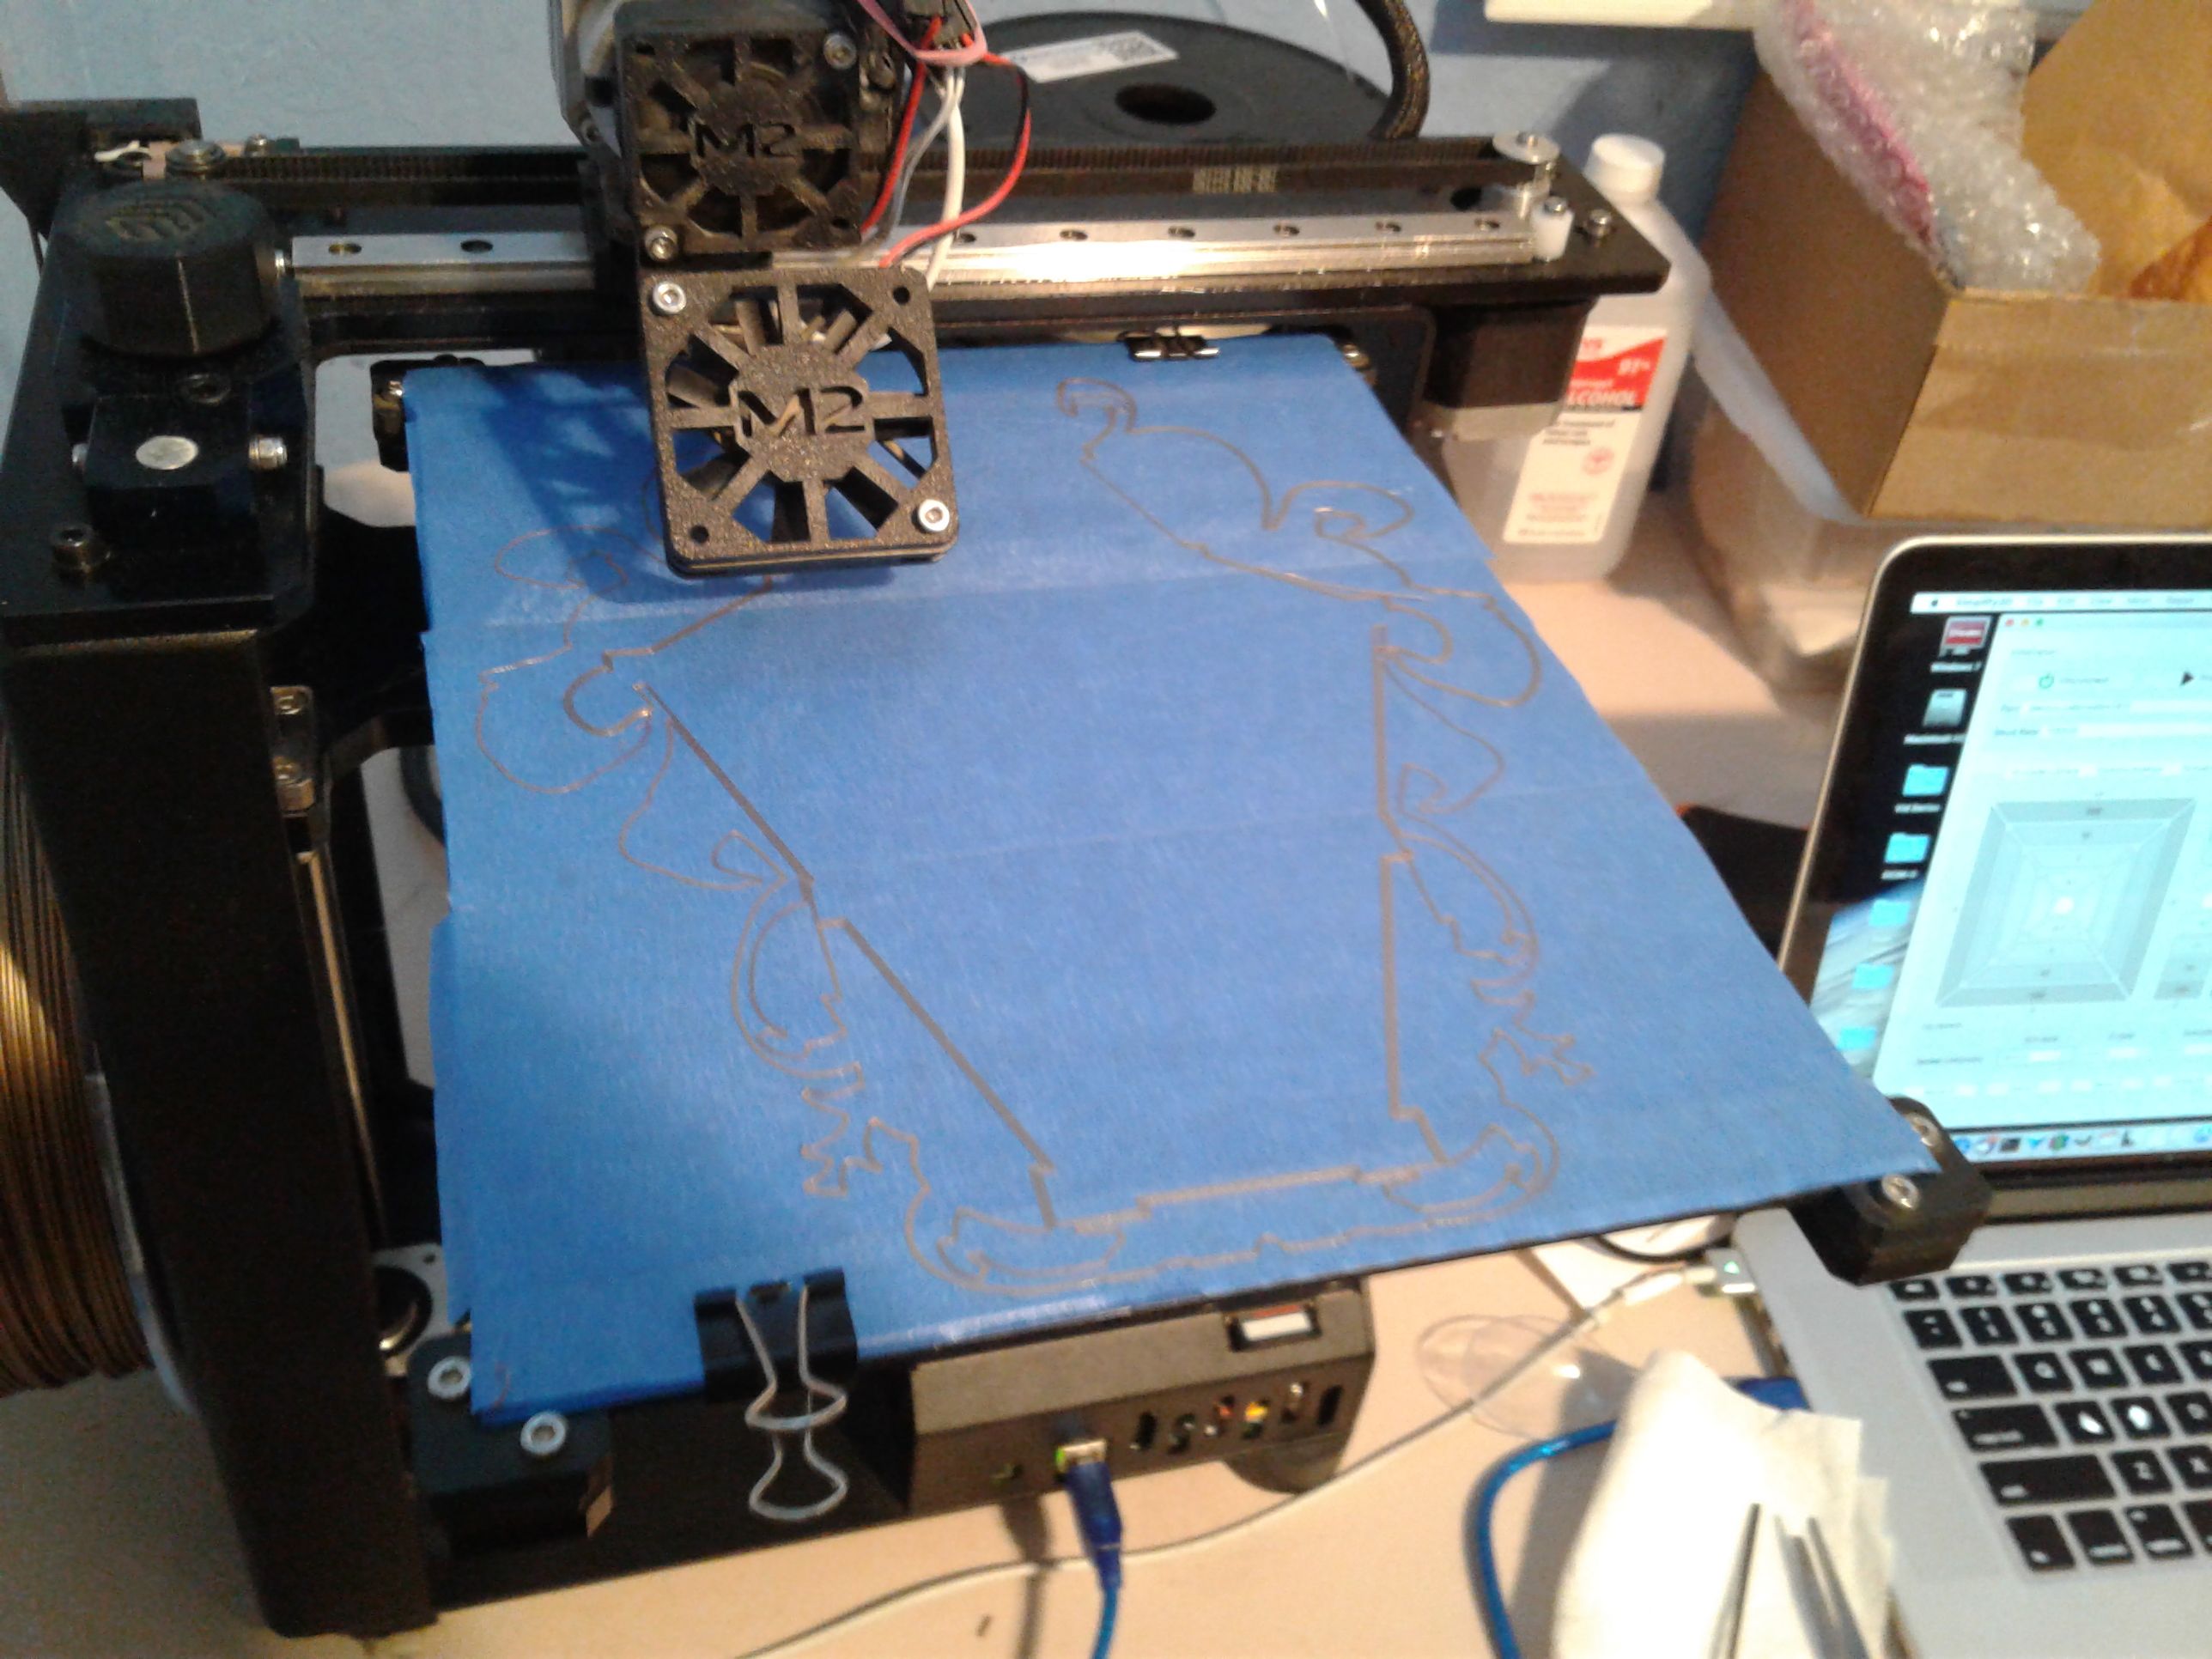
Lots of printing, actually. The following sequence shows the faceplate being printed.
|
|
|
|
|
|
Mirror Faceplate sequence: CAD to printing... (click for full-sized images)
Original images by @creatr
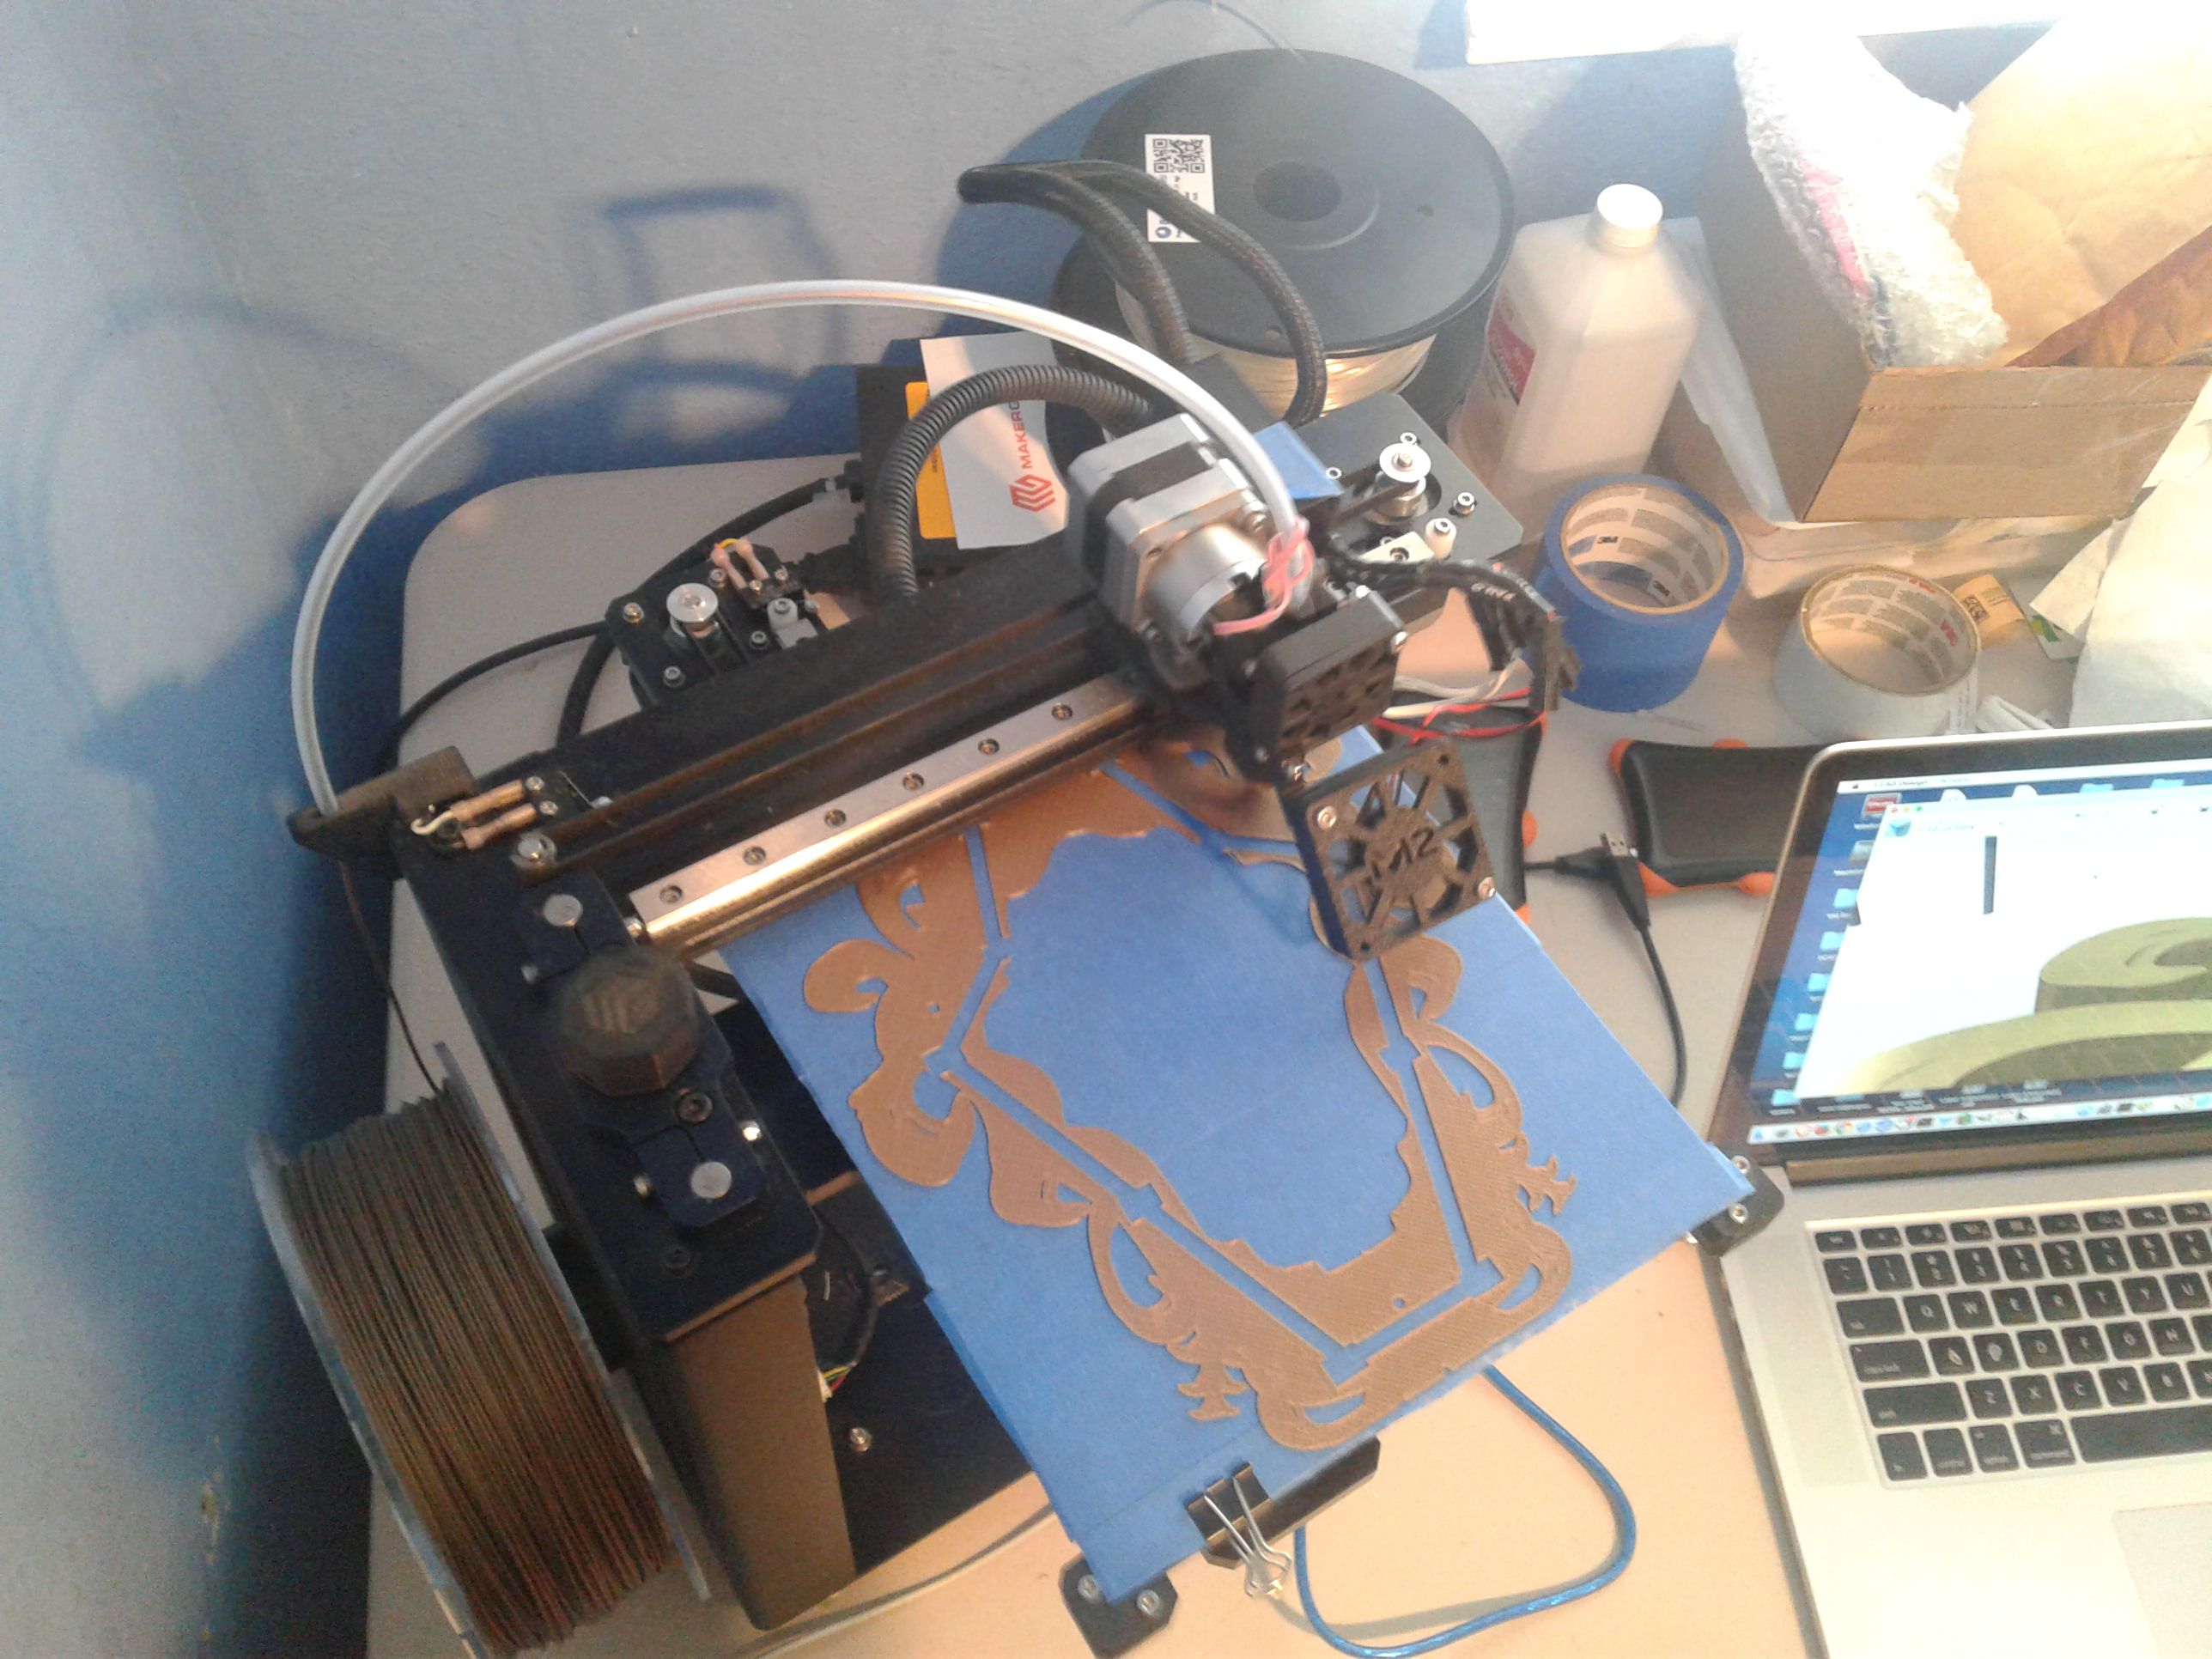
The faceplate was printed with the interior side downward. If you look closely, you can see the wiring channels are visible in the fourth image, and have narrowed as layers are being added in the fifth image.
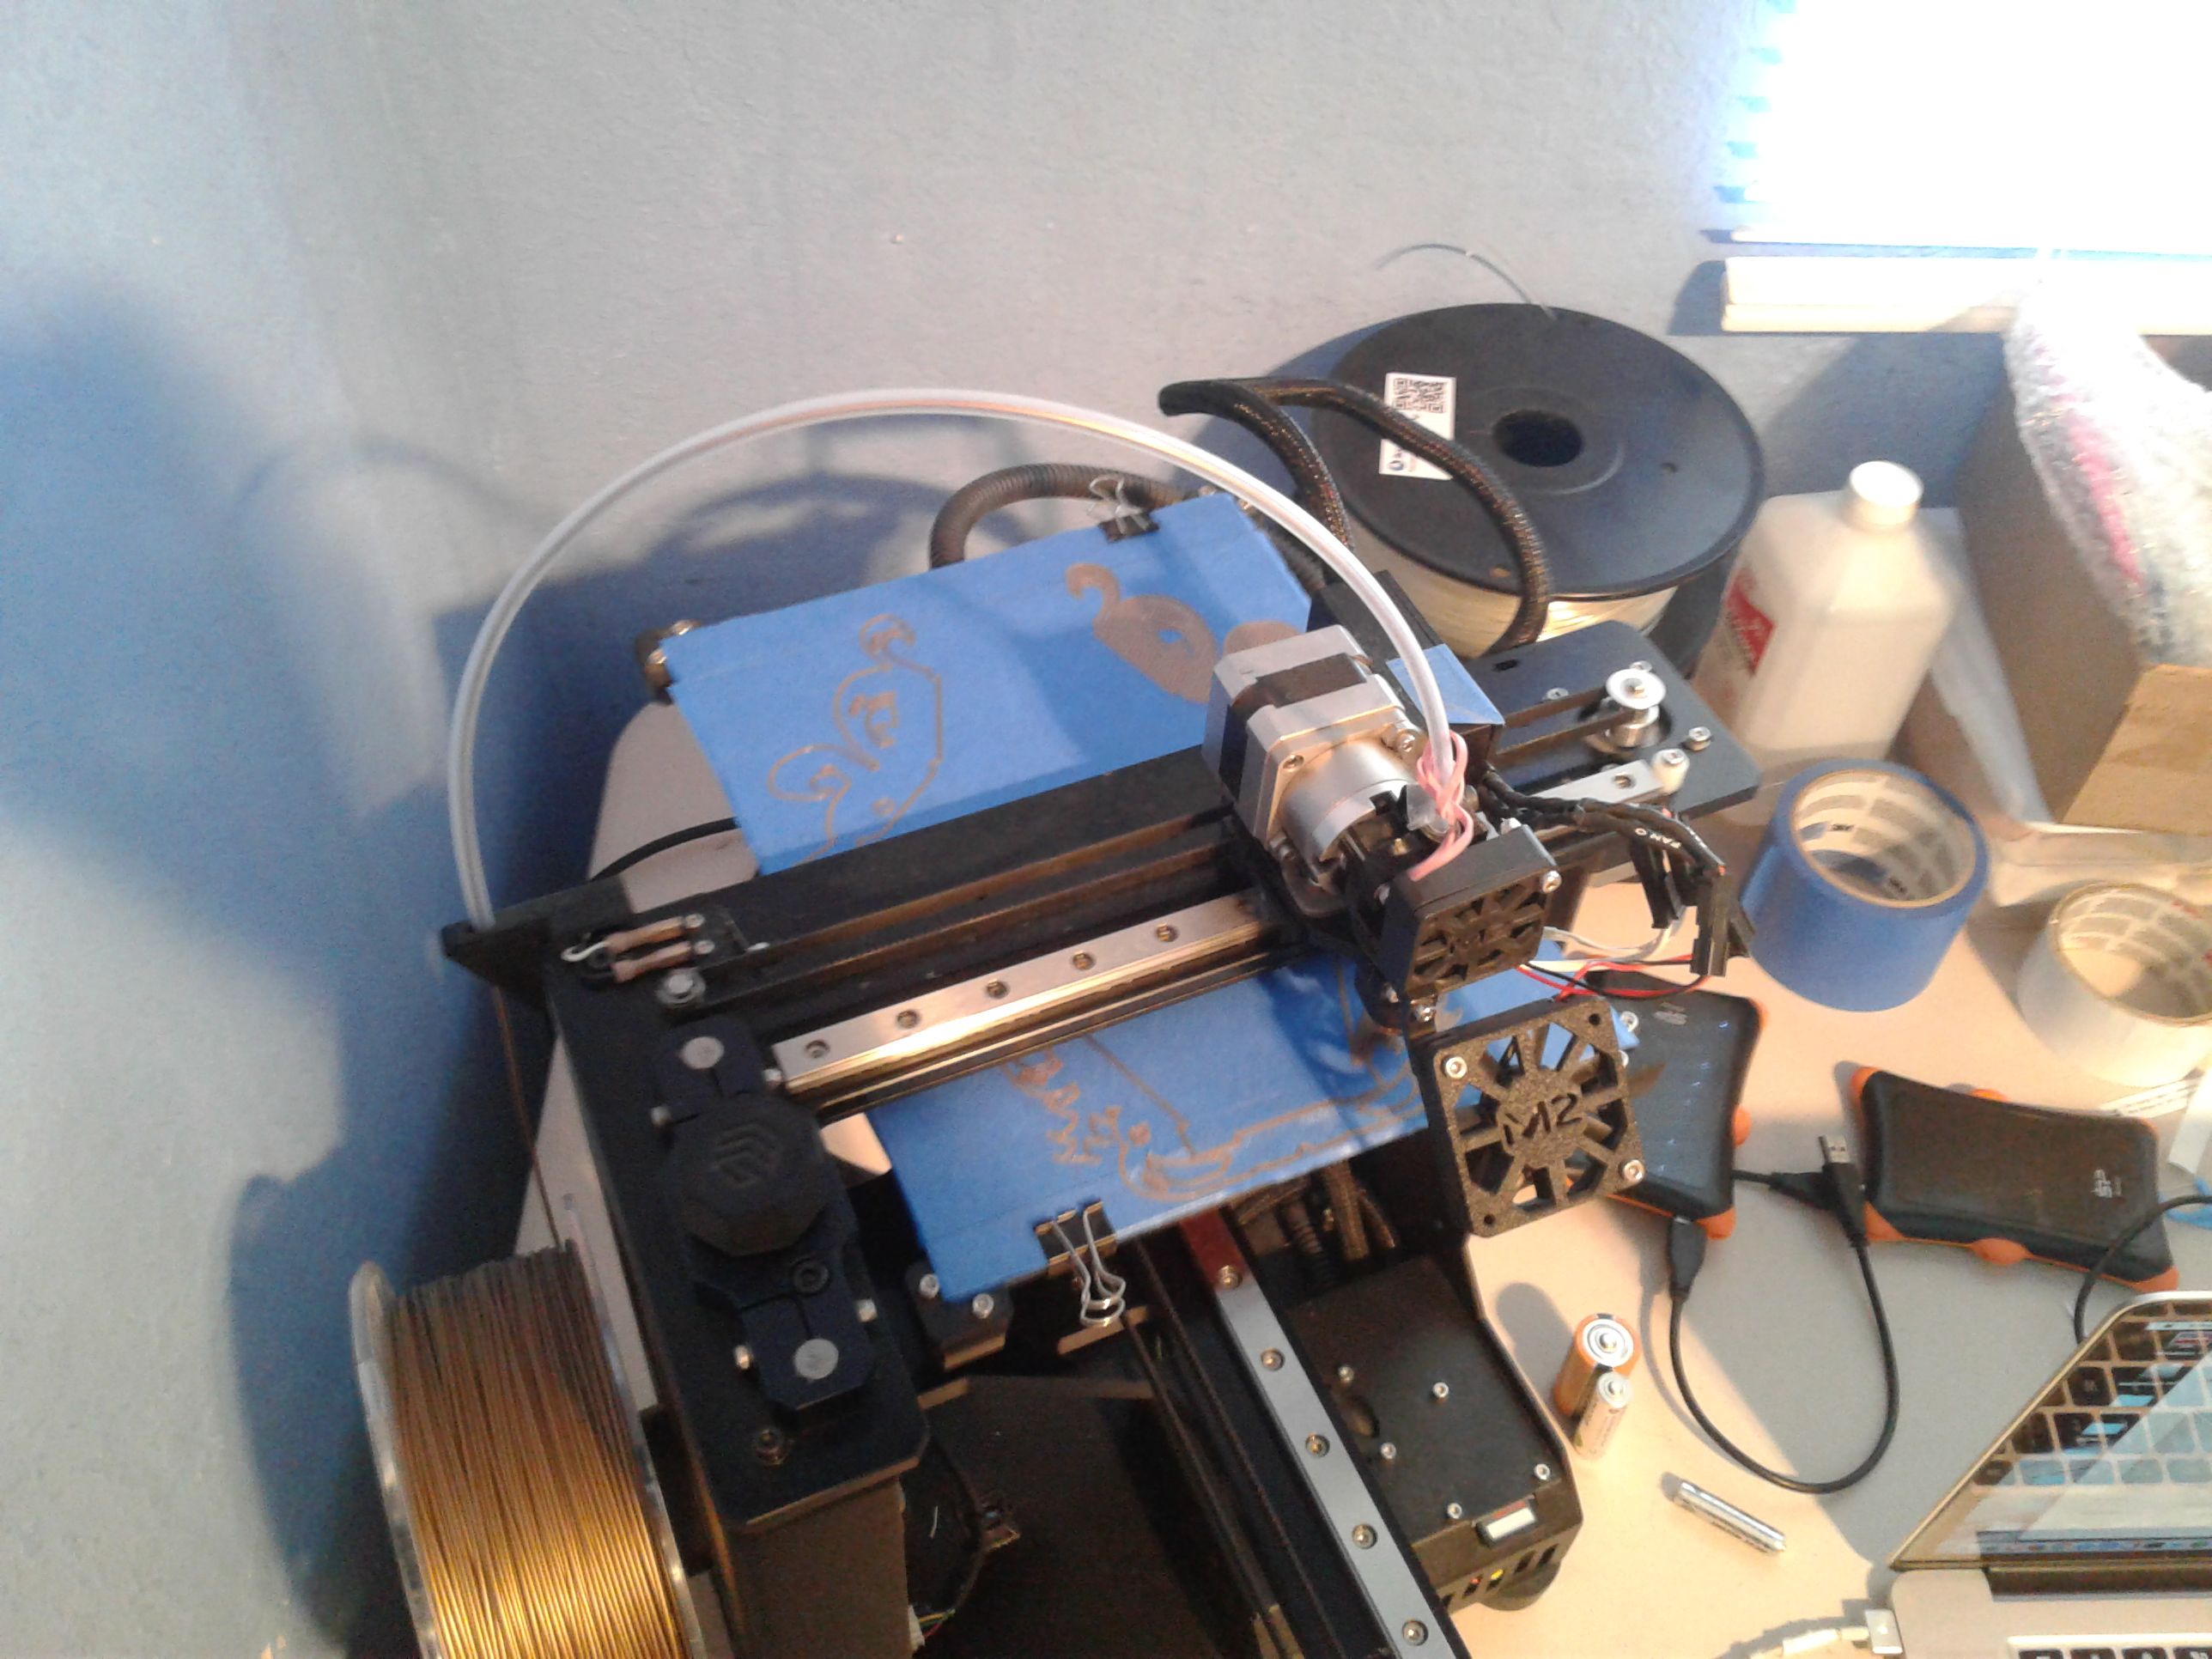
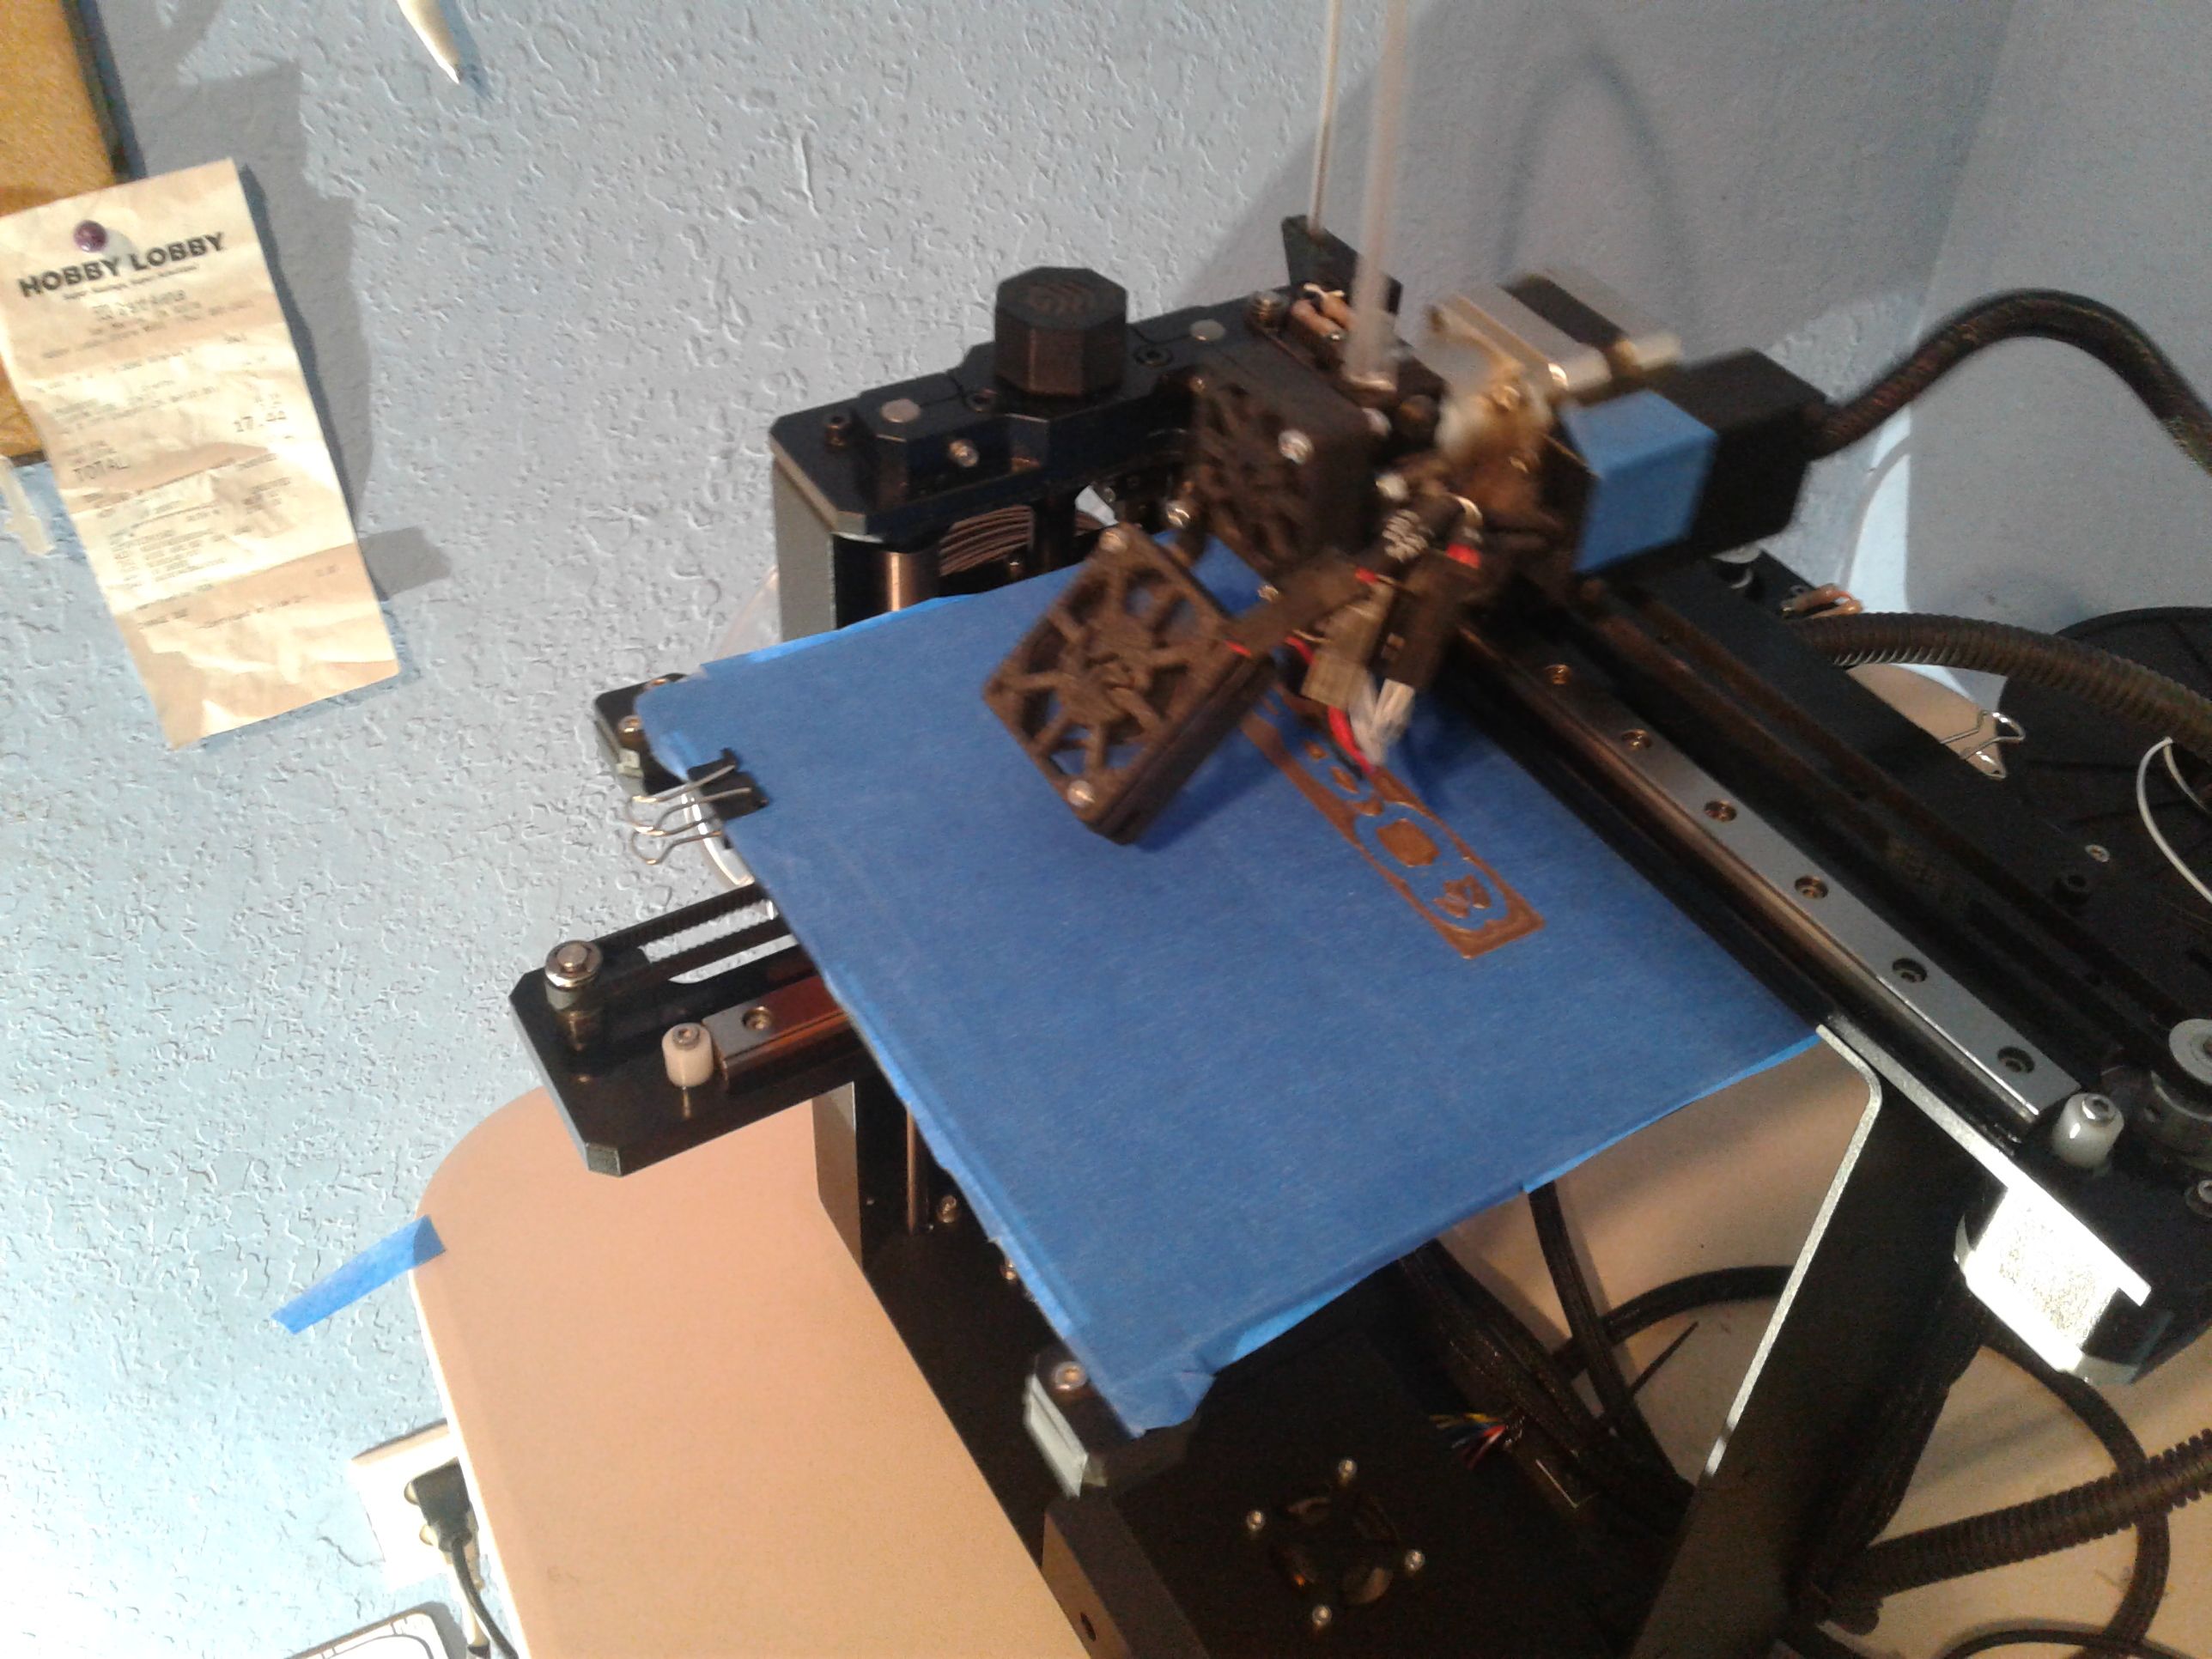
One of the largest objects I've ever printed,
the main mirror case (see image below) almost filled the 8" x 10" print bed of my MakerGear M2 printer. Being so large and complex, it also took more than 24 hours to print.

Beginning the main Mirror case print.
Original image by @creatr
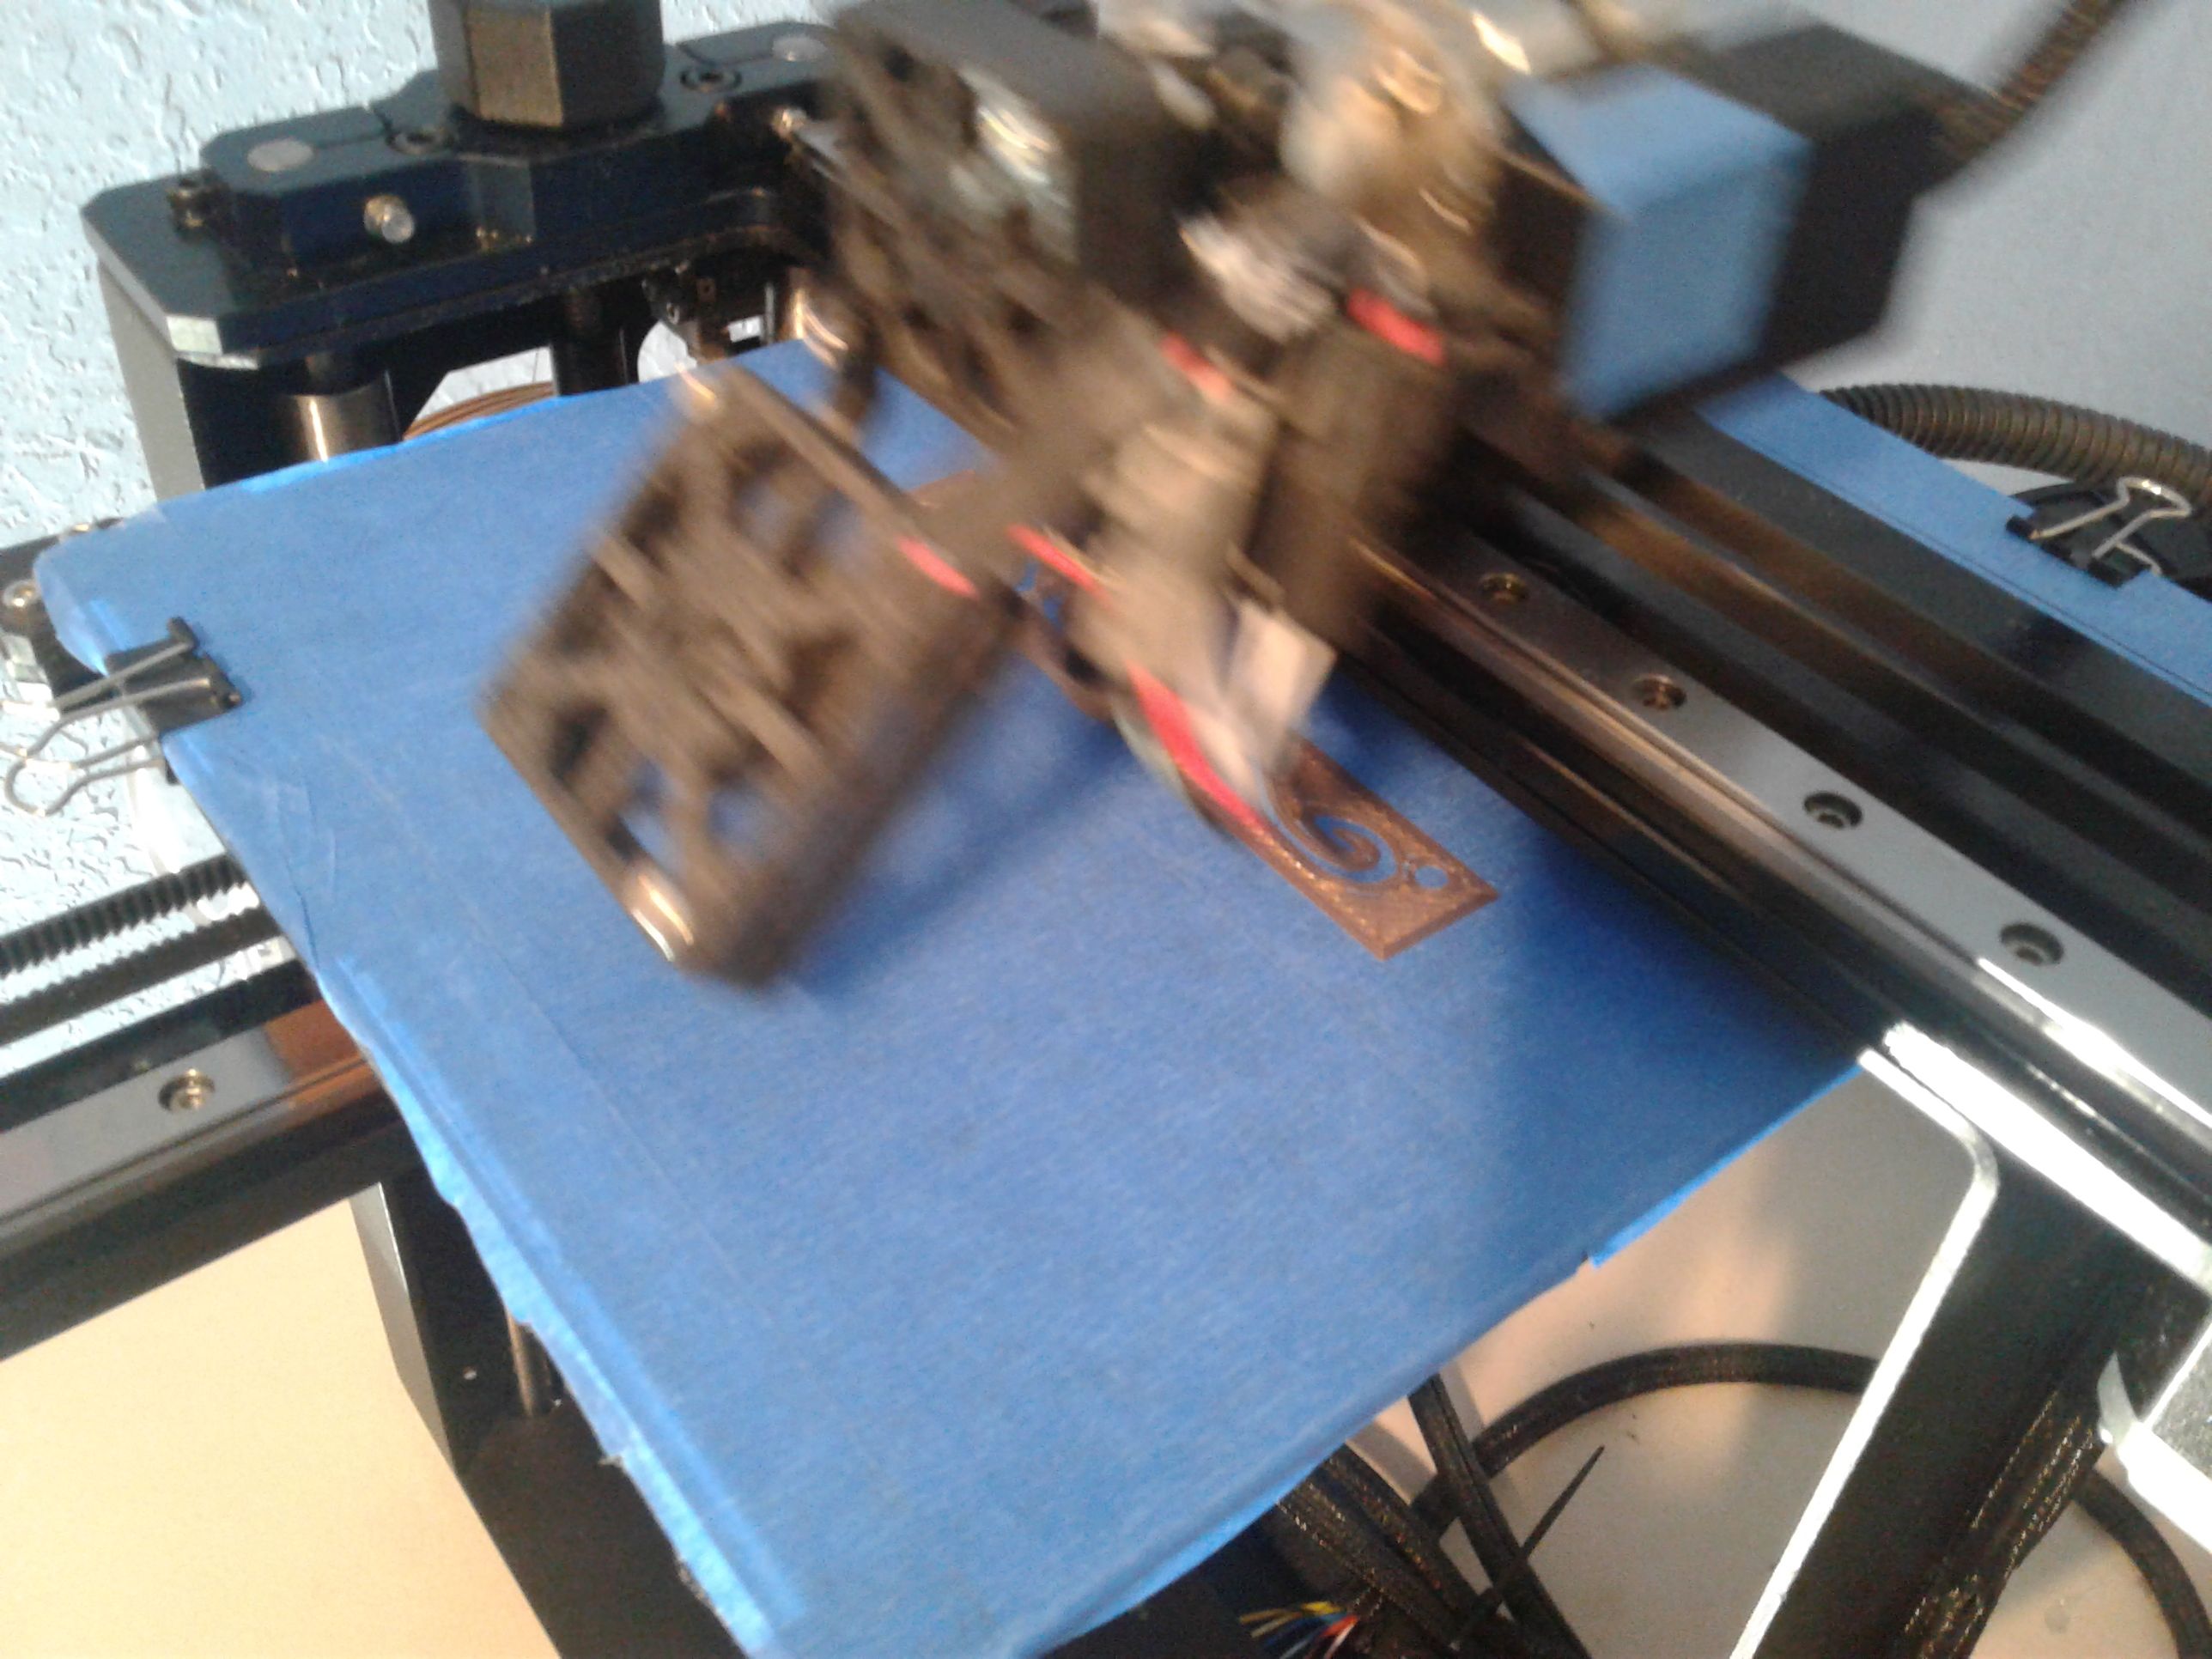
On a huge print like the main Mirror case, checking on the print gets a little bit nerve-wracking, especially toward the end. When its nearly done, with a large amount of time and material already invested, I find myself praying that the print will finish without any filament jams or printer component failures.
Handle Print
As I mentioned earlier, my first handle failed. I had designed the bas-relief decorations in a way that left little "islands" of printer material on the print bed with only a very small contact area. The consequence was that those spots did not adhere well, and were knocked off by the printer head as it went to subsequent layers.
|
|
|
|
Mirror Handle sequence: CAD, failed print, successful print... (click for full-sized images)
Original images by @creatr
If you care to zoom in on the second image (above) you can see what I mean about the "islands" in that picture of the beginning of that failed print. The third image shows the successful print of the final design in progress.
With the major parts printed,
it was time to wire up the LEDs. In the image below, you can see the first few have been installed. They are held in with hot melt glue, which is a little bit tricky because it gets hot enough to soften the PLA plastic that the Mirror parts are printed with. However, as long as you apply it a bit at a time, it is manageable.
Installing LEDs and wiring in the back of the Mirror faceplate.
Original image by @creatr
If I end up with a "re-do,"
I'll probably replace the single channels with a pair of channels—one on either side of the LED holes—so that I can keep the positive and negative circuits separate and not have to worry about insulated wires. I'll also relocate the LEDs near the top of the mirror away from the edges, as the 3D print came out a little wonky in those four spots.
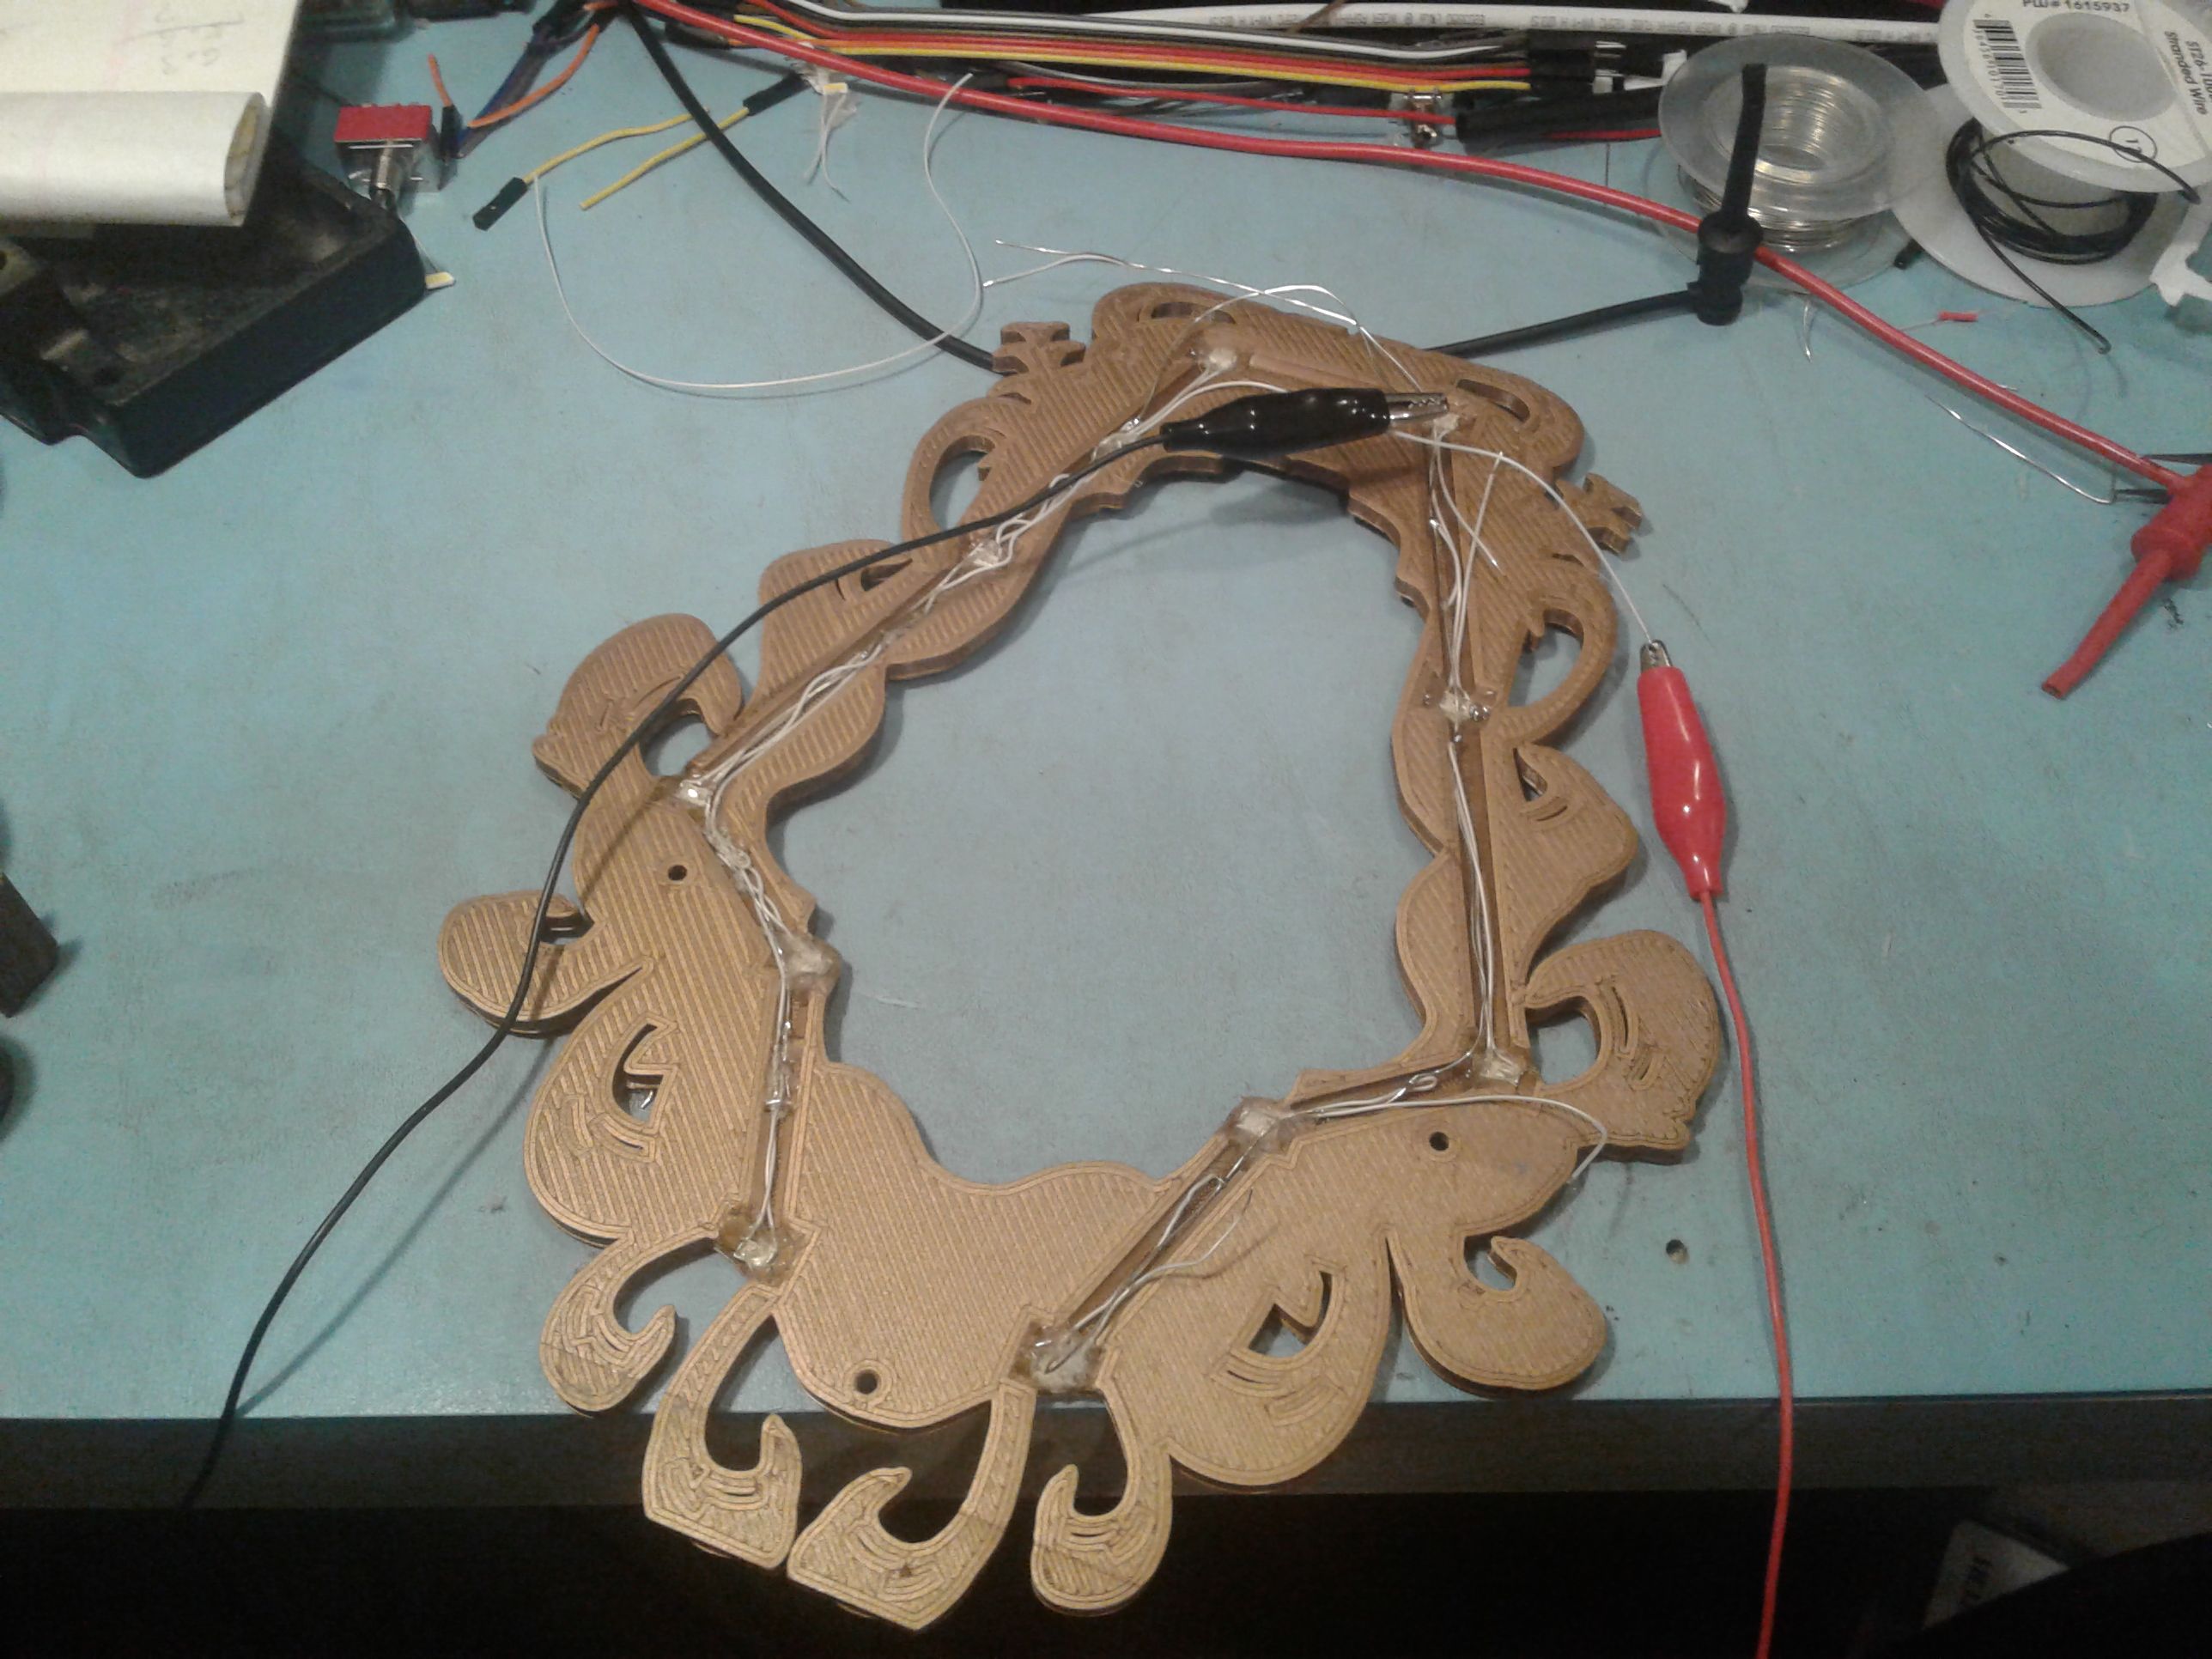
Testing LEDs as they are installed.
Original image by @creatr
As each LED was added to the circuit,
I paused to apply power to the LEDs installed thus far. By testing as I went along, I avoided the heartbreak of reaching the end of the task only to discover that one or more of the LEDs had failed or been dislodged during the process.

Faceplate and case all wired up.
Original image by @creatr
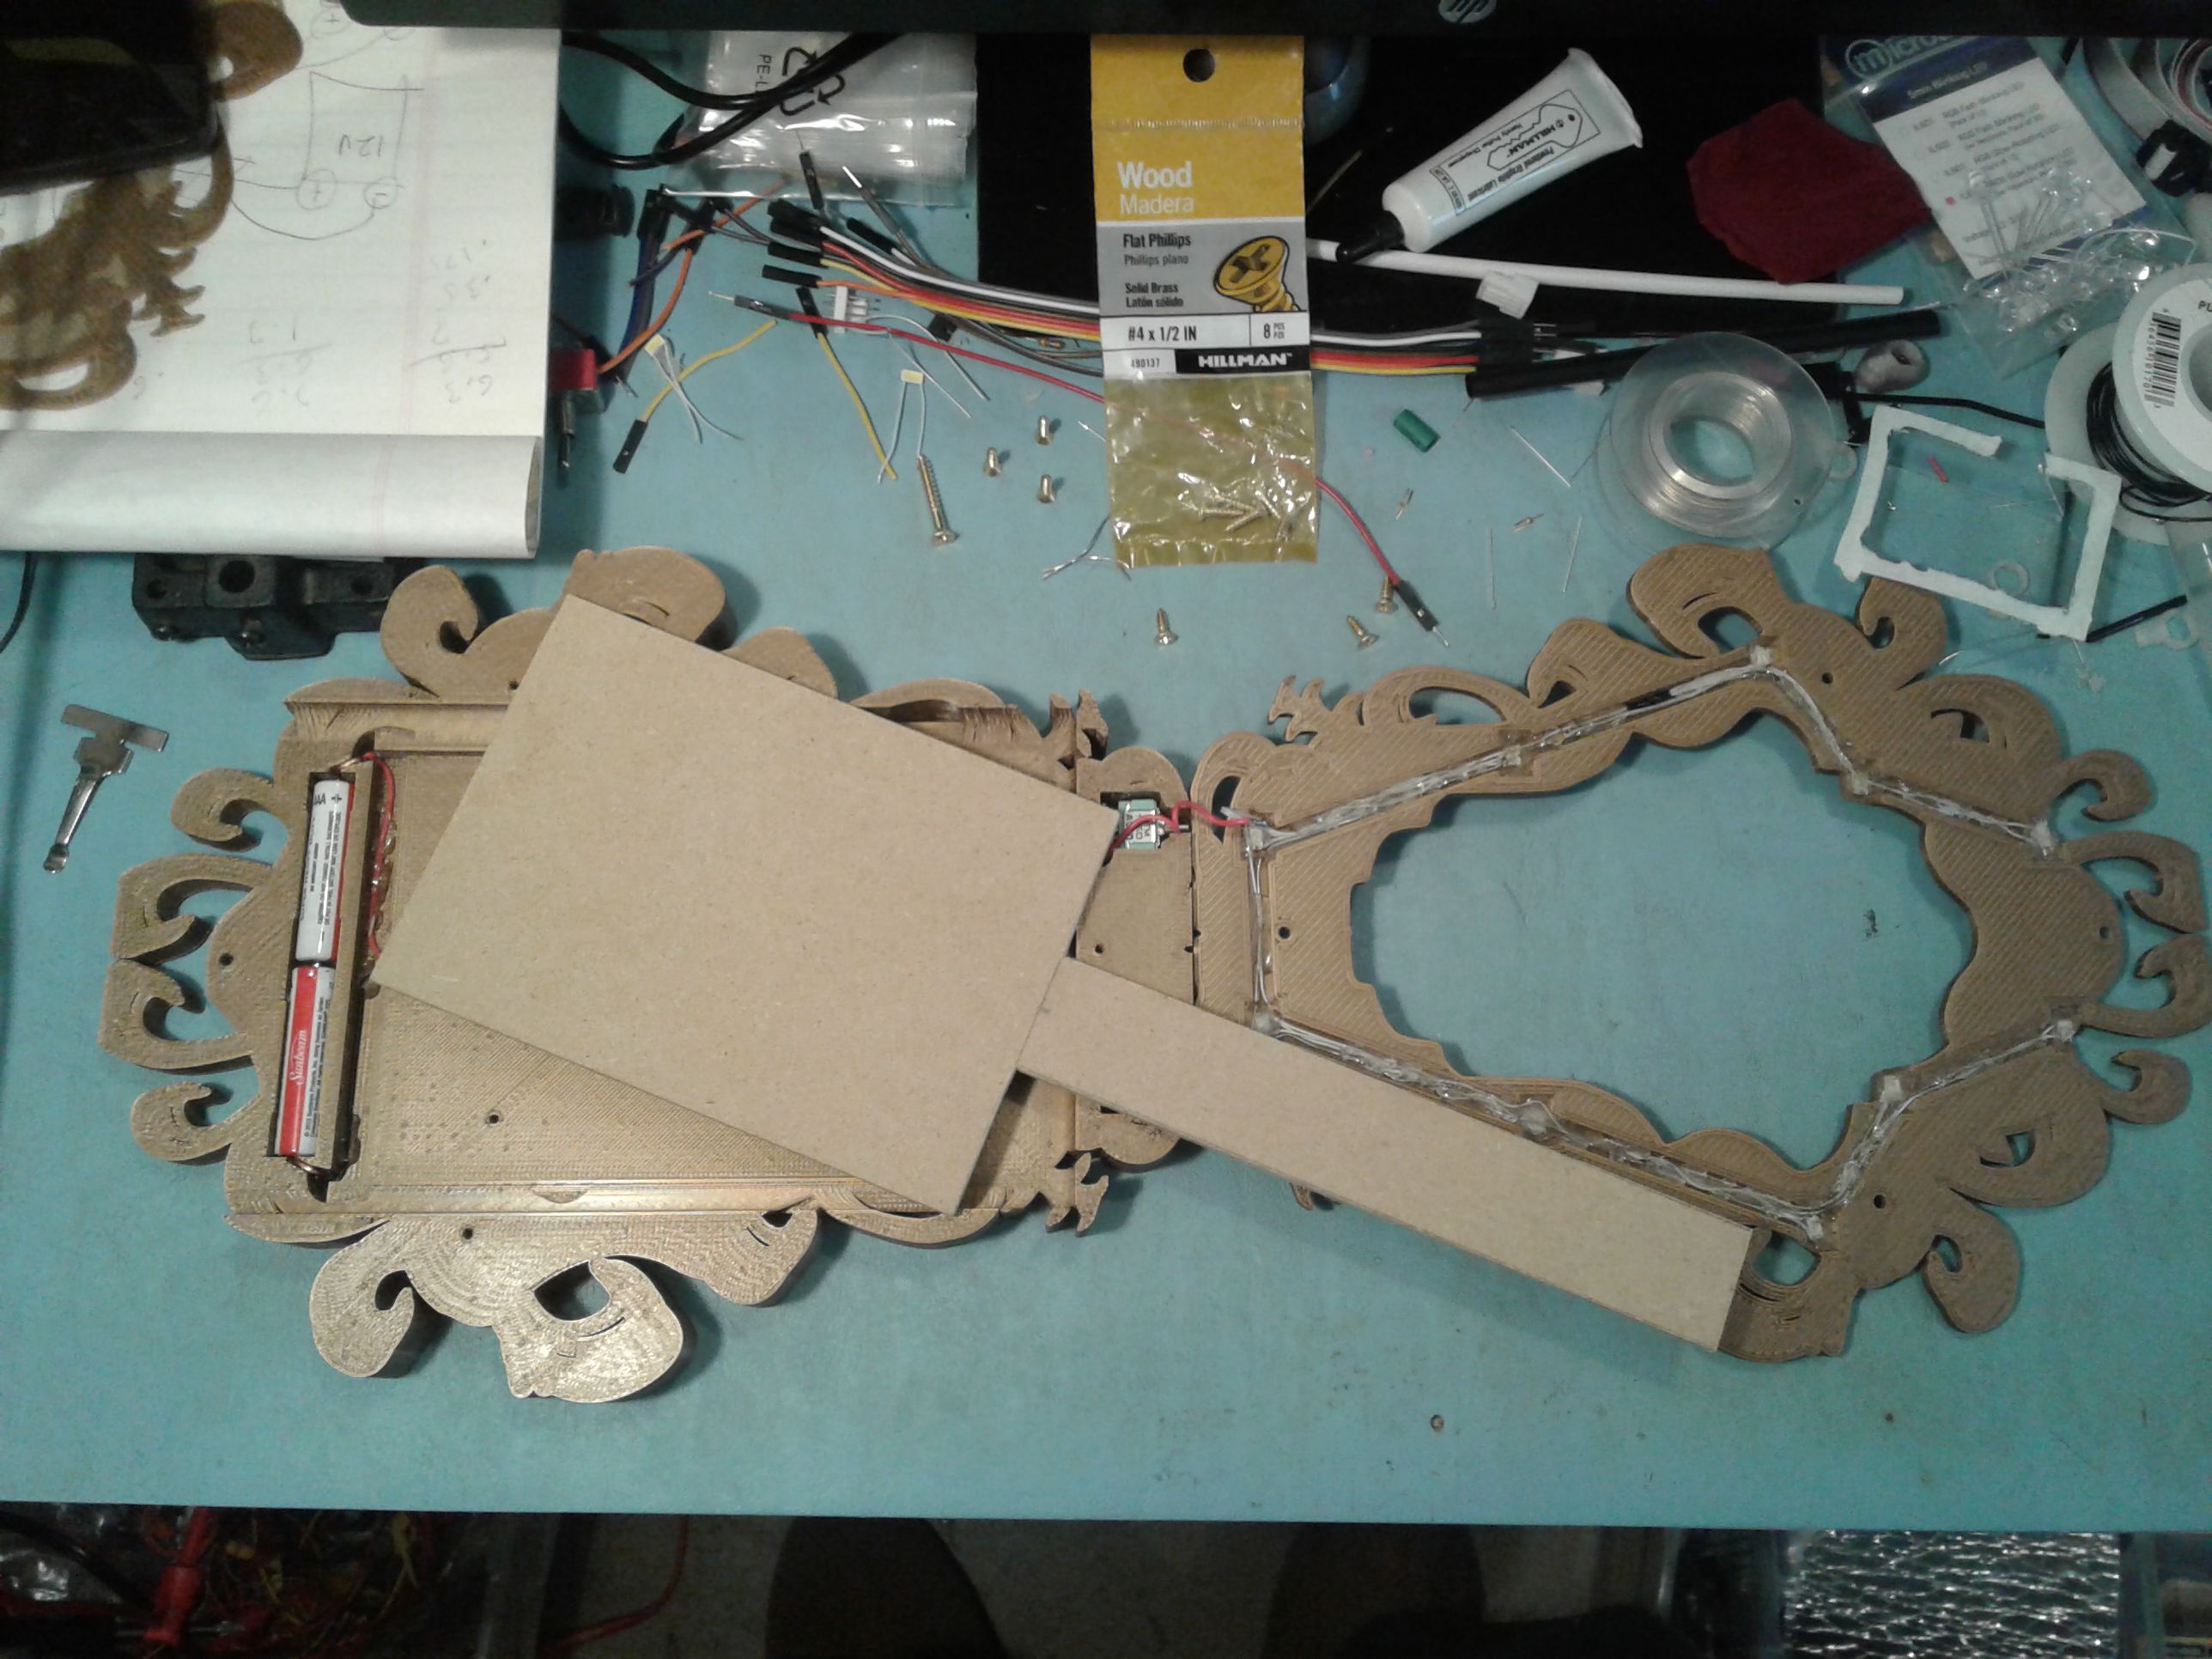
With all the LEDs in place and working,
I then wired up the battery case and ran power wires through the channels on the inside of the main case. I installed the ON/OFF switch in the right-hand cavity of the case, and connected the + and — wires between the main case and the faceplate as you can see in the image above.
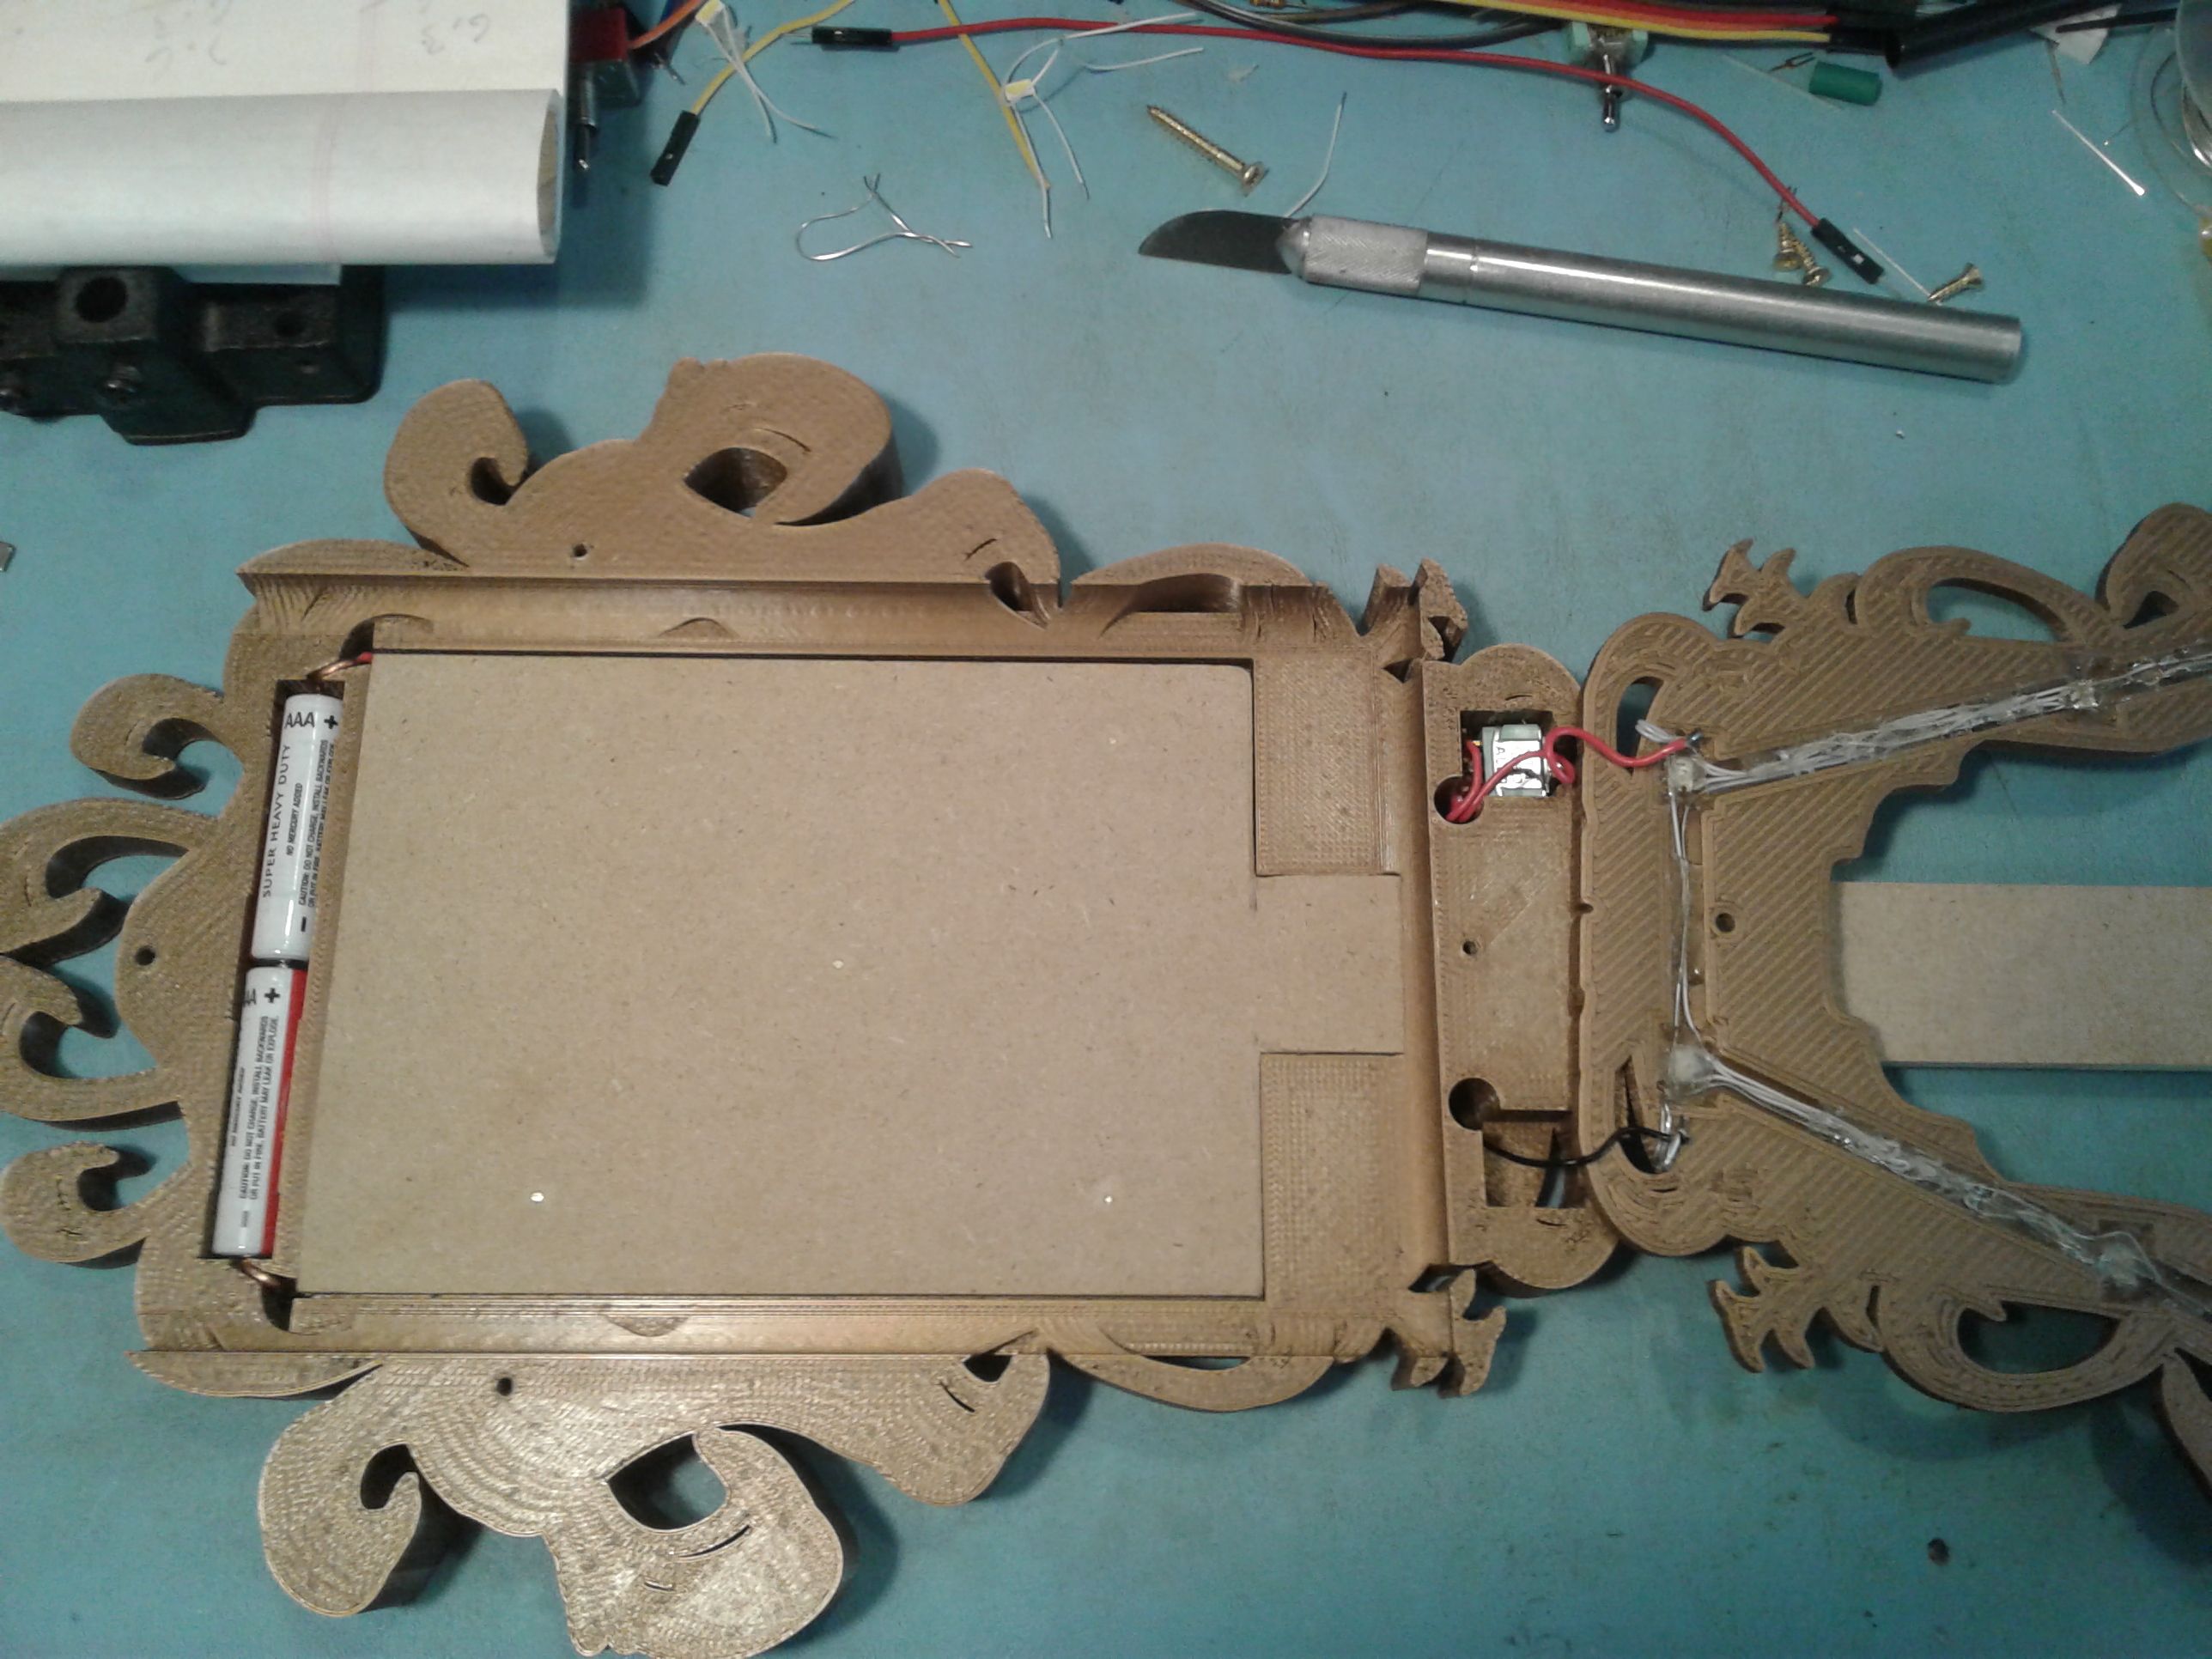
Ready to insert hardwood stiffener.
Original image by @creatr
It was time to install the stiffener.
The handle looks extra long, only because it has to pass through the lower part of the main case. I inserted it into the case, drilled pilot holes using the existing screw holes in the case as a guide, and installed seven brass screws from the back side of the case to hold it in place.
The stiffener is installed.
Original image by @creatr
Dealing with some short dimensions,
I couldn't get screws the exact length necessary, so I got some that were very slightly oversized. If you look closely at the image above, you'll see five places where I had to grind off a small amount of the screw tips that had projected through the surface of the hardboard stiffener.
The end was finally in sight.
The Mirror was almost done, except for all the shouting...
Belle, showing Gaston the Beast.
Source: Disney image by way of YouTube
Thanks for your patience.
Have I told you how much I appreciate all my loyal fans? ;)
I think we'll be able to wrap this story up in the next installment.
~To Be Concluded~
If you're just tuning in, here are previous entries in this series (including ruminations) about prop-making:
"The Ocean of Life" - A Haiku by Duncan Cary Palmer
"When Wandering Wizards Wonder..."
"Finally Out to Sea..." a Haiku by Duncan Cary Palmer
Beauty and the Beast Props - Enchanted Rose ~Teaser~
Beauty and the Beast Props - Magic Mirror ~Teaser~
Beauty and the Beast Props - Windmill ~Teaser~
Beauty and the Beast Props - The Director Is Happy!
Fine-Tuning The Rose for Beauty and the Beast
How I Designed And Built Maurice's Windmill for ~Beauty and the Beast~ Part 1
How I Designed And Built Maurice's Windmill for ~Beauty and the Beast~ Conclusion
How I Designed And Built The Magic Mirror for ~Beauty and the Beast~ Part 1
How I Designed And Built The Magic Mirror for ~Beauty and the Beast~ Part 2
How I Designed And Built The Magic Mirror for ~Beauty and the Beast~ Part 3
How I Designed And Built The Magic Mirror for ~Beauty and the Beast~ Conclusion

P.S. If you have an "in" with anybody at Steemit, Inc. - Would you please ask them to get rid of these damn, extremely annoying "off-website" arrow/boxes? The have, overnight, made Steemit ugly. There are much better solutions.
For more true-life stories, CLICK our Library Stories Shelf.


Introducing: The SILVERengines proton - Image by @creatr
CONTACT US - Will Exchange for Steem
You are why I'm here on Steemit!
I have very eclectic interests and hope, over time, to write about them all.
⬇️To Check Out @creatr's World⬇️CLICK Each Image Below⬇️

|
|

|
I have not used this type of printer before but I know the feeling of watching a piece of steel near completion from laser cutting only to have parts knock the head off course. Ugh...
I was curious from the beginning how you were going to mount the led’s and batteries. Nicely done. 👍
:D
Thanks! ;)
Sure is a lot that goes into it. That printer deal is cool!
Yeah... you need a 3D printer... :D
Oh yeah, I just need a lot of things!
I mentioned you in my scoop post/video :)
https://steemit.com/howto/@old-guy-photos/how-to-make-a-sand-scoop-for-metal-detecting
Hey, thanks for responding to my curiosity! :D
😄😇😄

That was really cool to see the time and effort that goes into making it.. I love how you start your posts with famous quotes as well.. Nice idea.. I love great quotes..
Thank you!
wao its very beatiful @creatr, i think you are a great artist or mirror maker, This mirror is very beatiful, you can show your talent in this art, i am appreciate your hard work, and i hope you will share more posts like this in future.
Thank you for your kind words.
Doesn't it look fabulous!!! You must be so pleased with it :)
Thank you!
Yes, I am pleased. The director and the cast also seem pleased. I delivered the props to the theater today, and hope to write that story soon... :D
Such intricate work. I'm impressed!
:D Thanks...
Even with a four part report, you don't know the half of it! :O
Wow! I wish I have that kind of talent as well. I love your creativity and the result too.
Thanks.
Thank you for sharing all the steps for the design of the magic mirror. Now I'm blogging it so that more people know your designs. An affectionate hug @creatr
Thank you, and for the re-steem. :D
As you are documenting your work with Beauty and the Beast, I would think other directors and set designers would benefit from your writings. If there was a way to make these blogs available to other productions of this show nationally or globally others would benefit from your efforts. Well done my friend @crreatr.
Thank you, Troy.
I hope to try and find out who else is working on this play, and get in touch with them.
The way you made this glass is really hard to make it.Awesome Working
Thanks. :)