How I Designed And Built Maurice's Windmill for ~Beauty and the Beast~ Conclusion
"It is better to create than to learn! Creating is the essence of life."
- Julius Caesar -
If you're anywhere near Southern California around April 19th, you'll want to go see Beauty and the Beast. If you're lucky enough to attend, you will absolutely not believe it could possibly be a "mere" middle school theater production.
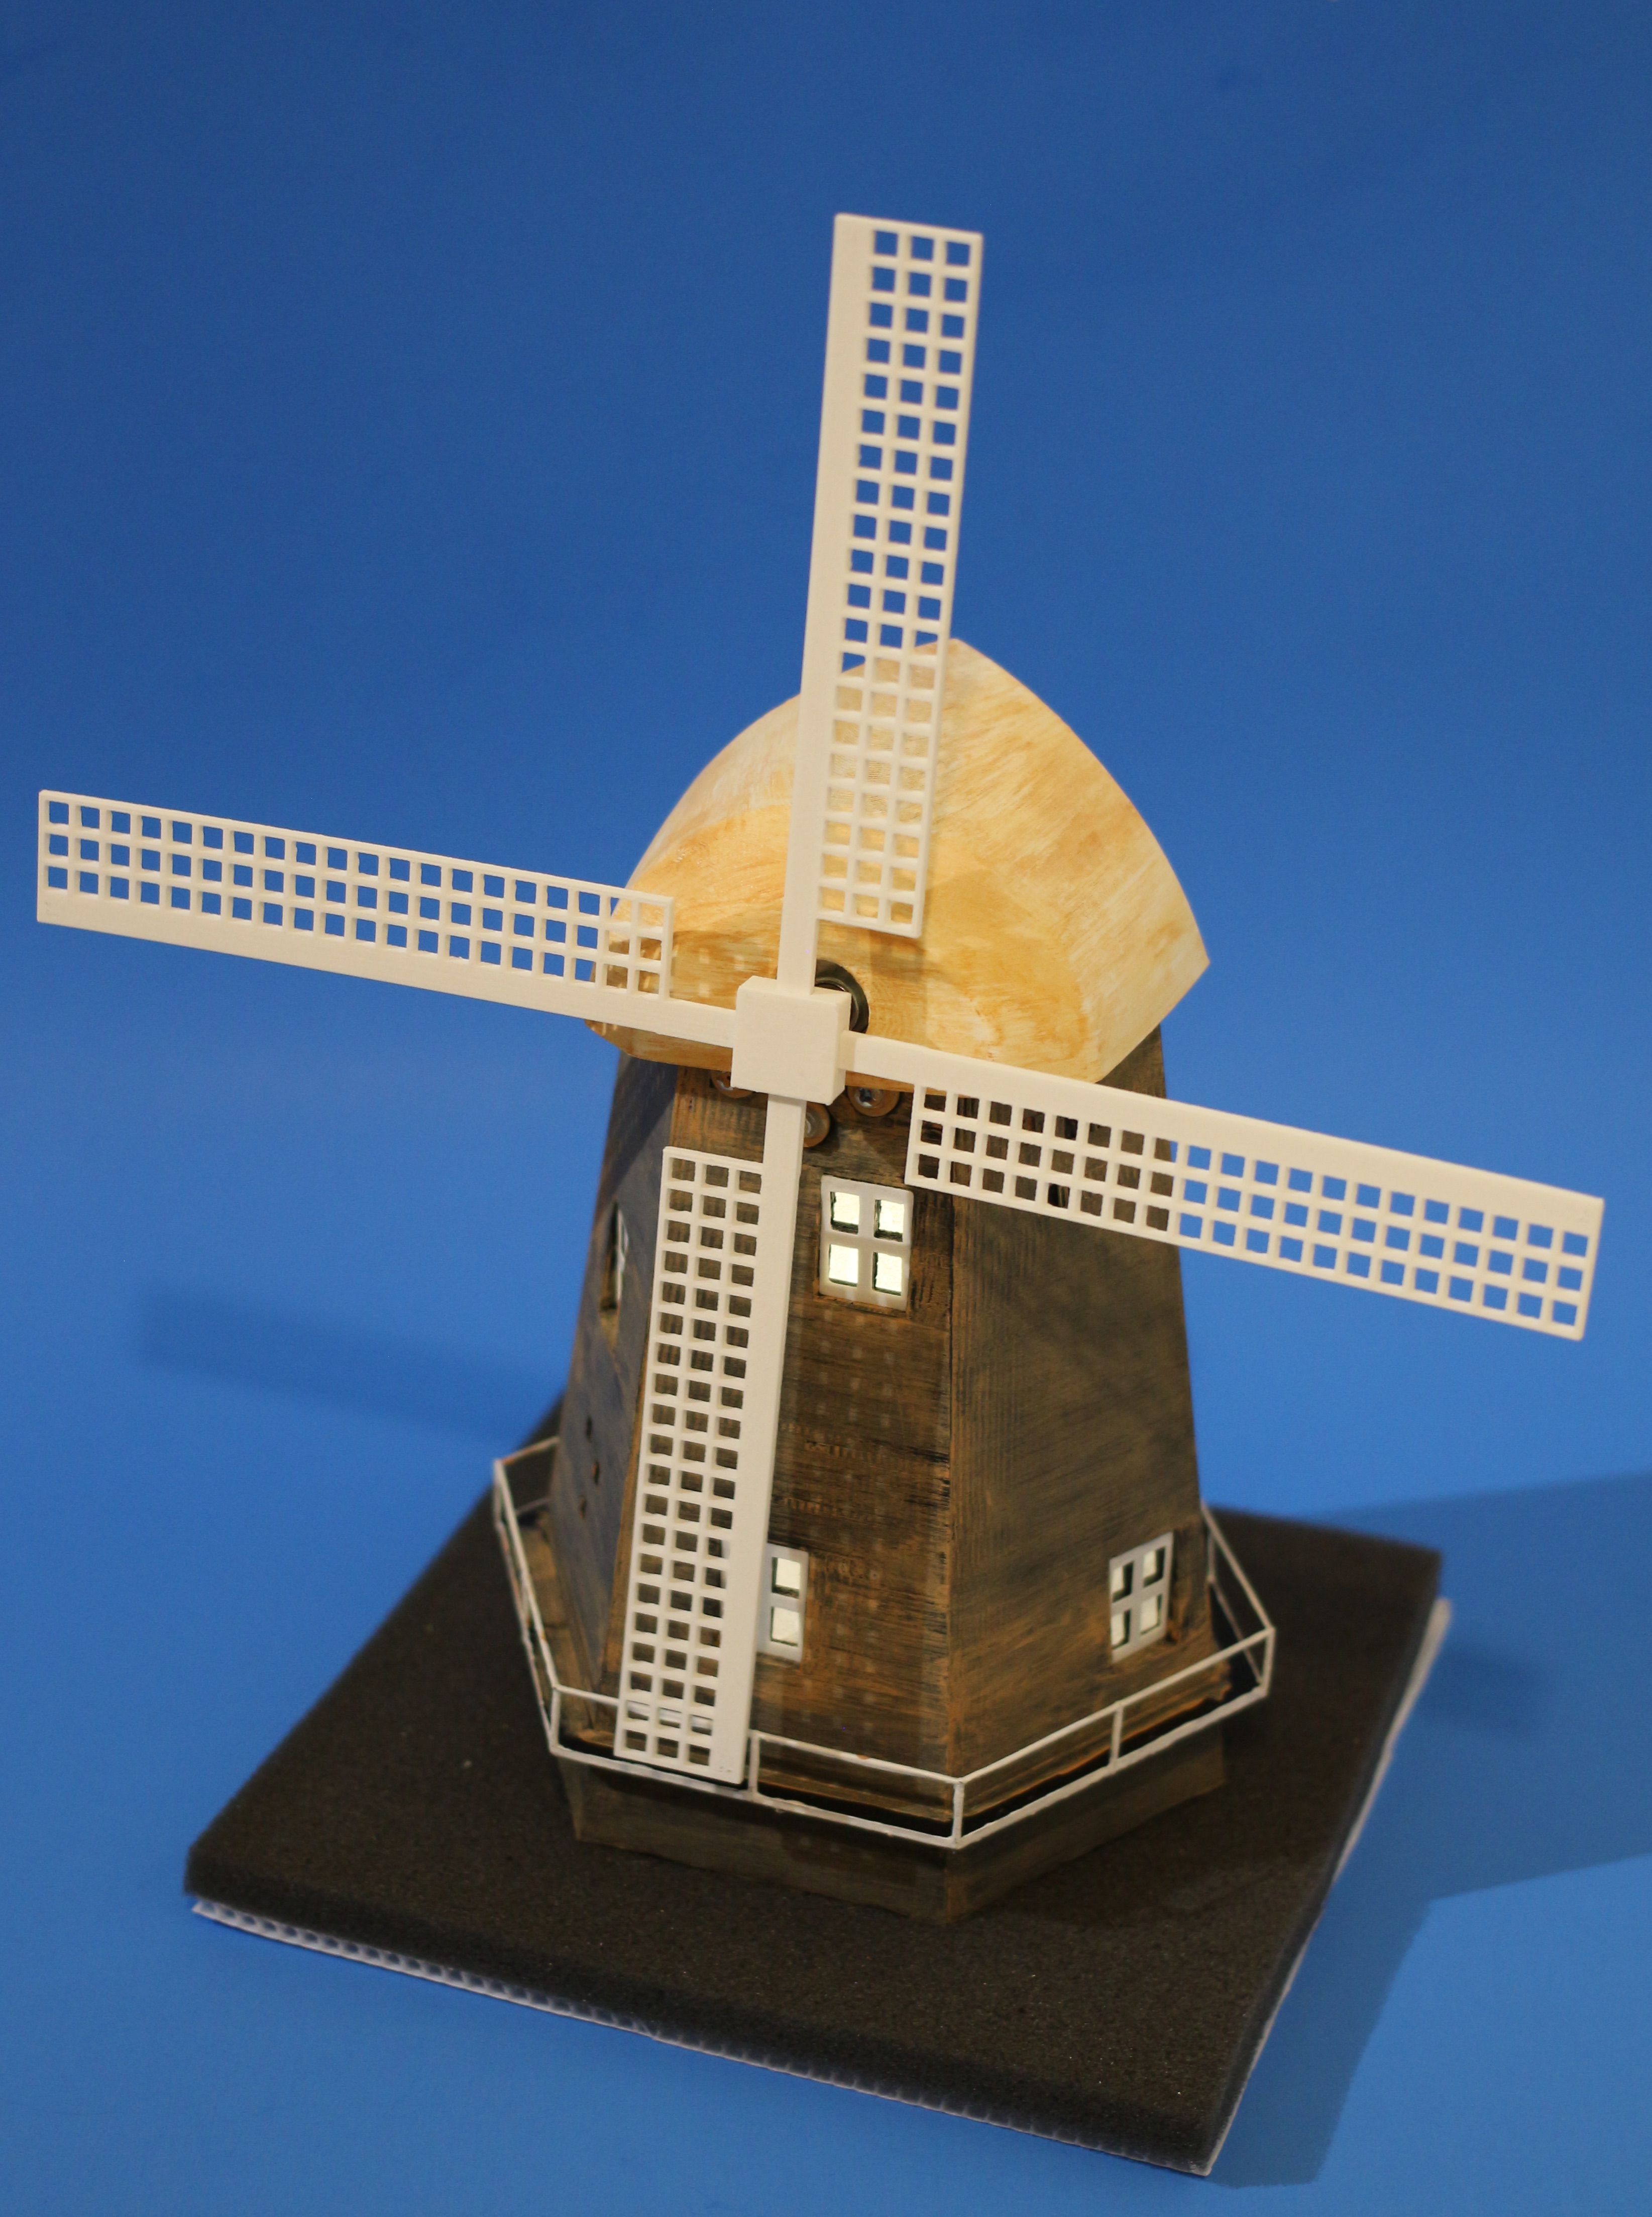
This is Maurice's Music Box Windmill prop.
Part 1 of this article explains why it isn't exactly like the prop in the 2017 Disney movie.
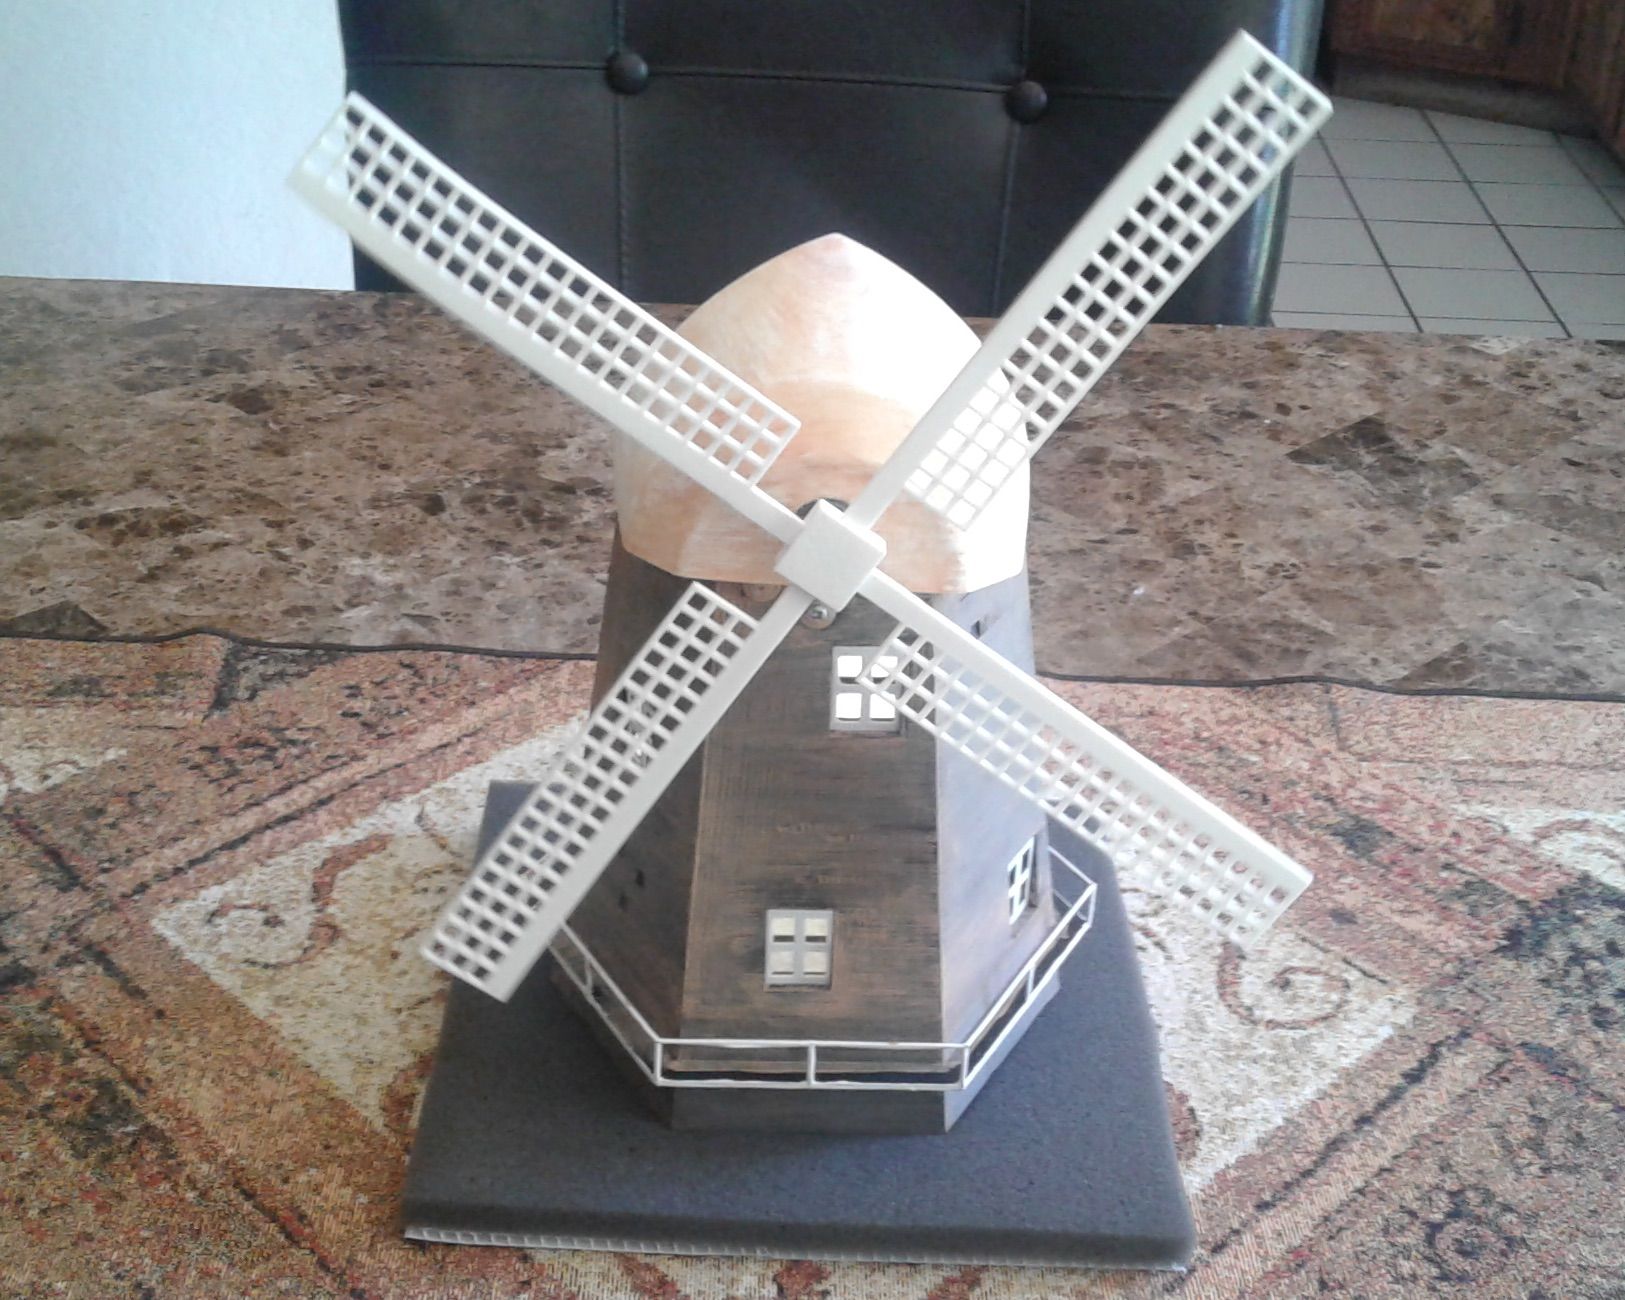
Maurice's Windmill Music Box.
Original image by @creatr
NOTE: In this series of prop design articles, clicking on most images will reveal a full-sized version of the image. Just in case you want to examine the nitty-gritty details.
I could have put more thought into the roof design.
I simply designed the shell of the roof to be an appropriate size and scale, but didn't work out details of how to mount the roof on the top of the windmill structure itself.
The end result was that I had to jury-rig a way to mount the roof on the body of the windmill. The photo below shows that I used hot-melt glue to attach some flexible rubber-coated wires to the underside of the roof. I then bent the wires to fit into the opening at the top of the main windmill structure.

Under The Windmill's roof...
Original image by @creatr
The roof is so thin,
the glue melted it a little where the wires attach. Thankfully, not enough to notice; but if I ever make a copy of this prop, I had better revise the way the roof is mounted.
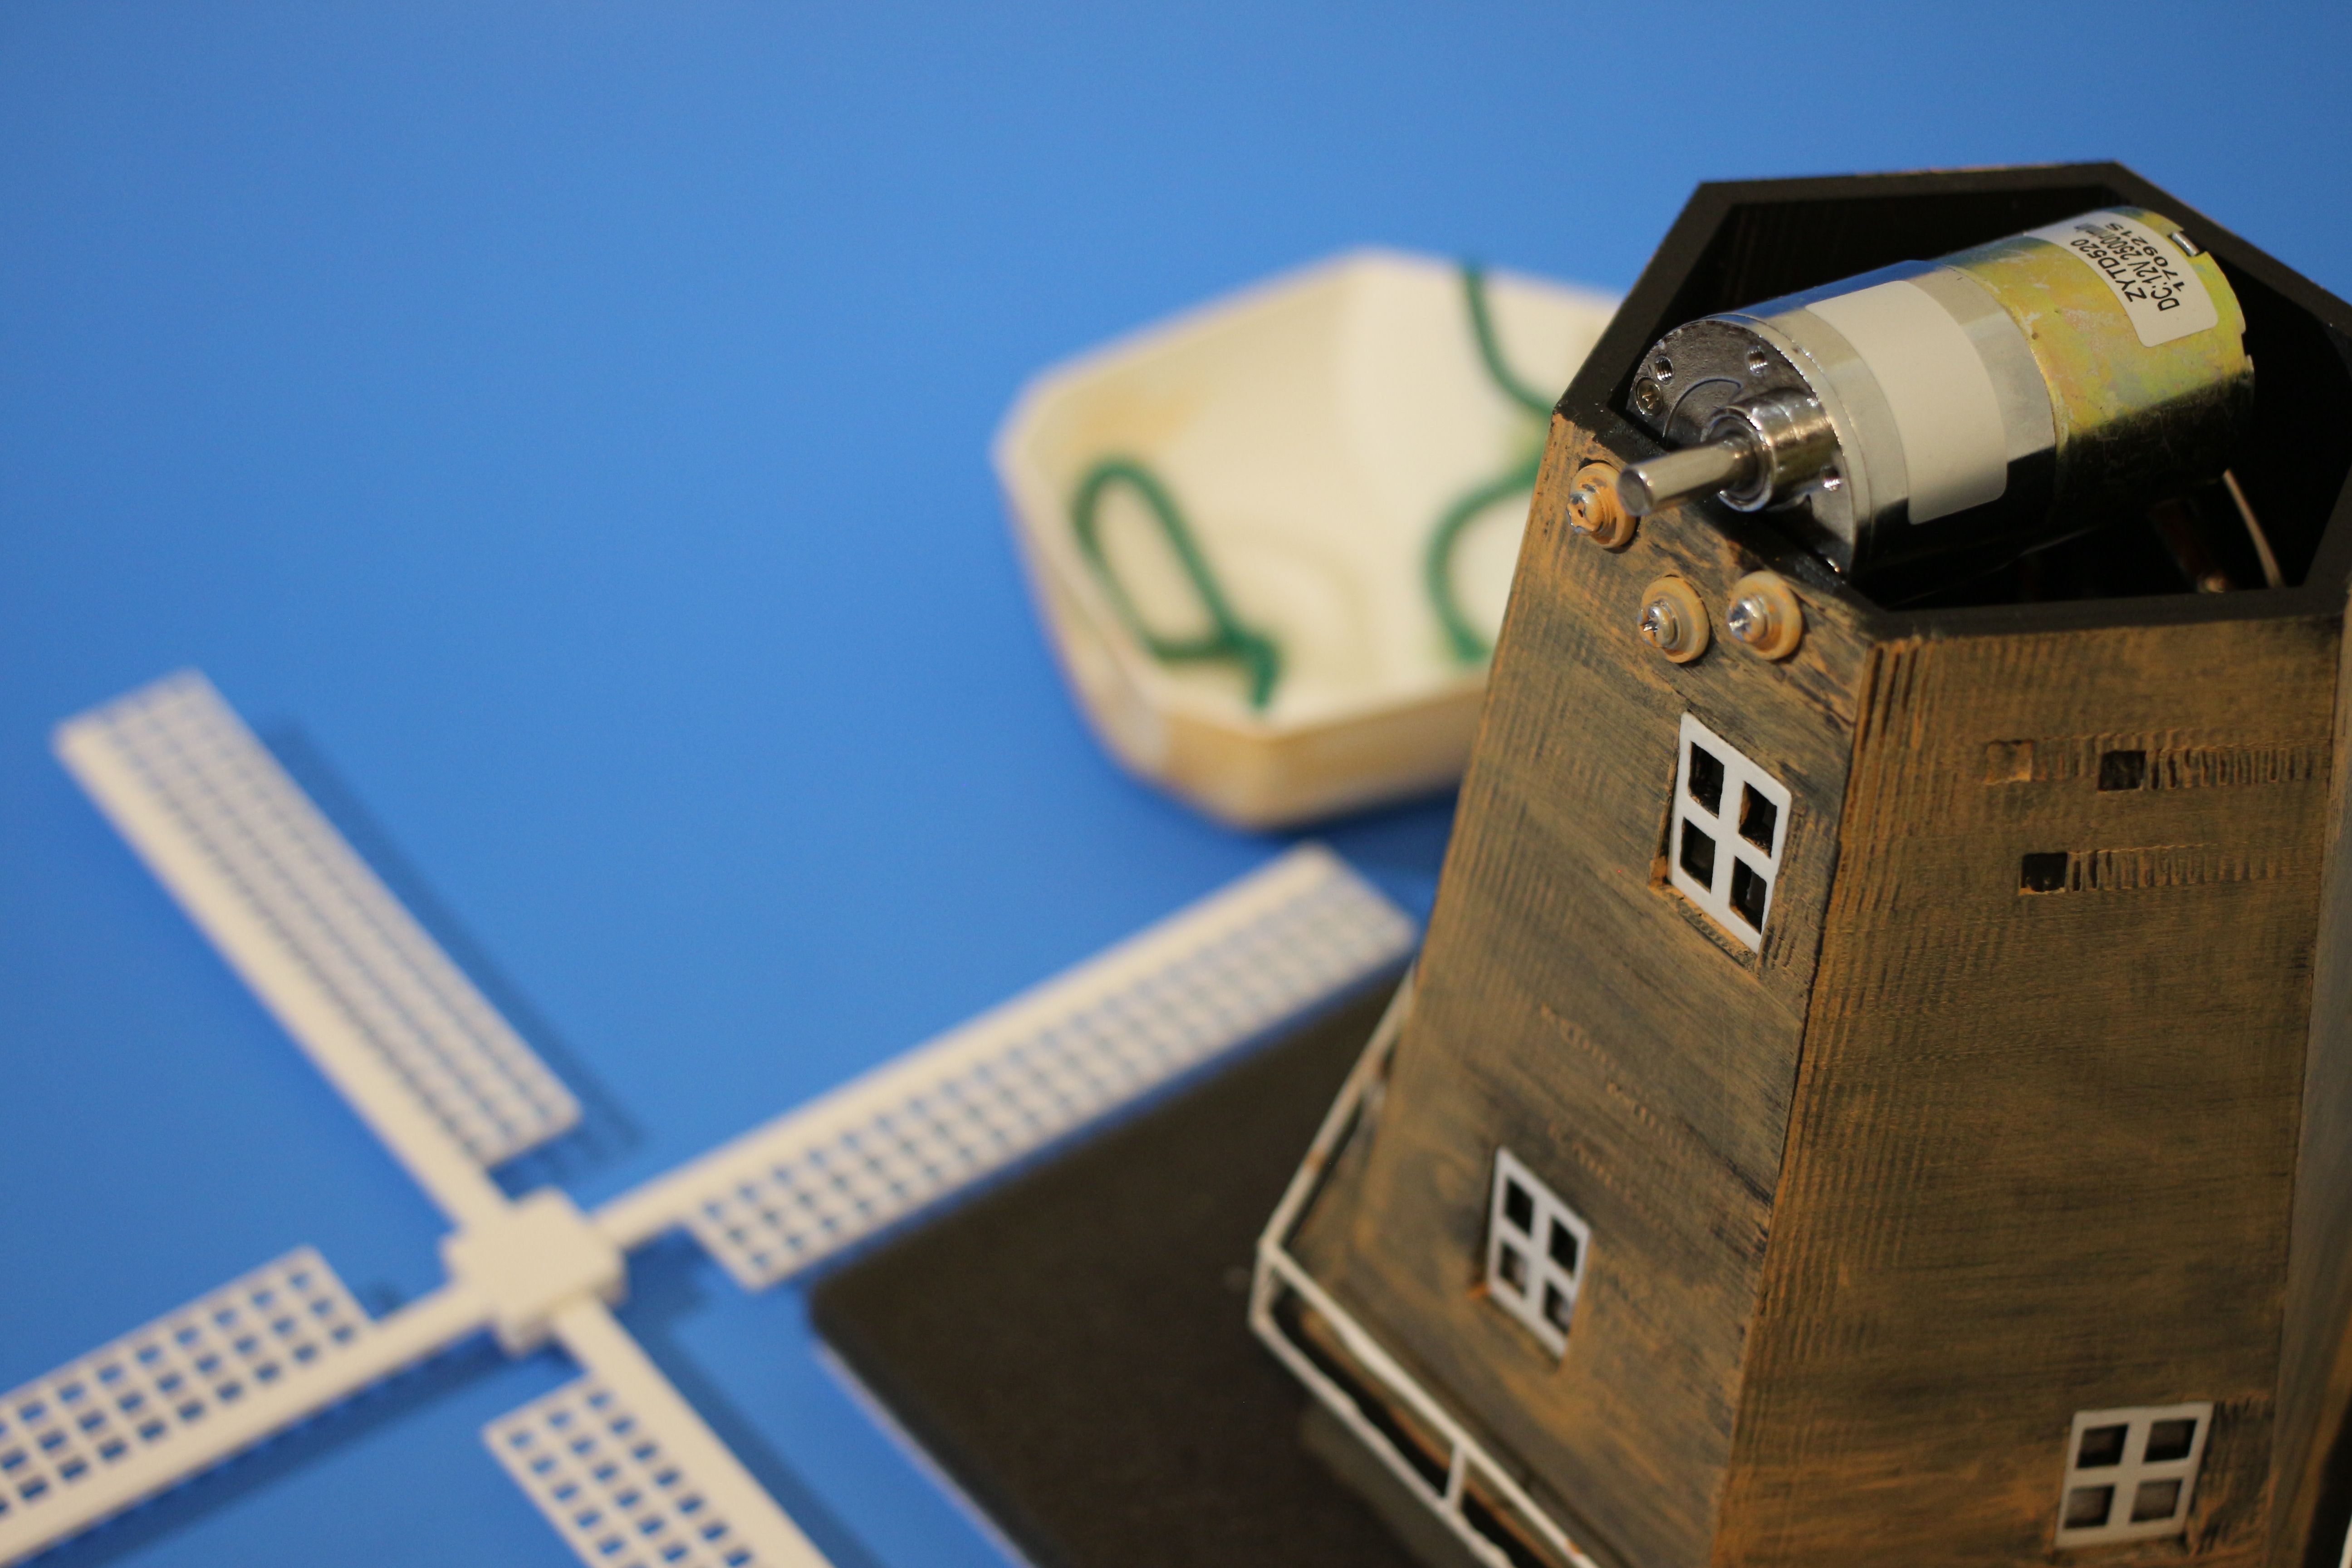
12 volt gear motor mounted in windmill body.
Original image by @creatr
That wasn't the only ad-hoc design choice.
When I printed the windmill body, I also left out motor mounting holes for the gear motor that powers the windmill blades. Instead, I drilled three holes in the face of the front wall of the windmill after it was printed. I then attached the motor with screws through those three holes.
I painted over the screws with the same "weathering" paint that I used on the walls so that they would blend with the walls.
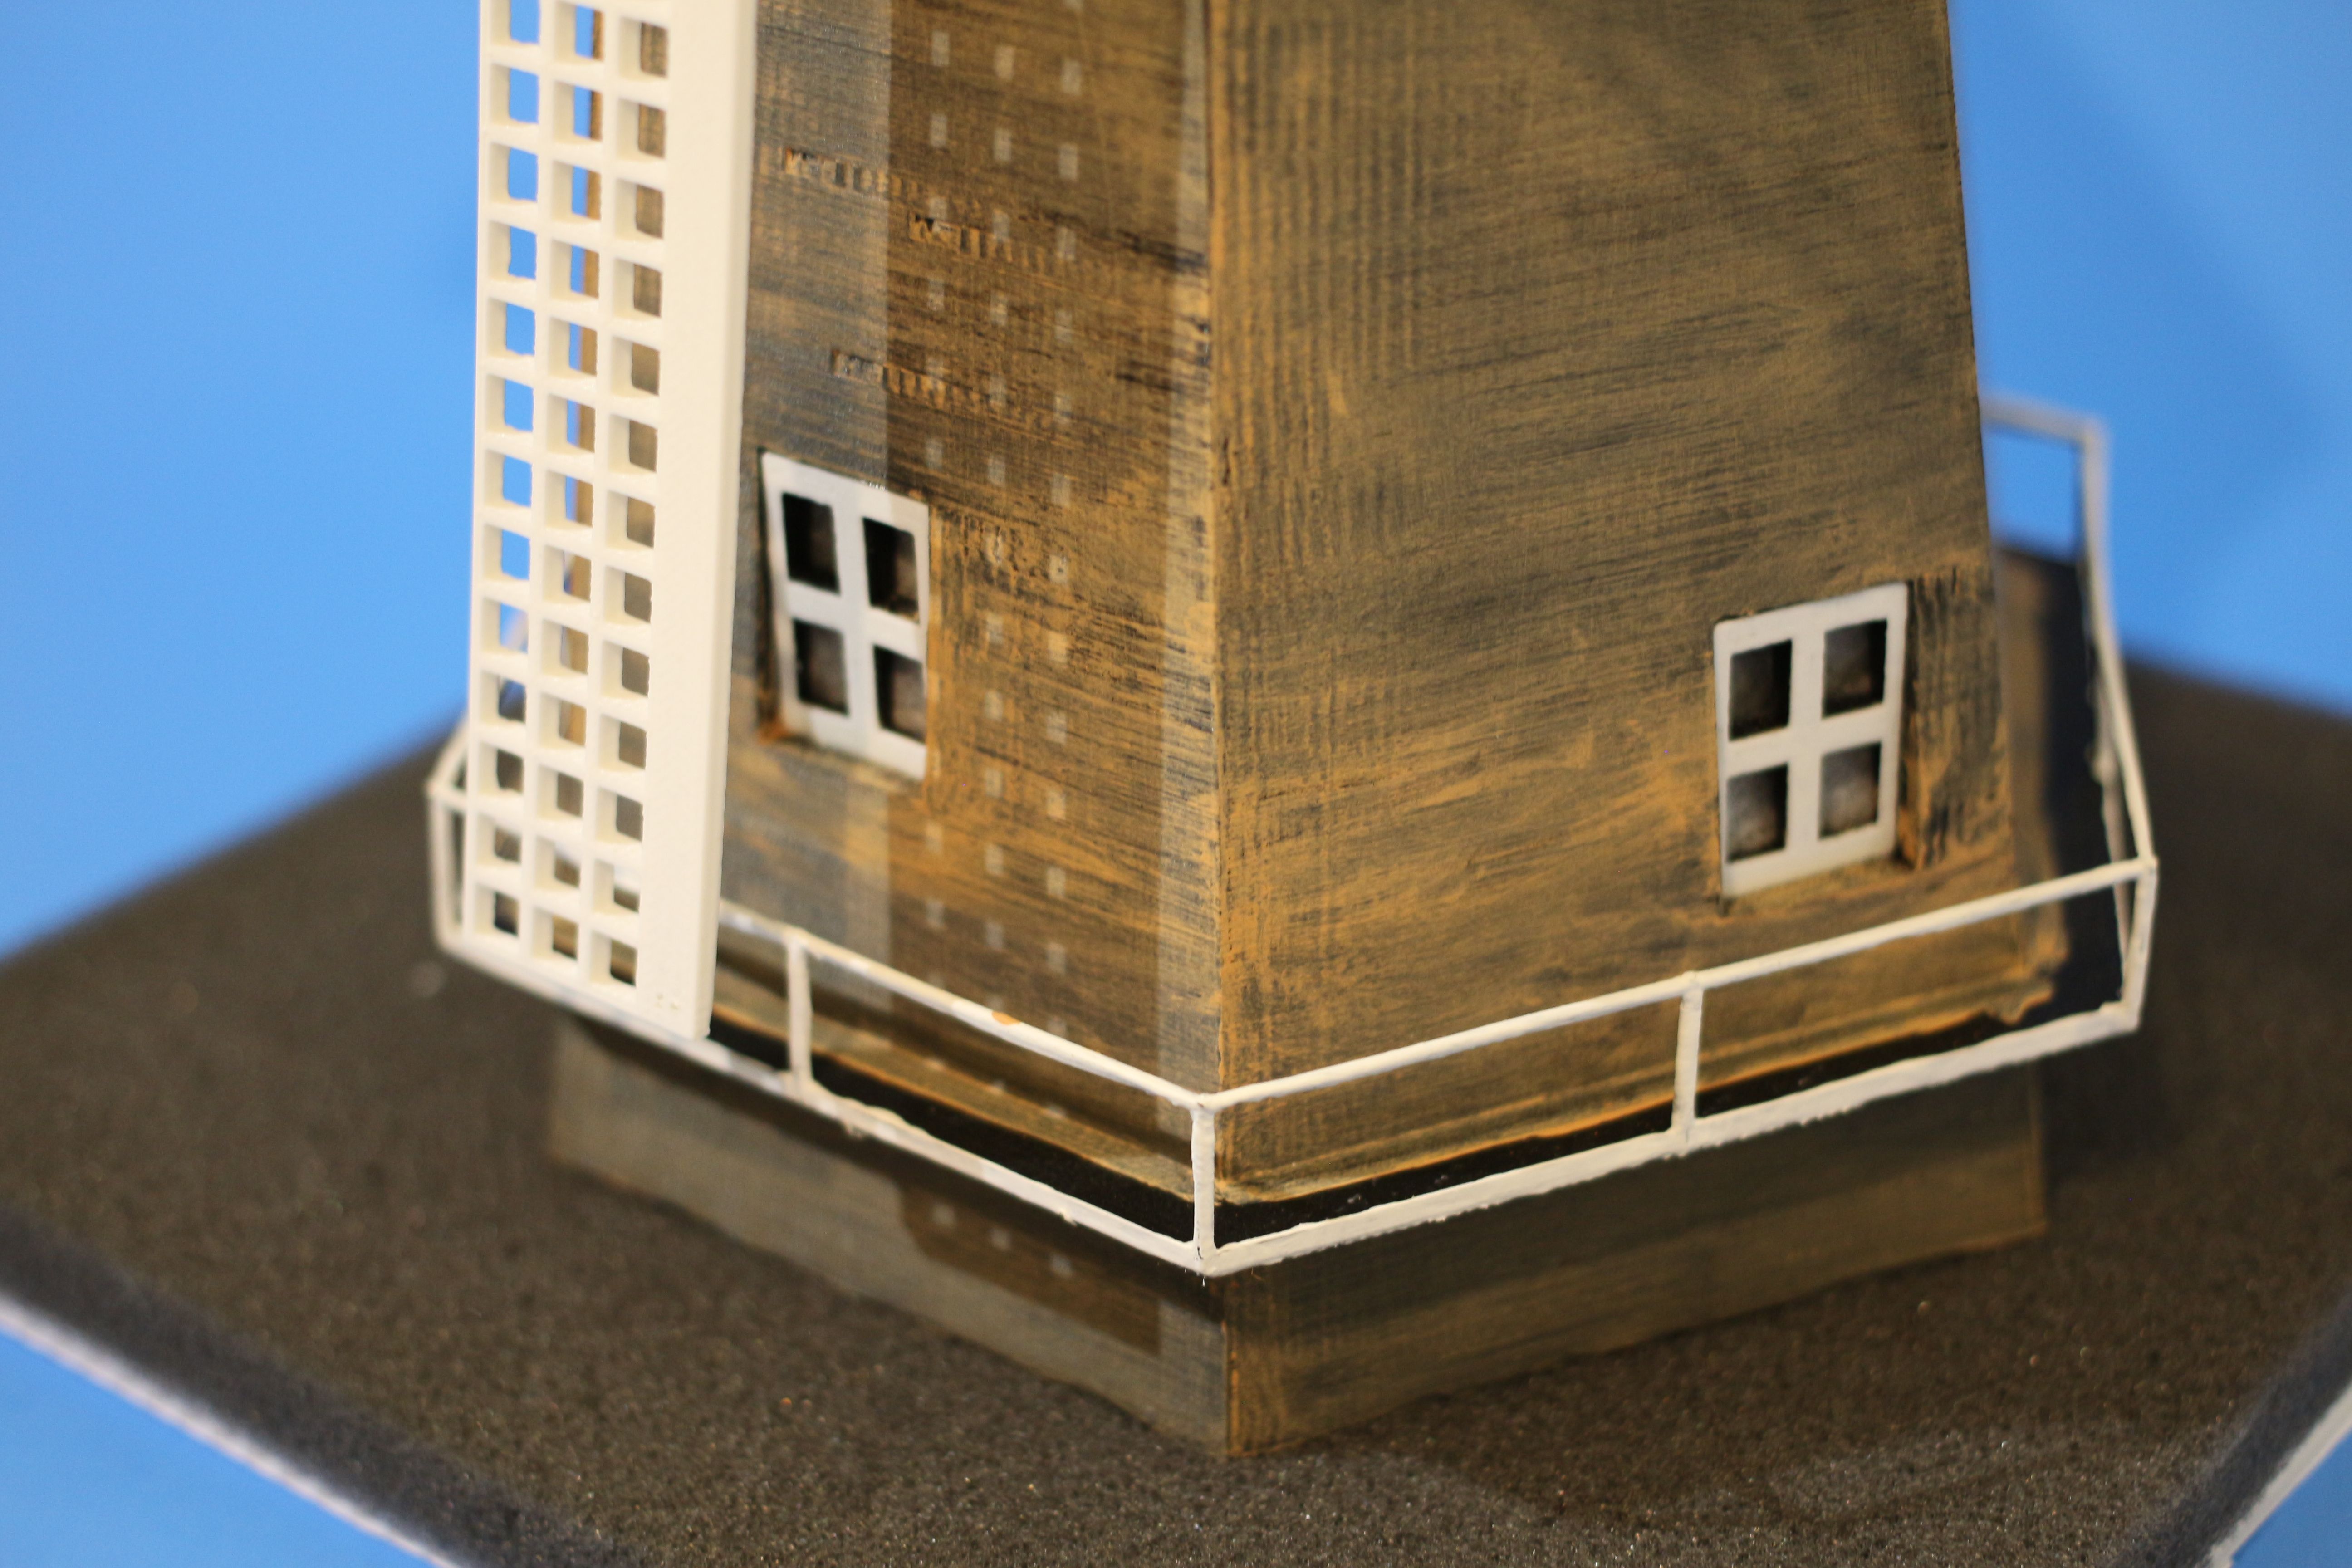
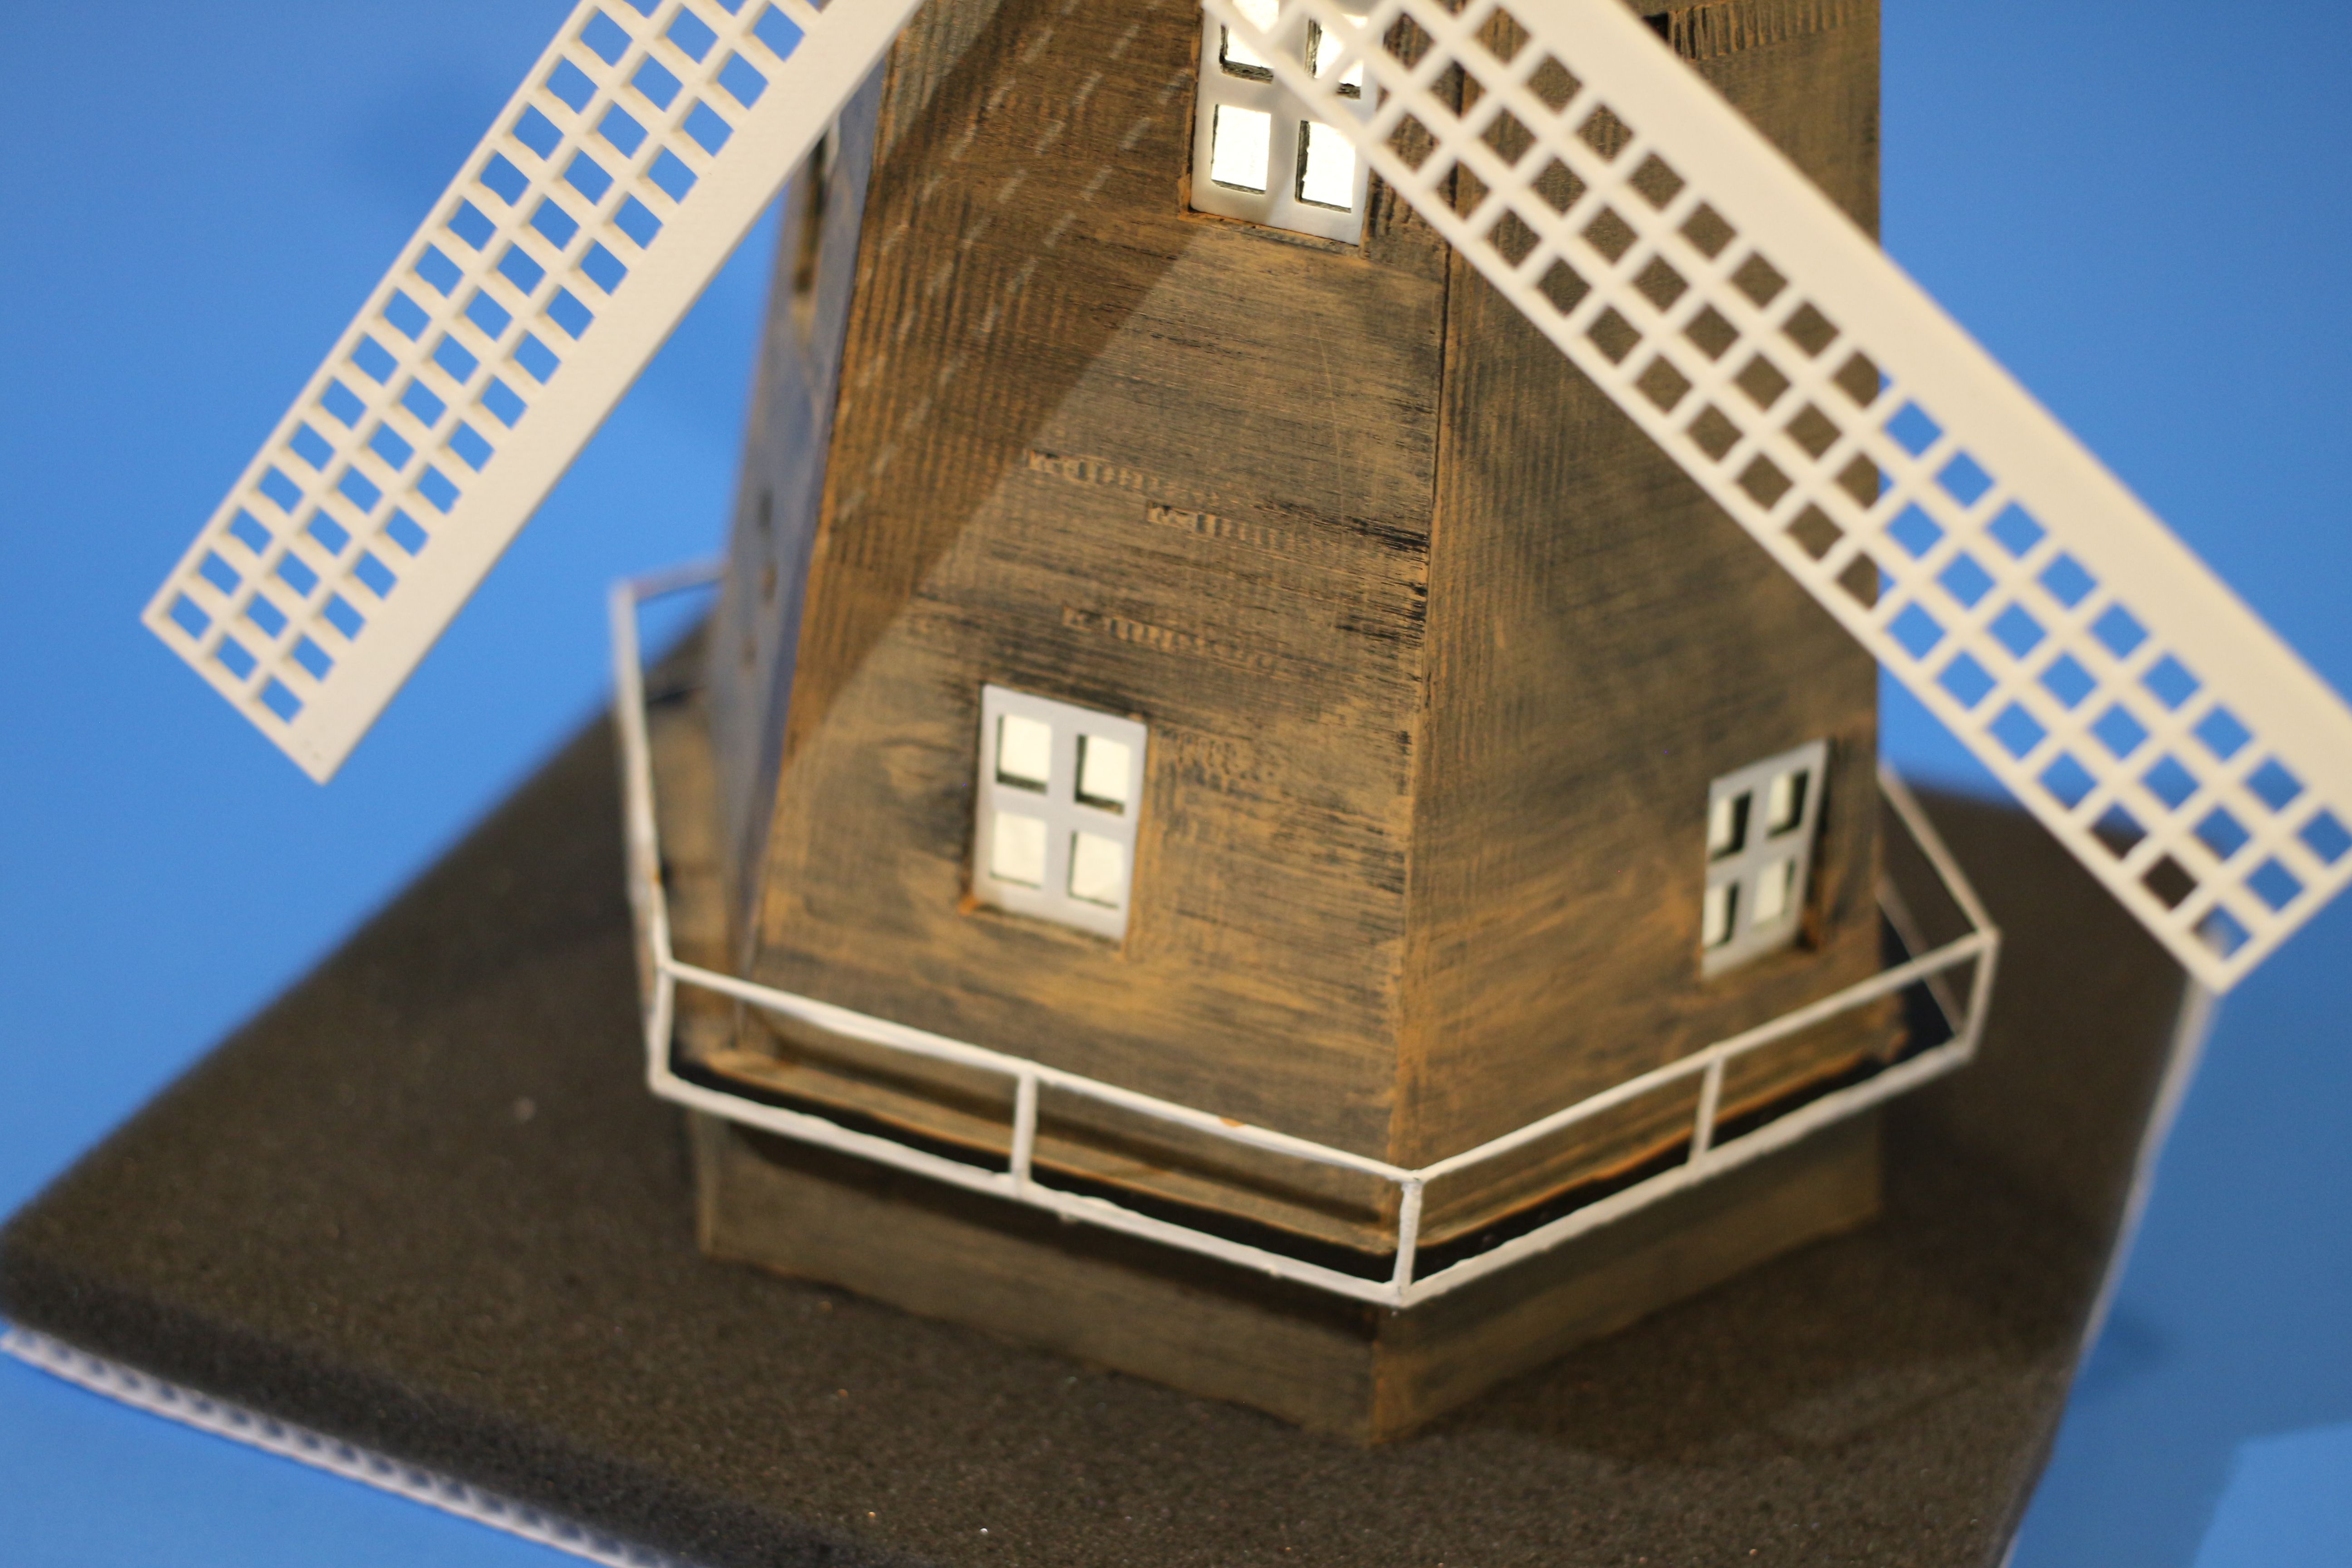
Closeup of windows, catwalk, and blade shadow.
Original image by @creatr
In the closeup above,
you can see thin window frame appliqués that I printed in white plastic and glued over the window frames.
I wiped orange paint over the black plastic windmill body. Paint caught in the natural striations created by the 3D printing process produces a rather nice weathered look for the building.
Notice also the shadow of the 3D printed windmill blade cast on the wall. I left the top of the catwalk black, as it will never be seen by the audience.
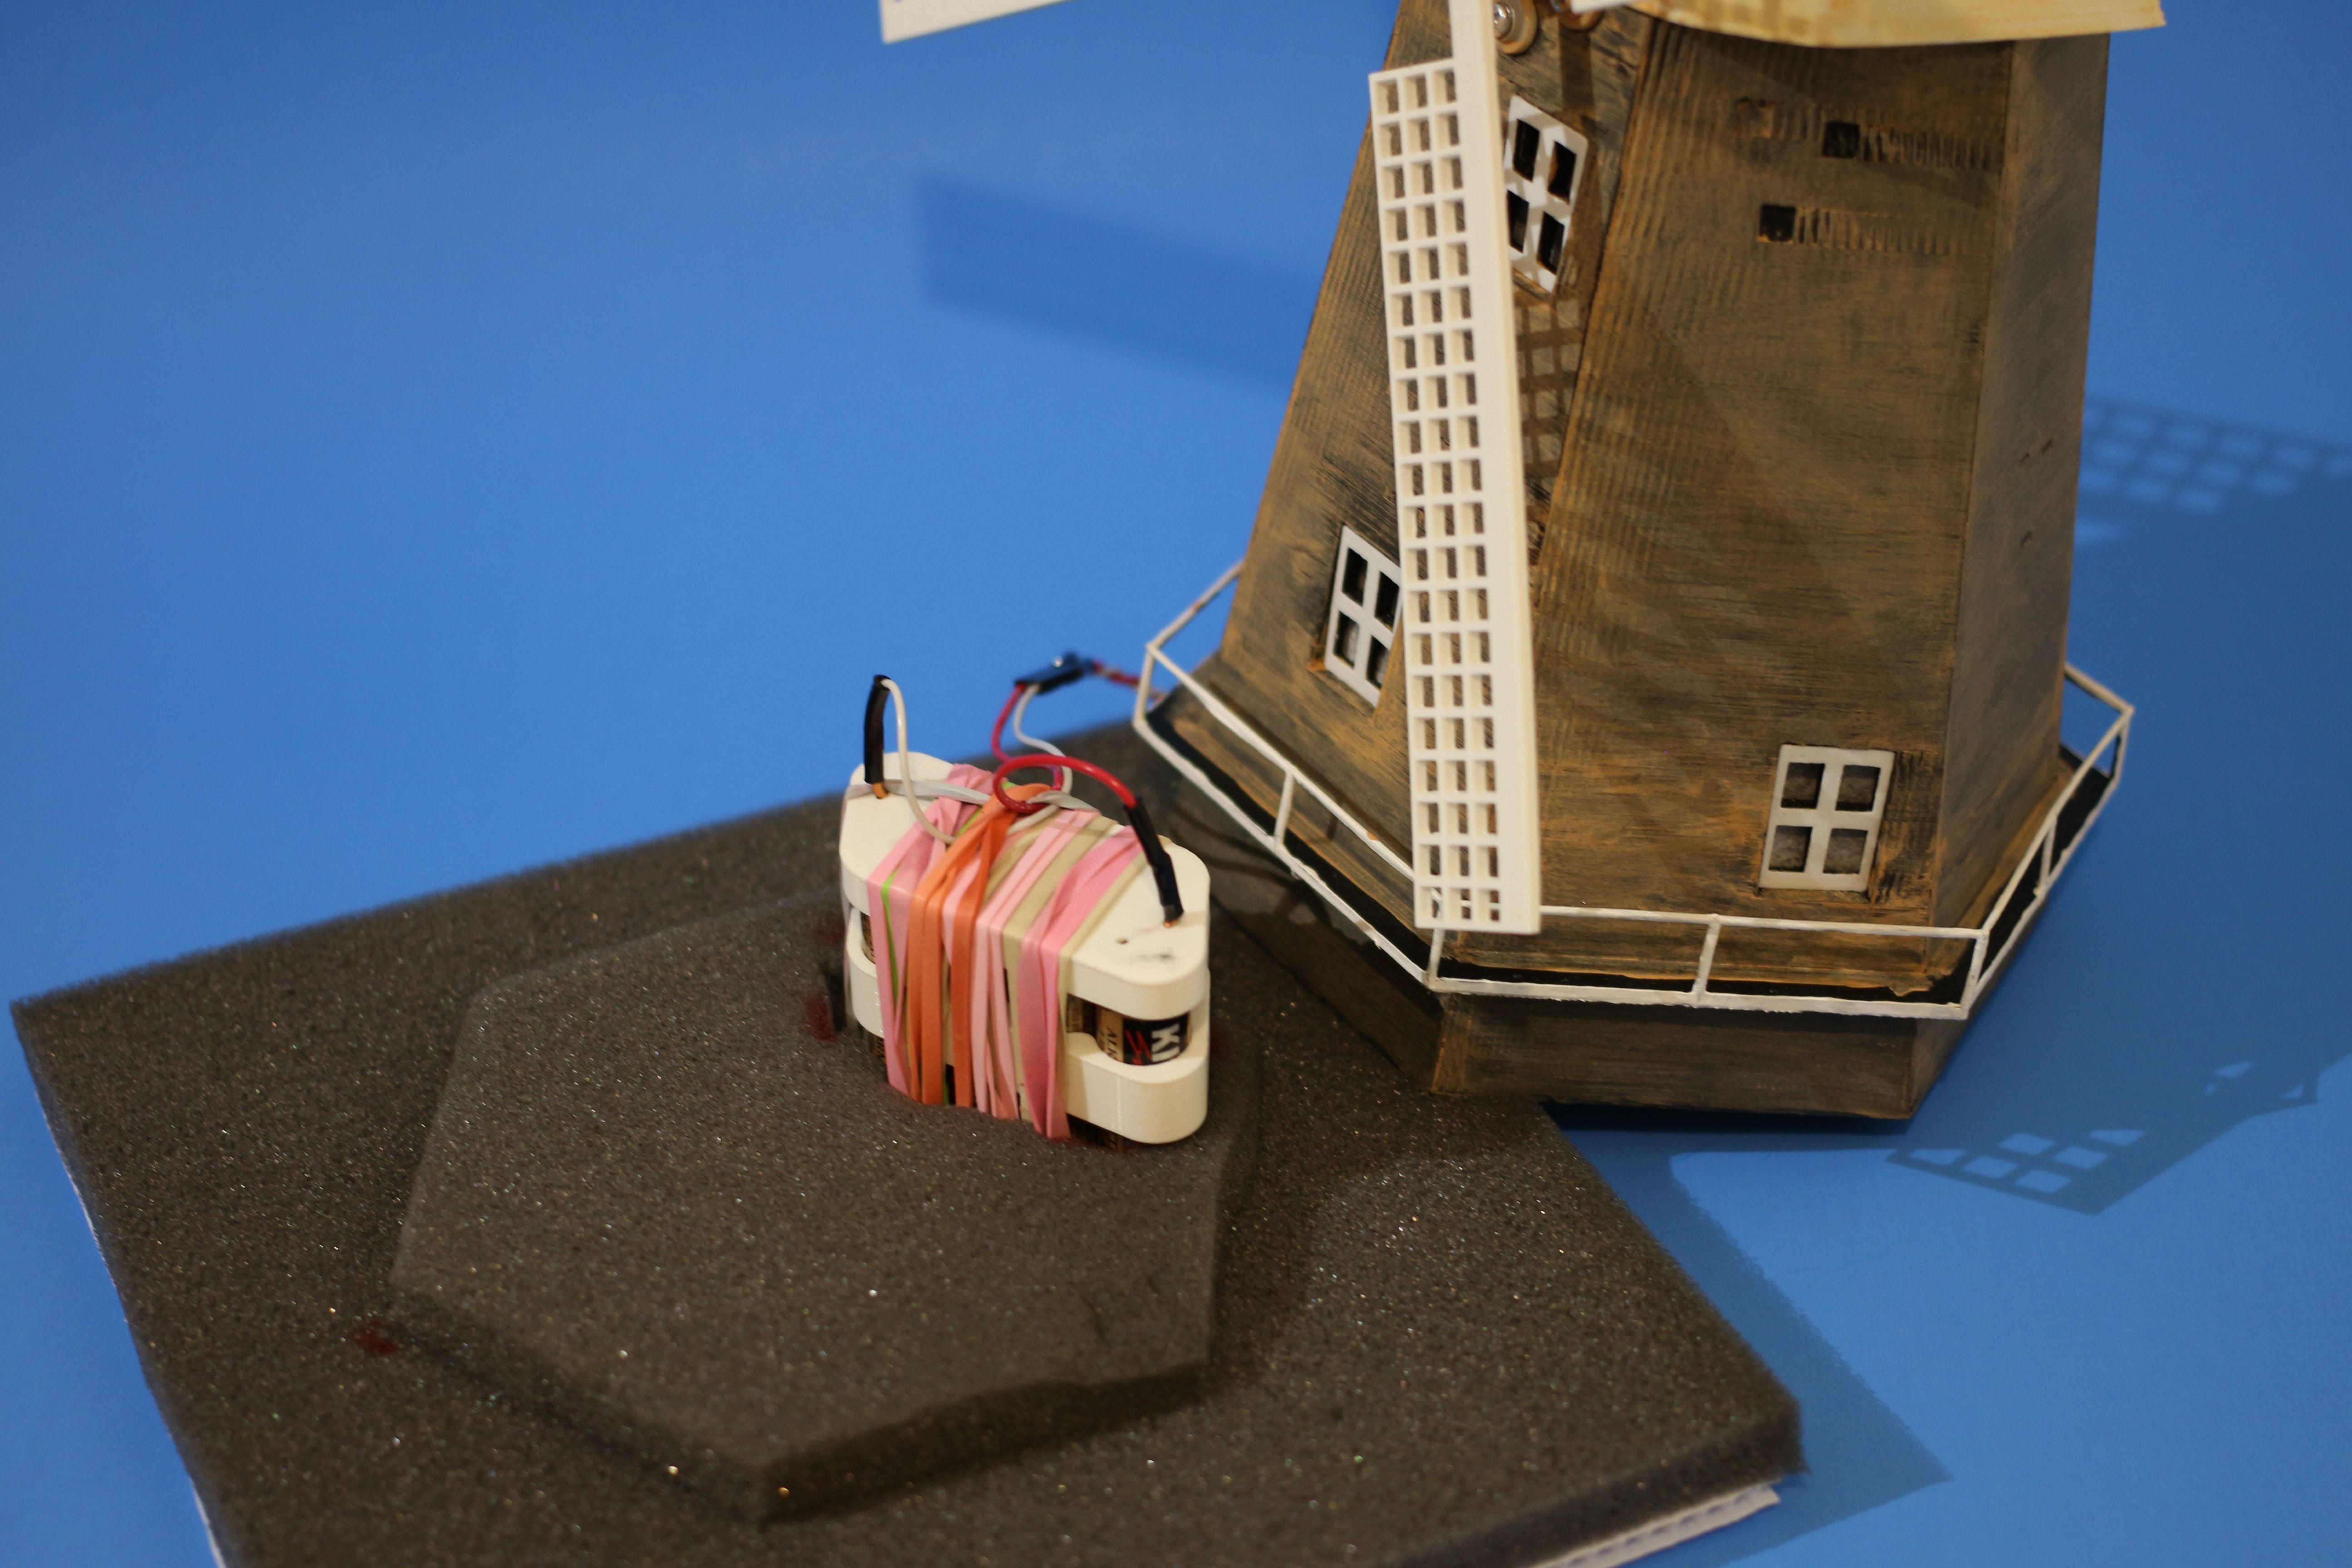
The 12v battery pack is mounted on the windmill pedestal.
Original image by @creatr
The Windmill runs on an internal 12-volt battery pack.
The battery is made up of eight AA cells. It powers a motor that spins The Windmill's blades. The batteries also light up internal LEDs that shine through five windows set somewhat randomly into the six sides of the windmill.
The pedestal is covered with foam that helps to muffle the sound of the running electric gear motor. The battery pack is inserted into a niche in the foam to keep it from flopping around when The Windmill is moved. A hexagonal piece of foam keeps the windmill body itself centered on the pedestal.
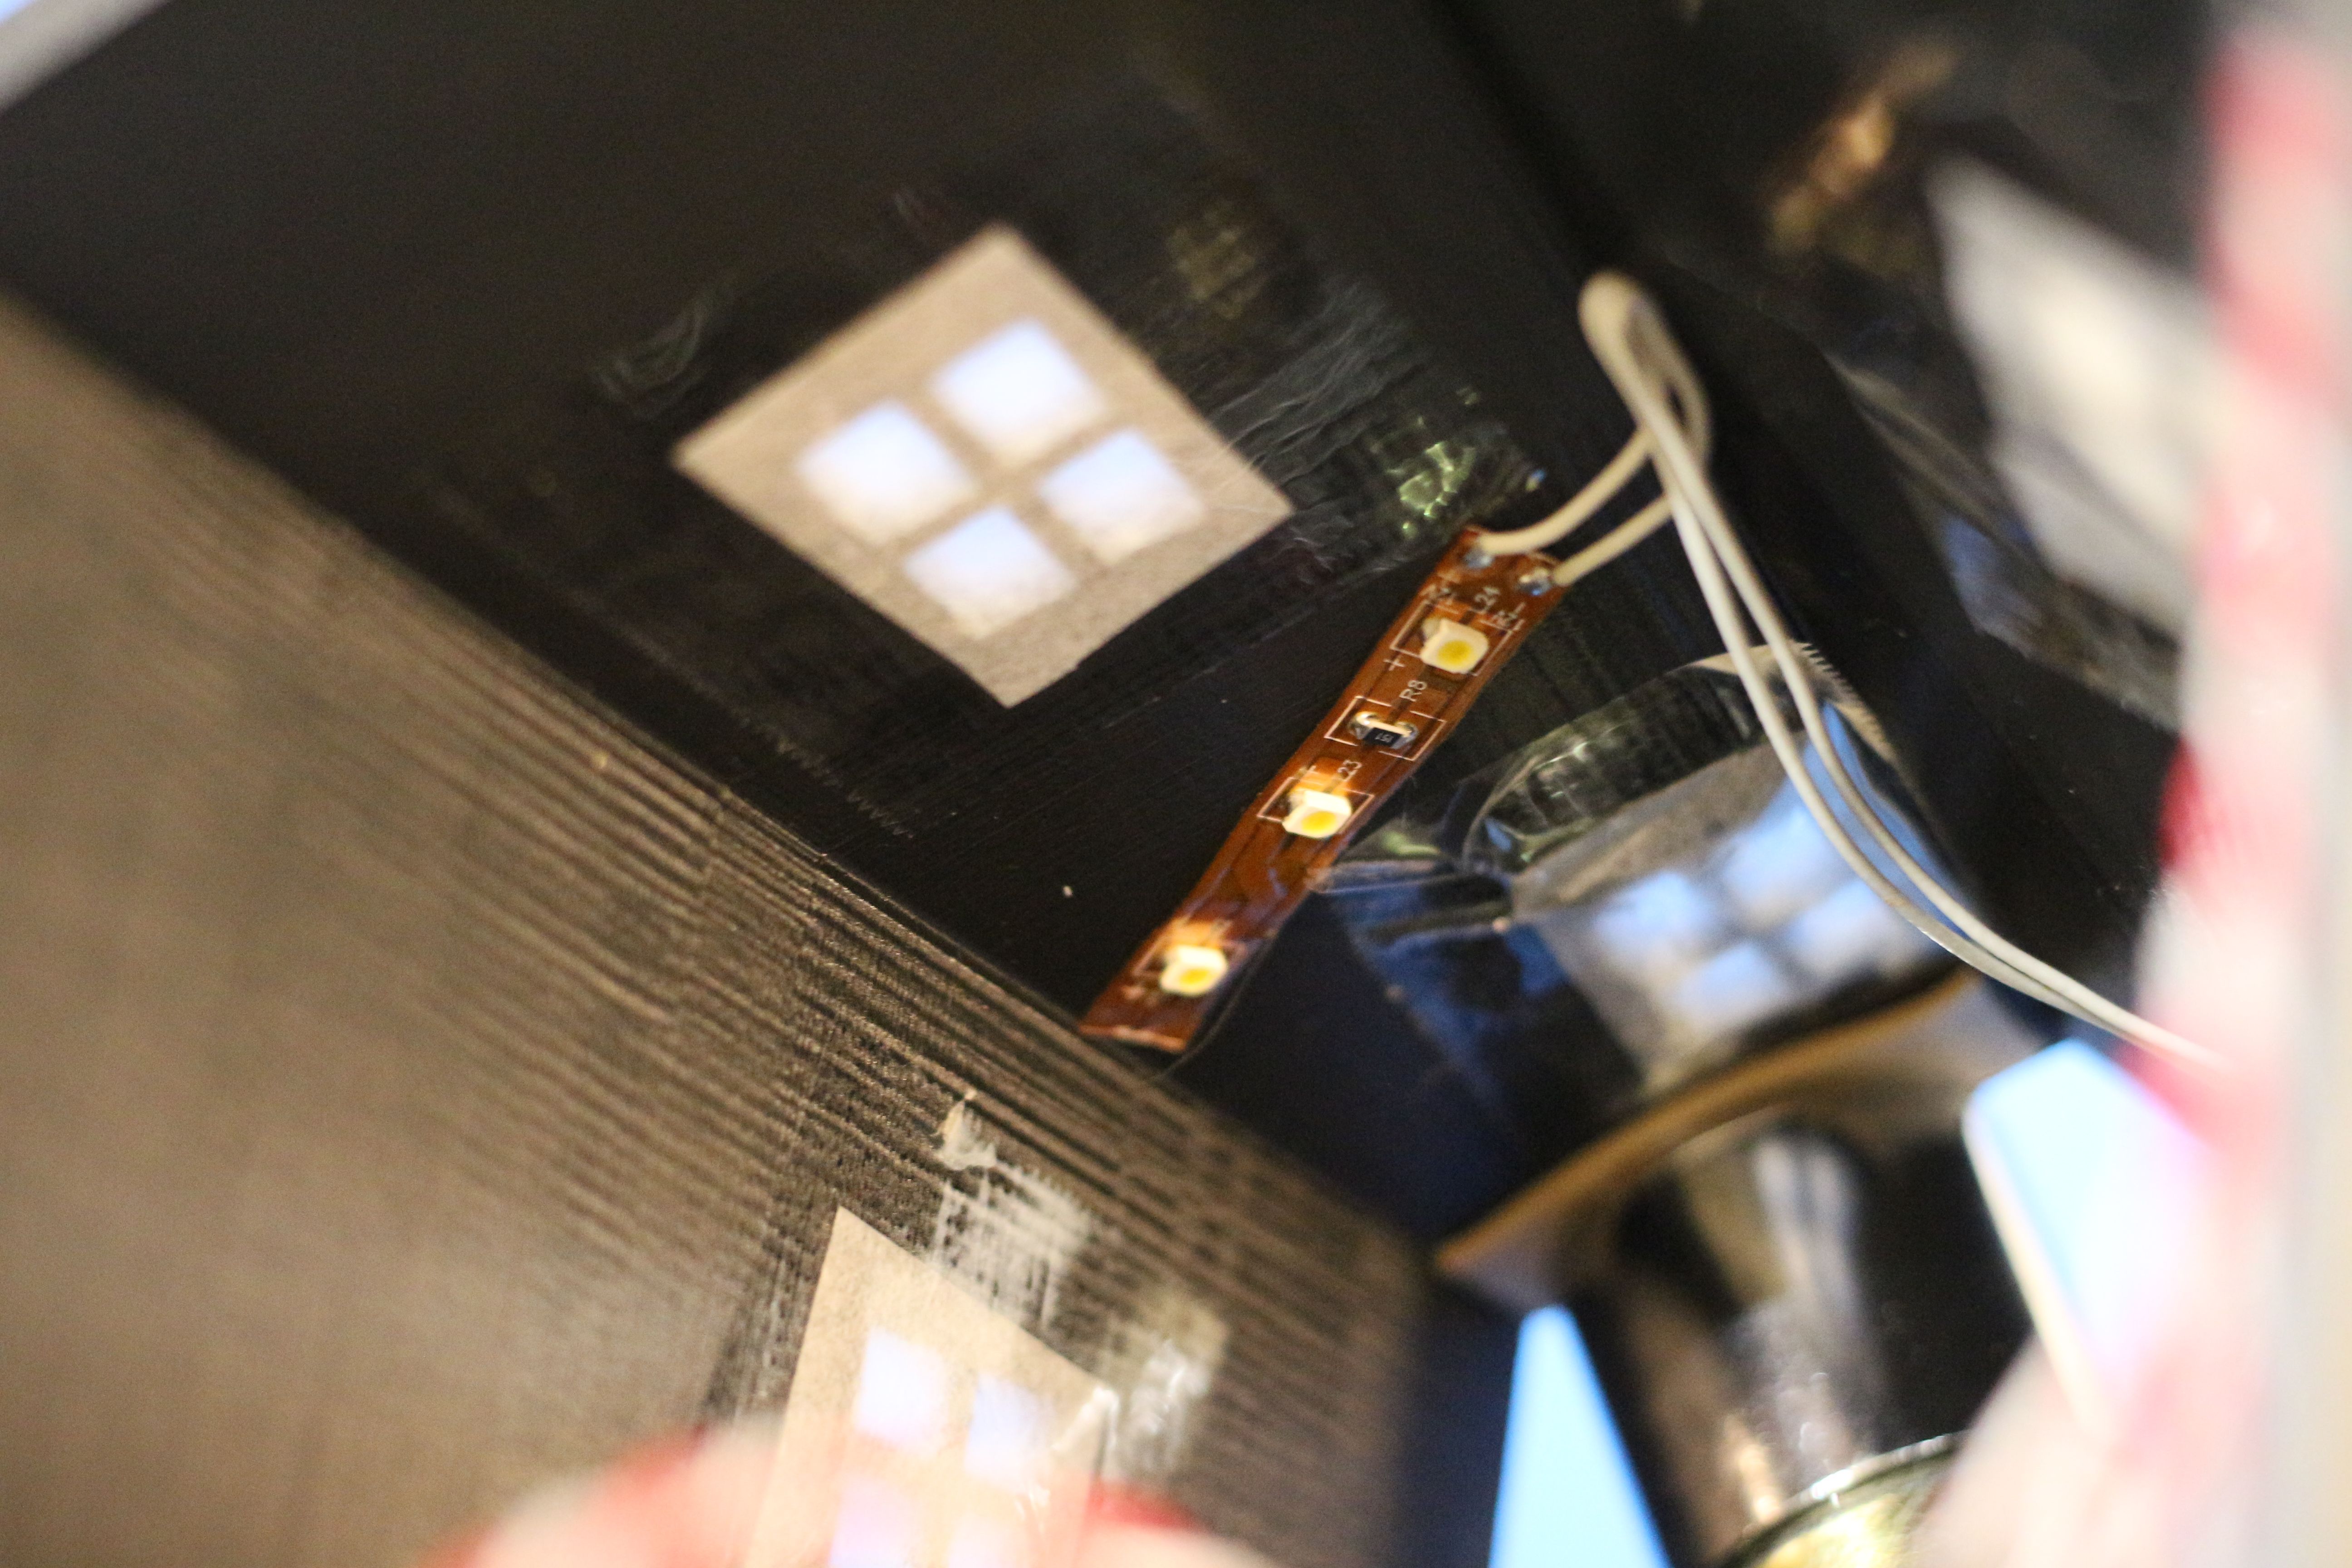
Internal detail: LED strips and window dressing.
Original image by @creatr
I used white LEDs cut from long reels.
The reels are made of 3-LED sections. Each set of 3 LEDs is wired in series on a strip of flexible circuit material. Each segment of the strip is rated for 12 volts—you can see one segment clearly in the photo above—but a current limiting resistor is wired in series with the LEDs so that they will function safely on a reasonably wide range of voltages.
The backs of the LED strips are coated with an adhesive, which I used to stick the LEDs on the inner wall of the windmill, opposite the windows. The 12 volt LED strips are wired in parallel with each other and with the 12 gear motor.
In the same photo,
you can also see the window dressing that I used to obscure the individual LEDs as seen from outside the windmill. Inside each window, I've taped a rectangle of white tissue paper covered with clear tape. This gives the windows their final, evenly illuminated appearance when the windmill is operating.
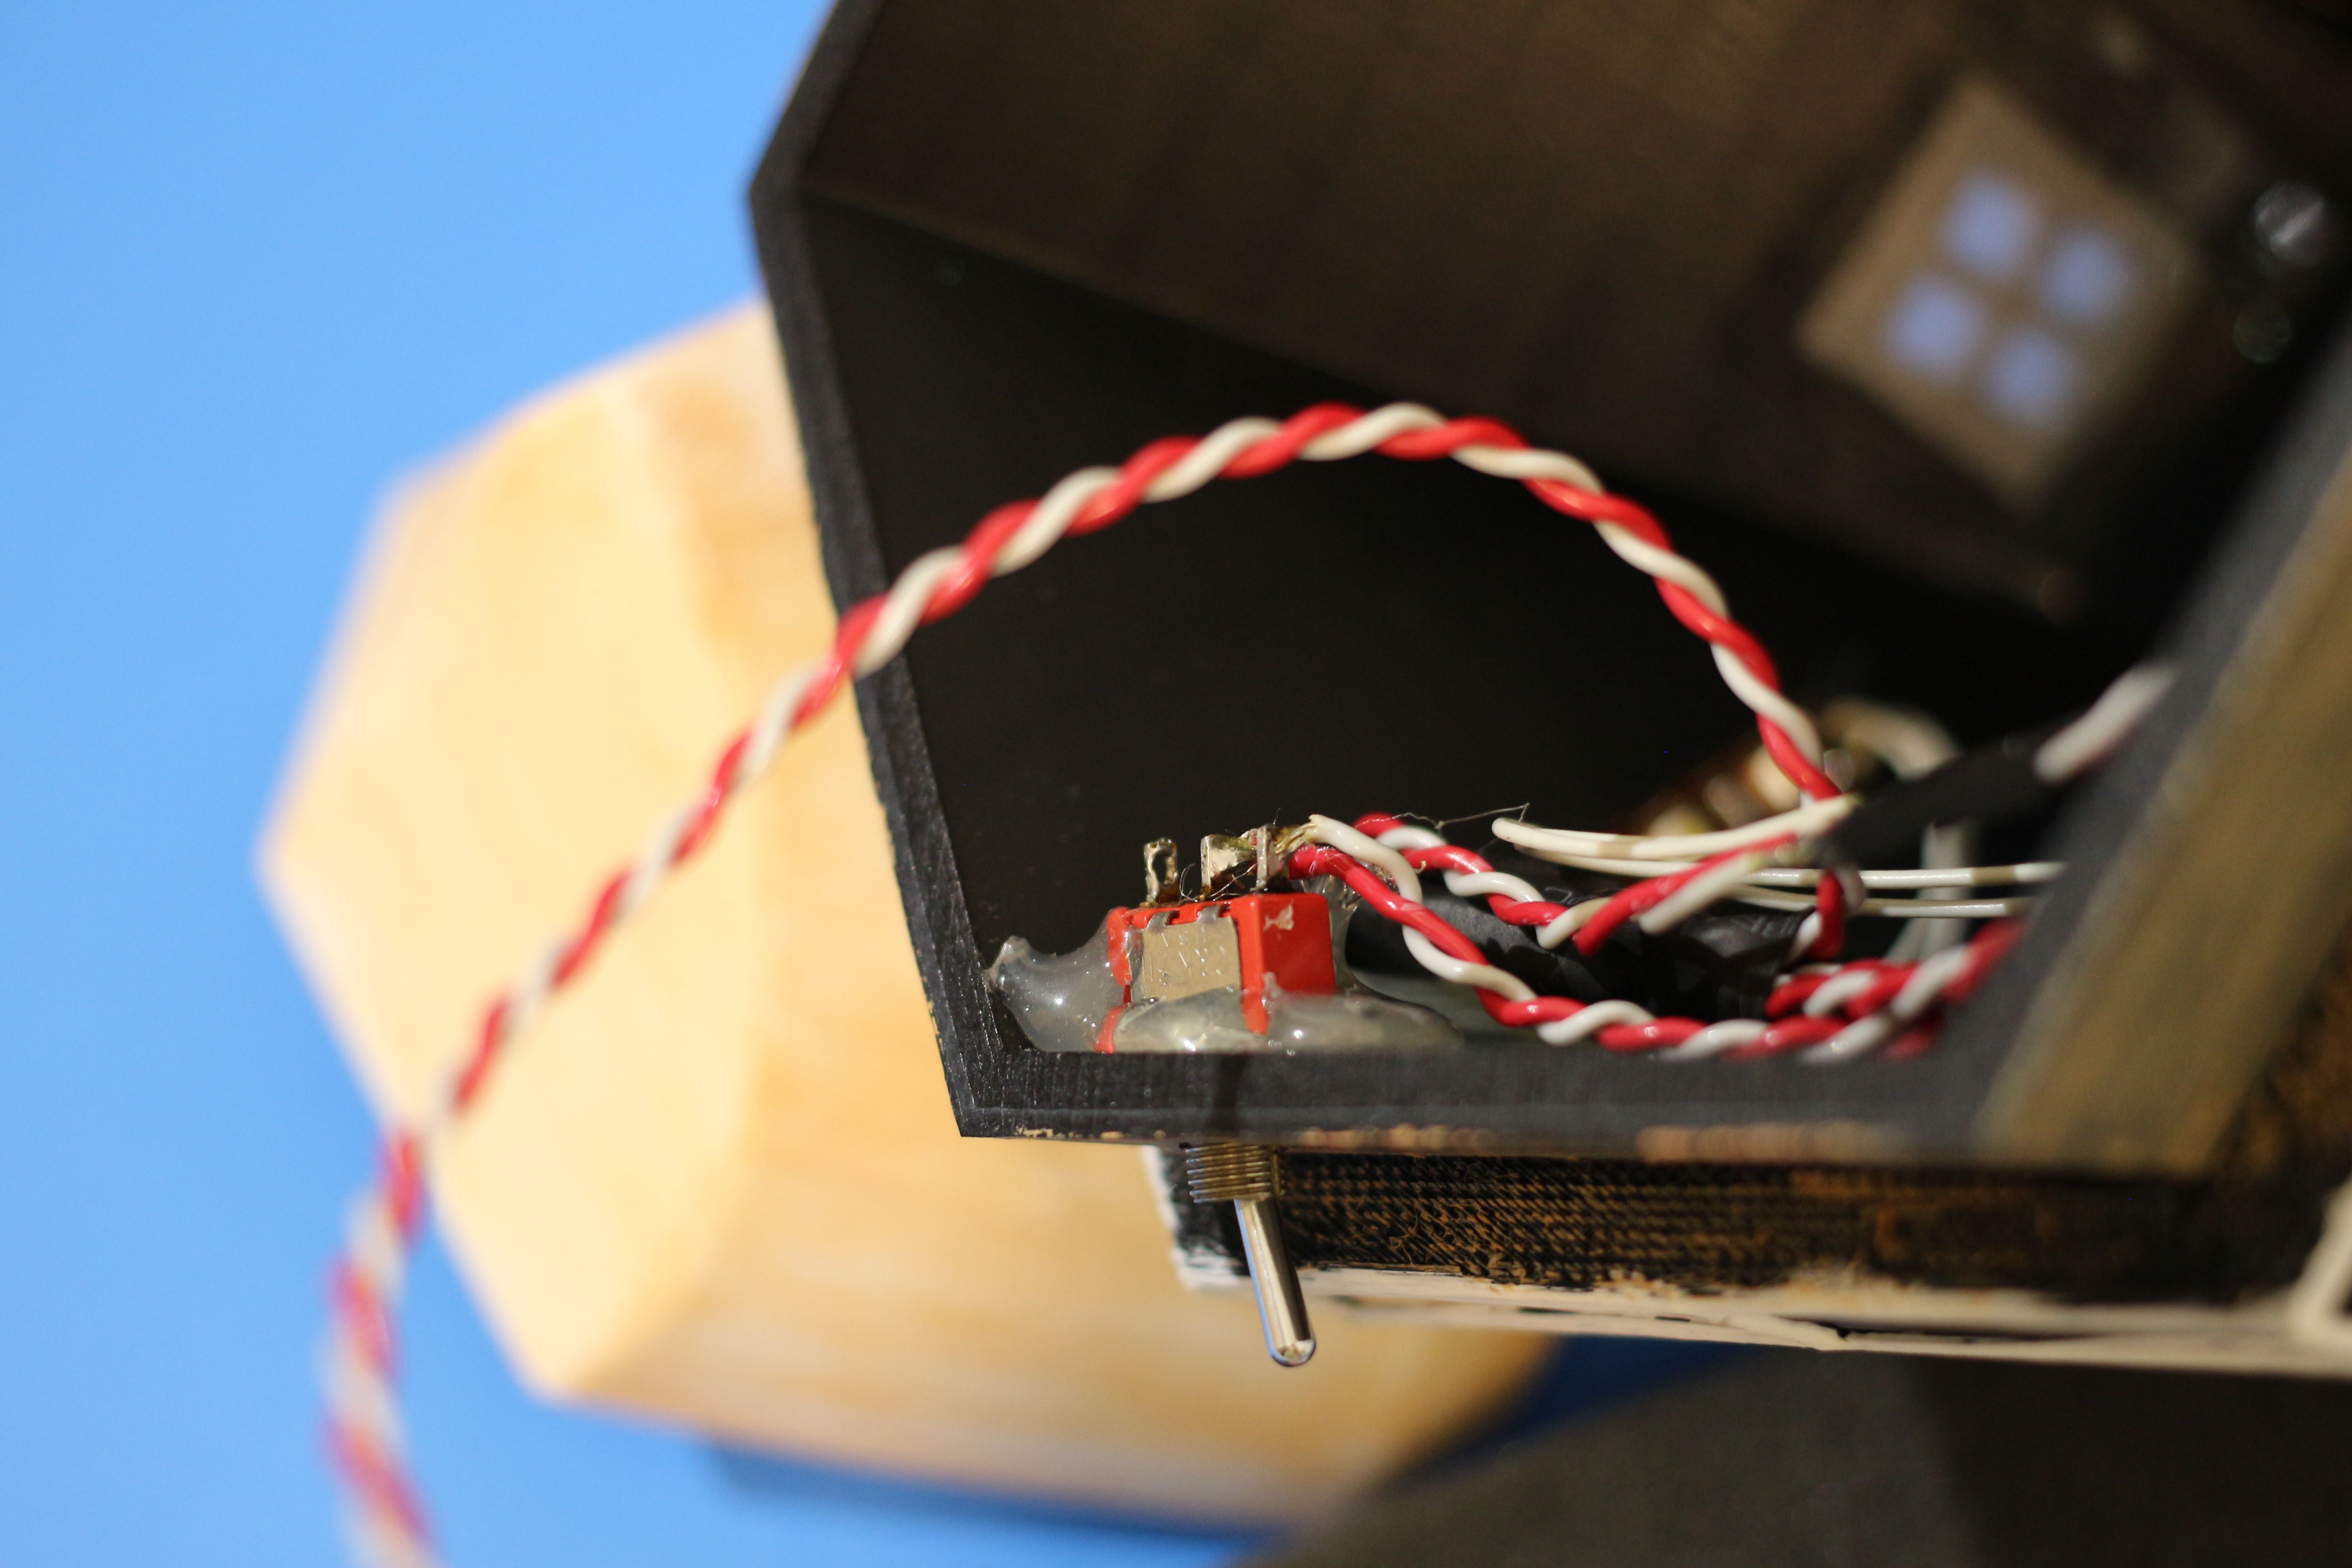
Internal detail: power switch and wiring.
Original image by @creatr
Another afterthought,
I drilled a hole in the lower edge of the back wall of the windmill and installed the ON/OFF toggle switch that you see in the photo above. The switch allows the actor playing Maurice to activate the windmill after he installs the final windmill blade.
Close up of internally illuminated windows.
Original image by @creatr
The end result is fairly dramatic.
The illuminated windows make the windmill look as if someone is at home. The rotating blades make it look as if the wind is blowing. The overall effect is quite pleasant. Most important of all, the director is happy.
All told, it's been a terrific adventure.
Because The Windmill is, relatively speaking, the simplest of the three props, it reached a high percentage of completion before the other two props. It was helpful to have one "almost done" when I ran into struggles with The Magic Mirror and The Enchanted Rose. I'll be telling those stories in separate articles.
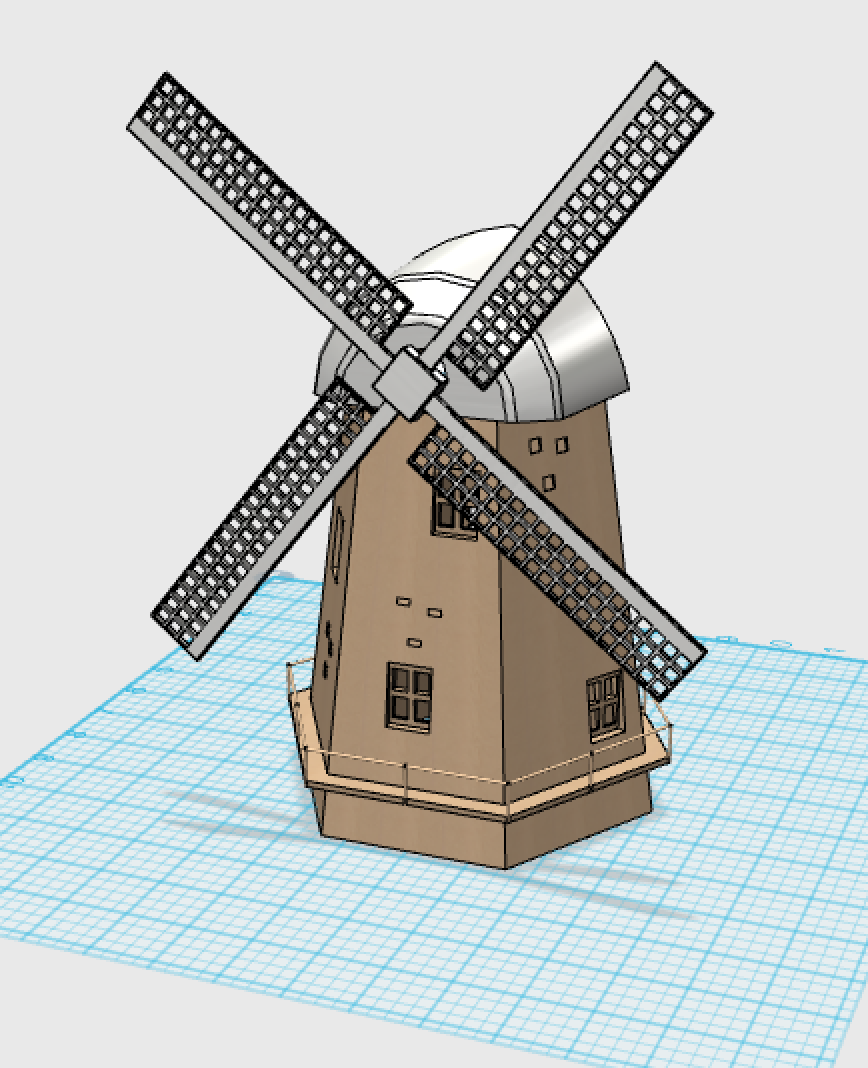
Starting with this imagination...
|
...progressing to this, a finished Windmill.
|
Possible future improvements.
If The Windmill becomes an item to be replicated, I'll modify the 3D designs to incorporate roof and pedestal attach points, mounting holes for the motor, and a hole for the ON/OFF toggle switch.
Animated GIF of The Windmill in operation.
Original image by @creatr
I will probably also print the catwalk separately and glue it in place. Why? Revising the design to be printed in that way will not only eliminate the expense of printing support materials, but will also significantly reduce print time.
Maurice's Windmill Music Box is now completely finished.
It's finally ready for prime time.
I'm excited at the prospect of setting it up in the theater next week, and seeing the reaction of the cast when they see The Windmill in operation for the first time.
These animated GIFs should give you at least some idea of what The Windmill looks like in operation.
Animated GIF of The Windmill in operation.
Original image by @creatr
Coming up soon:
Next on my schedule, I hope to write the saga of the design, development, and construction of The Magic Mirror.
Stay tuned!
~FIN~
If you're just tuning in, here are previous entries in this series (including ruminations) about prop-making:
"The Ocean of Life" - A Haiku by Duncan Cary Palmer
"When Wandering Wizards Wonder..."
"Finally Out to Sea..." a Haiku by Duncan Cary Palmer
Beauty and the Beast Props - Enchanted Rose ~Teaser~
Beauty and the Beast Props - Magic Mirror ~Teaser~
Beauty and the Beast Props - Windmill ~Teaser~
Beauty and the Beast Props - The Director Is Happy!
Fine-Tuning The Rose for Beauty and the Beast
How I Designed And Built Maurice's Windmill for ~Beauty and the Beast~ Part 1
How I Designed And Built Maurice's Windmill for ~Beauty and the Beast~ Conclusion
How I Designed And Built The Magic Mirror for ~Beauty and the Beast~ Part 1
How I Designed And Built The Magic Mirror for ~Beauty and the Beast~ Part 2
How I Designed And Built The Magic Mirror for ~Beauty and the Beast~ Part 3

P.S. If you have an "in" with anybody at Steemit, Inc. - Would you please ask them to get rid of these damn, extremely annoying "off-website" arrow/boxes? The have, overnight, made Steemit ugly. There are much better solutions.
For more true-life stories, CLICK our Library Stories Shelf.

Introducing: The SILVERengines proton - Image by @creatr
CONTACT US - Will Exchange for Steem
You are why I'm here on Steemit!
I have very eclectic interests and hope, over time, to write about them all.
⬇️To Check Out @creatr's World⬇️CLICK Each Image Below⬇️

|
|

|
very impressive @creatr
very good design, you are very genius
Thanks.
yes brother
thank you for coming to my post, even though it has passed
Amazing the way you innovated and solved design problems - one small question - Shouldn't the vanes be turning clockwise? I reserve the right to be wrong, LOL!!
Hi John,
Thanks for checking this out.
Have a look at this video, starting at about 3:45, for the answer to your question... ;)
There may be other designs, but there you at least have an "existence proof."
BTW, and perhaps surprisingly, we have an authentic Dutch windmill right here in Escondido, and it turns the way my model turns... ;)
ha ha, that video showed me the vanes don't turn at all - I believe you :)
The other video, at 3:45...
That's very creative of you. I liked the results. No wonder your name is creatr :) HAhaha. You really love to create things.
I do love it, Thanks.
Very talented what you did, you left me impressed
Thanks.
its very beatiful and inresting thing, i appreciate your hardworking on this prop. This is good invention you are very genious. Thanks for sharing this on steemit. you are doing very good work.
Thanks.
you welcome my brother
This is like wind while. This the best home made creation I've ever seen. sir, @creatr keep it up sir. Your blog is so interested to me because you share the most of informative post that is very important to me.. Best wishes to you sir. You can checkout my blog sir
Thanks.
You're most welcome sir. You've done a great job which can't do everyone..
That's really amazing work. I wish I could see the show and see all your neat props. You've really put a ton of work into this project.
Thanks, friend. :D
I wish you could see the show too...
I hope at least to share a few backstage photos with you. :D
Looks great! Did you have similar issues with the LED lights and the battery as you did with the rose? Or was this one a little smoother sailing?
This was much simpler electrically. The commercial LED strip lights, although nominally 12 volts, are designed to tolerate a wider range of voltages. And, they are actually designed to be cut with a pair of scissors into segments of any length, as long as you "cut on the dotted line" to maintain the groupings of three LEDs and a resistor... :D
You put a lot of love into this and it shows with your attention to detail. Thanks for explaining this @creatr
The blades are turning
the project is completed
@creatr rests
Thank you, dear friend, for the lovely haiku! :D
My pleasure 🙏