Desolate Wasteland Transformed into Vibrant Colorful Garden
It's been a while since our last update - but we have been super busy working on the other side of the front yard and I have lots of pics of our progress.
If you've been following us then you have seen us transforming this piece of dirt into a beautiful yard and flower garden. Even though we have done a lot - there is still so much more to do - after all we have a 1/3 of an acre to tame.
To see what we've been doing so far check out the following blog posts:
Transforming Our Front Yard
The Yard Transformation Continues...A Path and a Patio
Yard Transformation: A Path to Completion
Caught Red Handed! You wont believe this Yard Transformation
Time for the next project!

When we got here - there was nothing but dirt and dried up weeds.
The ground was also very uneven and had bumps and dips all over the place because there used to be some very large trees that were removed. Their roots caused havoc on the ground and made working in the yard more difficult. But what many other people might look at as a wasteland looks like a blank canvas to my wife and I. We weren't quite sure how to use this space but the more we worked on the yard - the more ideas started coming to us. Ultimately - we decided that this would be a good space to put some of our fruit trees and make flowerbed to attract bees.

We put the orange tree in the ground first - mostly because we had already pulled it out of the ground at our previous house and I wanted to get it back in the ground as soon as possible. We started to bring some of the other trees to the area so that they could acclimate to the new location. It sat like this for a few weeks while we worked on other side of the yard.
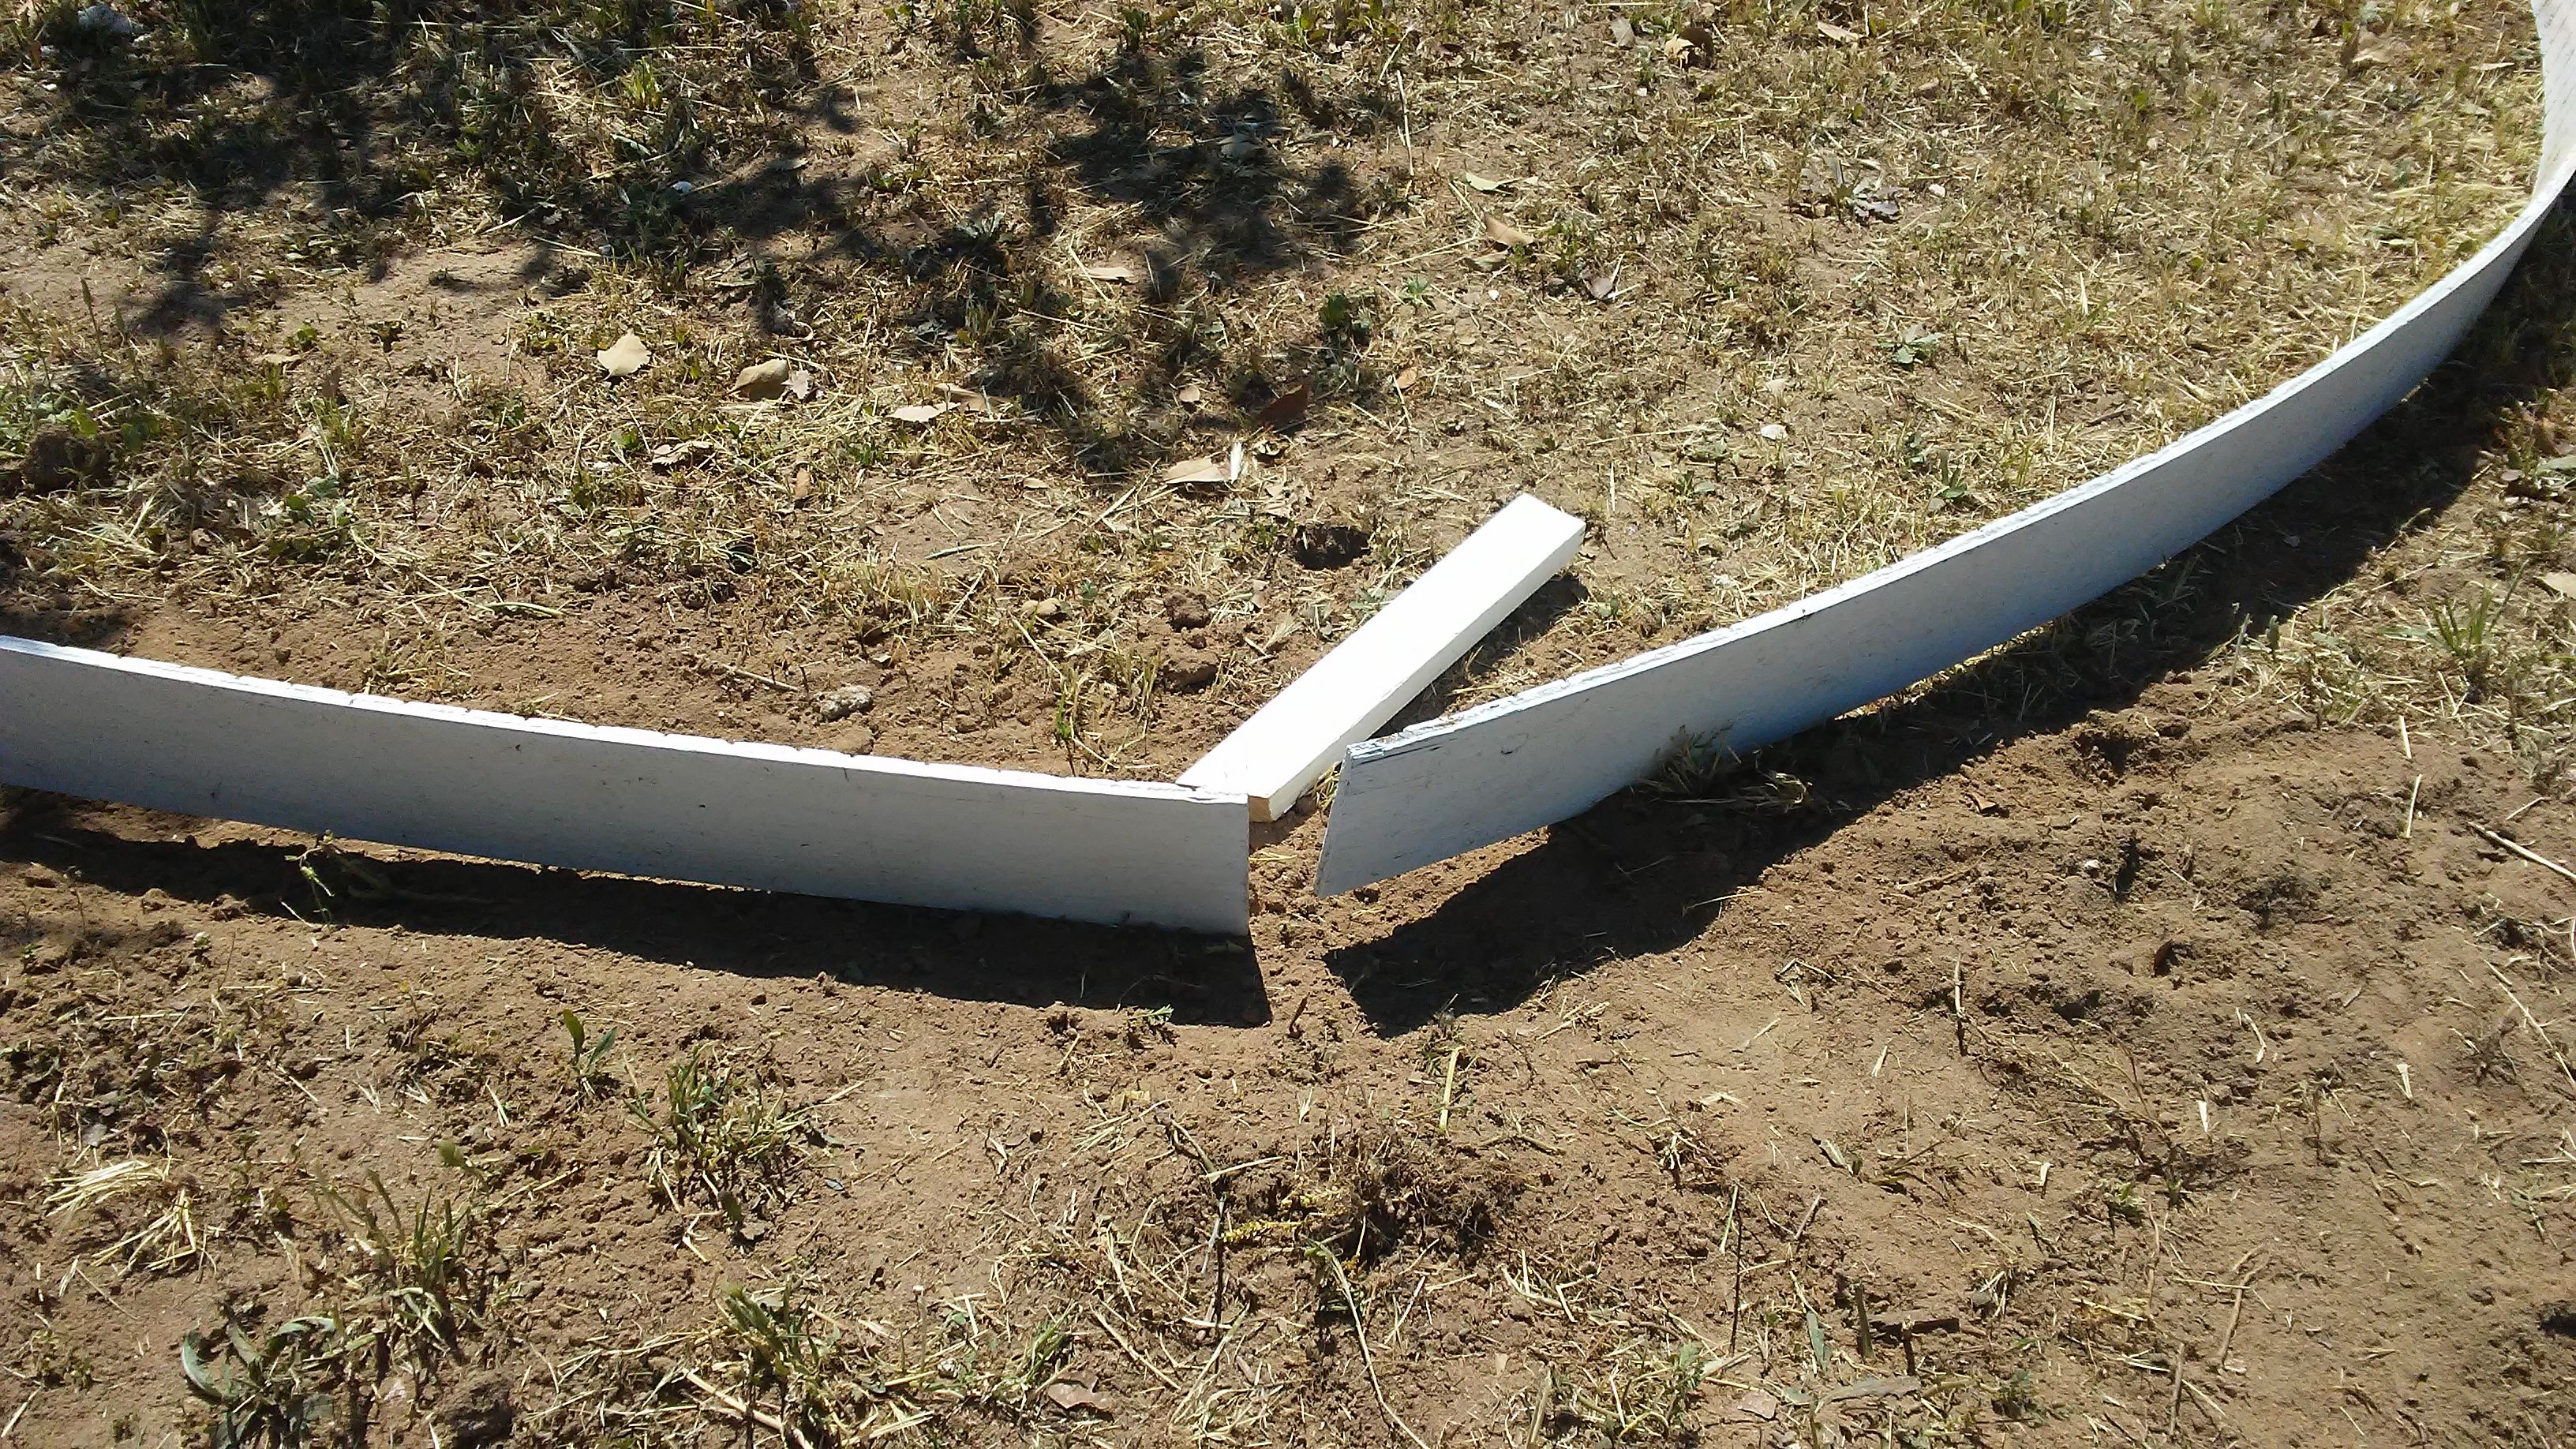
I wanted to make a border around the space - so we needed some edging. You can go ahead pick up from home depot for about $20 a board. OR - you could take some extra wood laying around and make it into edging board. This was the perfect option because I had put aside some long skinny pieces of left-over trimmed wood and had it in storage. I didn't know what I was going to with it at the time - but I knew that I did not want to throw it in the garbage with the rest of the scrap wood - so I put it aside. Now that we are working on the garden - using the pieces to make an edging for the garden is a great way to repurpose these.
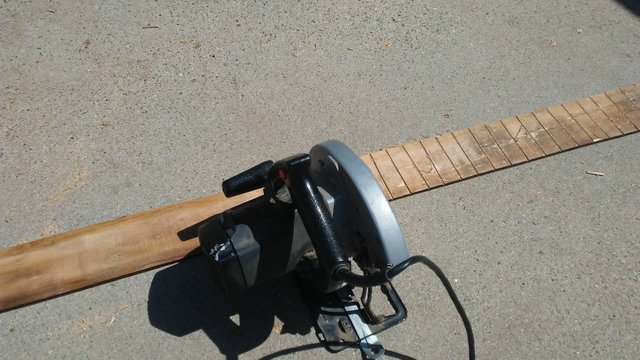
The boards were to stiff to be flexible - so to render that problem - I simply put "kerf" cuts into the wood. Using my skill saw - I cut a line into the wood about every two inches or so. I didn't measure -just made my best guess at making the lines even to each other. Doing this makes the wood very flexible and easy to bend into shapes.
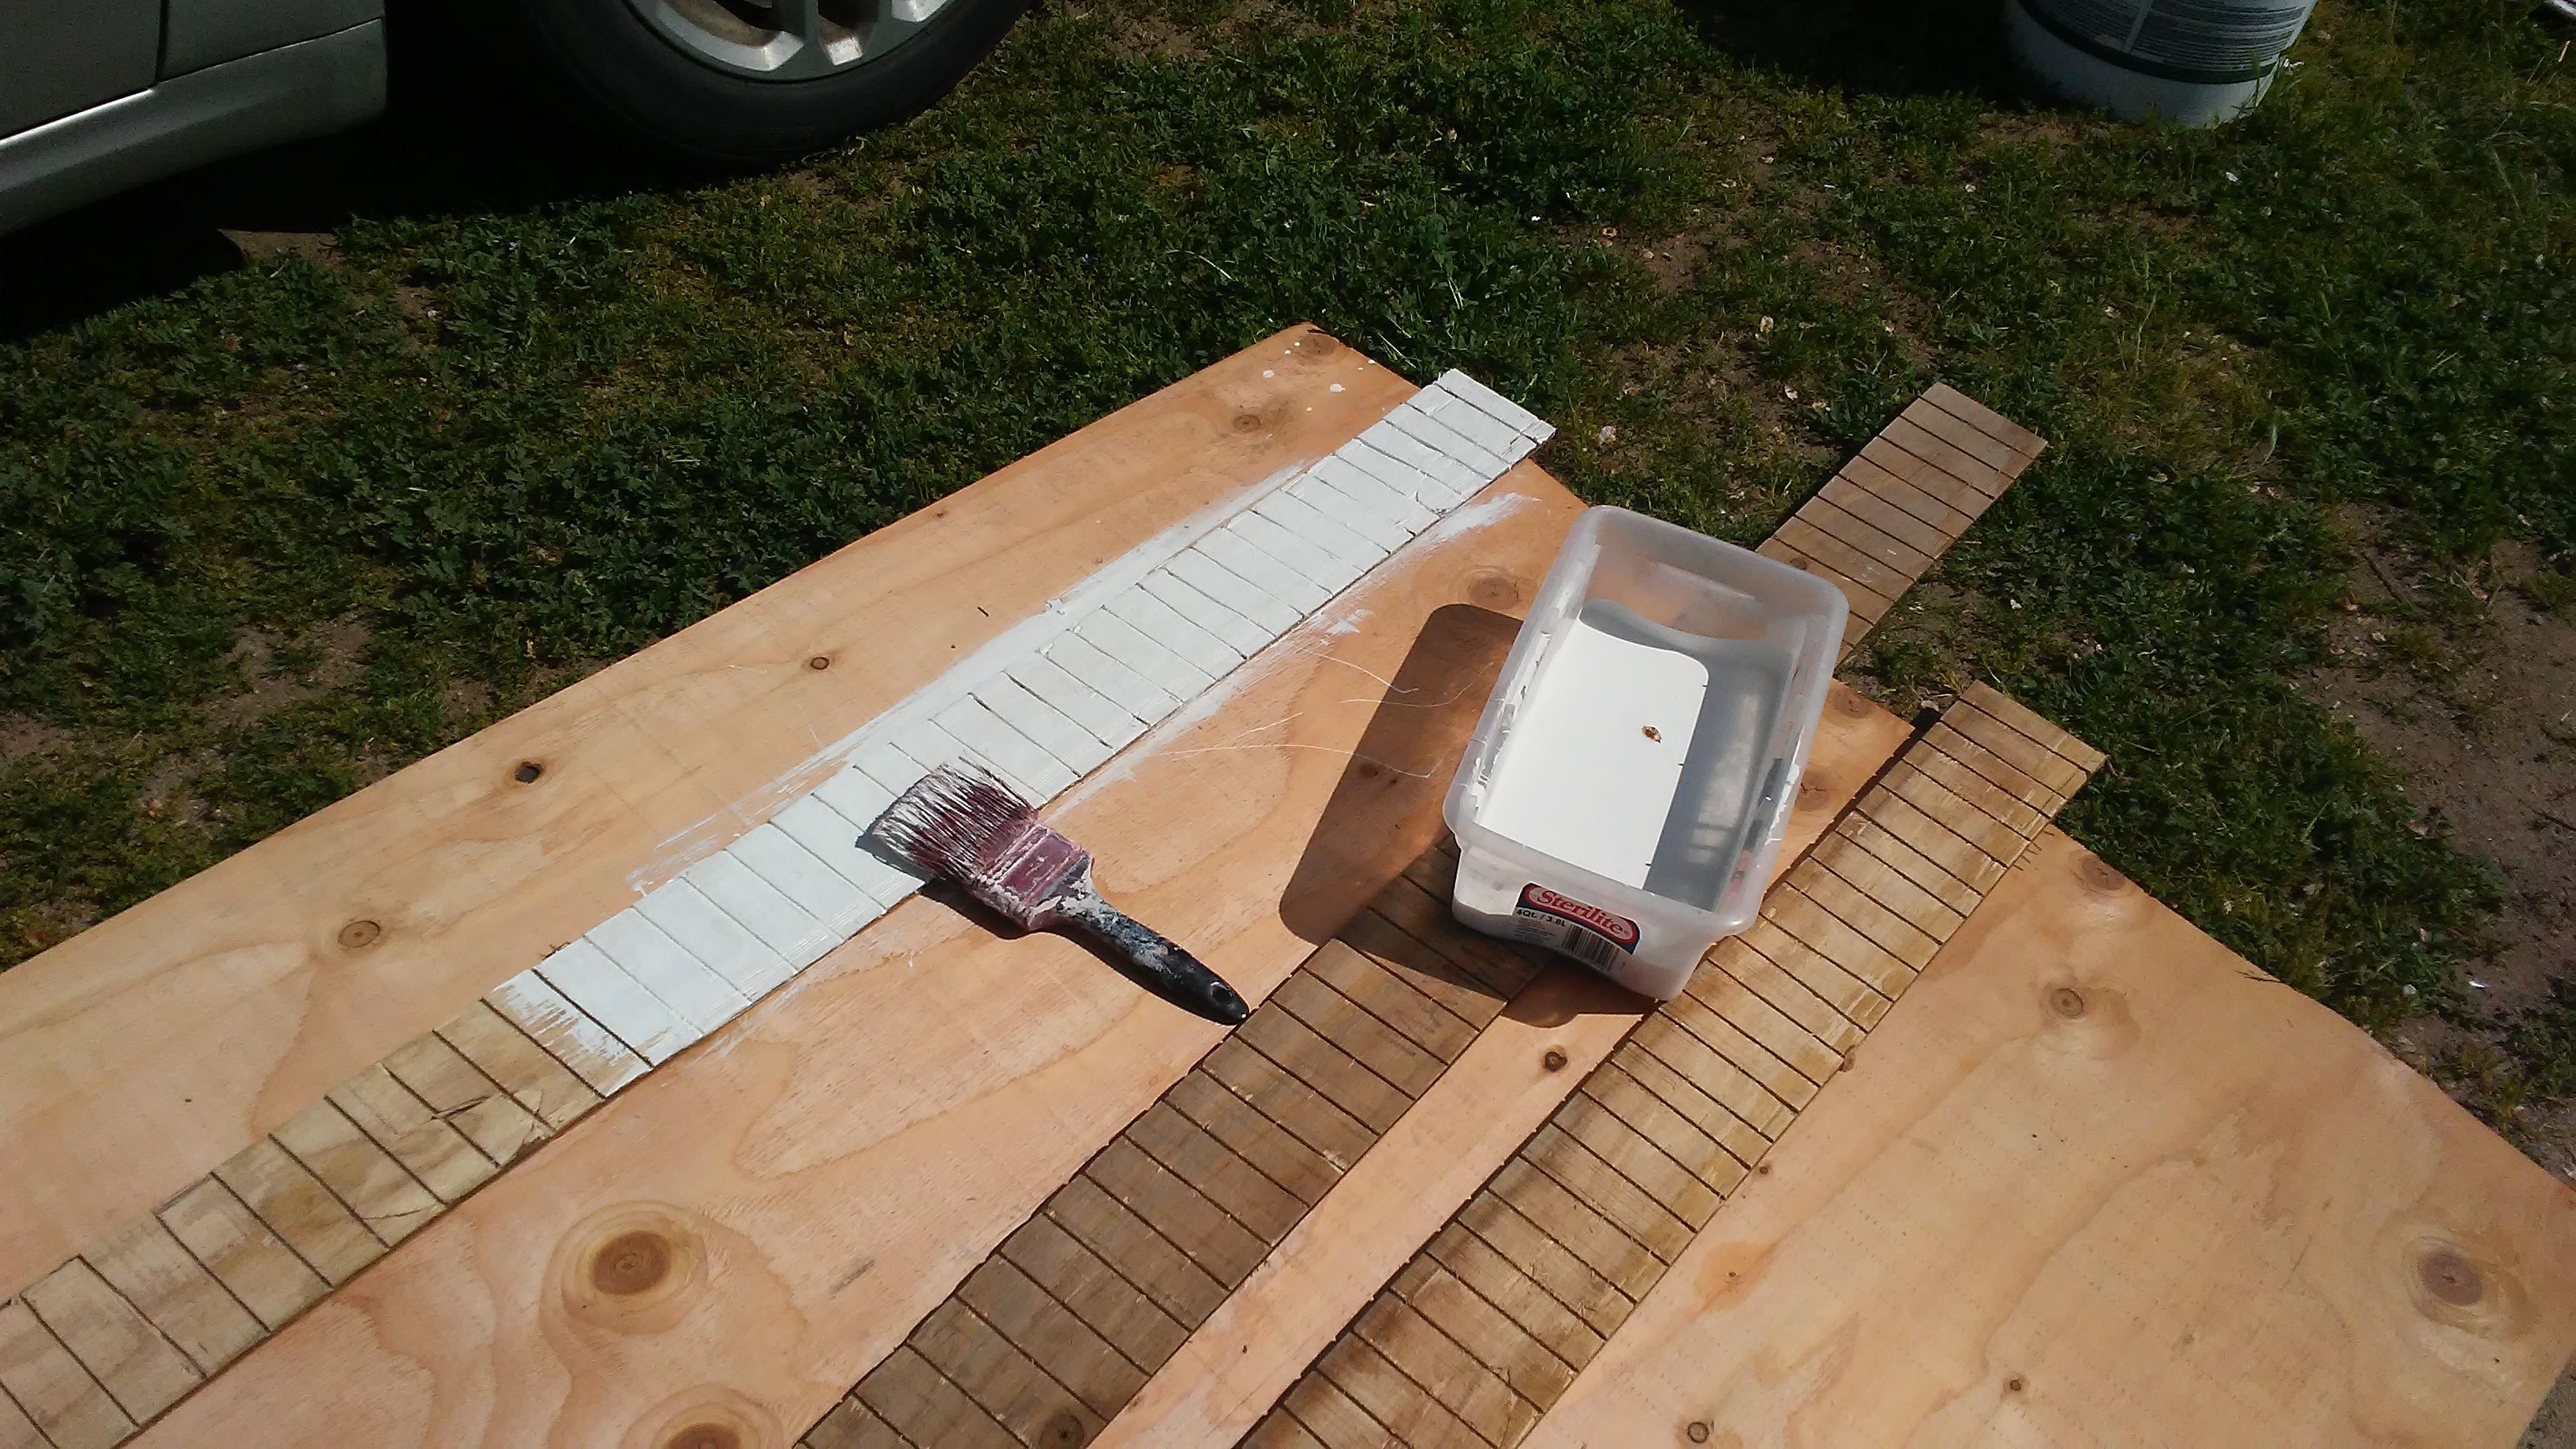
To protect the wood from the weather , as well as to make it look nicer - I painted them all with exterior latex paint that matches the color of the house, which is "Swiss Coffee".
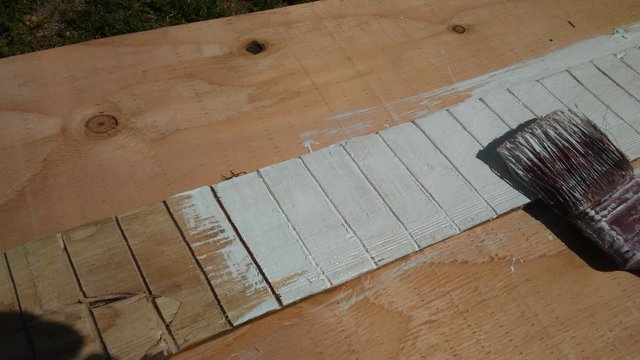
The wood absorbed a lot of paint so it took two coats on each of them.
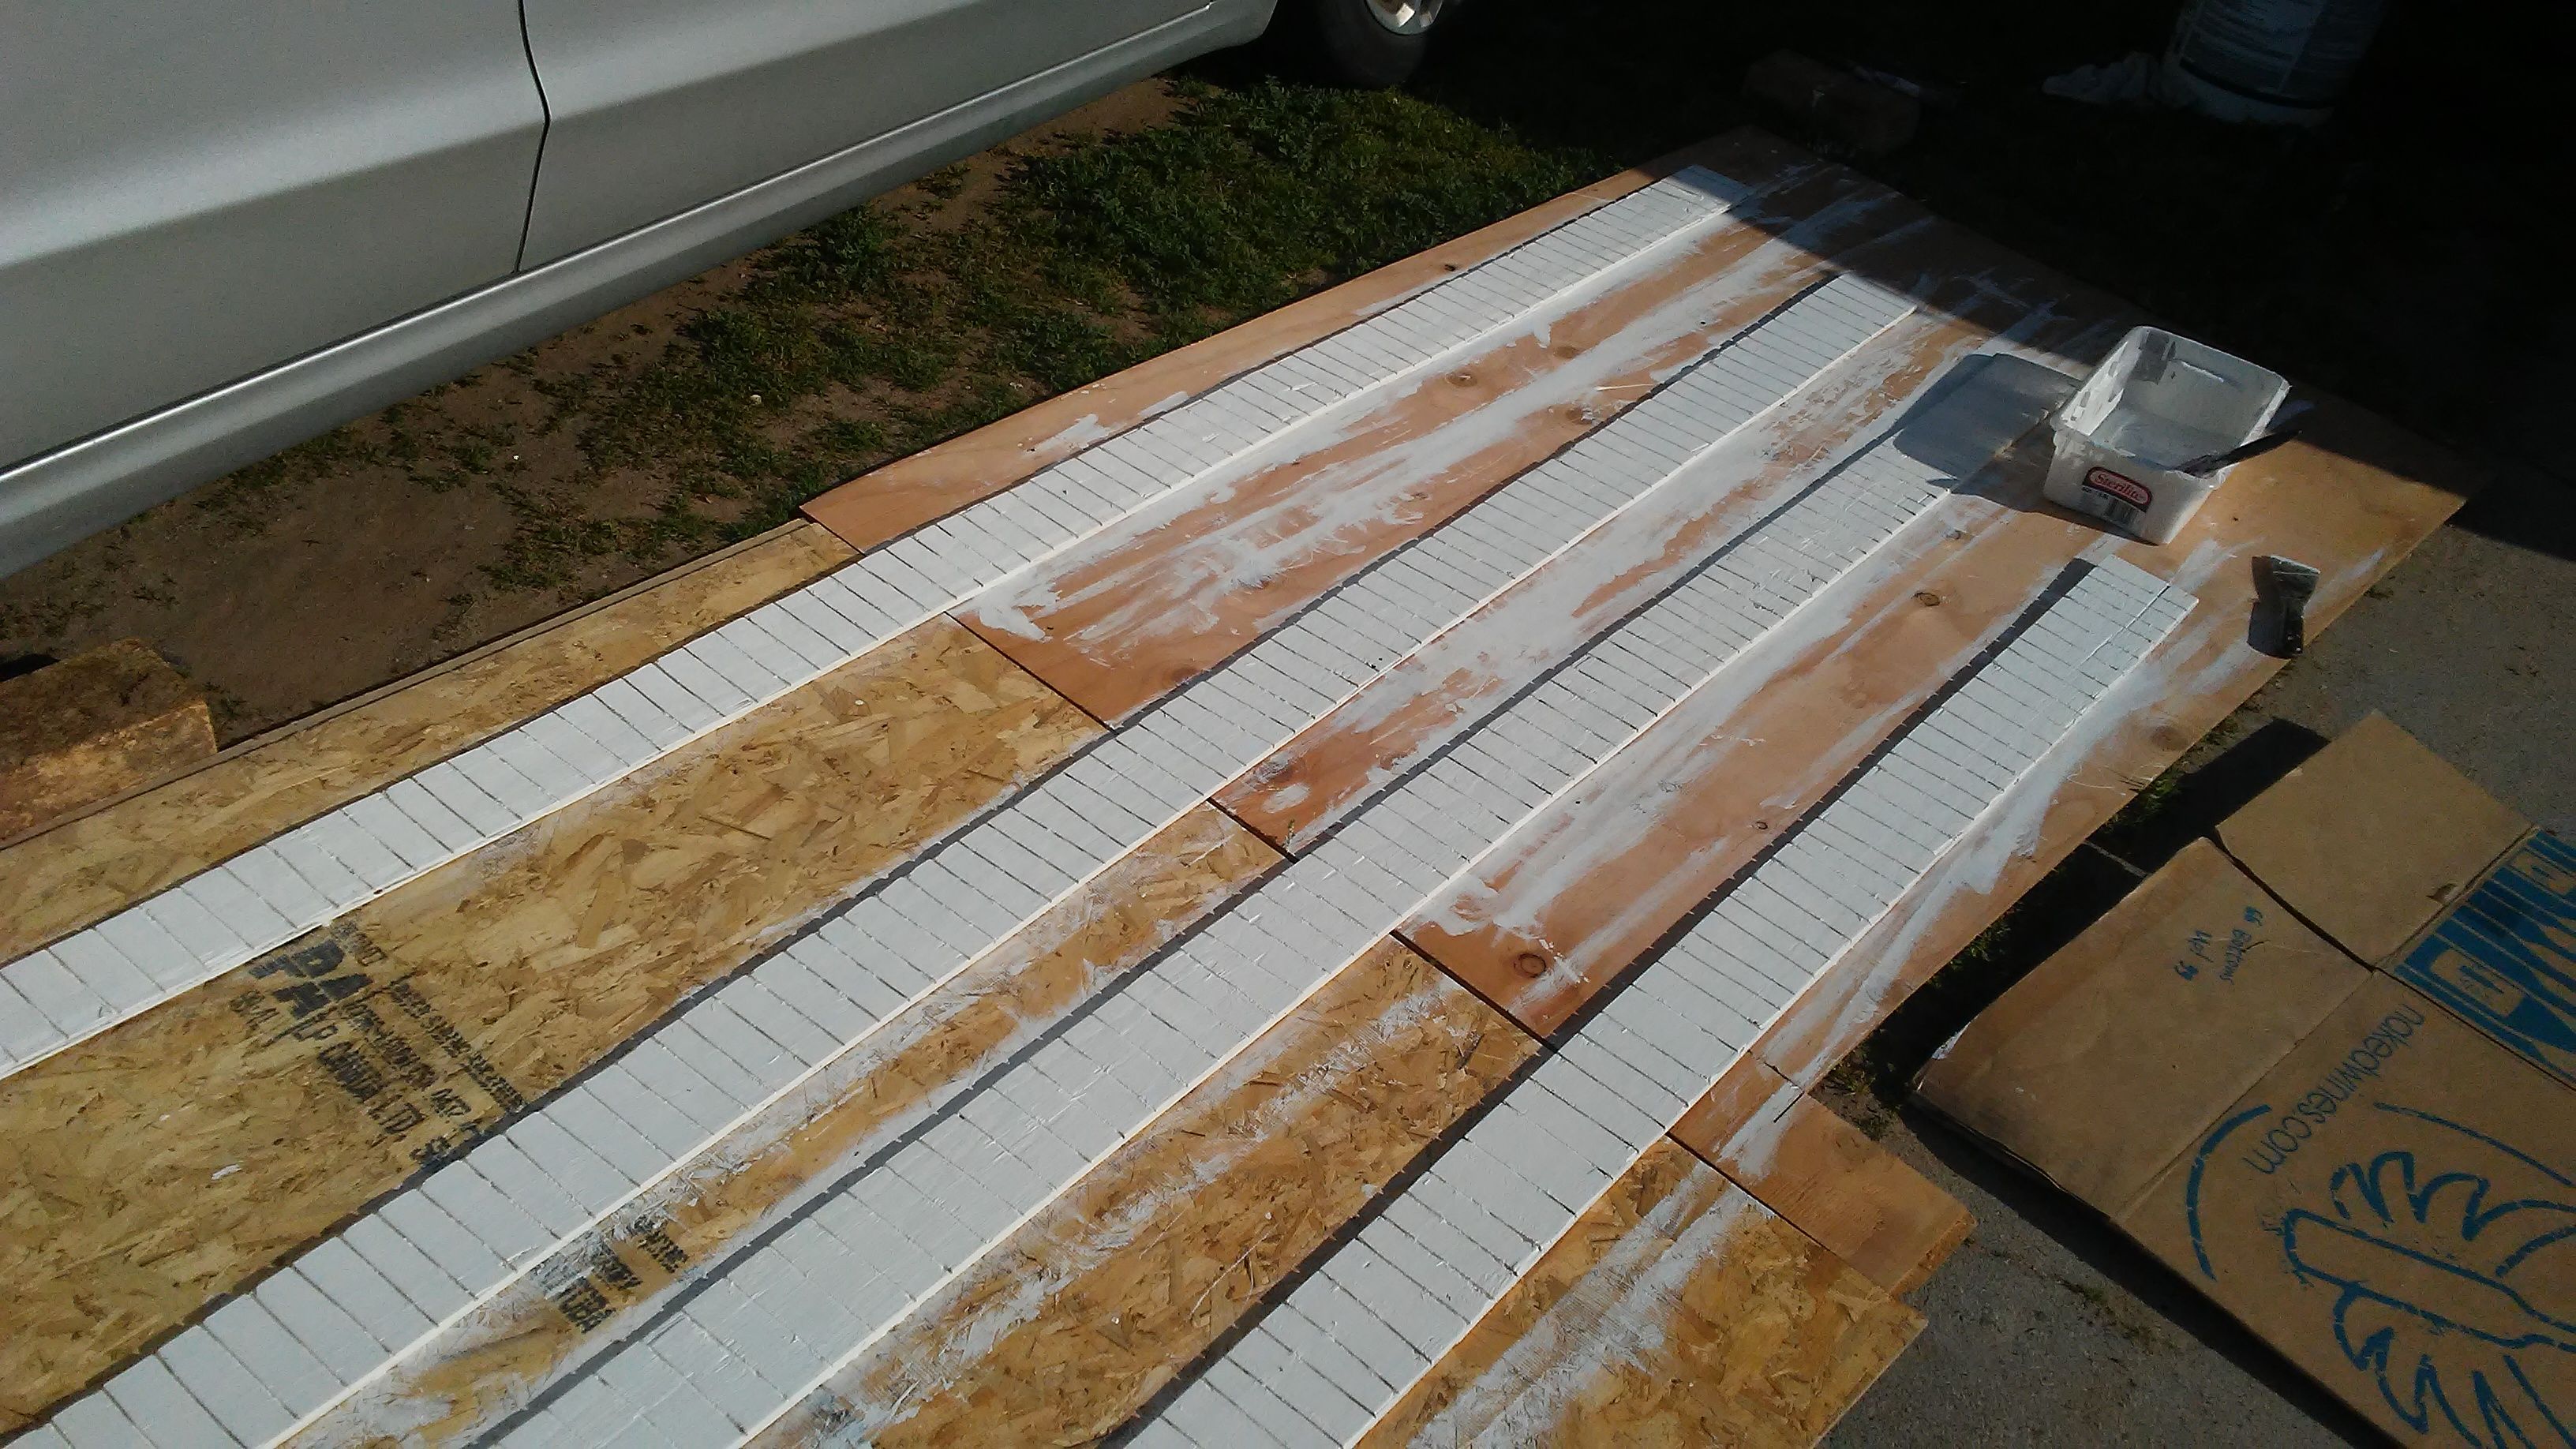
It took a while to do all of them but I think it was worth it - I got to use up some scrapwood and saved money at the same time - two of my favorite things.
Once the paint dried - I laid out the edging and made it into the shape I wanted to make the garden. This was just a rough figure to get an idea of what it would look like.
These boards will be secured together by a stake
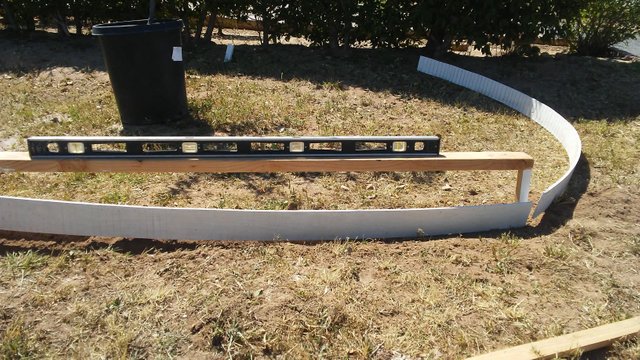
The yard itself is not flat - but I wanted for the flowerbed to be - so I used a level to ensure that as I installed each board - they were level to the previous board. To do this, I made sure the stake was level first - then attached the board to the stake.
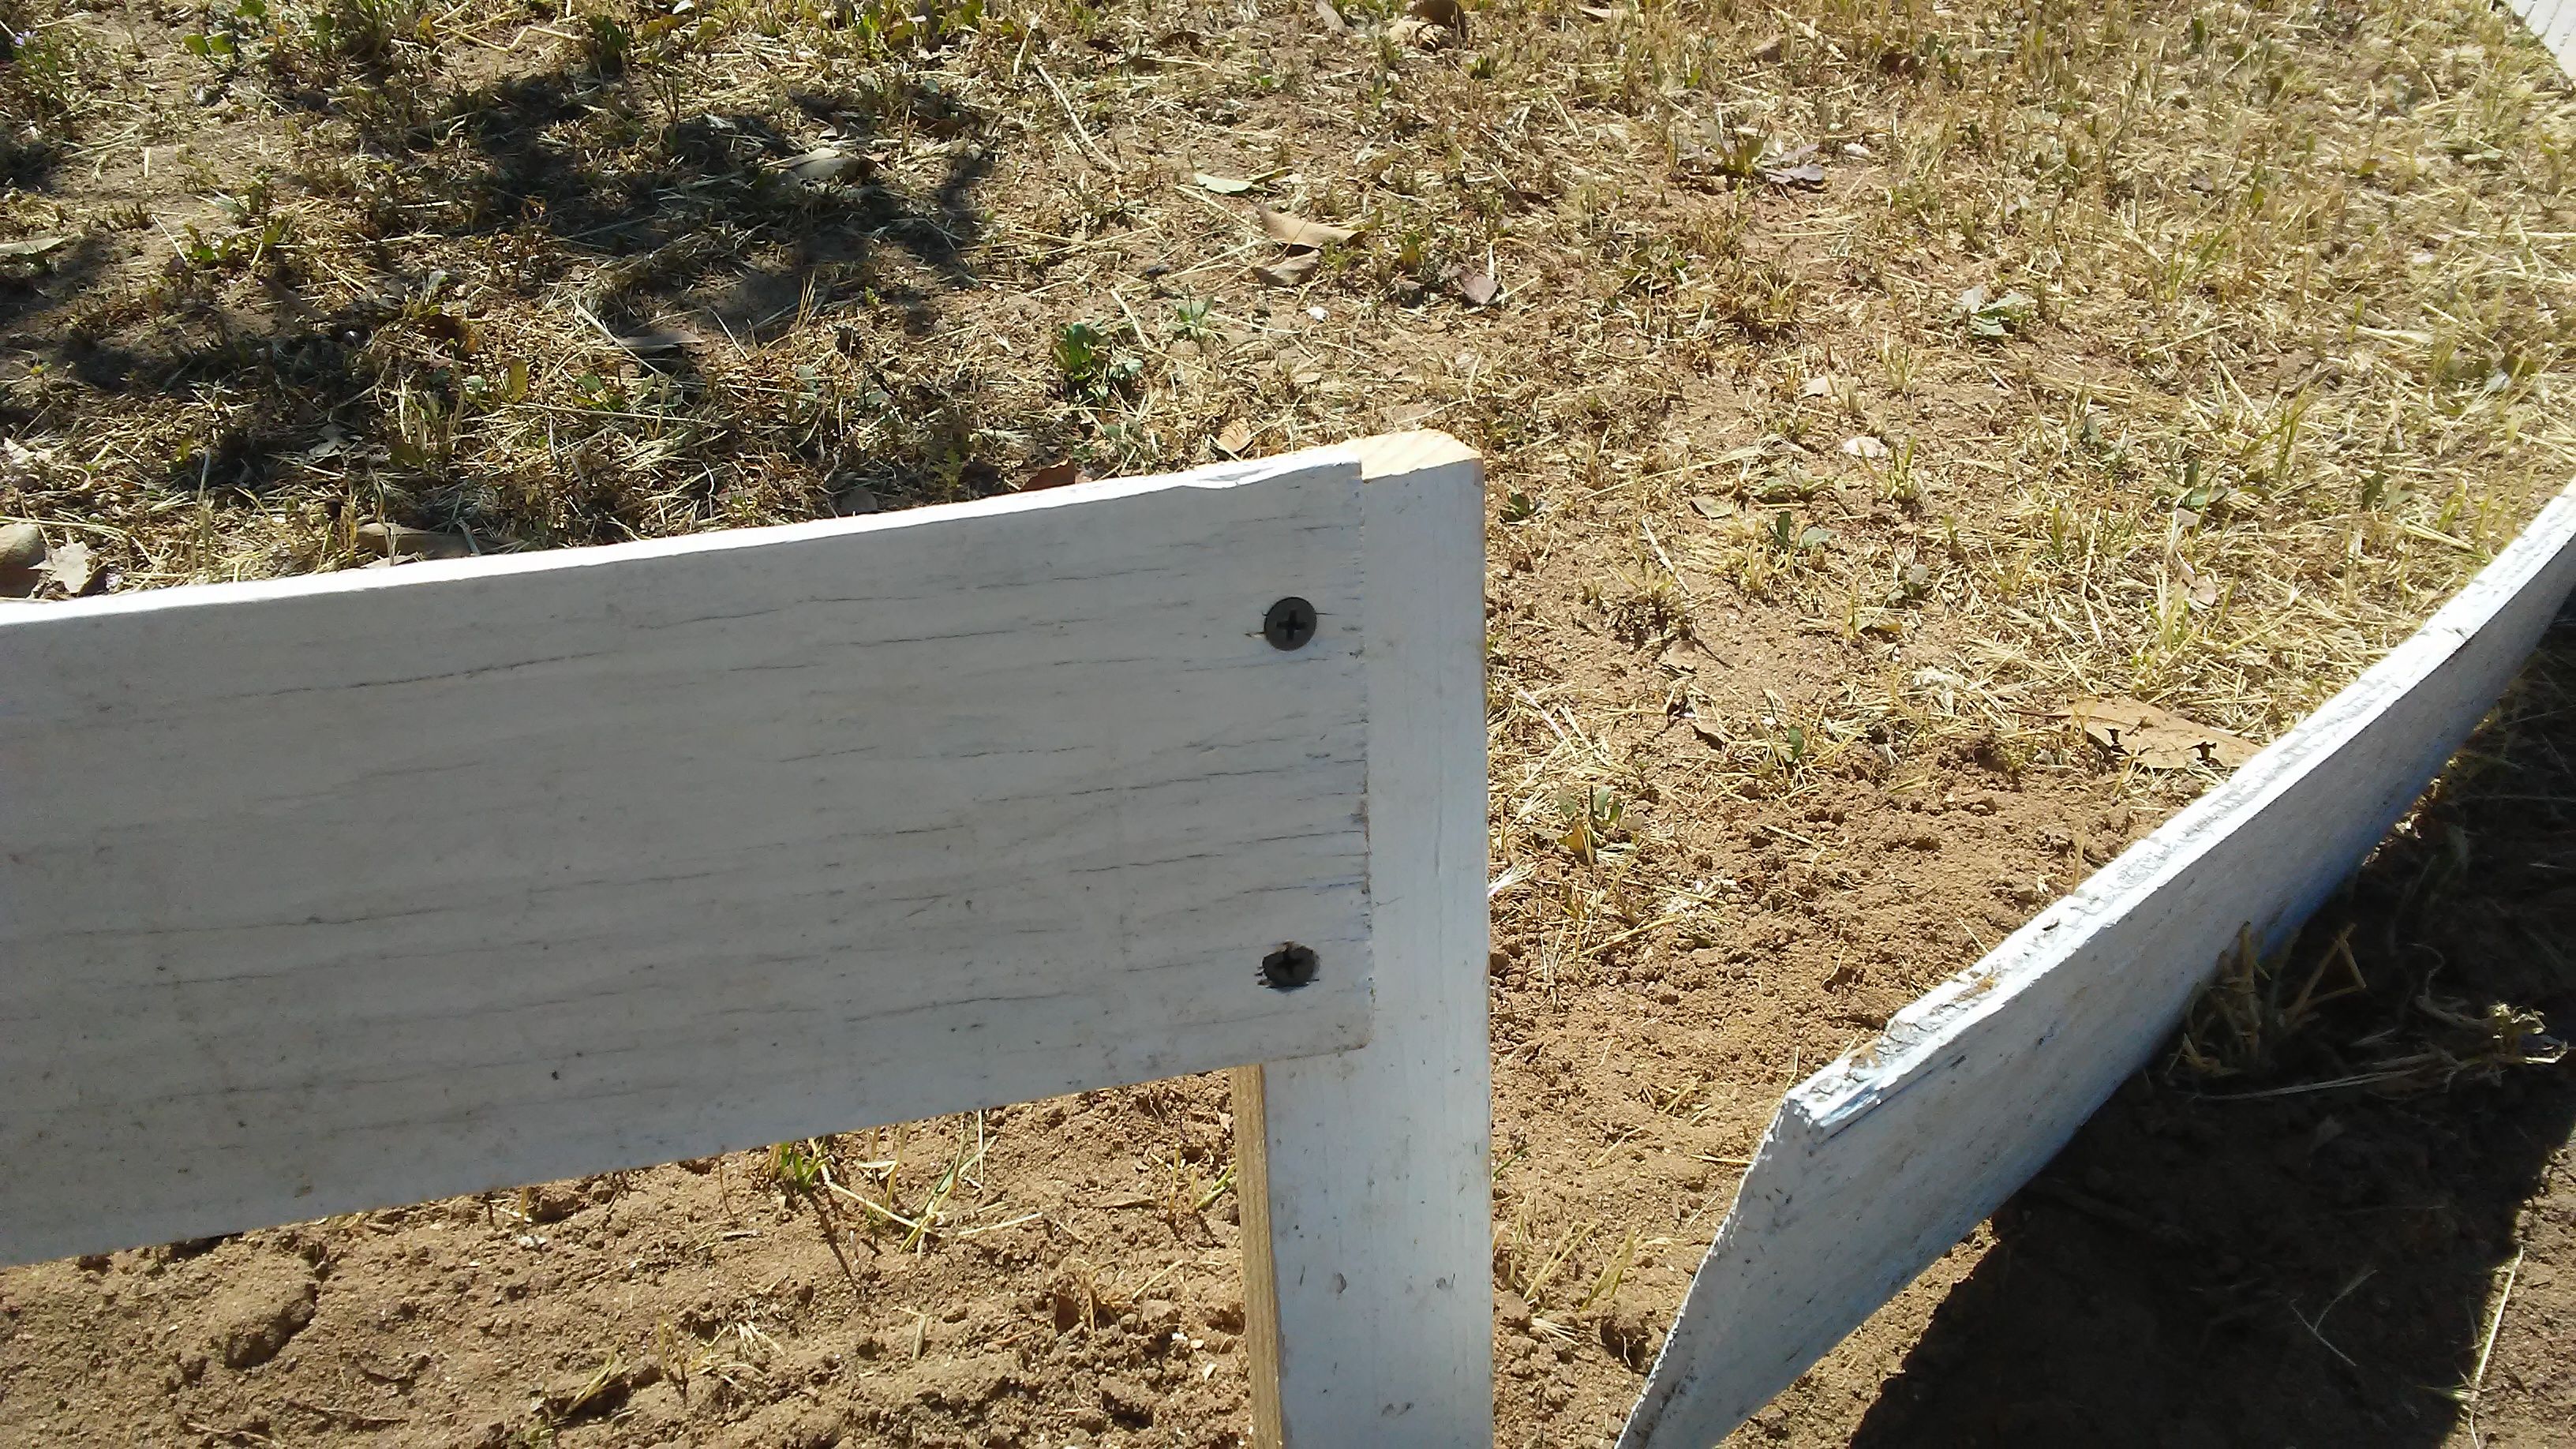
I pieced them together by drilling pilot holes and then screwing the boards to the center of the stakes.
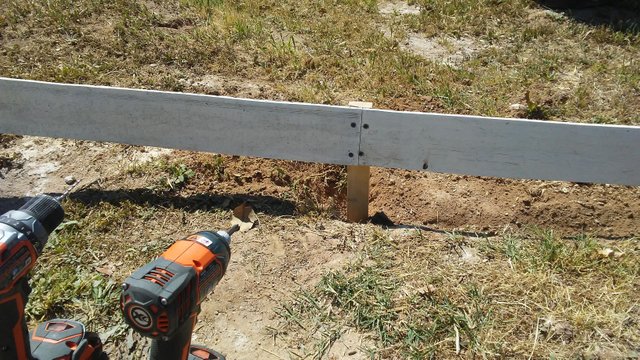
After the first piece of edging is attached, I connect the next one and screwed that one in too.
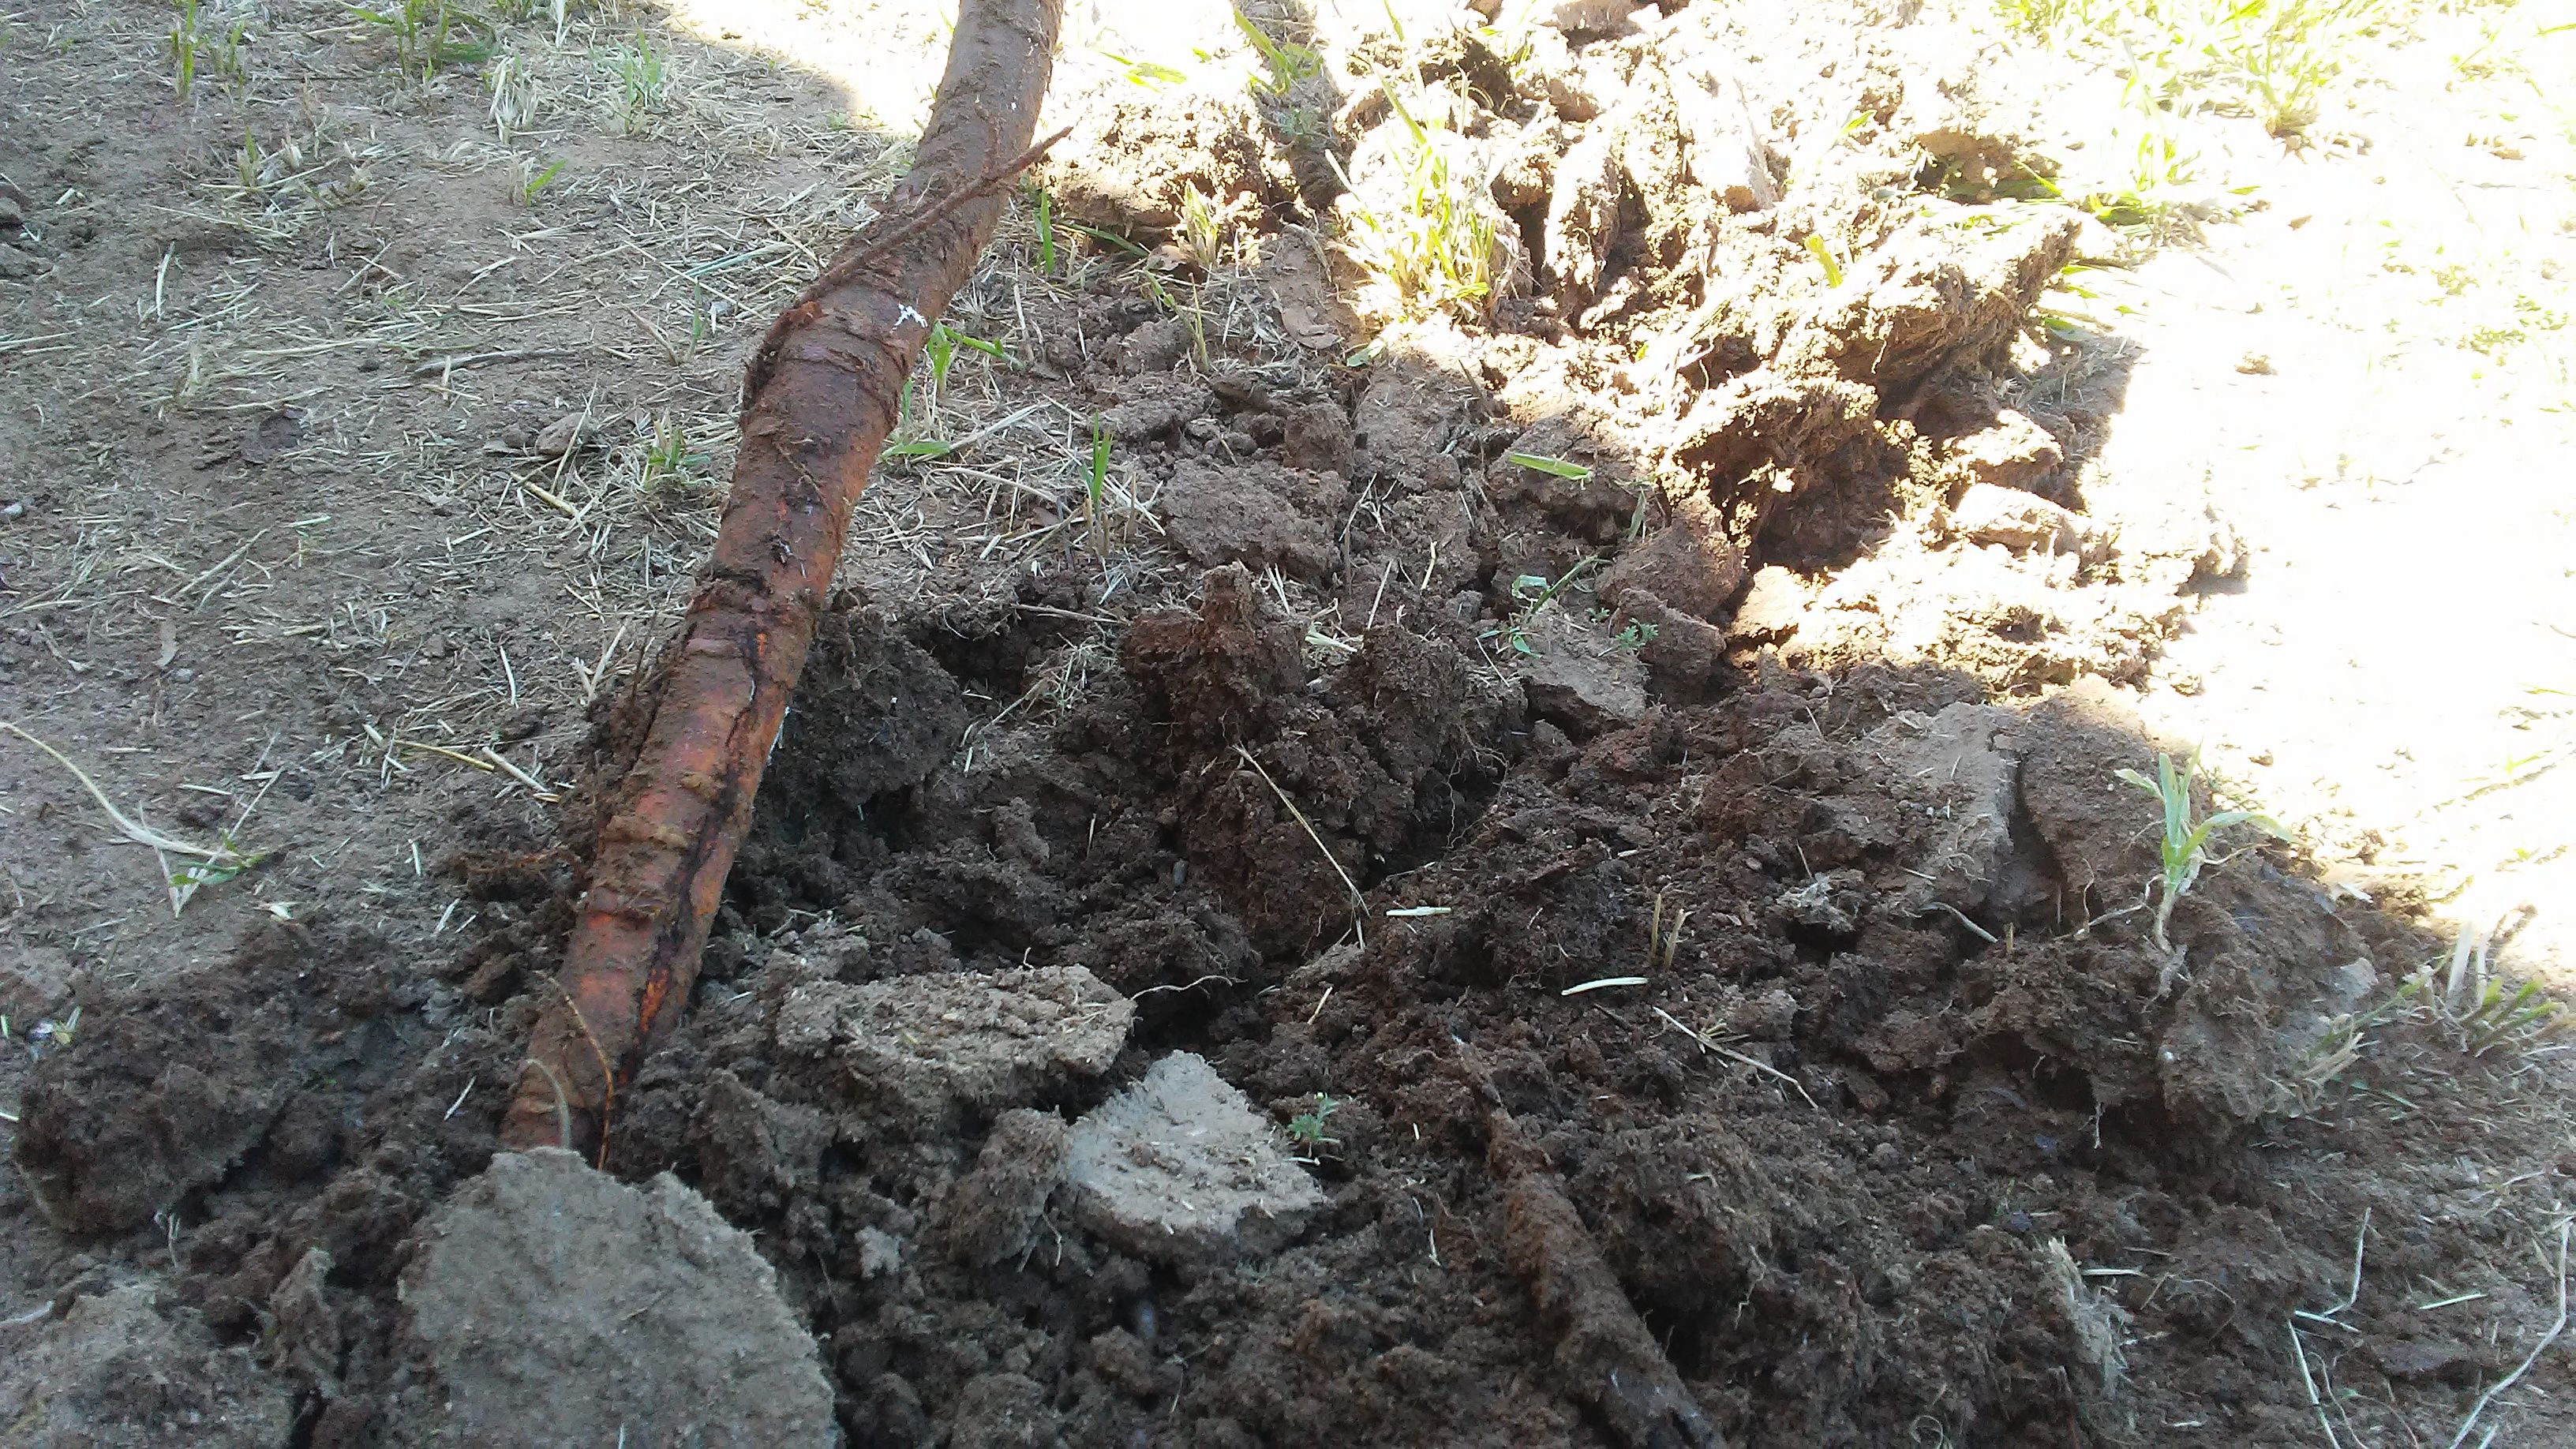
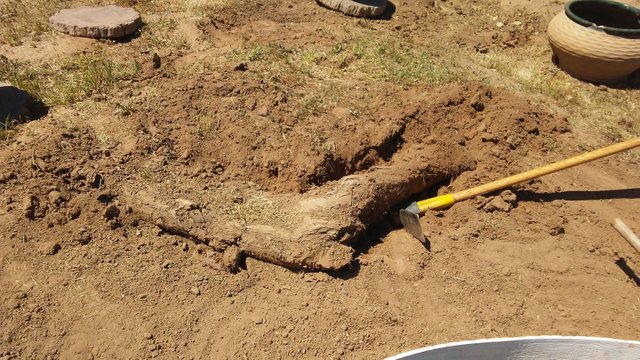
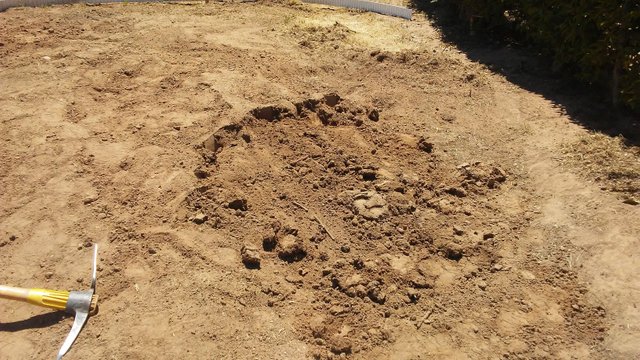
Roots are something that has plagued me for years. No matter where I live - whenever I work in the yard , inevitably I come across massive roots and this place is no different. I found many roots but I was not surprised - after all - we had cut down two extremely large trees and I knew the ground would be full of them.
This is pretty typical of the kind of roots I usually find. They start off as small stubs sticking out of the ground, but as I start to pull on them - they reveal themselves to be much longer than expected and in many cases, connected to other really long roots.
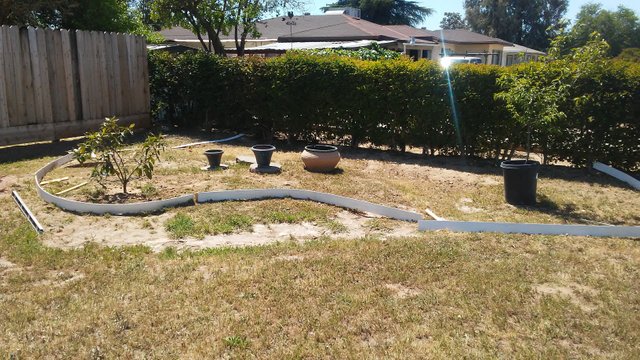
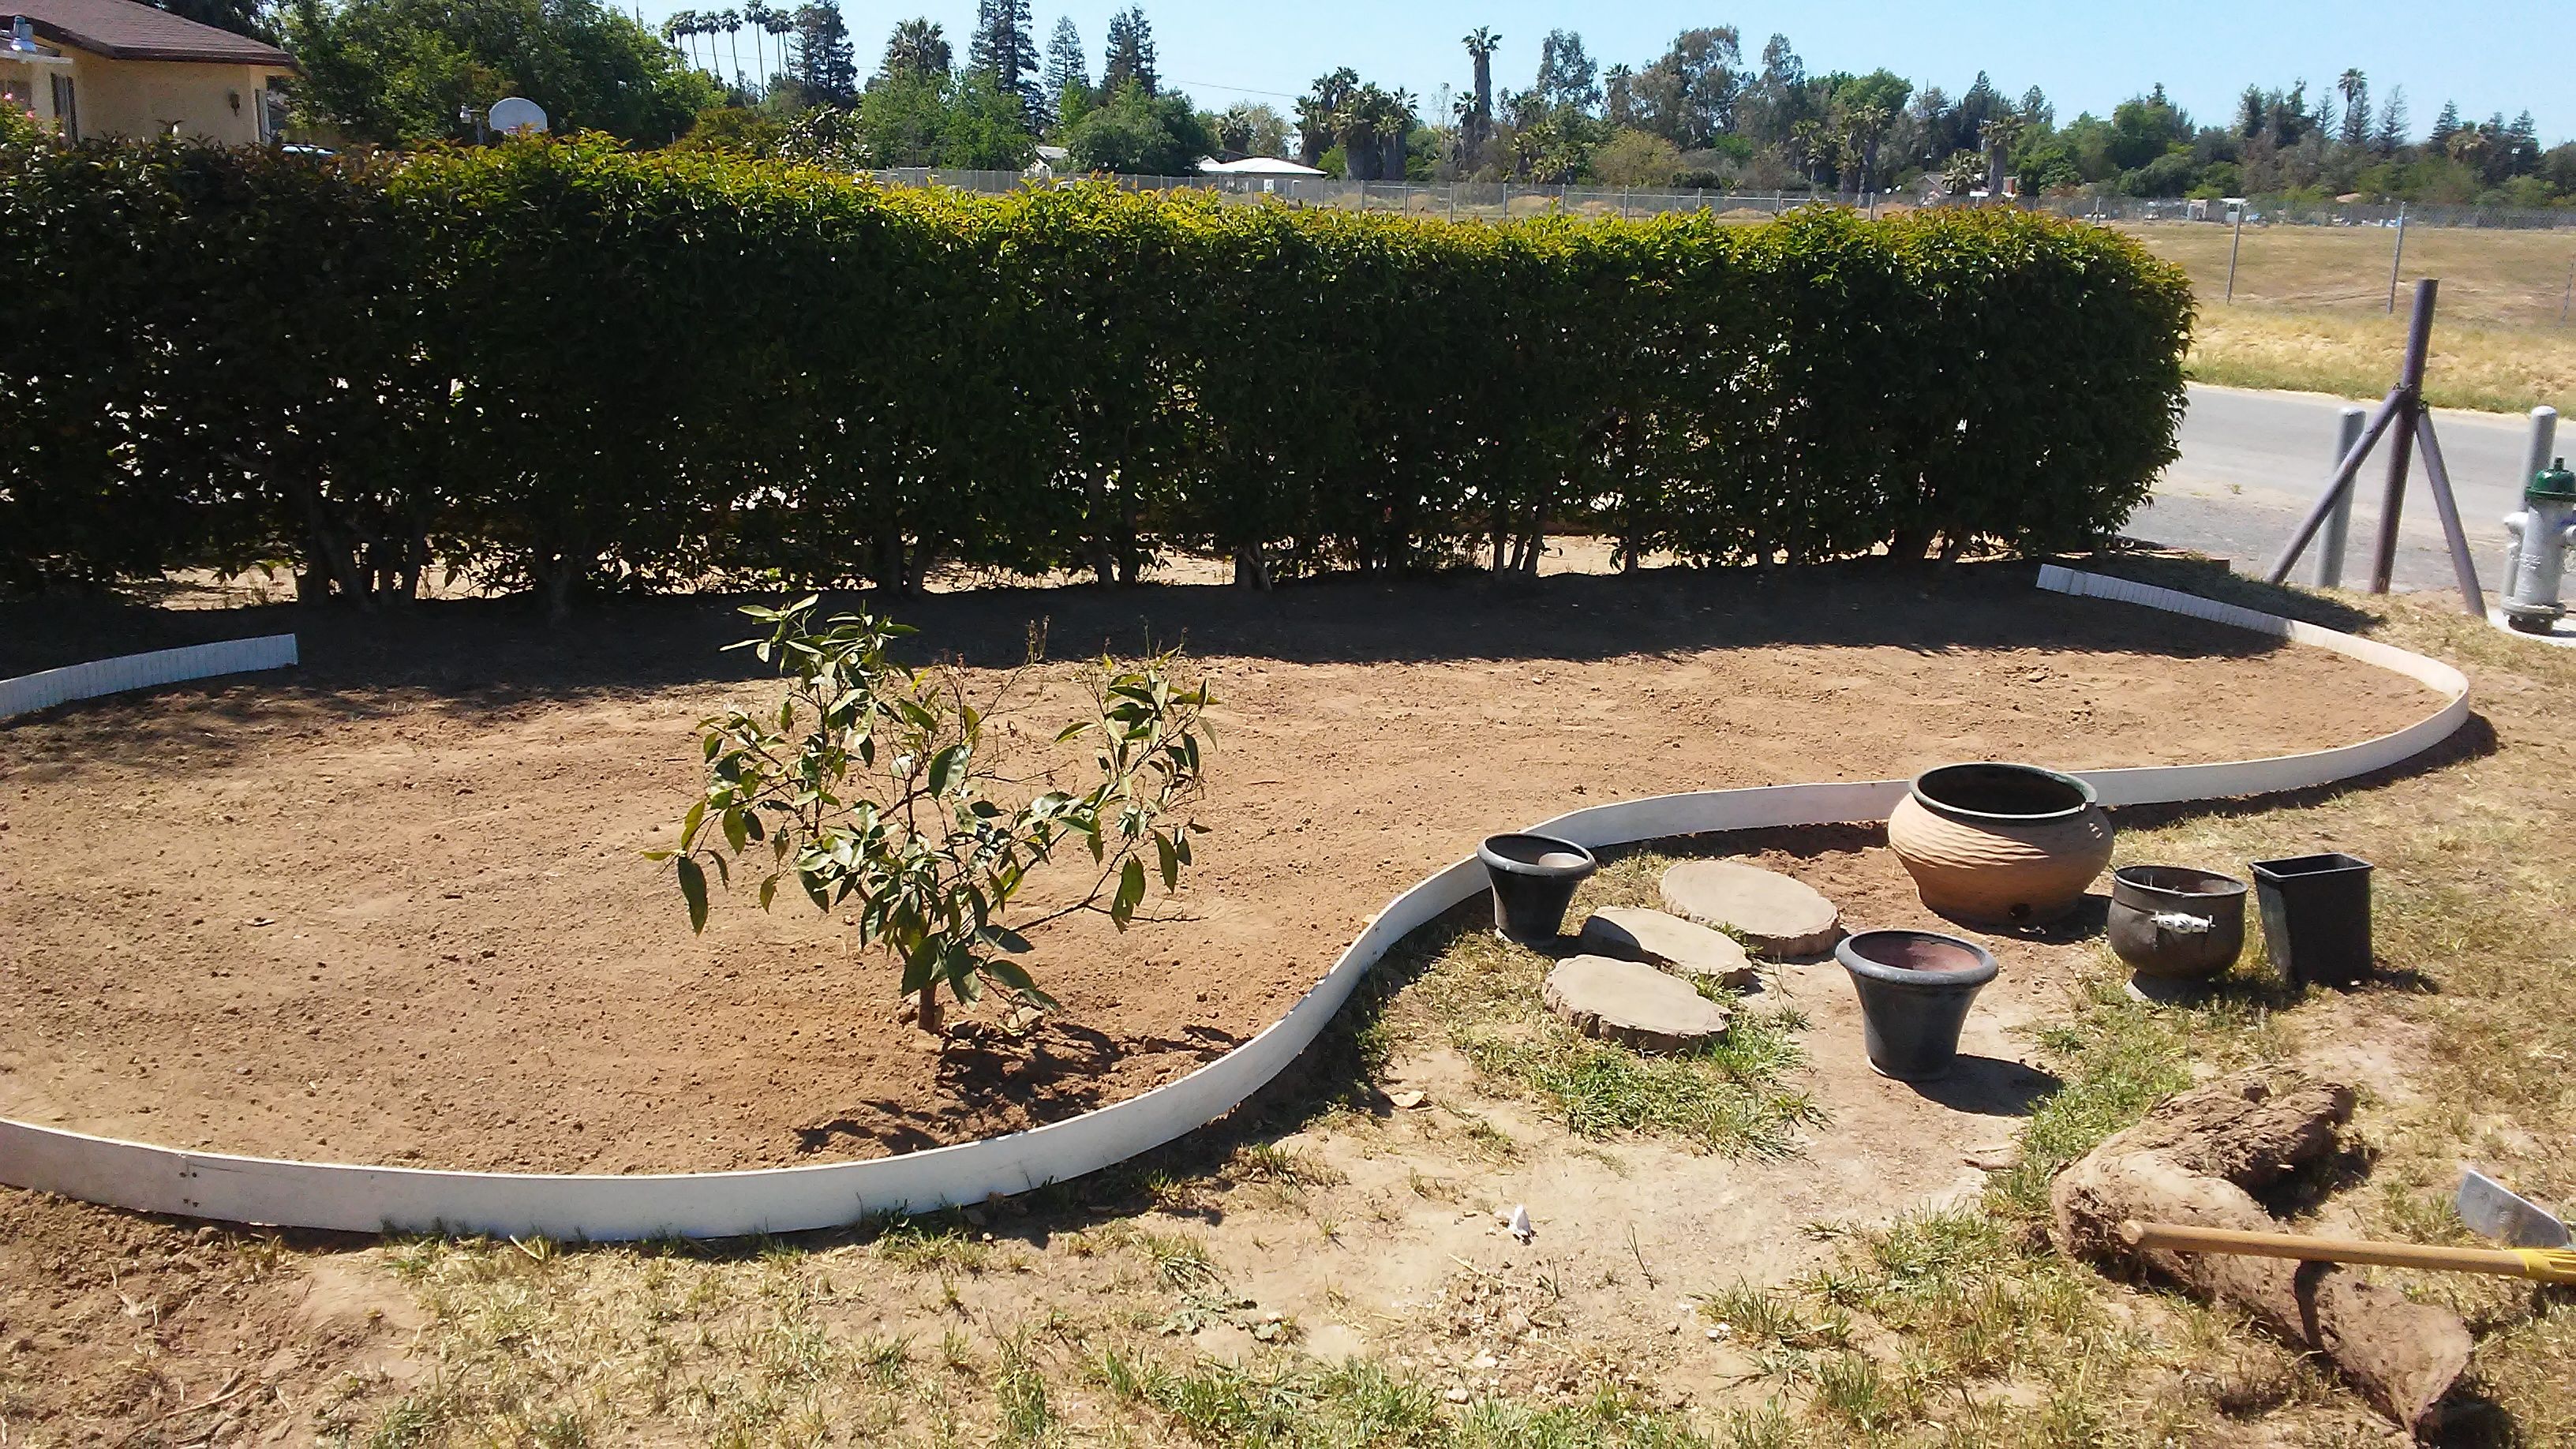
Here it is fully assembled - you can see how there are gaps under some parts of it - this is because the ground in uneven and is also sloping downward. You can also tell that the left side has much more dirt than the right side - we will be moving dirt from the high areas to the low ares to make it more level. These gaps at the bottom will all be filled in with dirt and grass.
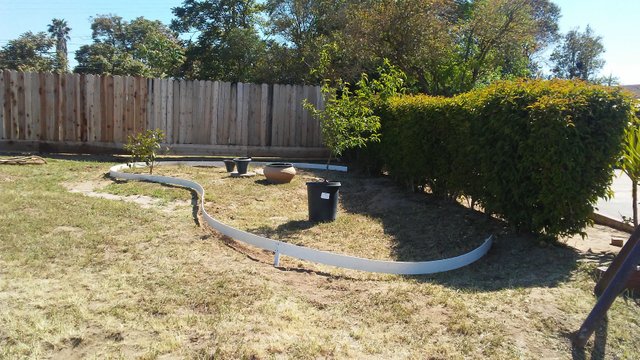
Another angle showing how high the edging had to come up to be level with rest of it.
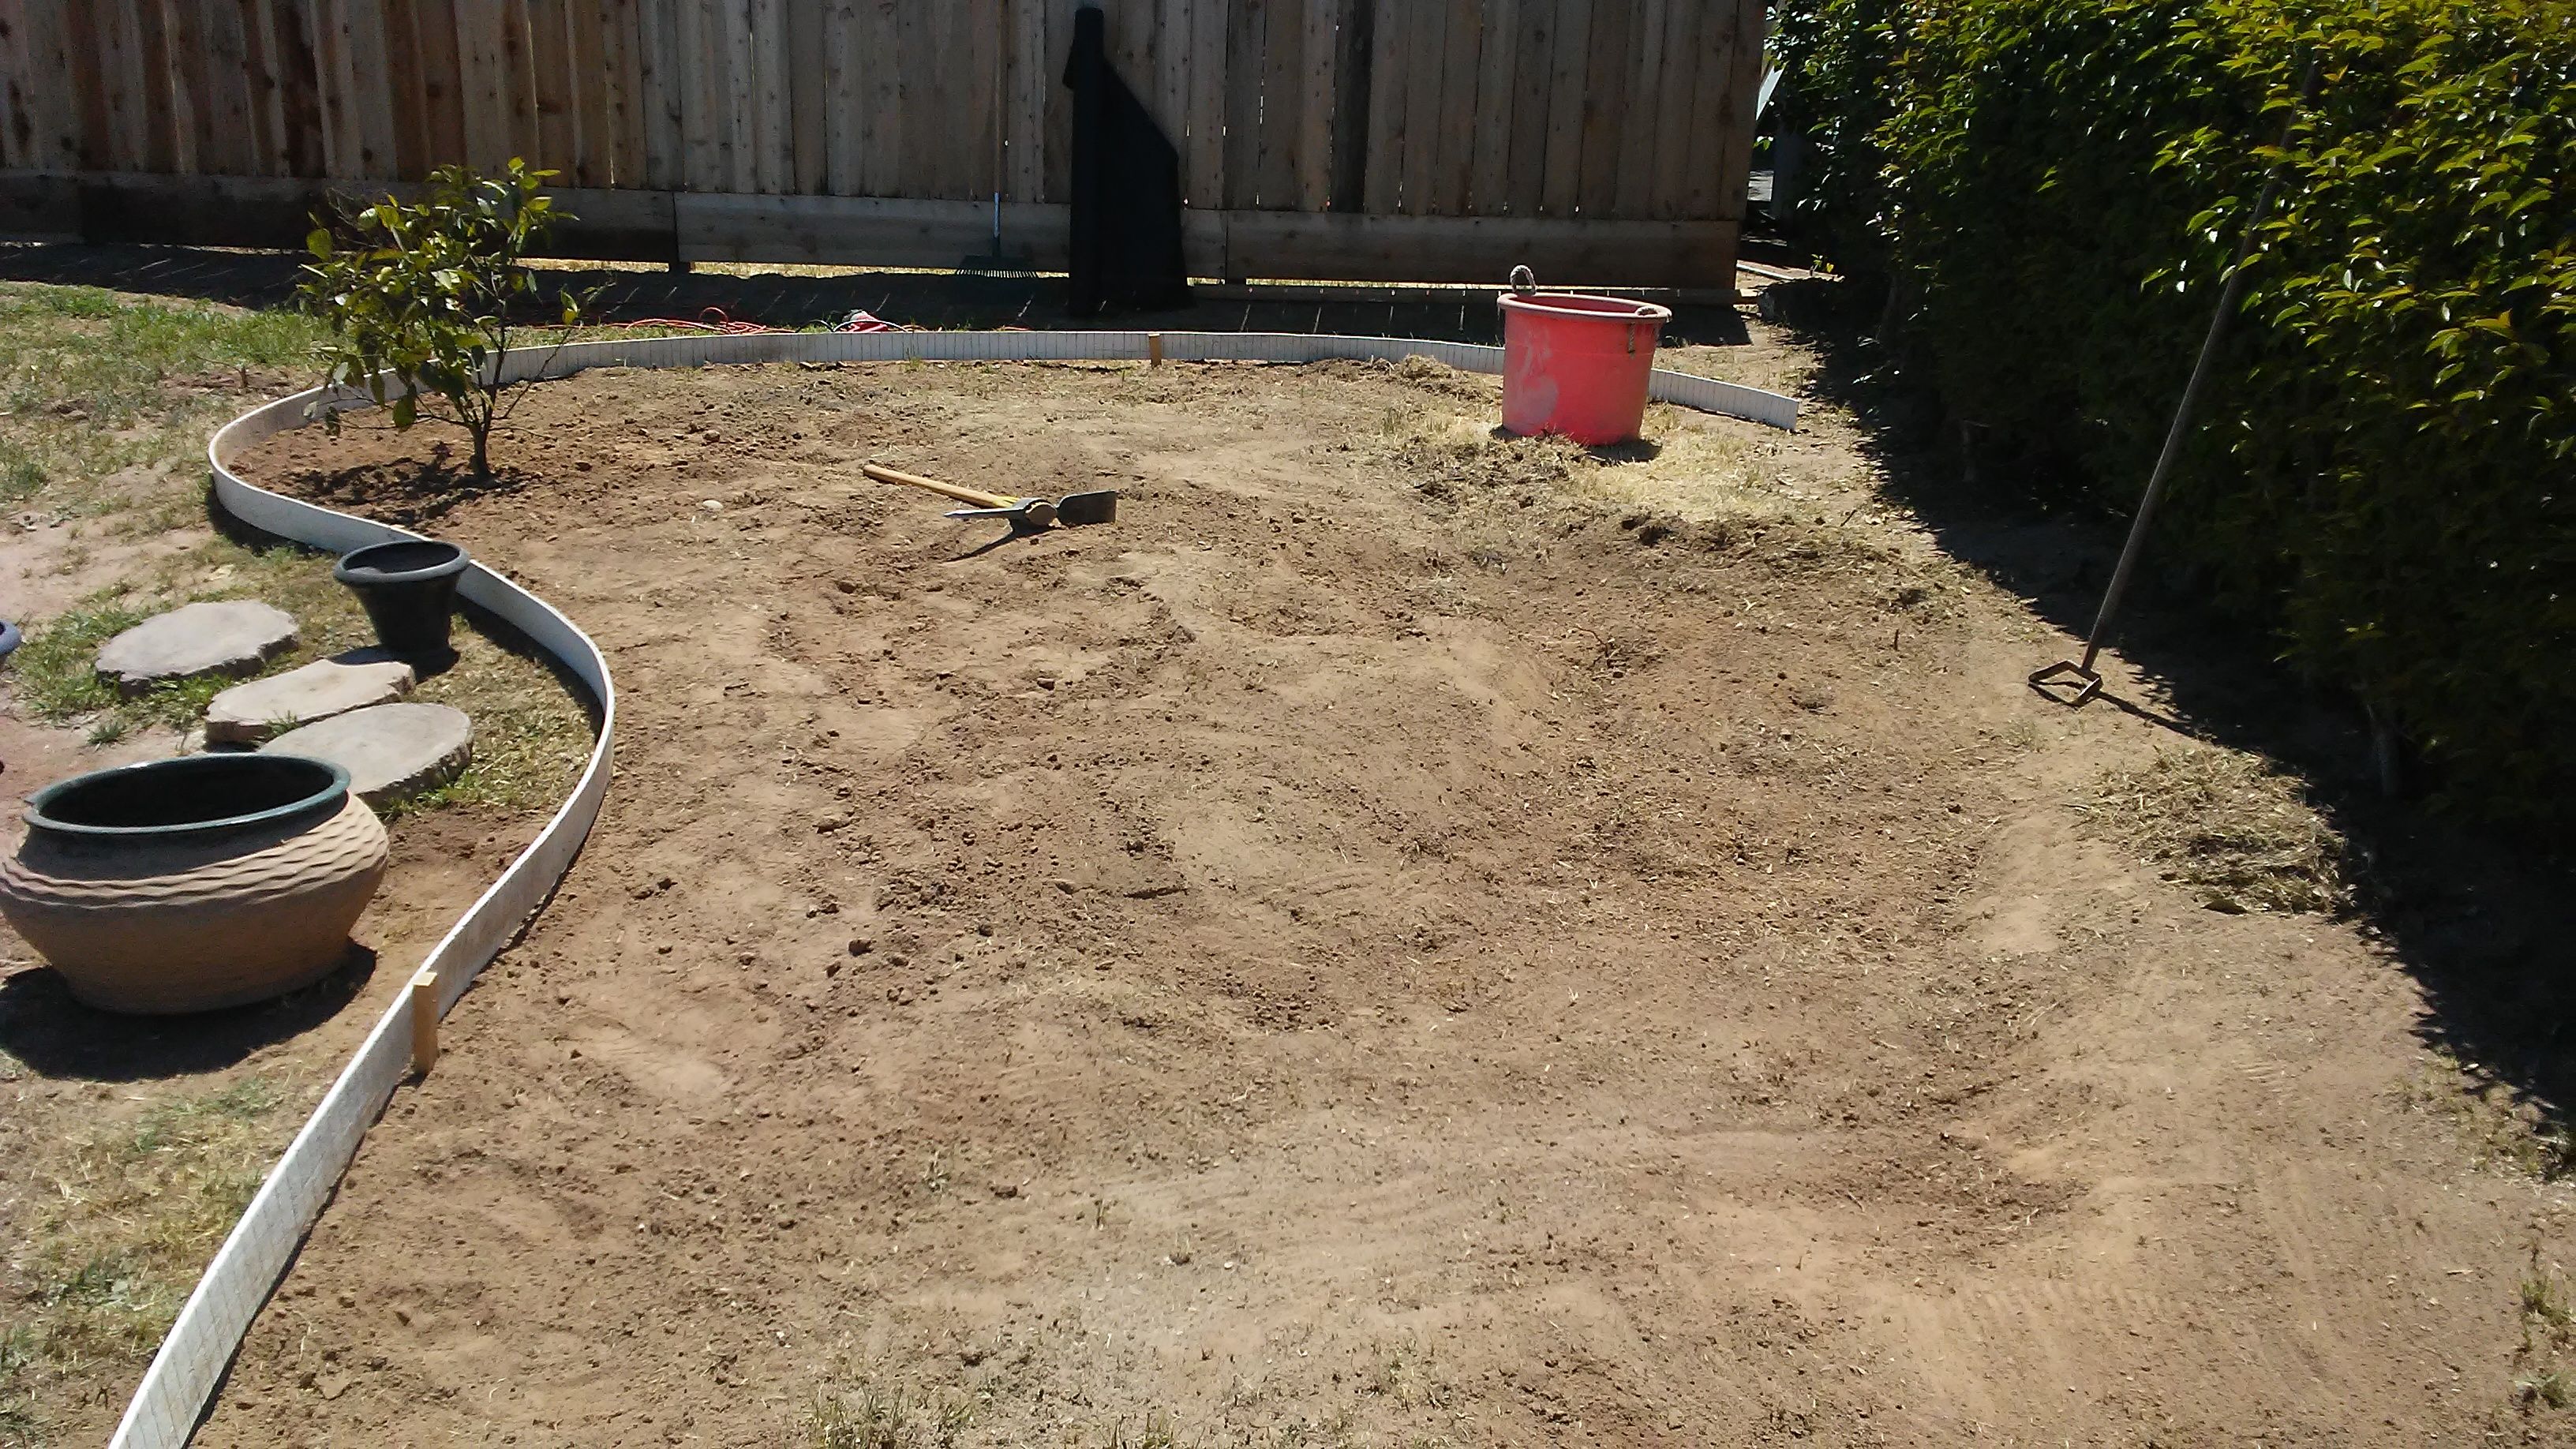
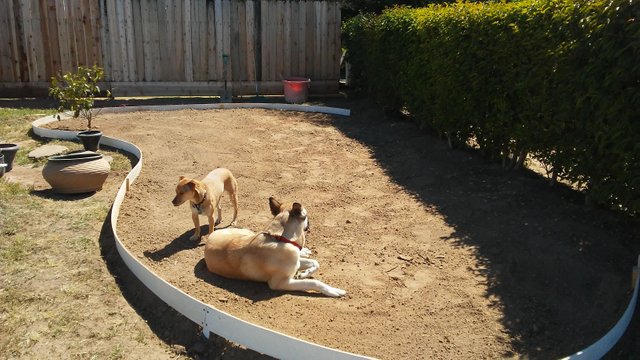
Now we had a starting point and began putting out pots to try to get an idea of where we wanted to place things . This is always the fun part where we get to be really creative.
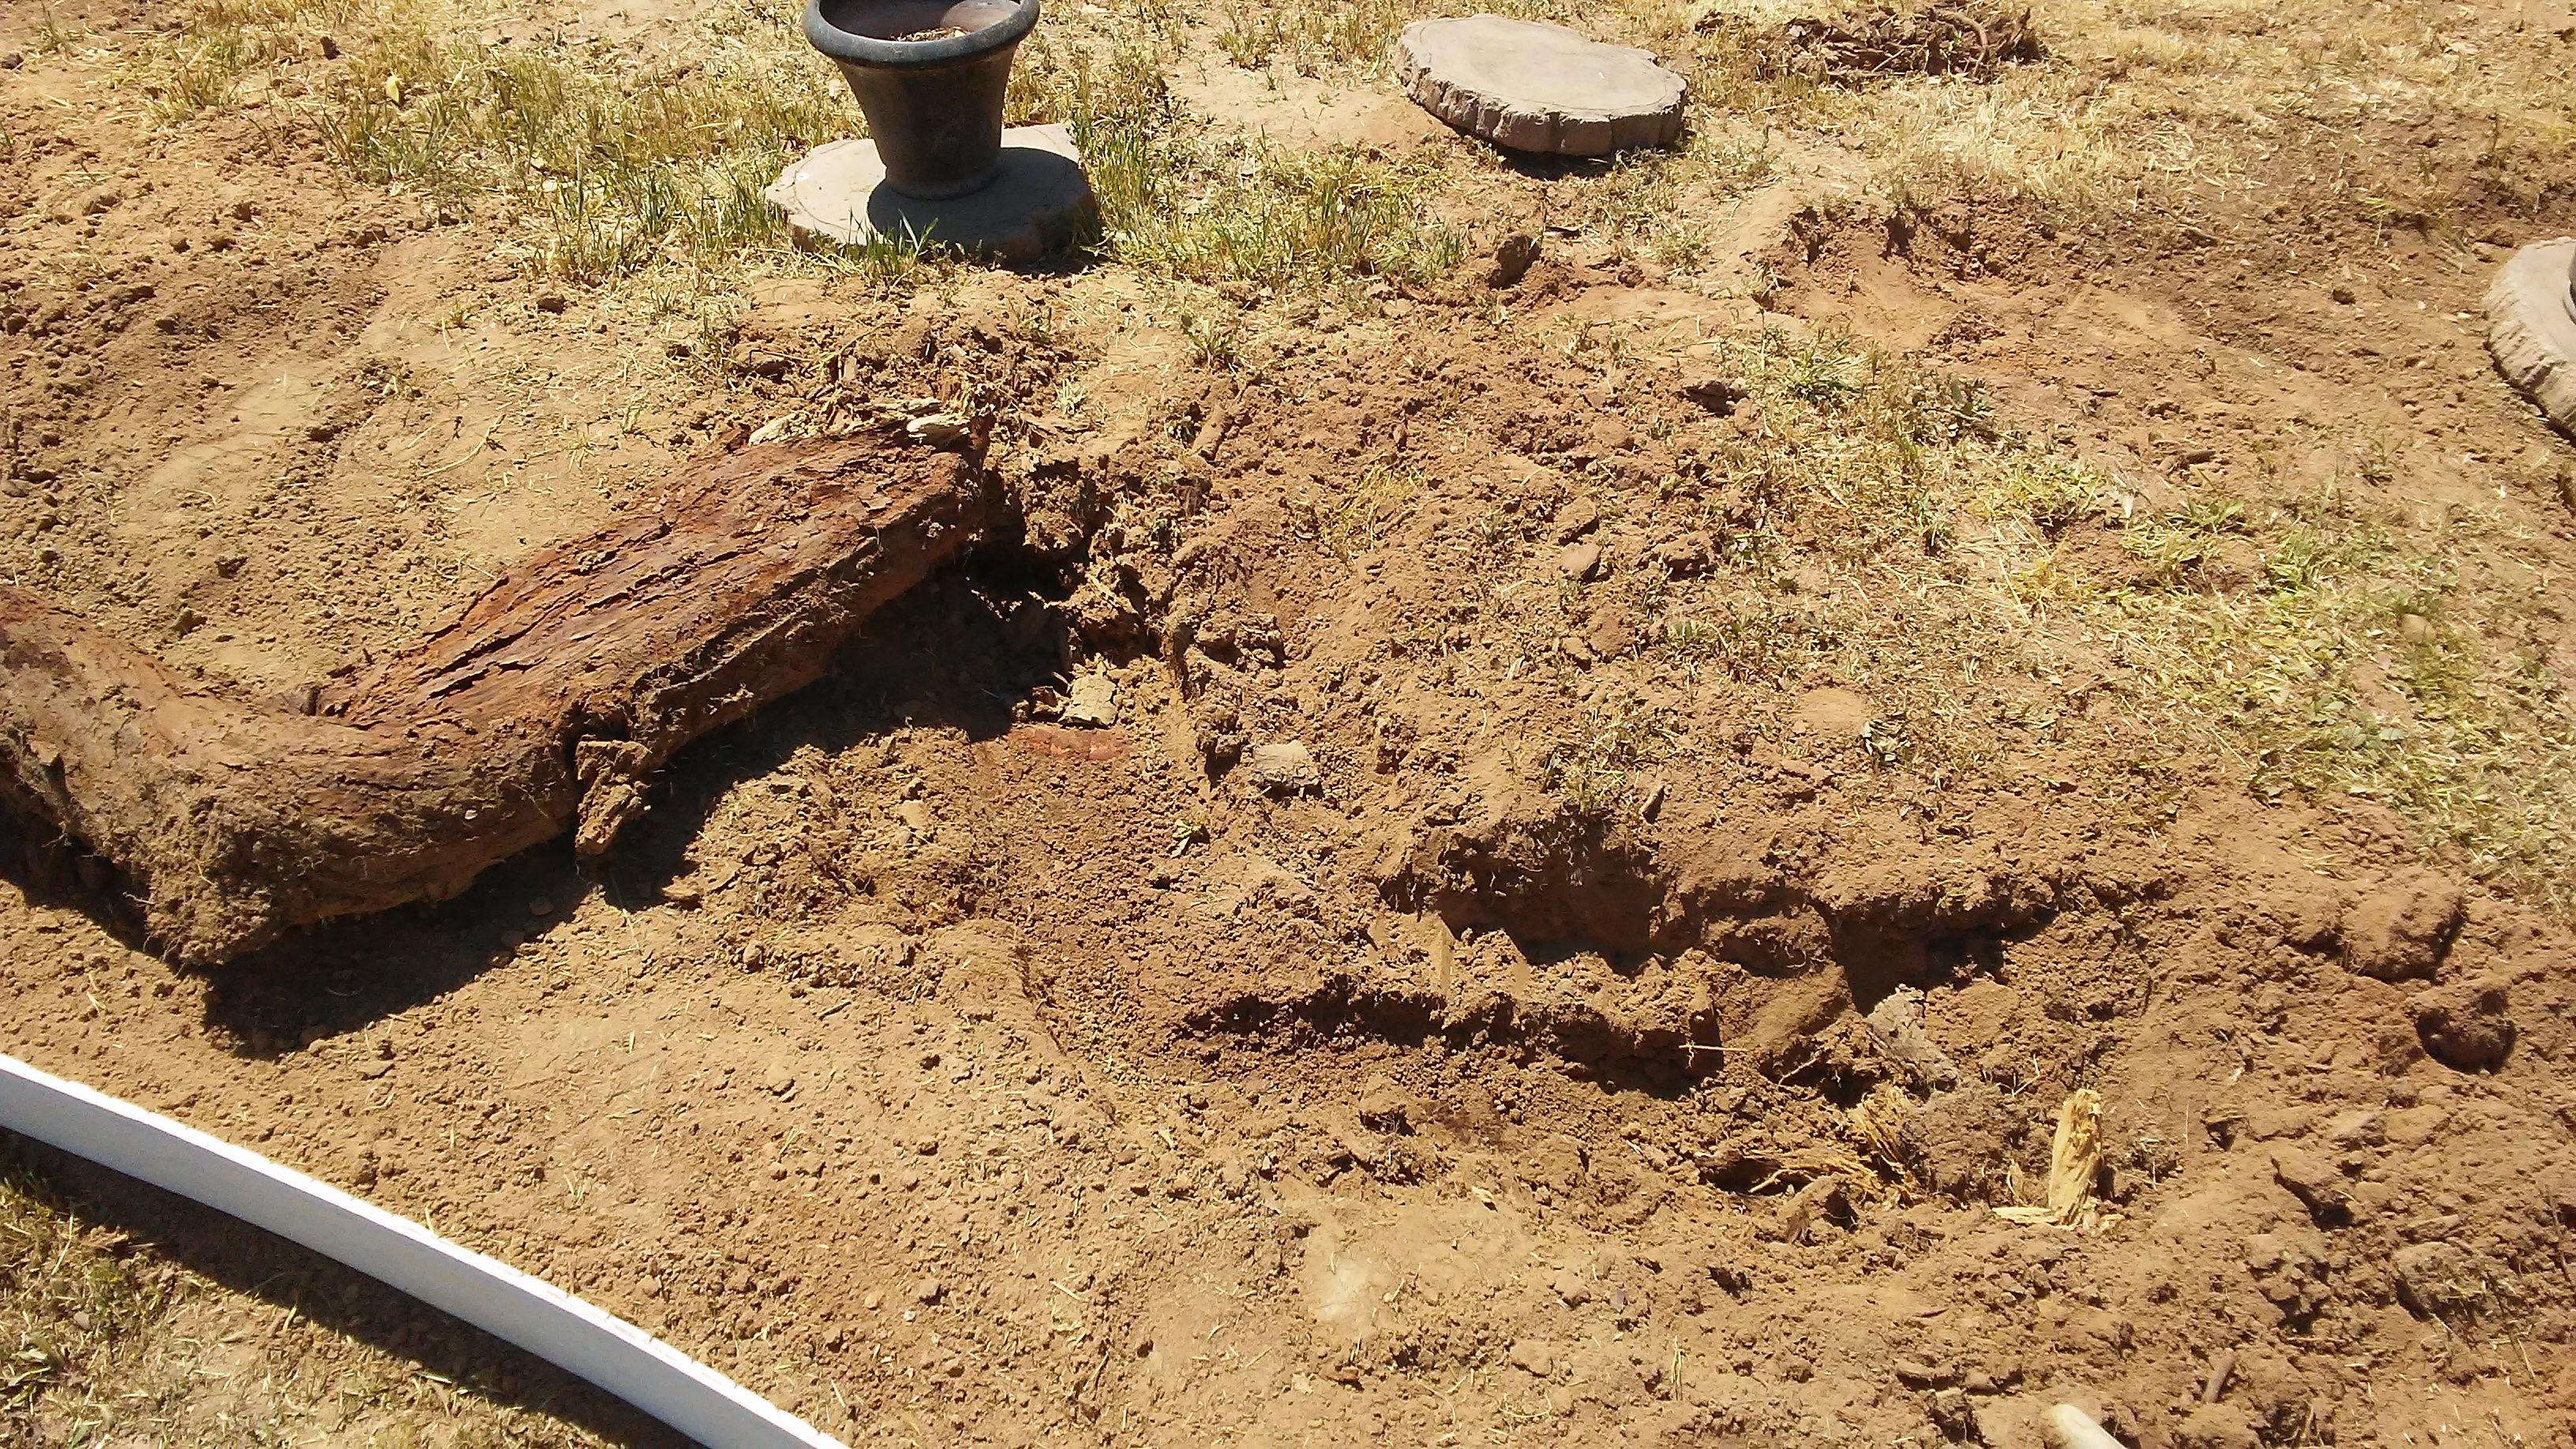
More roots!
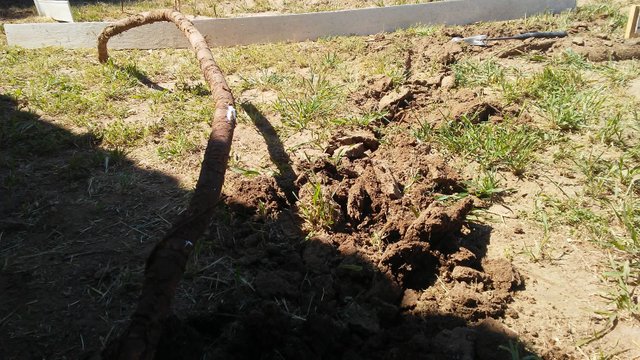
Another large root rears its ugly head - luckily - this particular root was severely rotted and came out with very little resistance.
Like all the previous roots I reckoned with - it had no choice but to succumb to me and my Mattock pickaxe
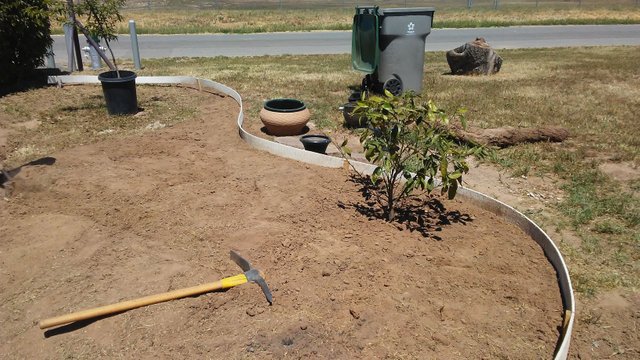
With the garden enclosed and the major roots removed - I could begin the task of moving dirt around - trying to take from the hig areas and move it to the low areas, filling in holes, pits, and valleys all the while. Once again my handy Mattock pickaxe helps me get the job done.
Here we have gotten the space cleared of all the weeds , dead grass, roots, large rocks and other debris. However , there is still a rather large dip in the yard that needs to be filled in if I want the ground to be leveled.
At it's highest point, I start to bring it down the dirt and move it to the lowest points. I keep looking for any areas that stick up high and level them down .
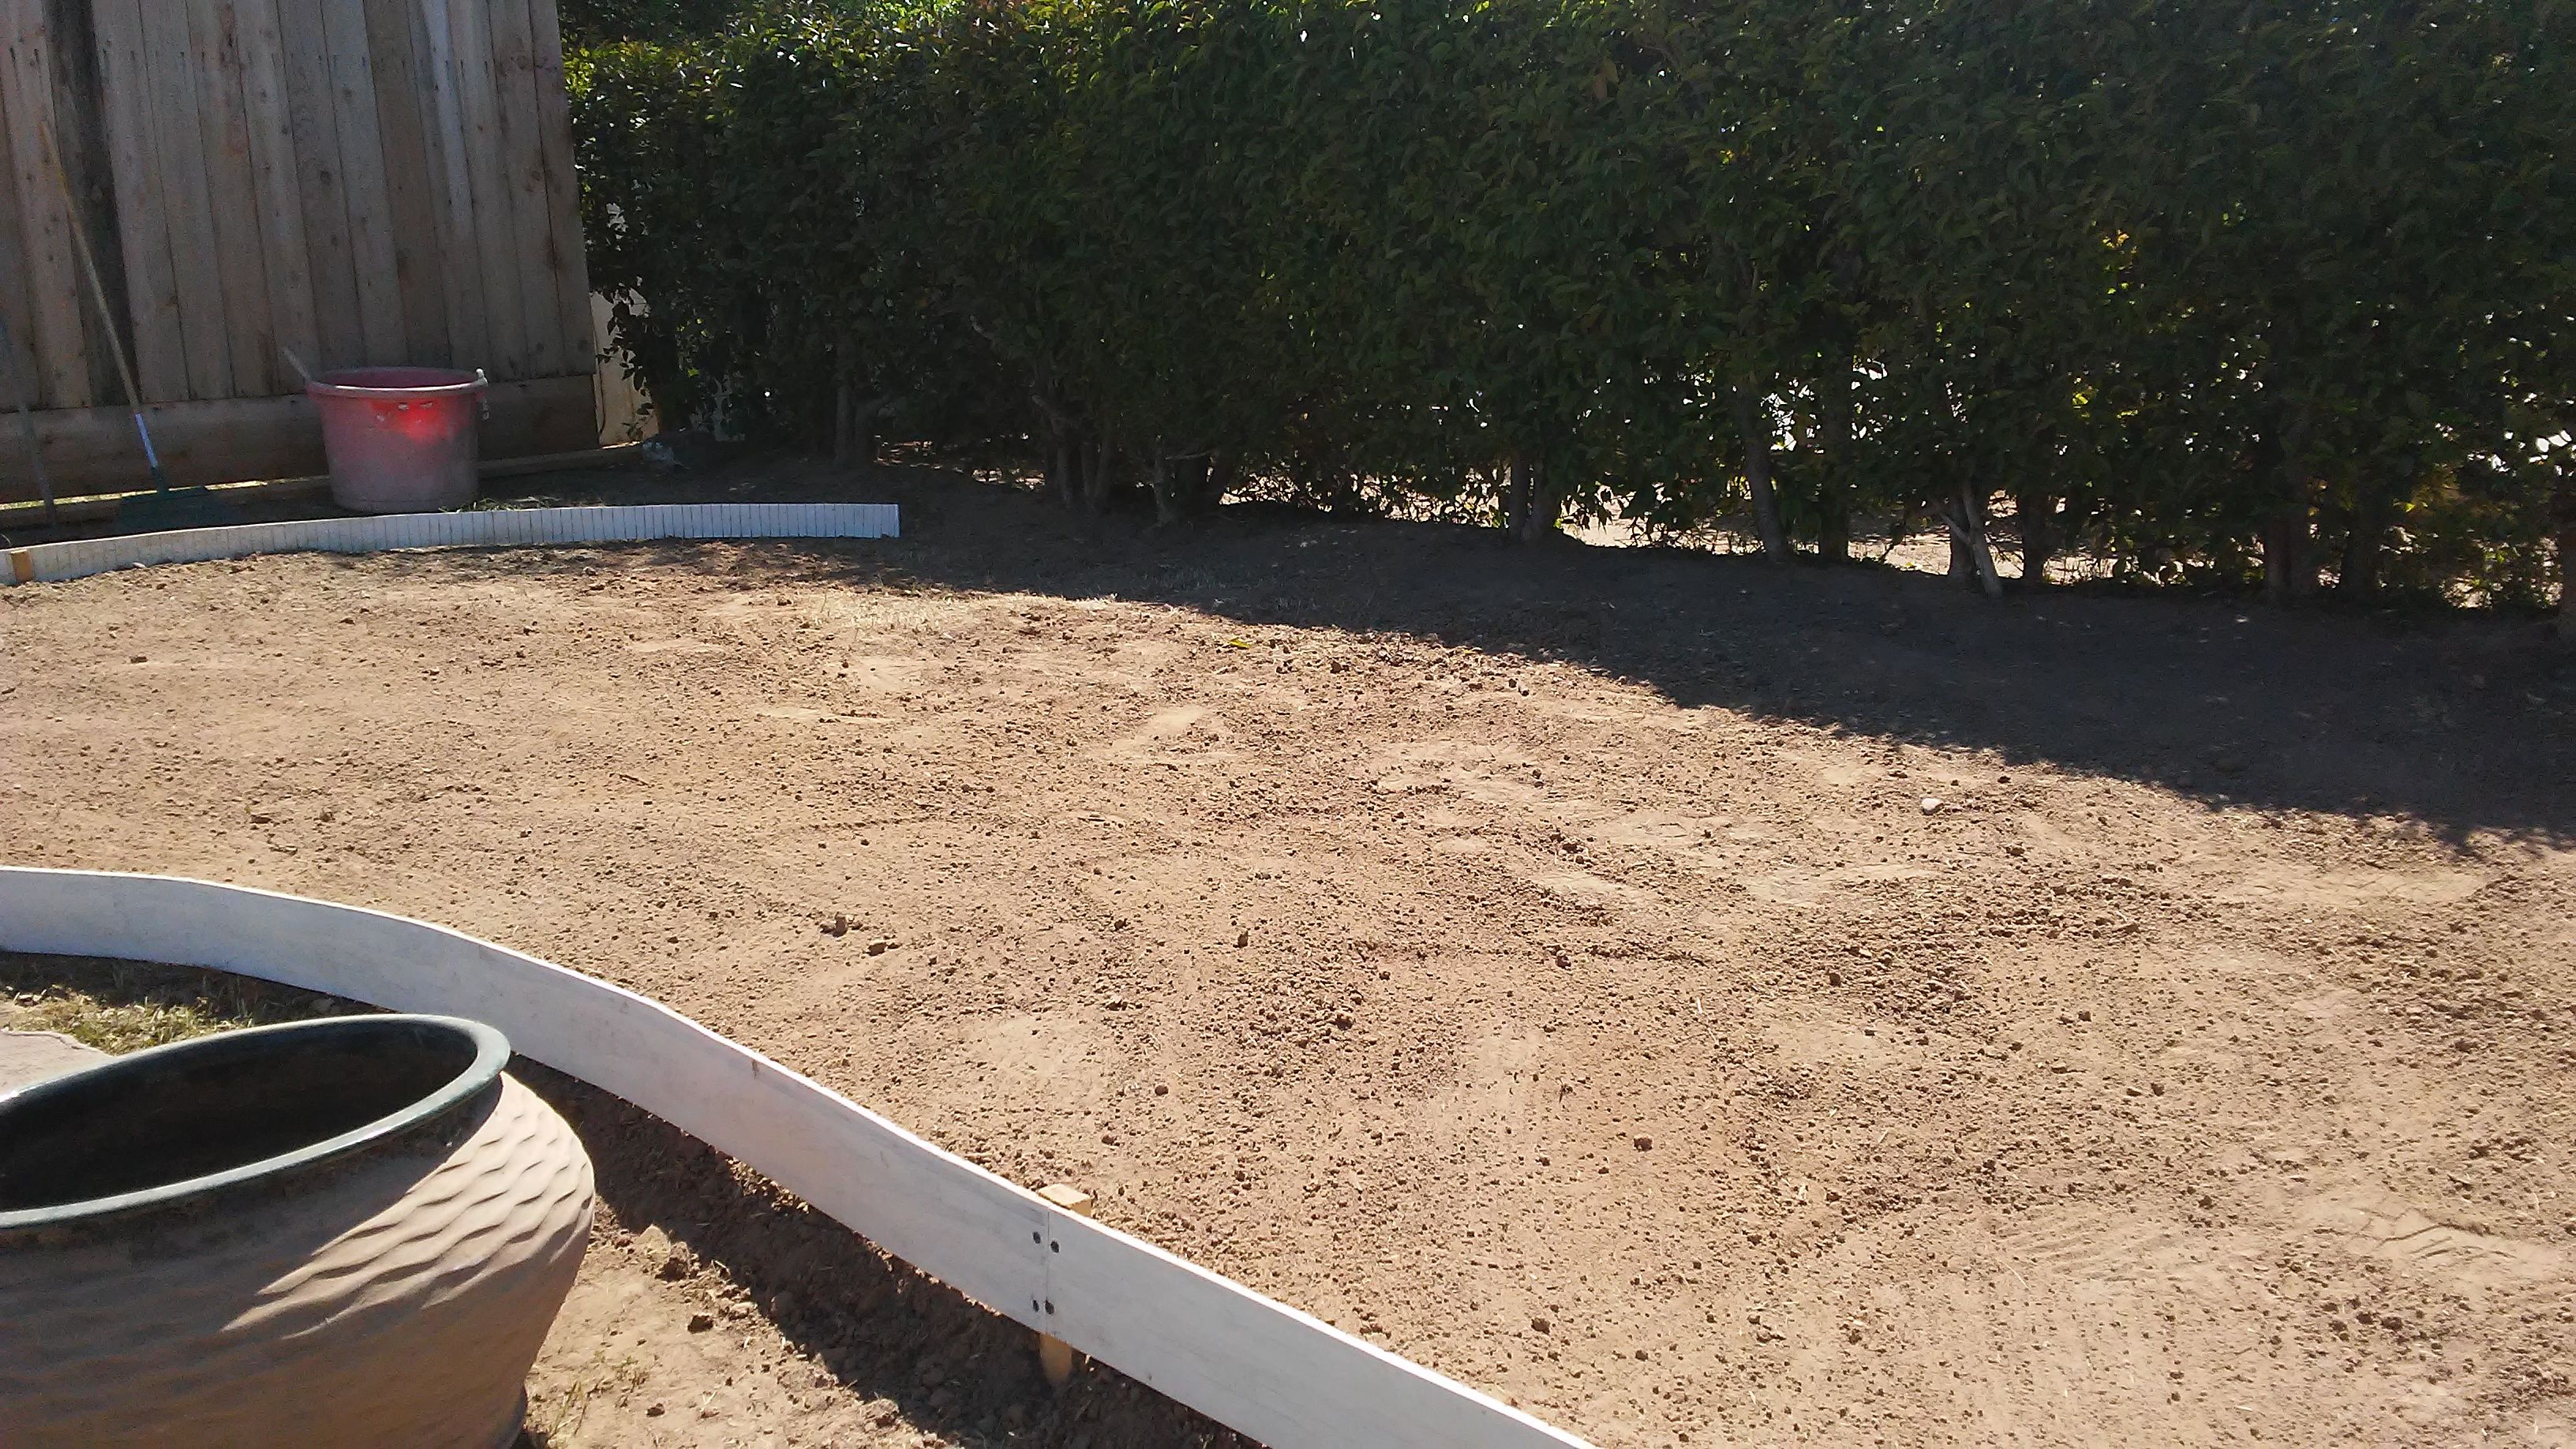
With some work, the dip starts to fade away and the garden starts taking on a smoother more even surface.
The inspectors come by to check on the work - they seem satisfied so far.
And here is what it looks like up to this point. We were pretty happy with the results and called it a day. Much more work to do, but happy to have a smooth level surface to work from.
Now for the fun part!

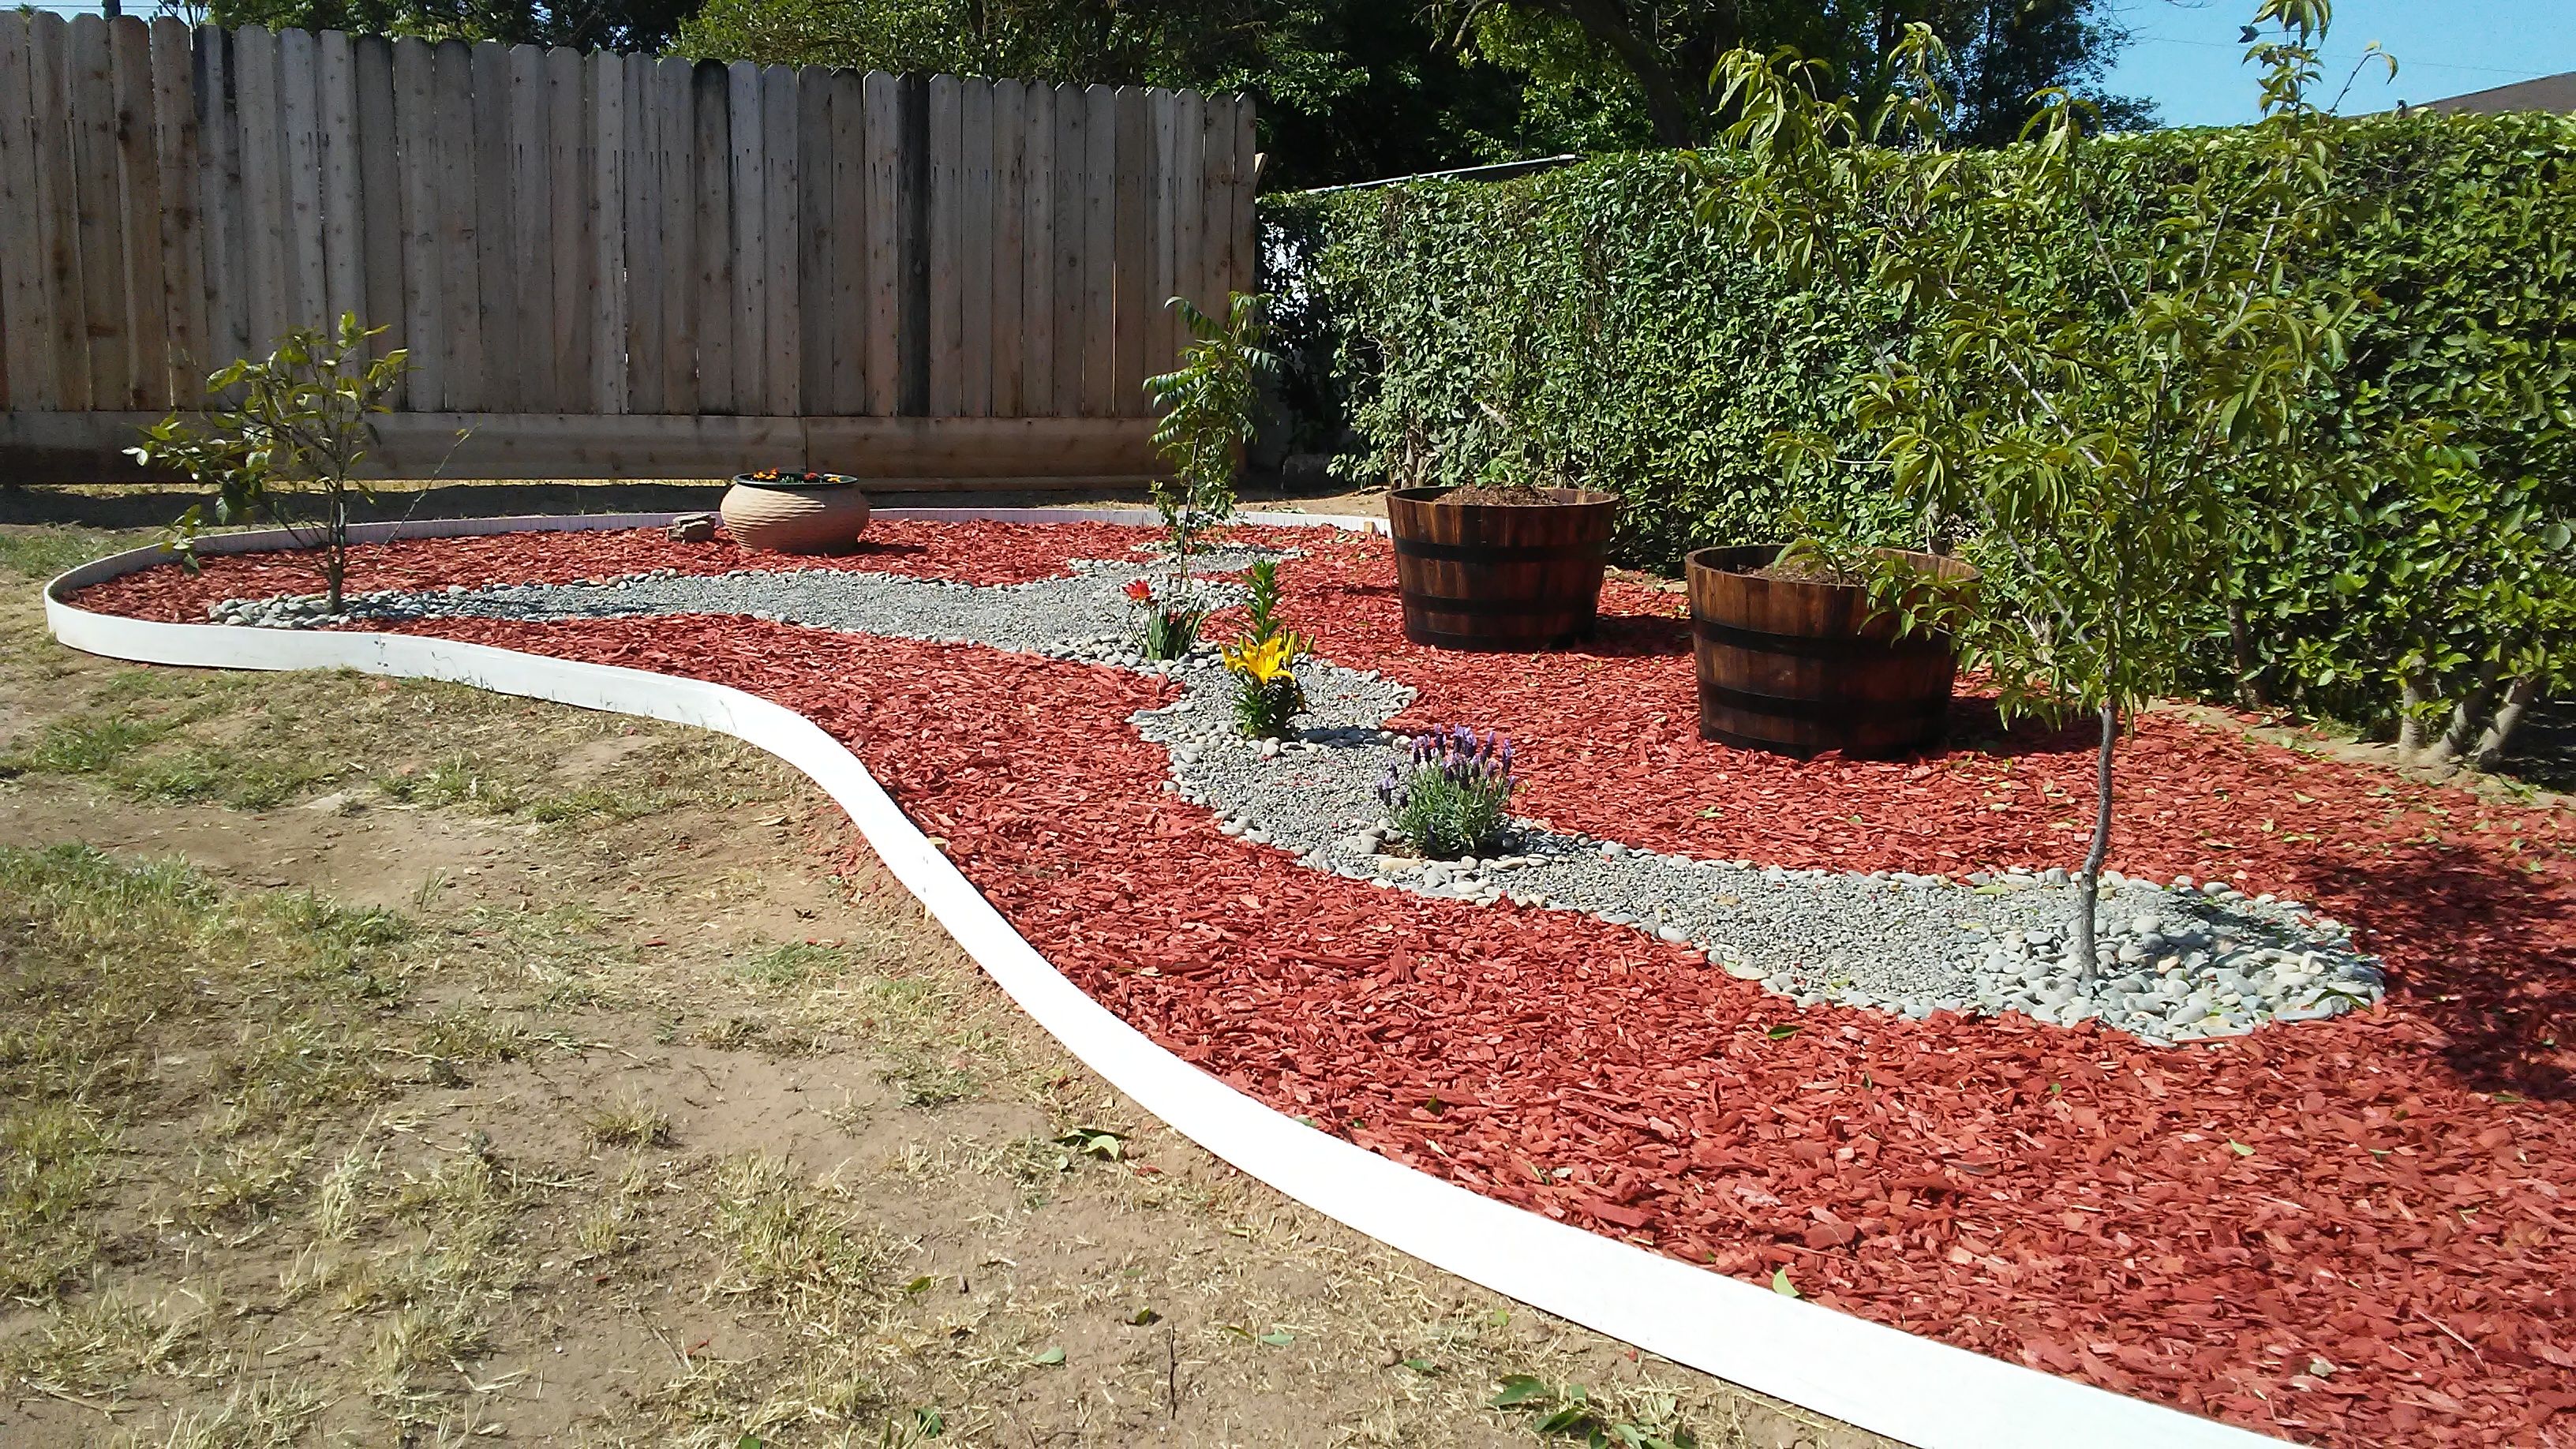
Finally after laying all the groundwork ( literally) we can finally start on the creative part of filling it with mulch and plants.
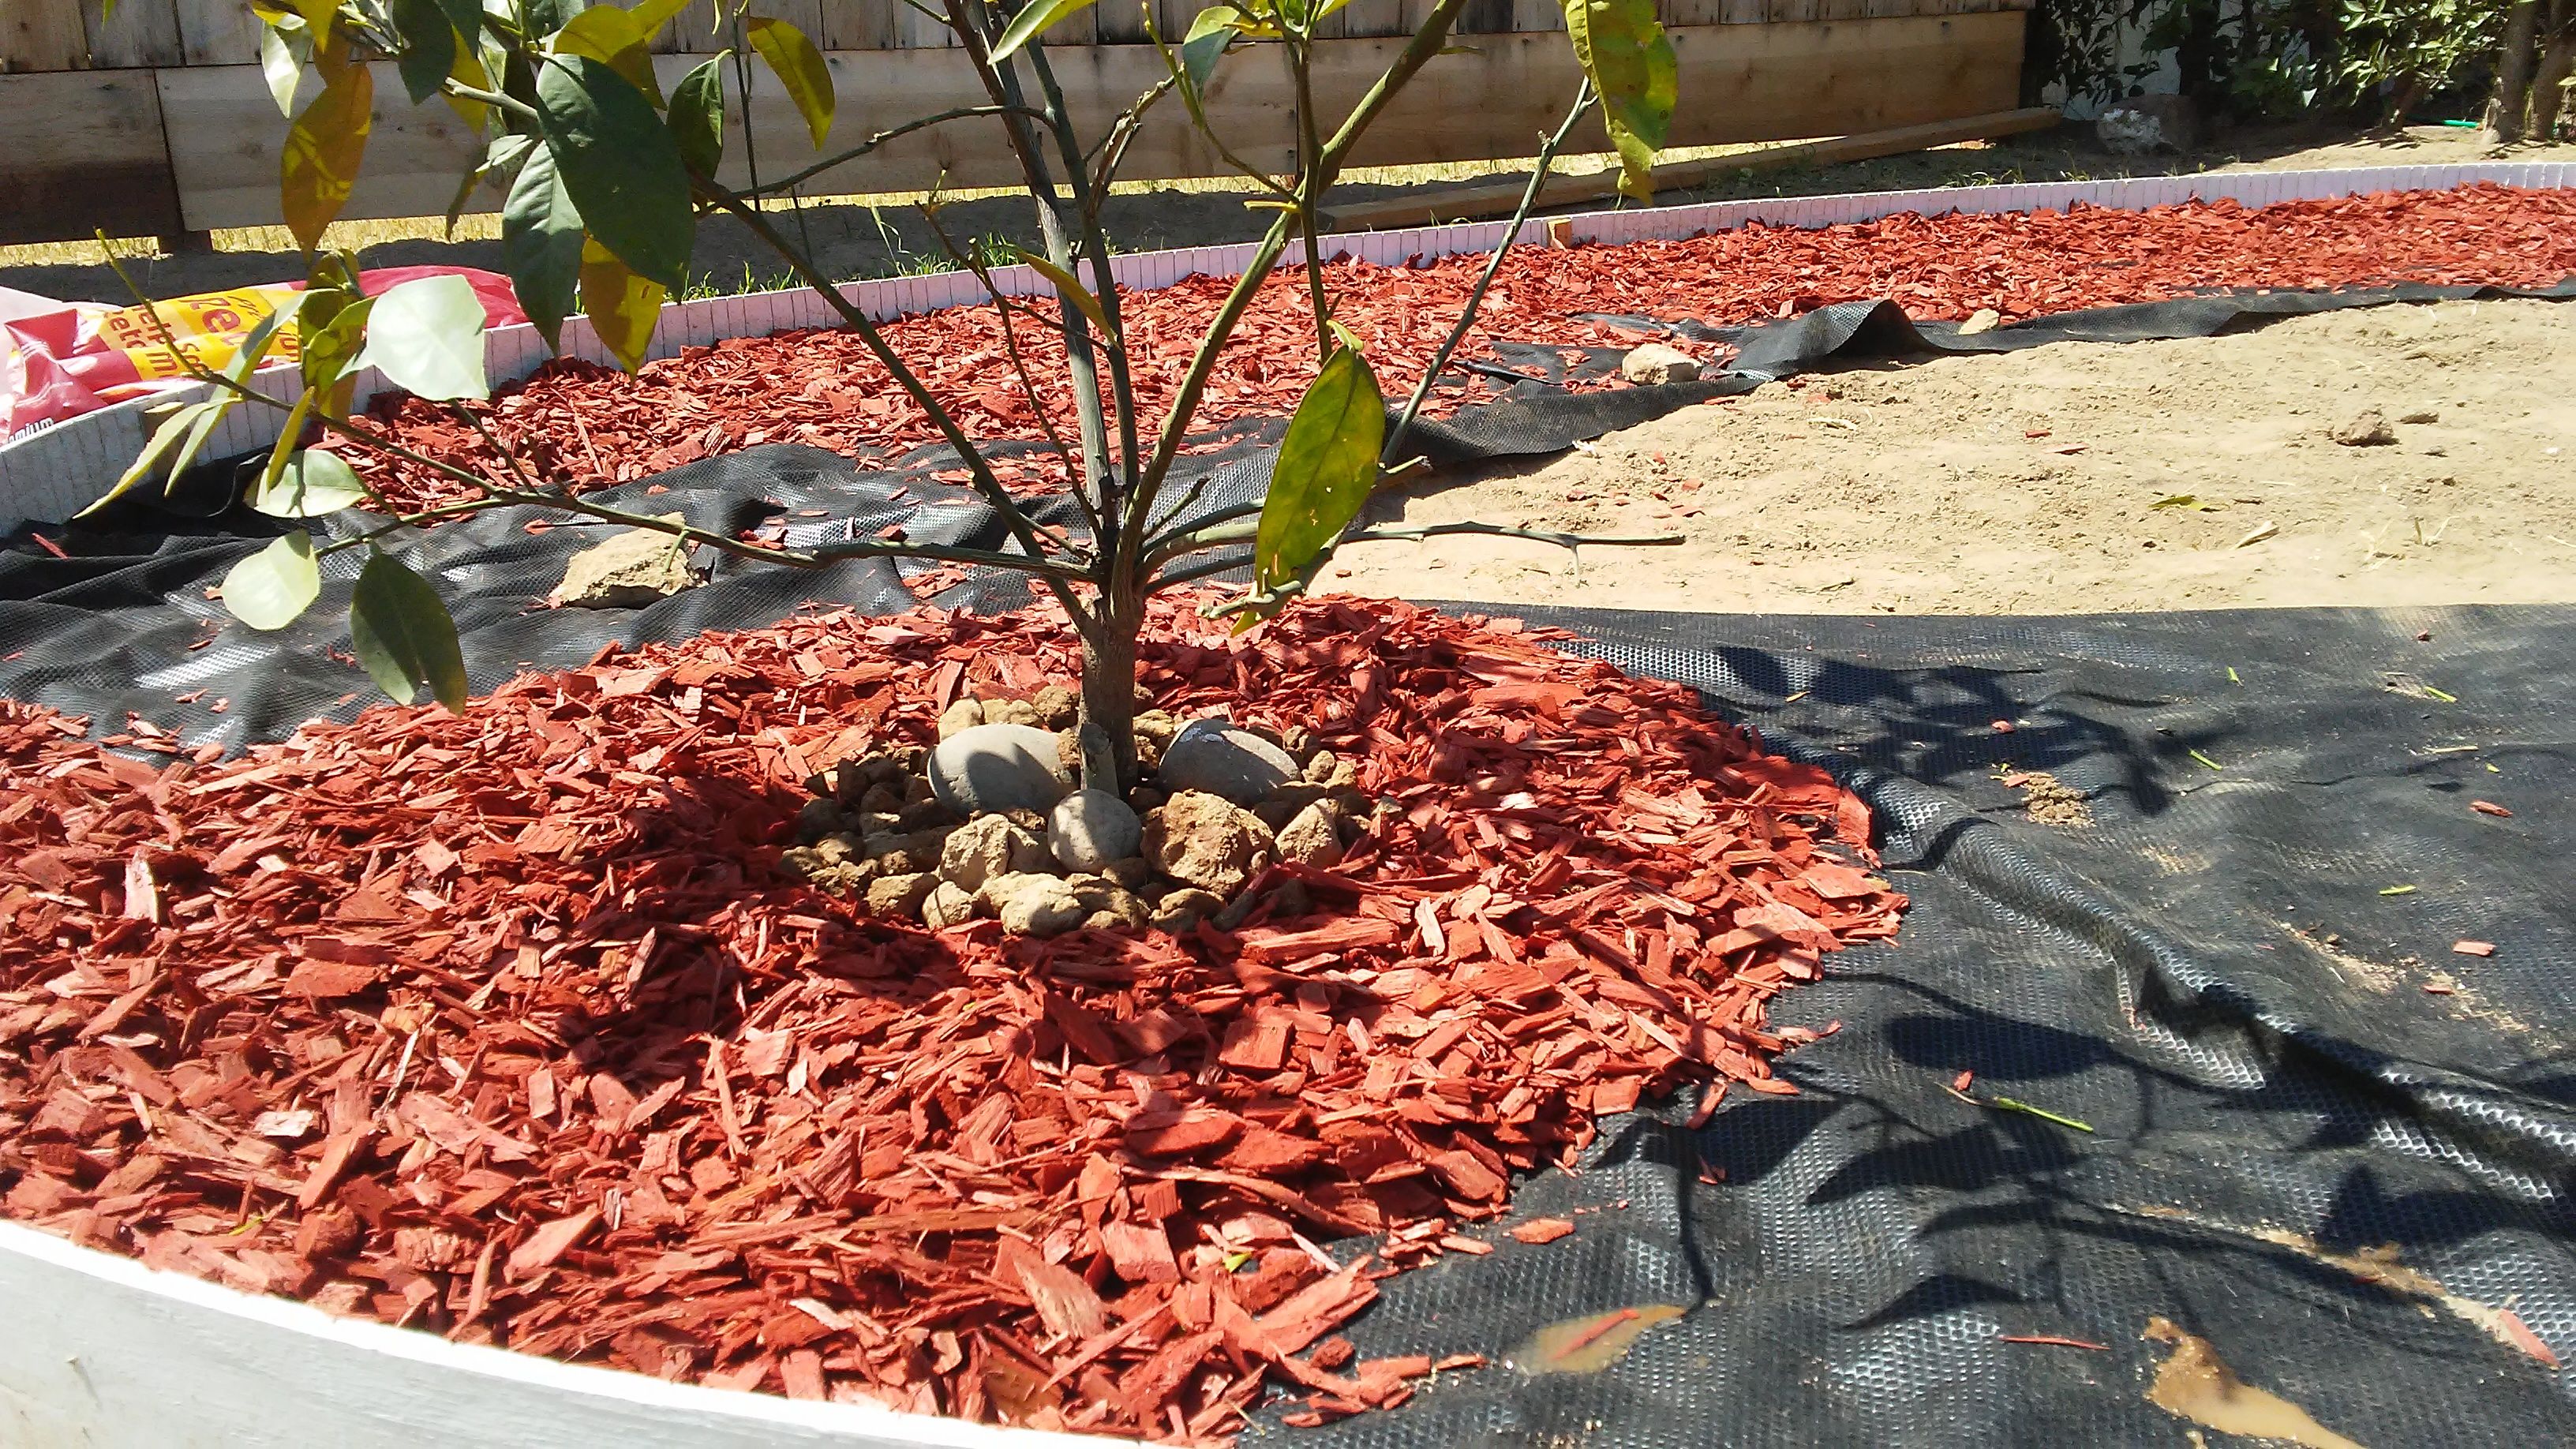
We lay some rocks around the tree and then surround that with red bark mulch
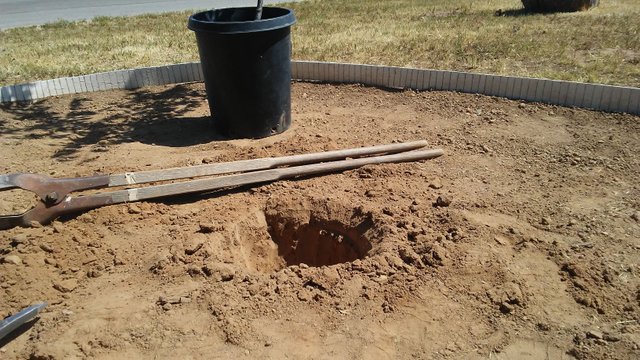
Digging a hole for the peach tree to go in - my post hole digger came in really handy for this job

The peach tree is looking good after it's transplant - this is the first tiem it has been in the ground. We got this tree from our other proeprty whena squirrel burried the seed in our tyard and we founs it as a seedling. We transplaneted it to a pot and have been waiting for the right time to put it in the ground. I think the time has come.
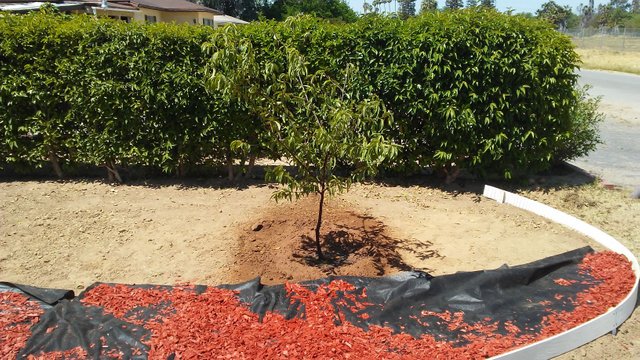
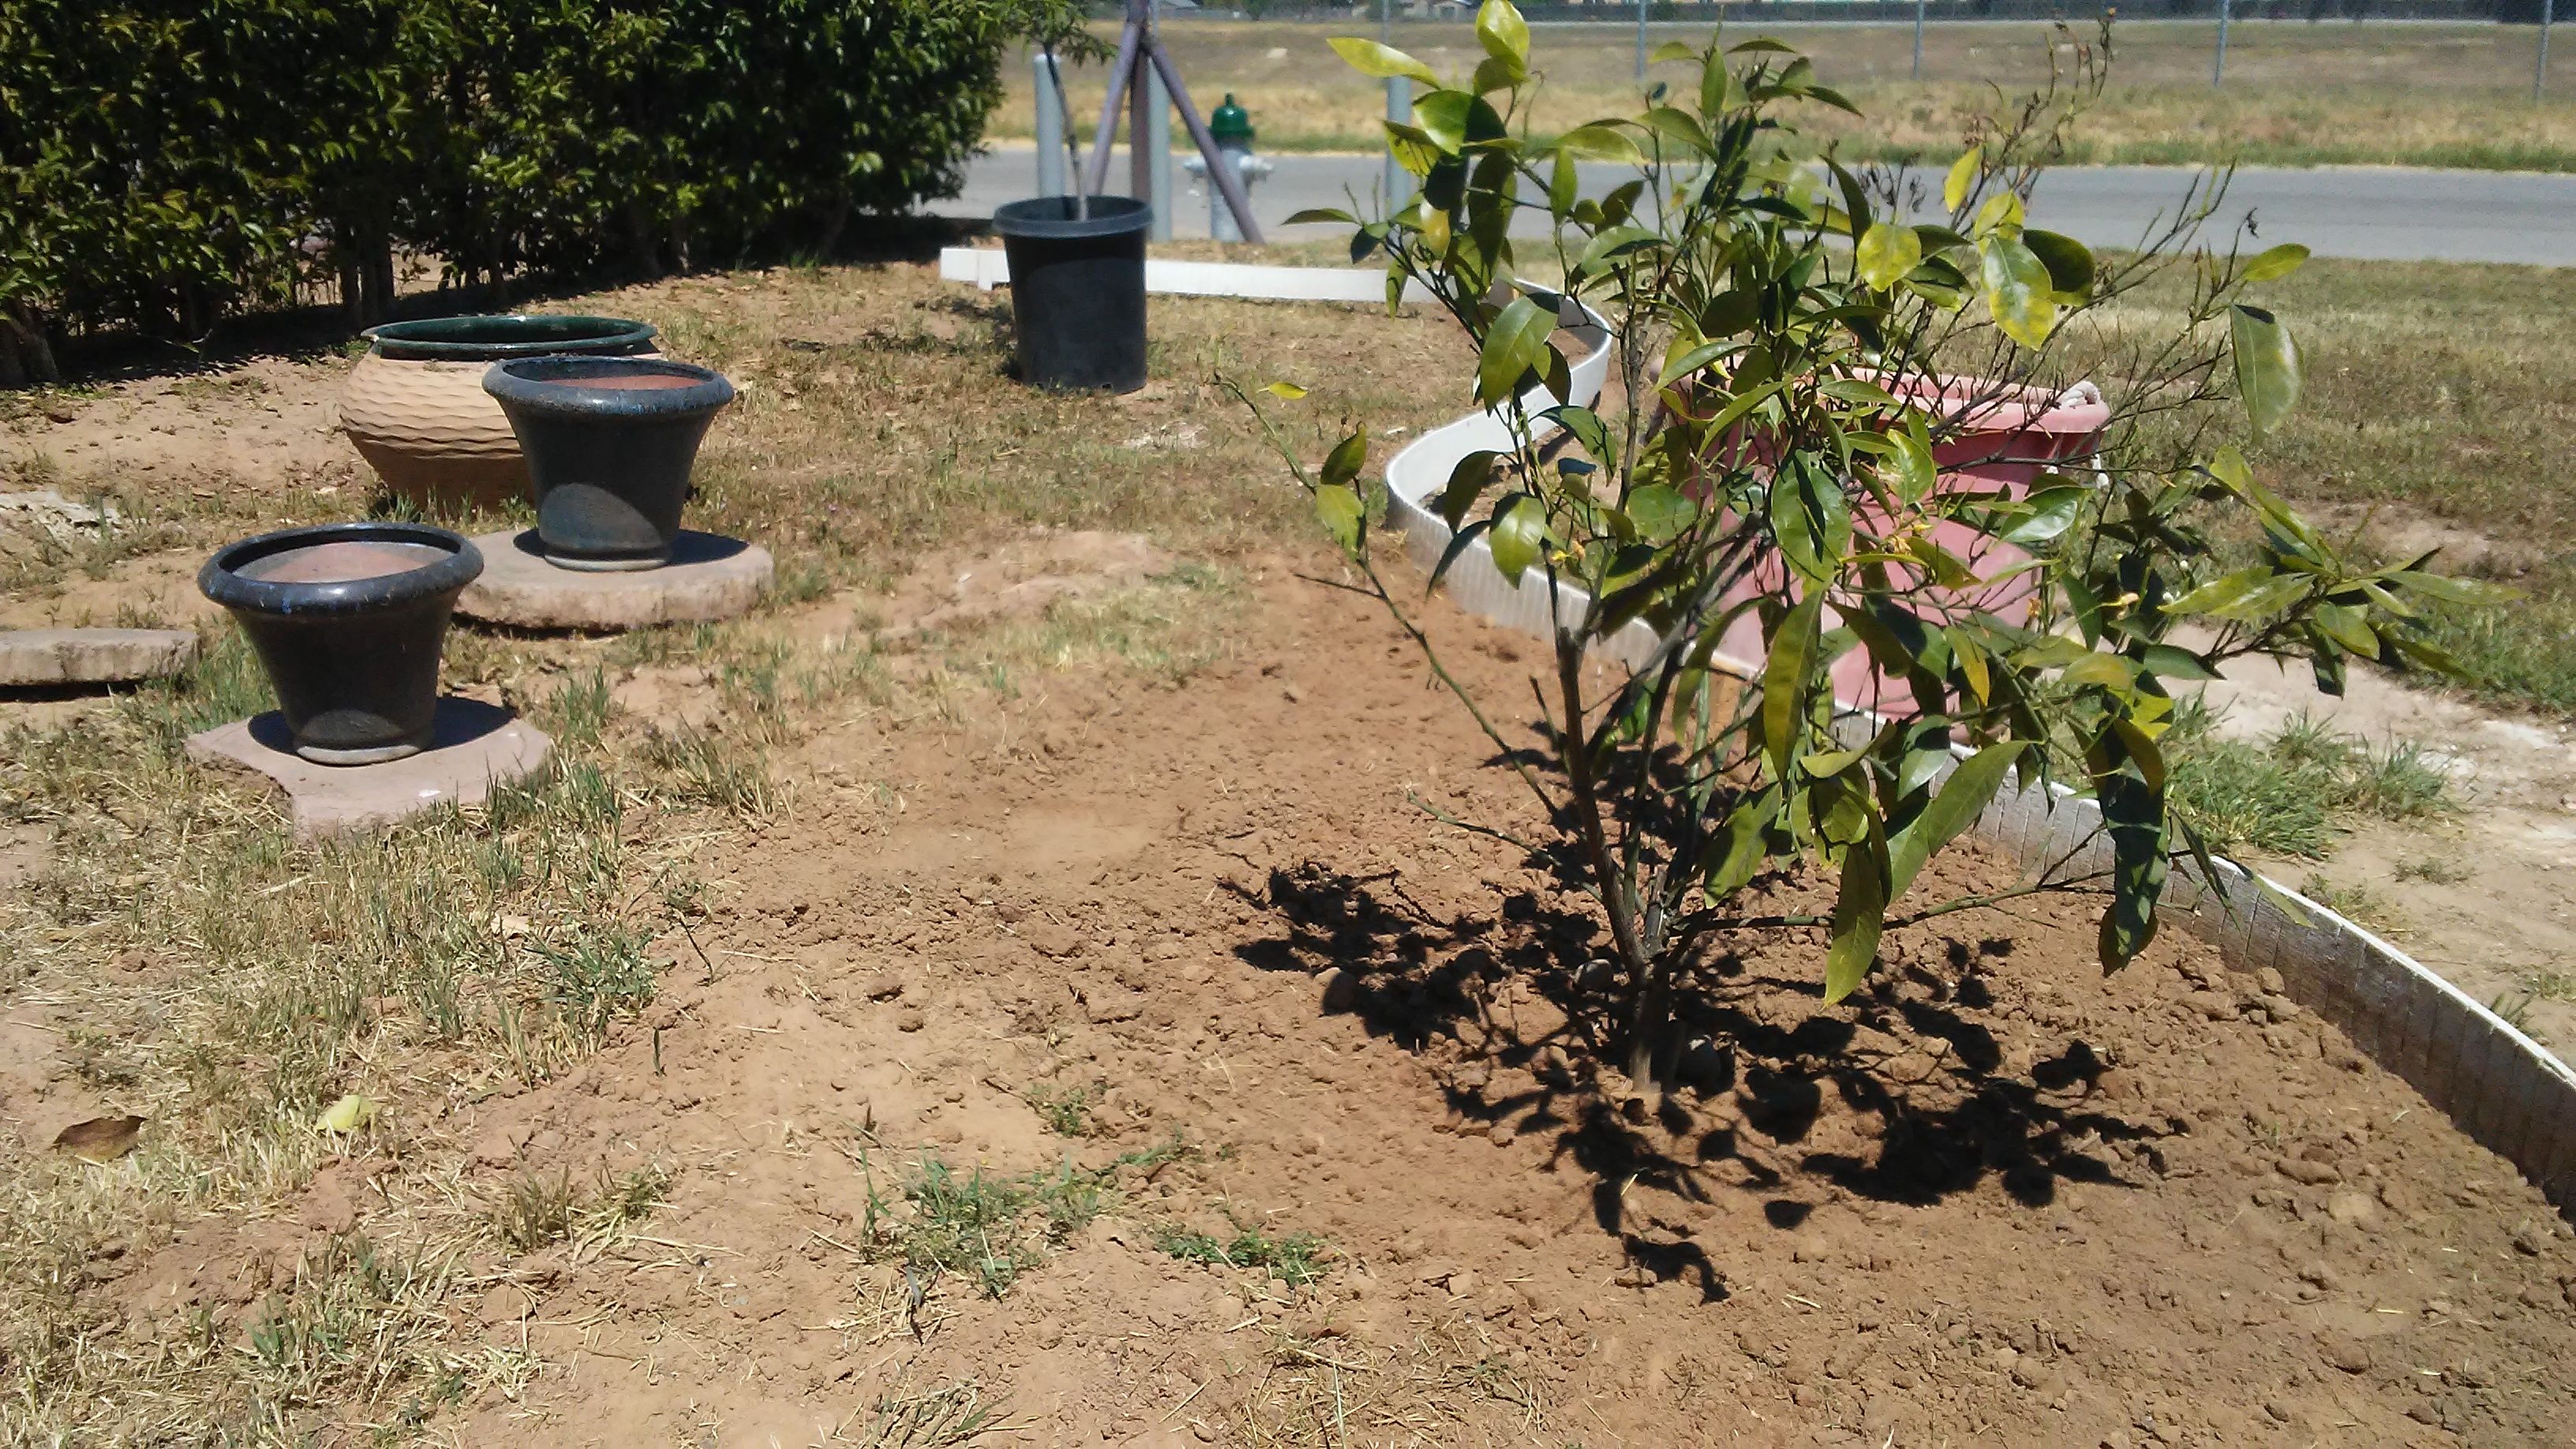
With the peach tree in place, we continue to lay down weed blocking fabric and red mulch.
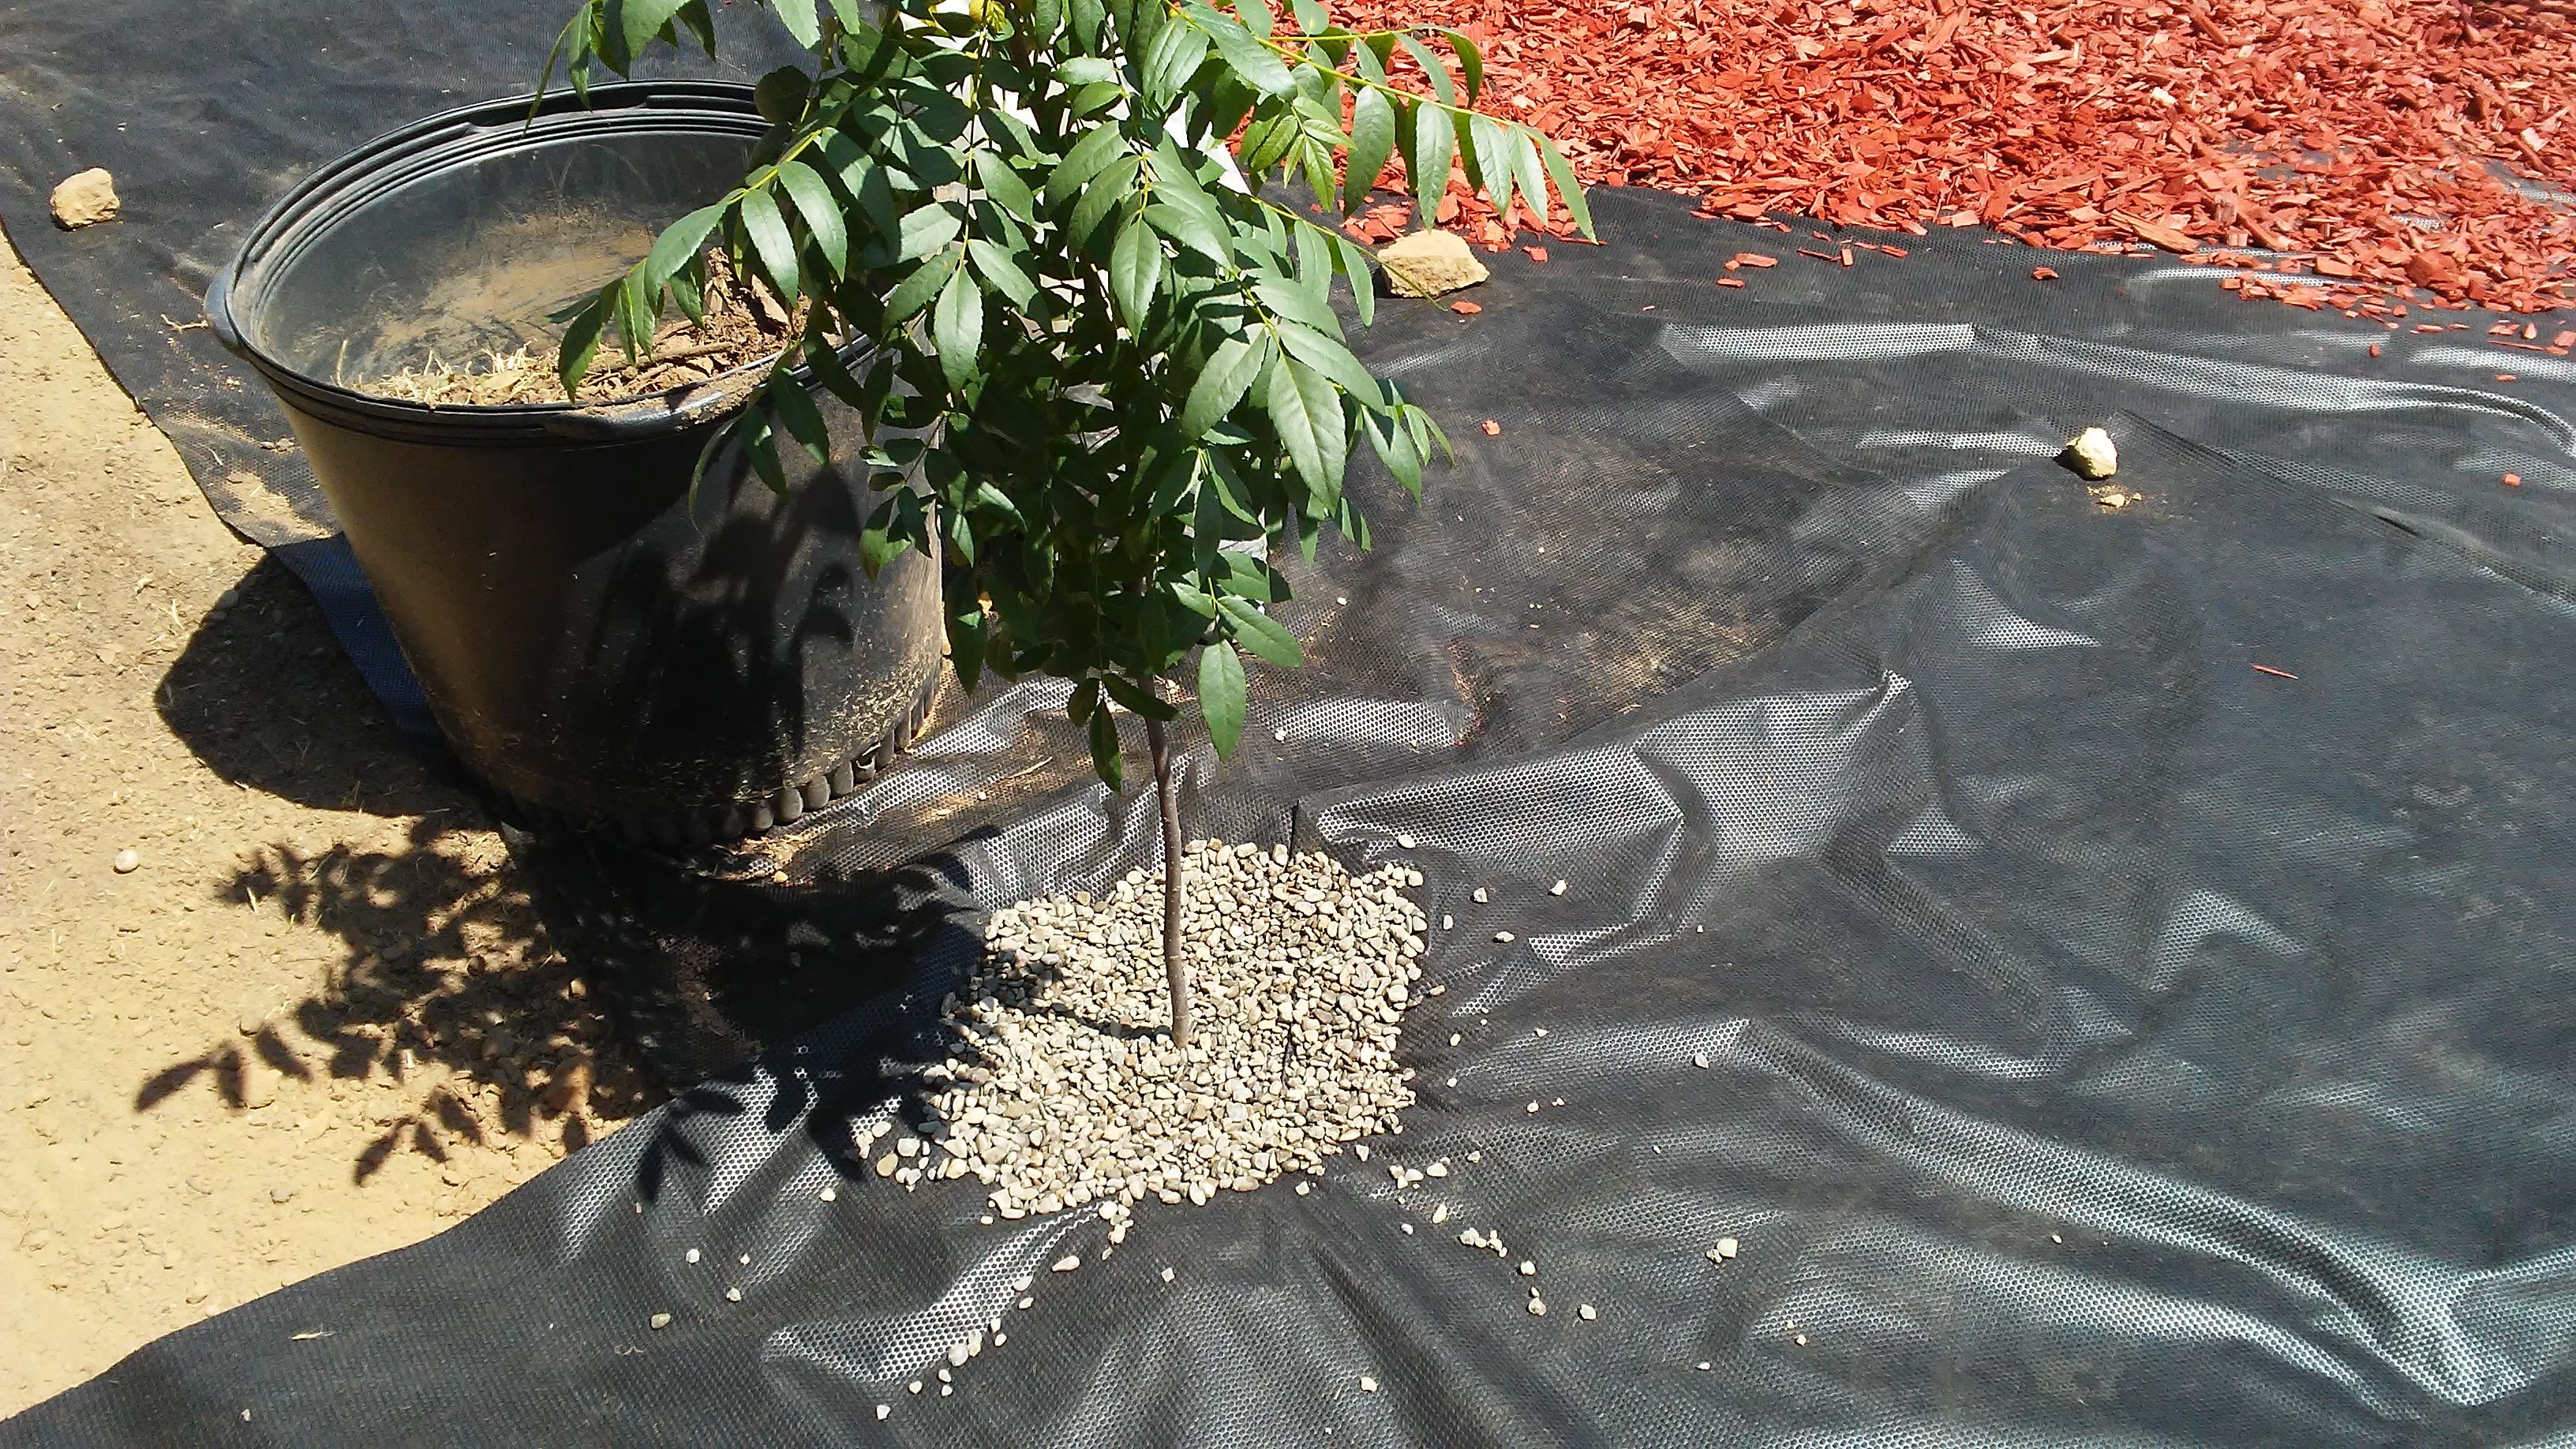
We also have a Walnut tree that we got the exact same way as the peach tree - on the same day!
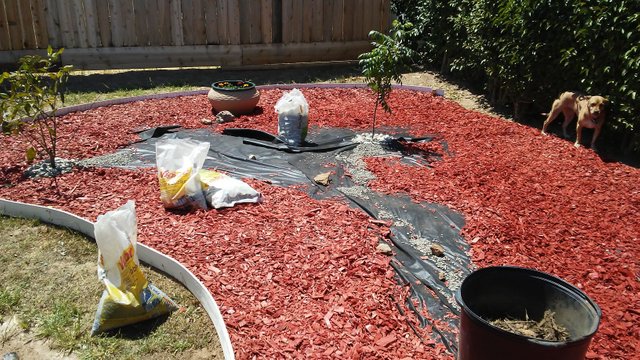
As we fill in the garden, we keep the center clear for the rocks that we are going to decorate it with .
The rock feature starts to take shape like a small river
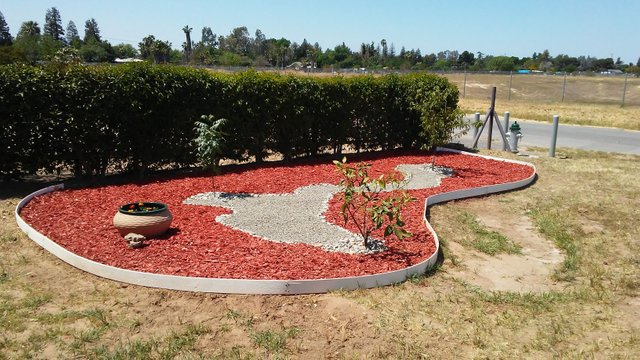
You can start to see what we are going for here as the rock fills in the center.
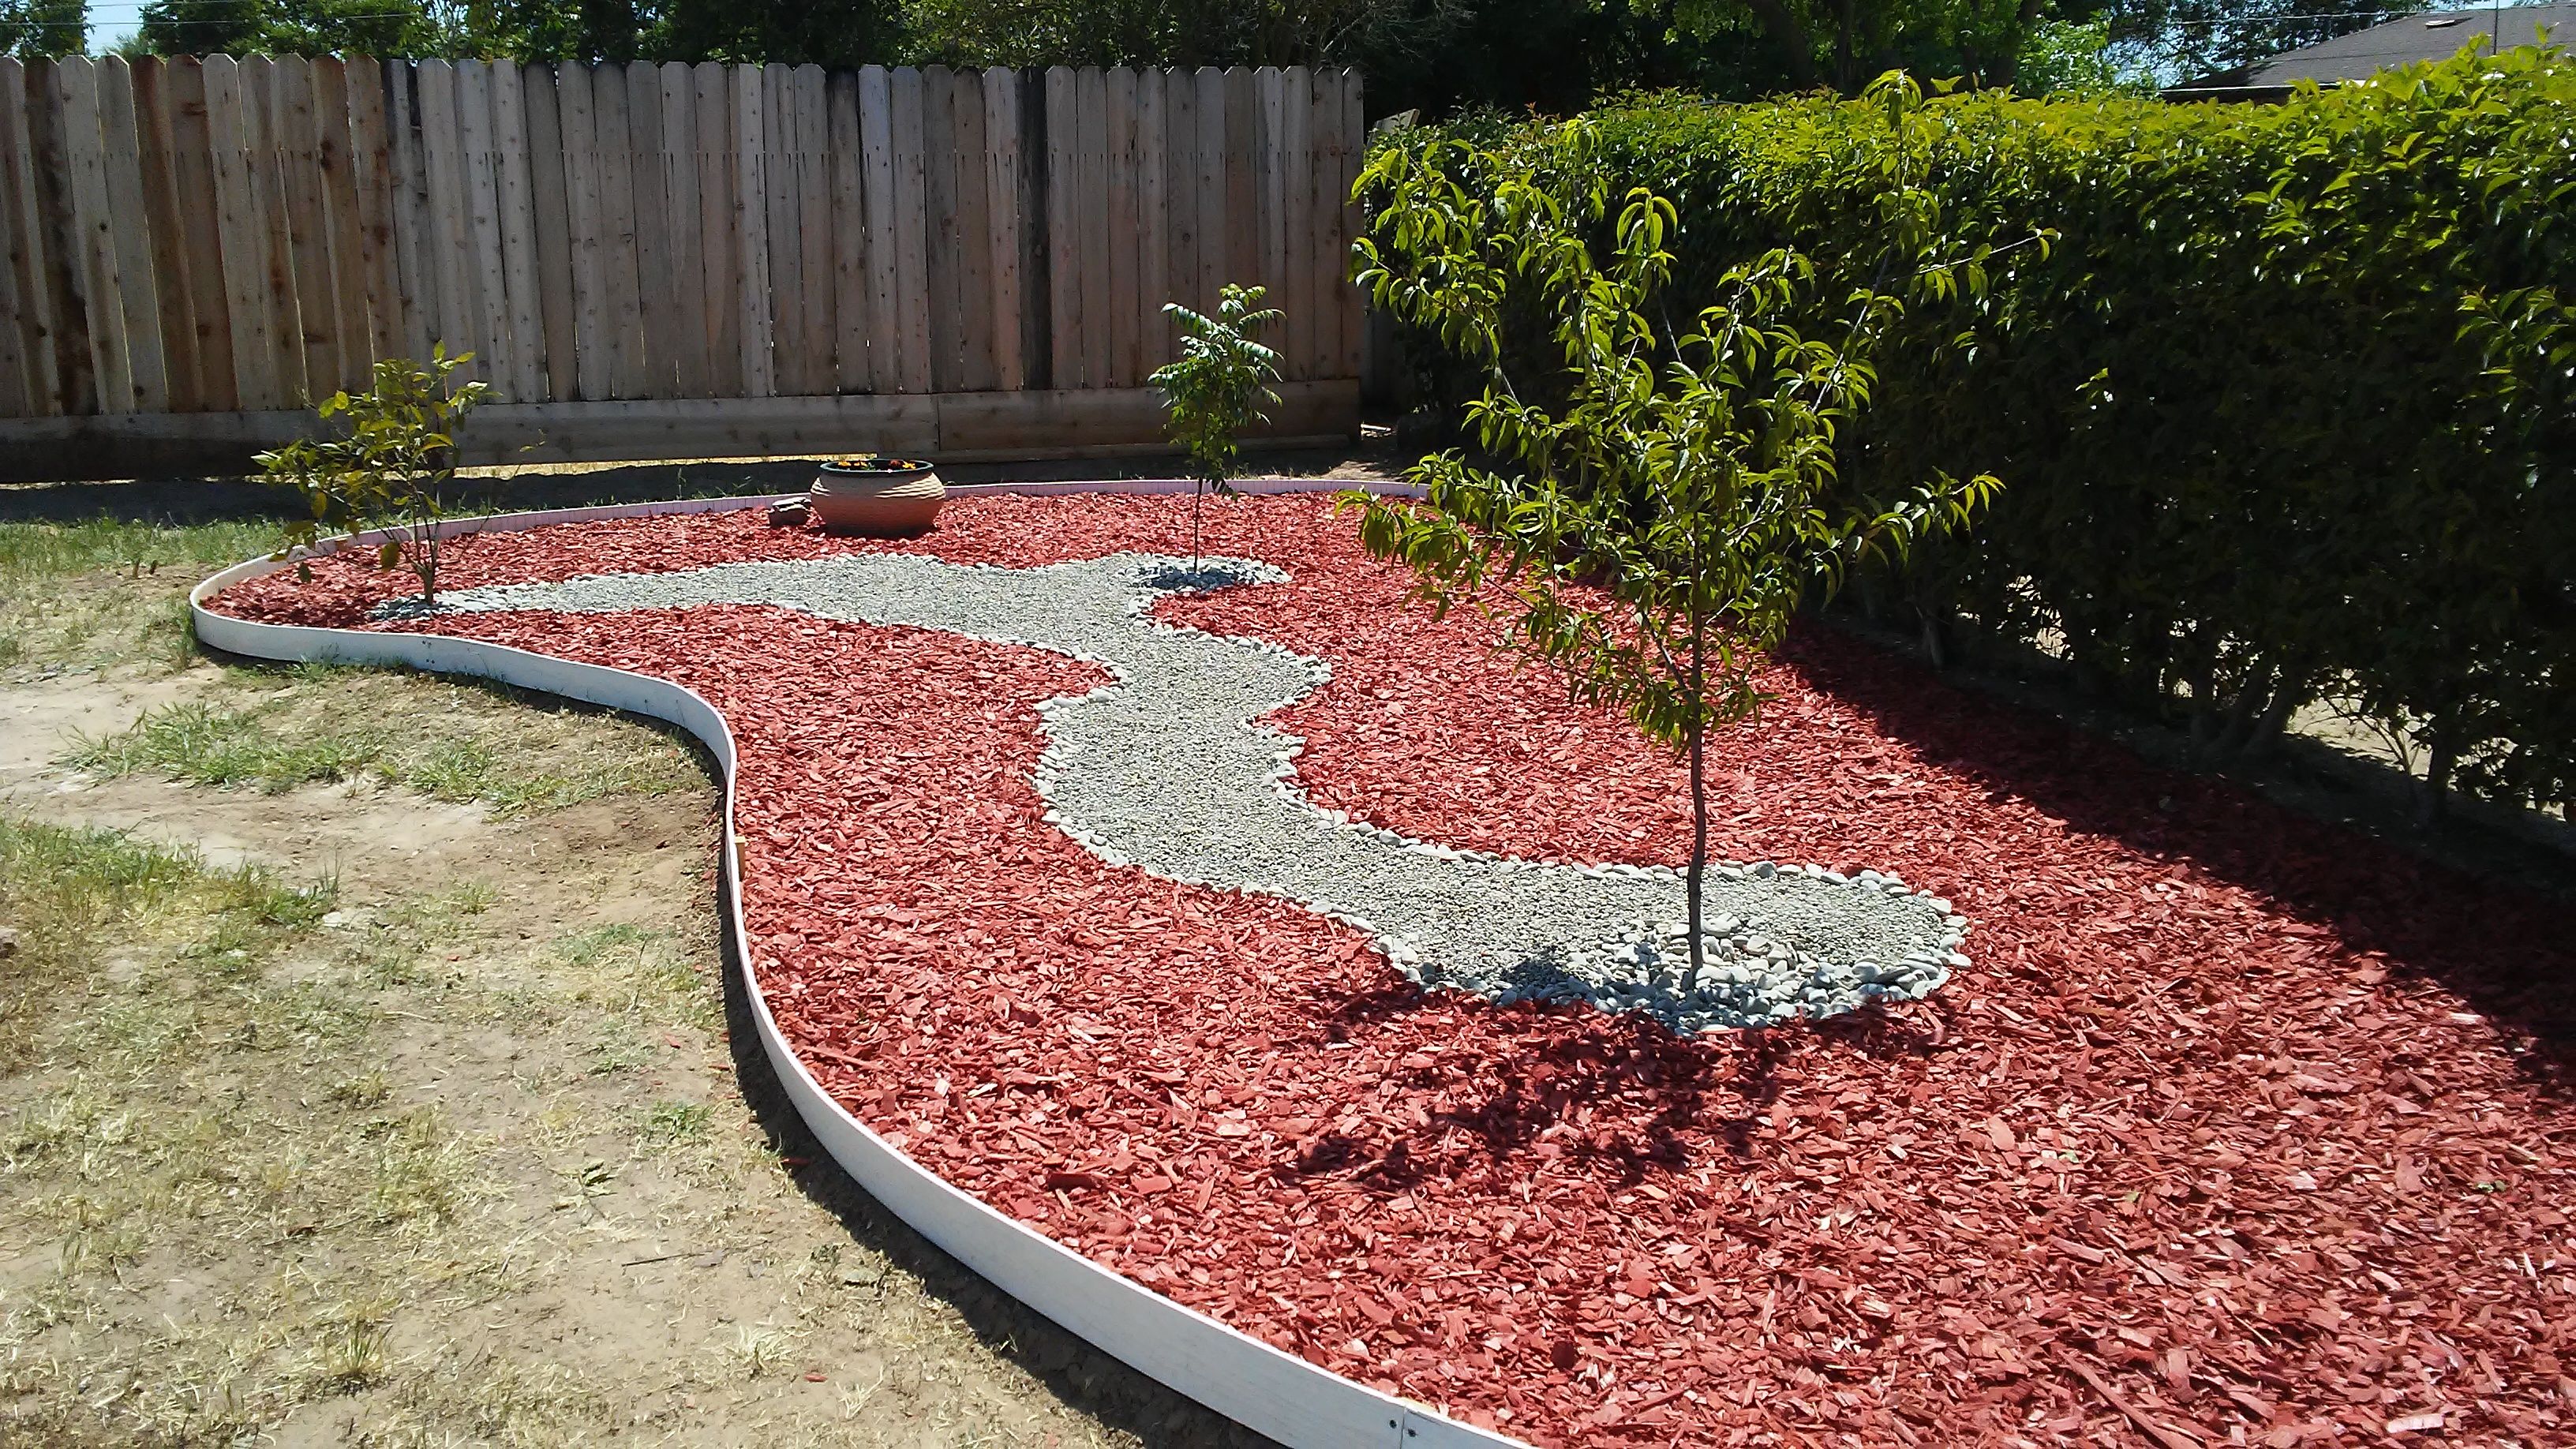
With the center filled in now, we have a faux rock river filled with river rock
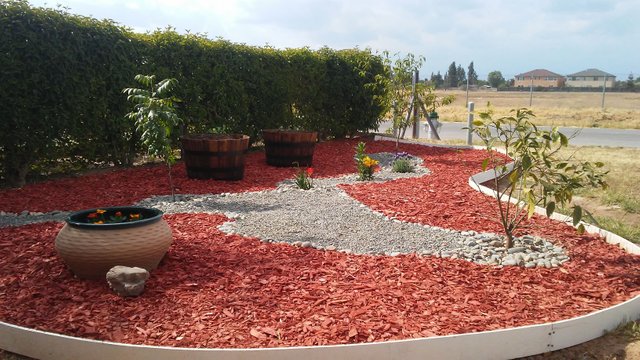
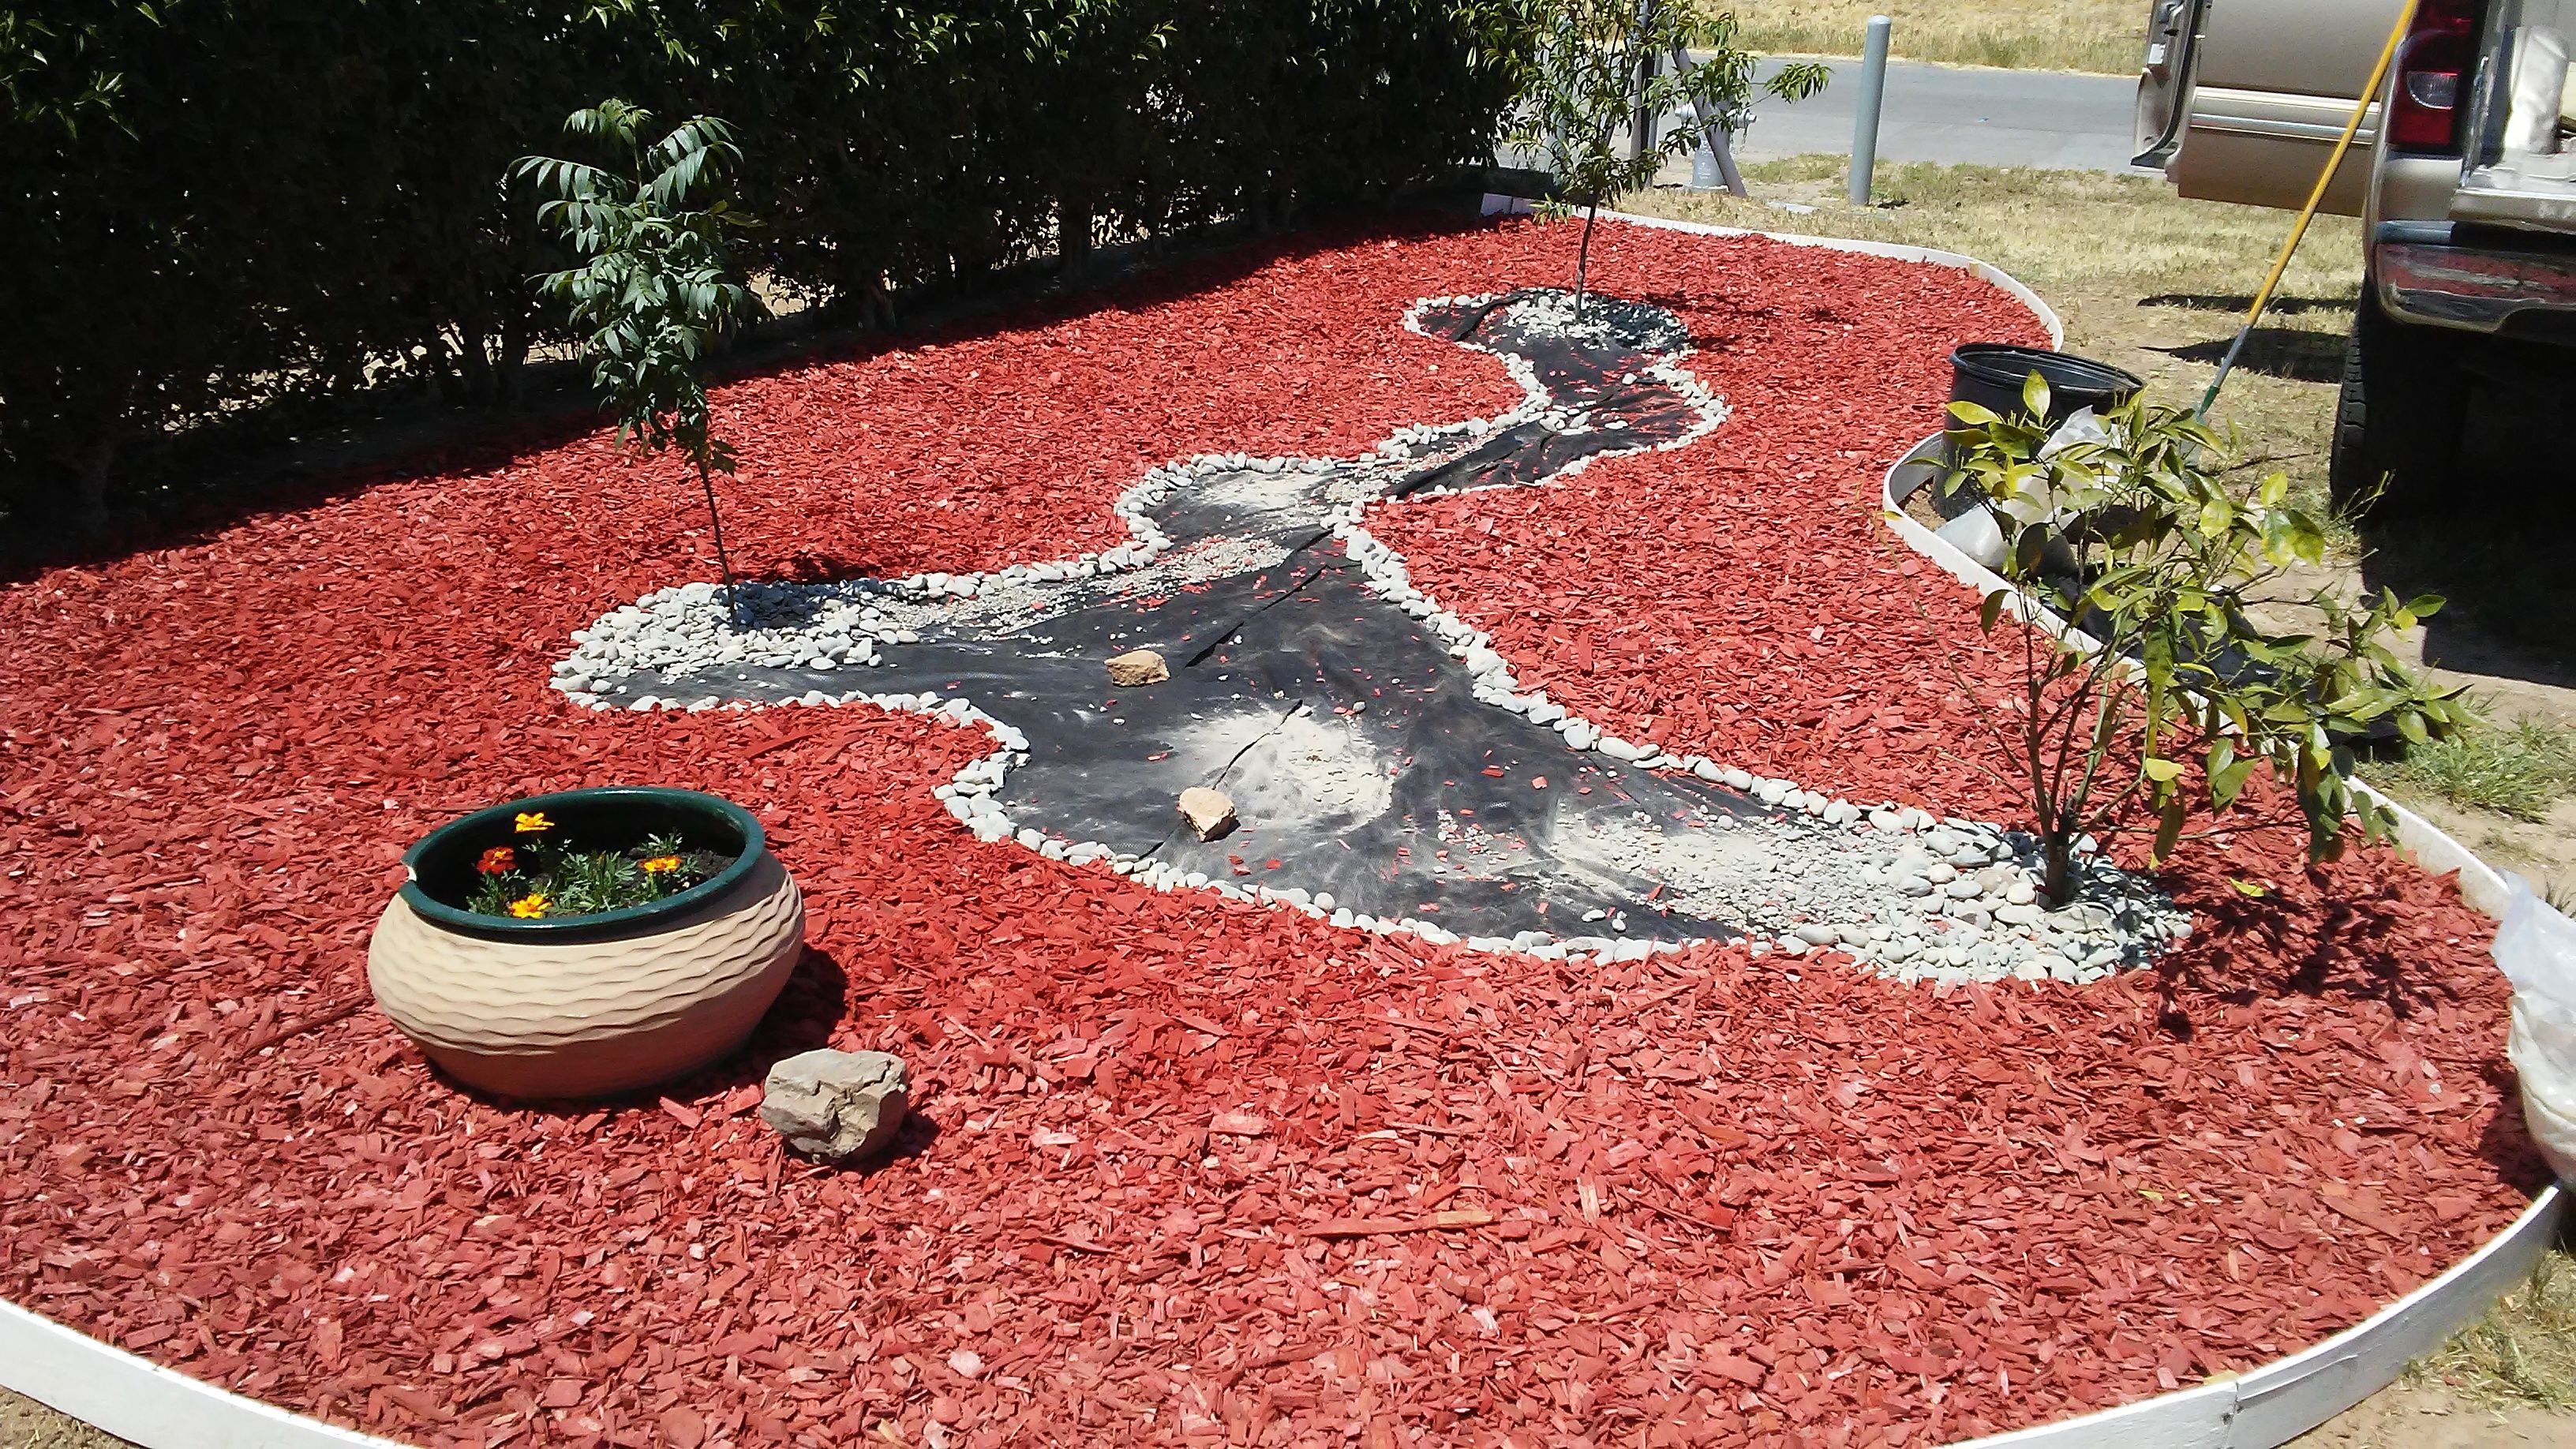
Time to start adding plants to give it some color
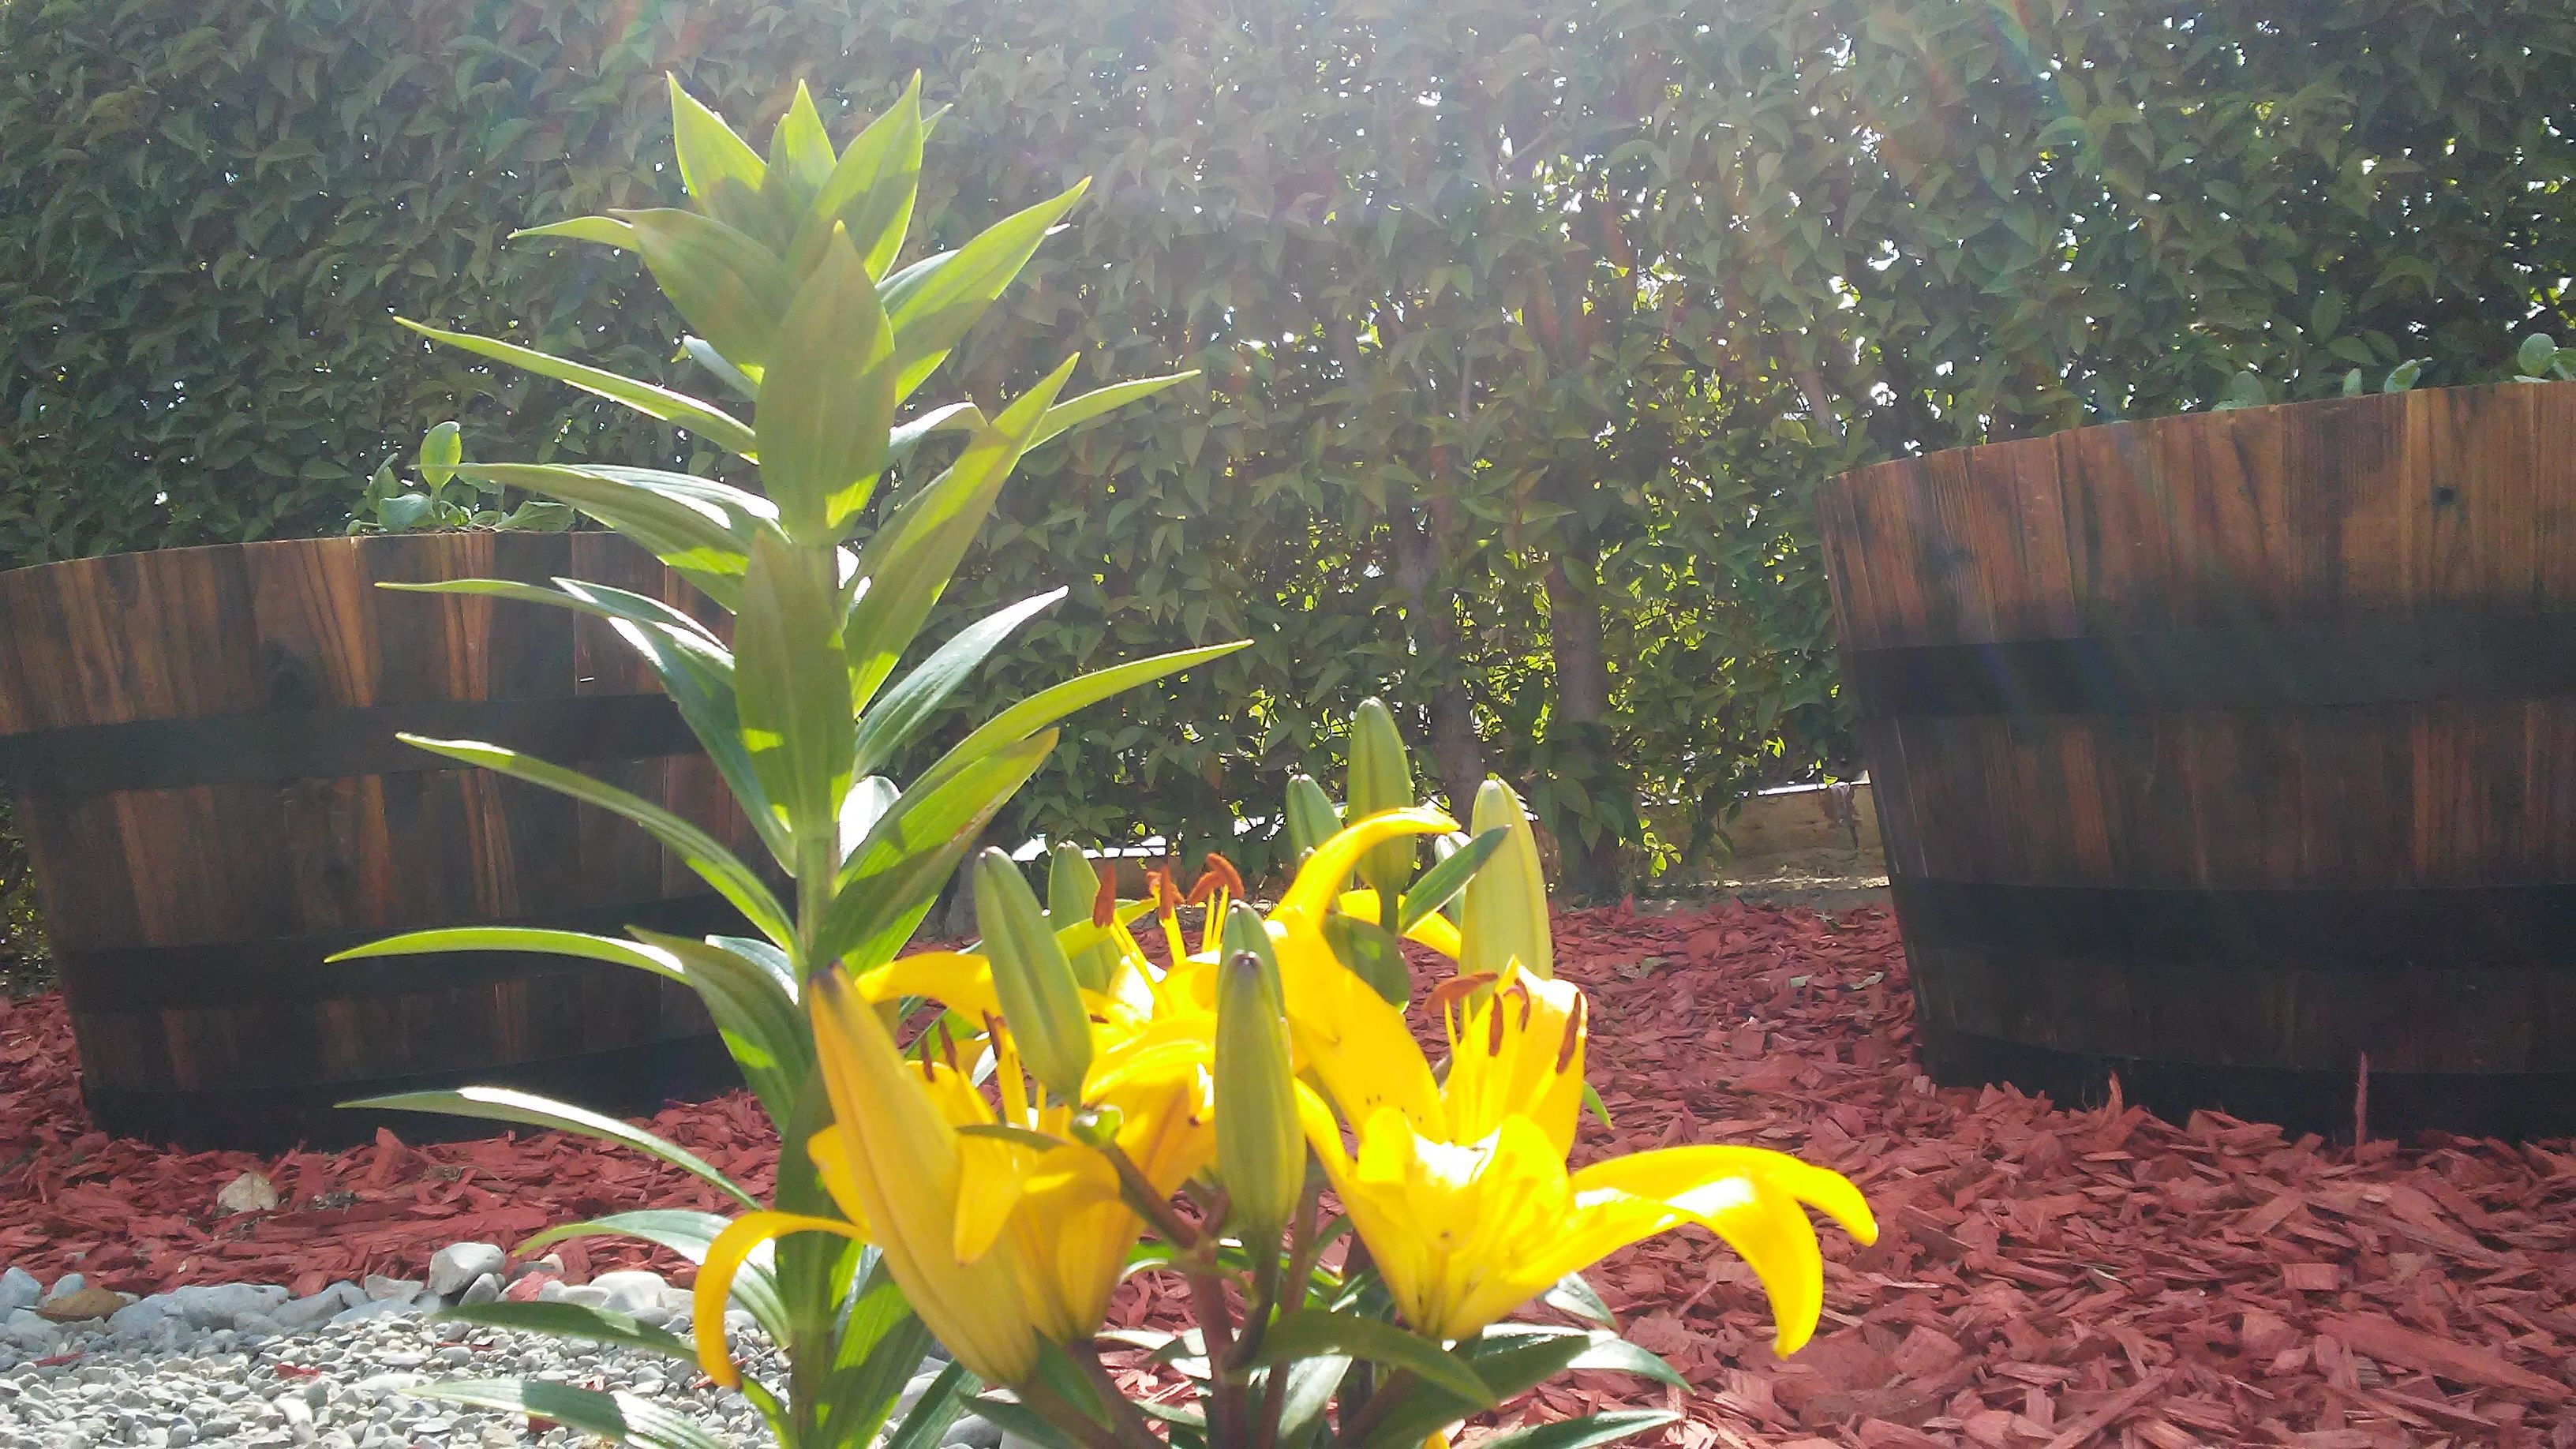
We thought this yellow one would really brighten up the garden and was a beautiful addition to it.
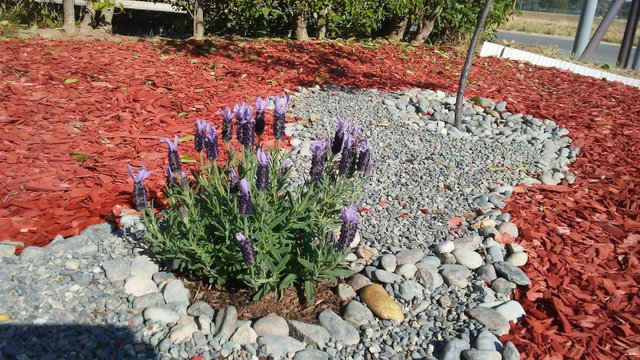
Lavender makes a beautiful addition to the garden and also attracts bees.
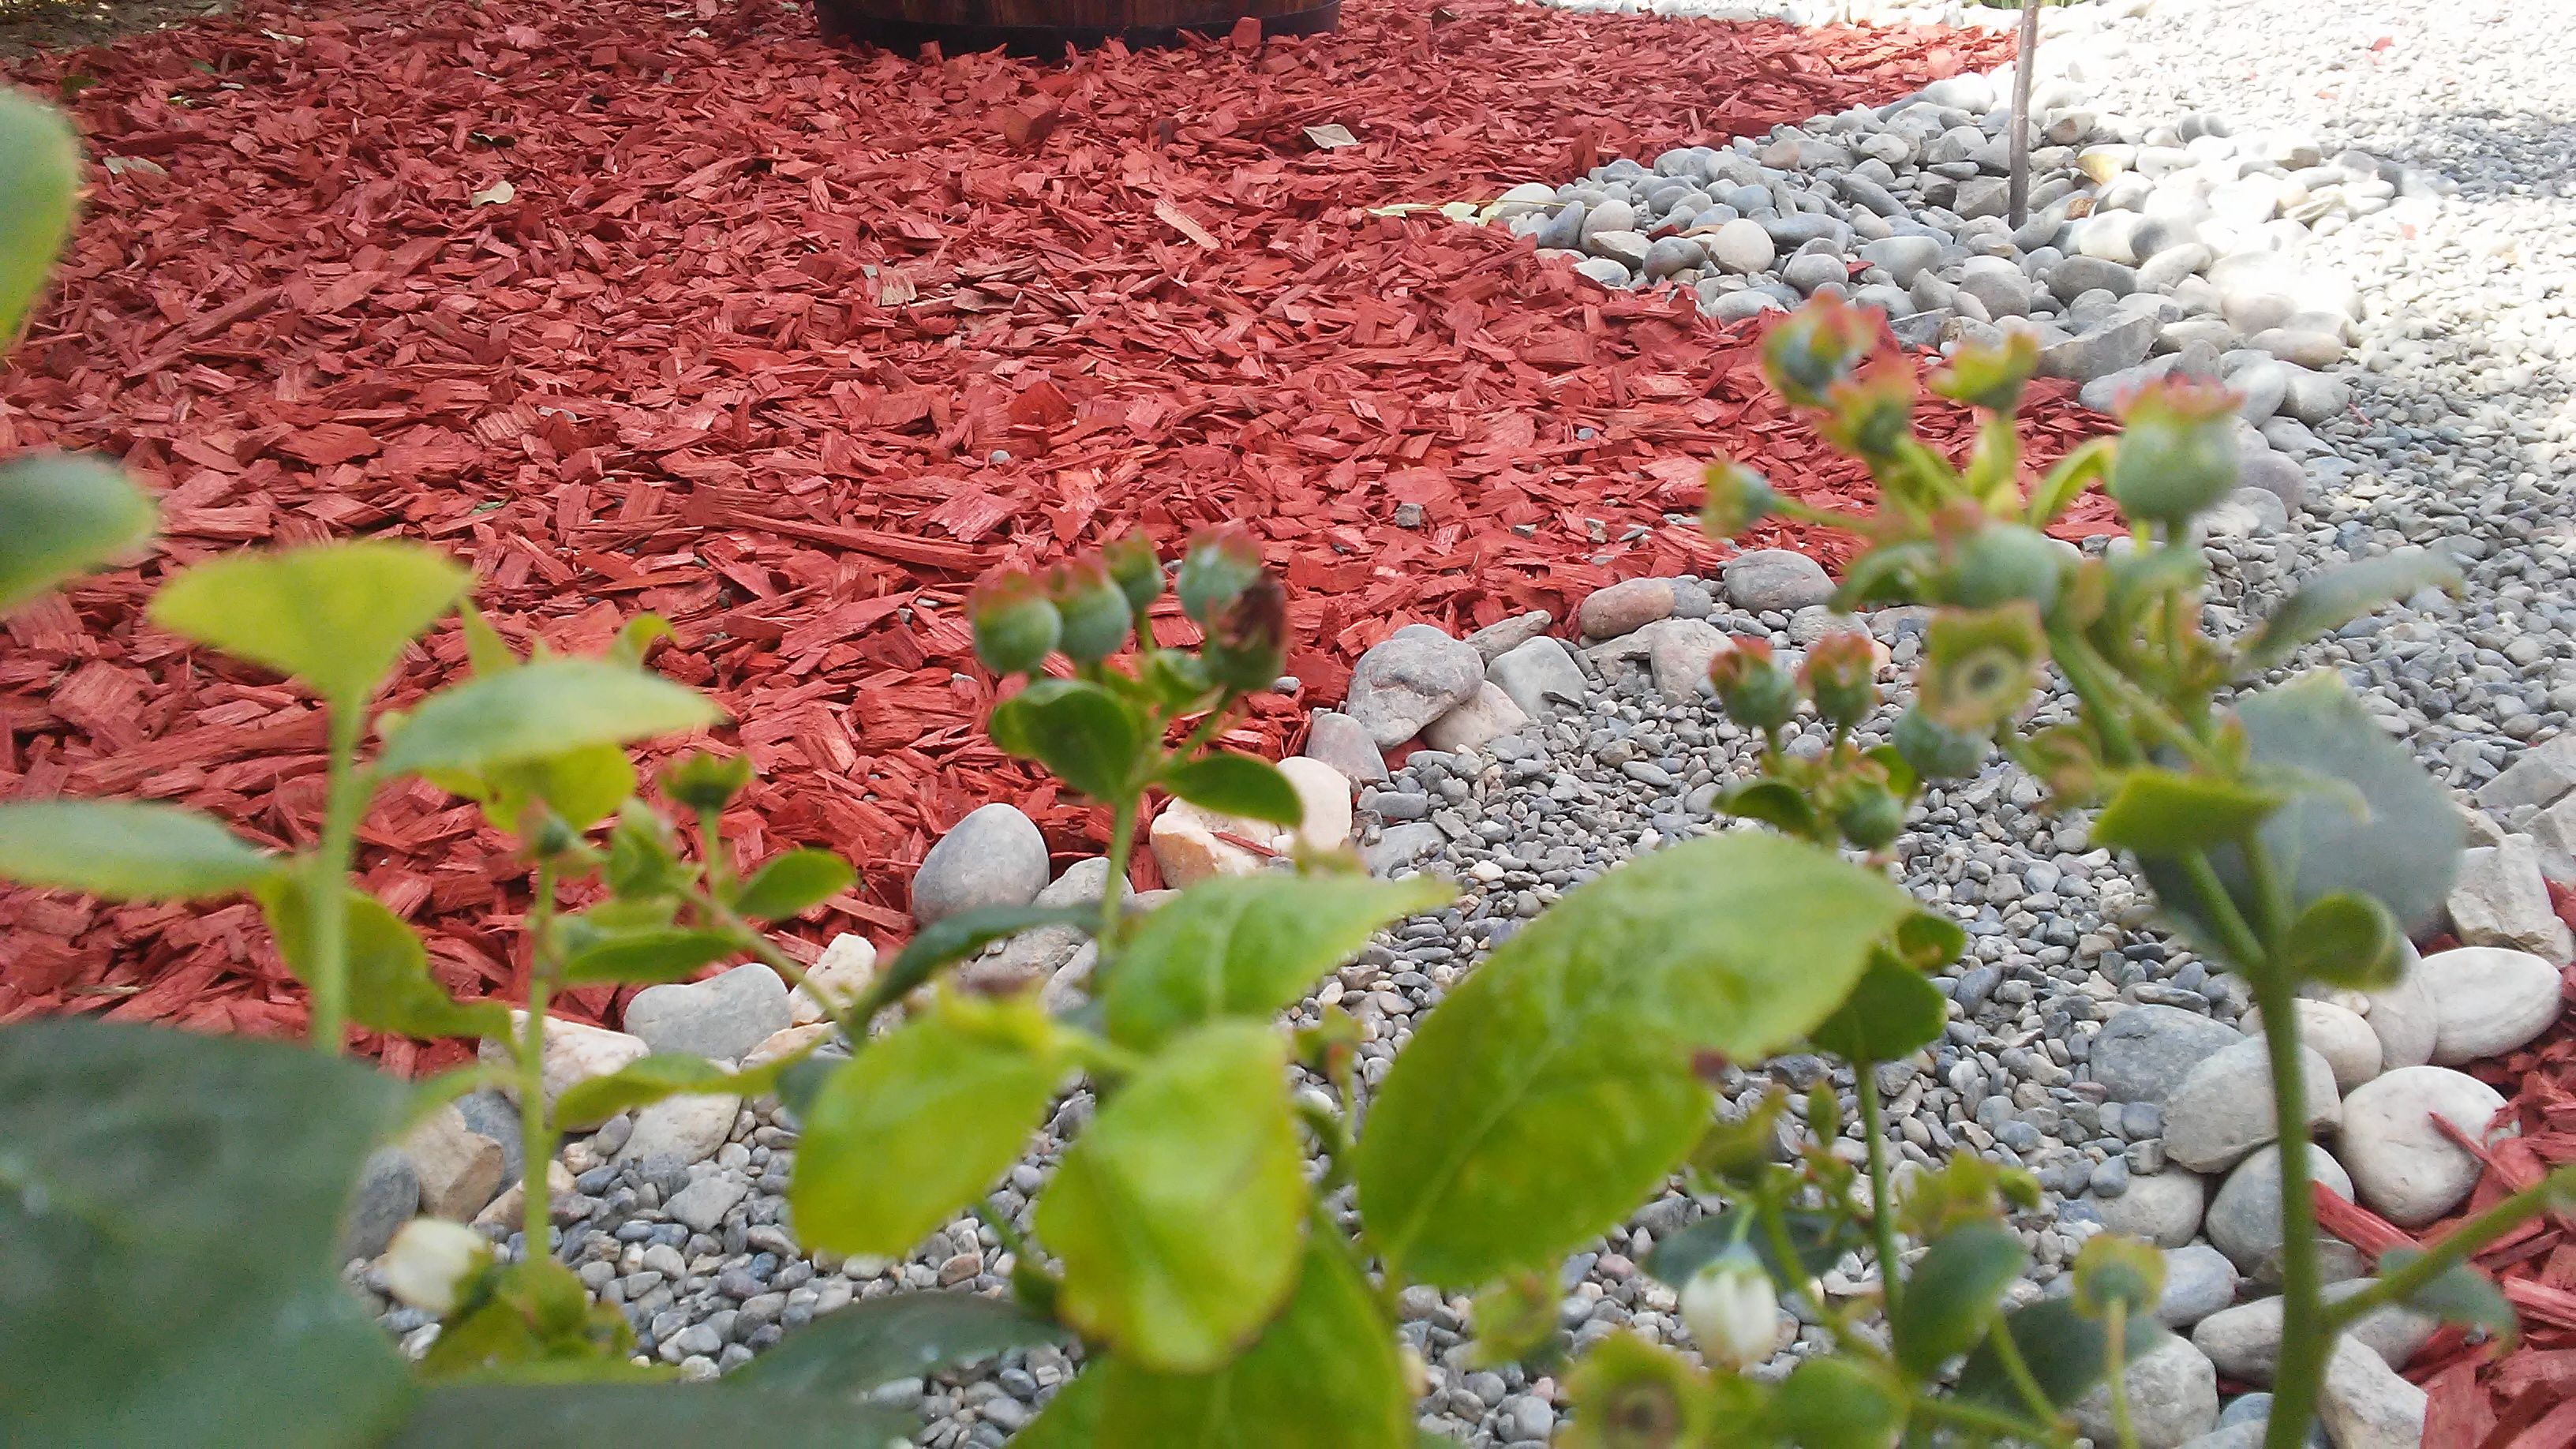
We also put in a blueberry bush that we picked up - it's already packed with blueberries - I sure hope they ripen up and taste delicious.
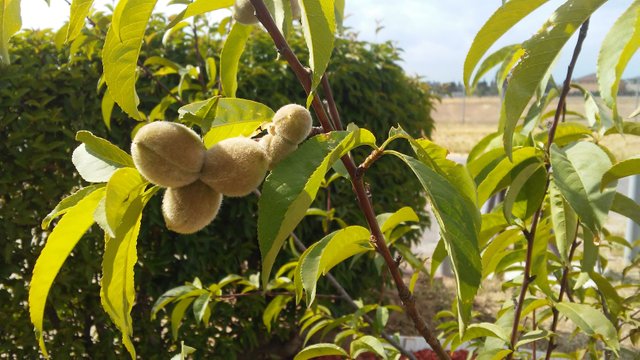
The peach tree also has peaches on it already - this is the third year that it has produced for us and the first time being in the ground-I have a feeling that next years crop is going to be a big one.
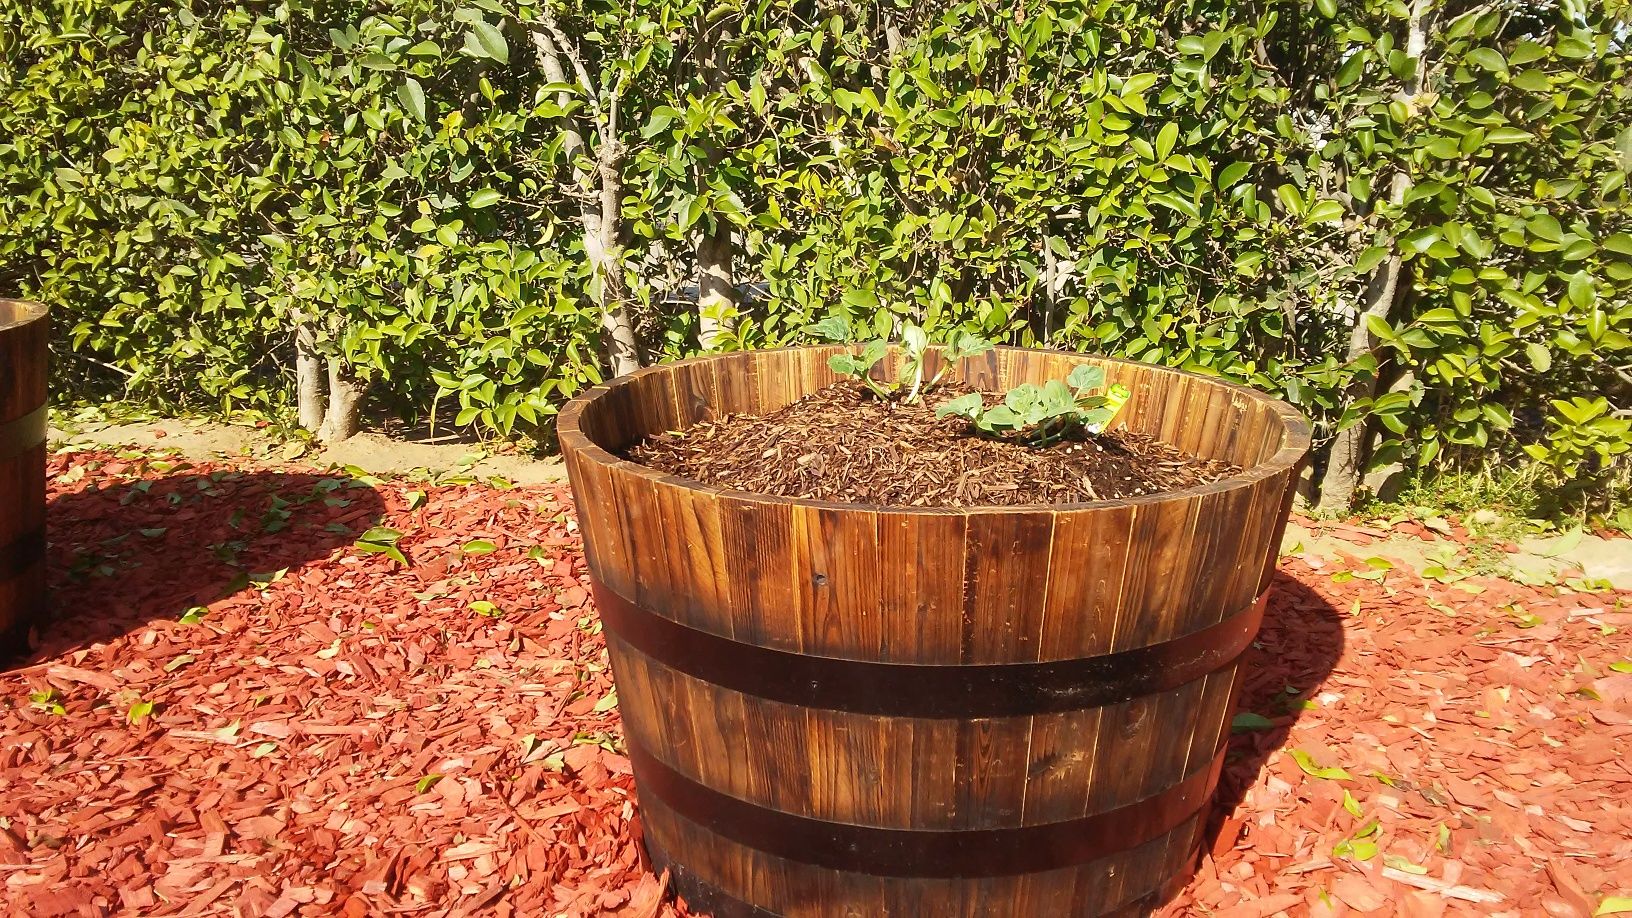
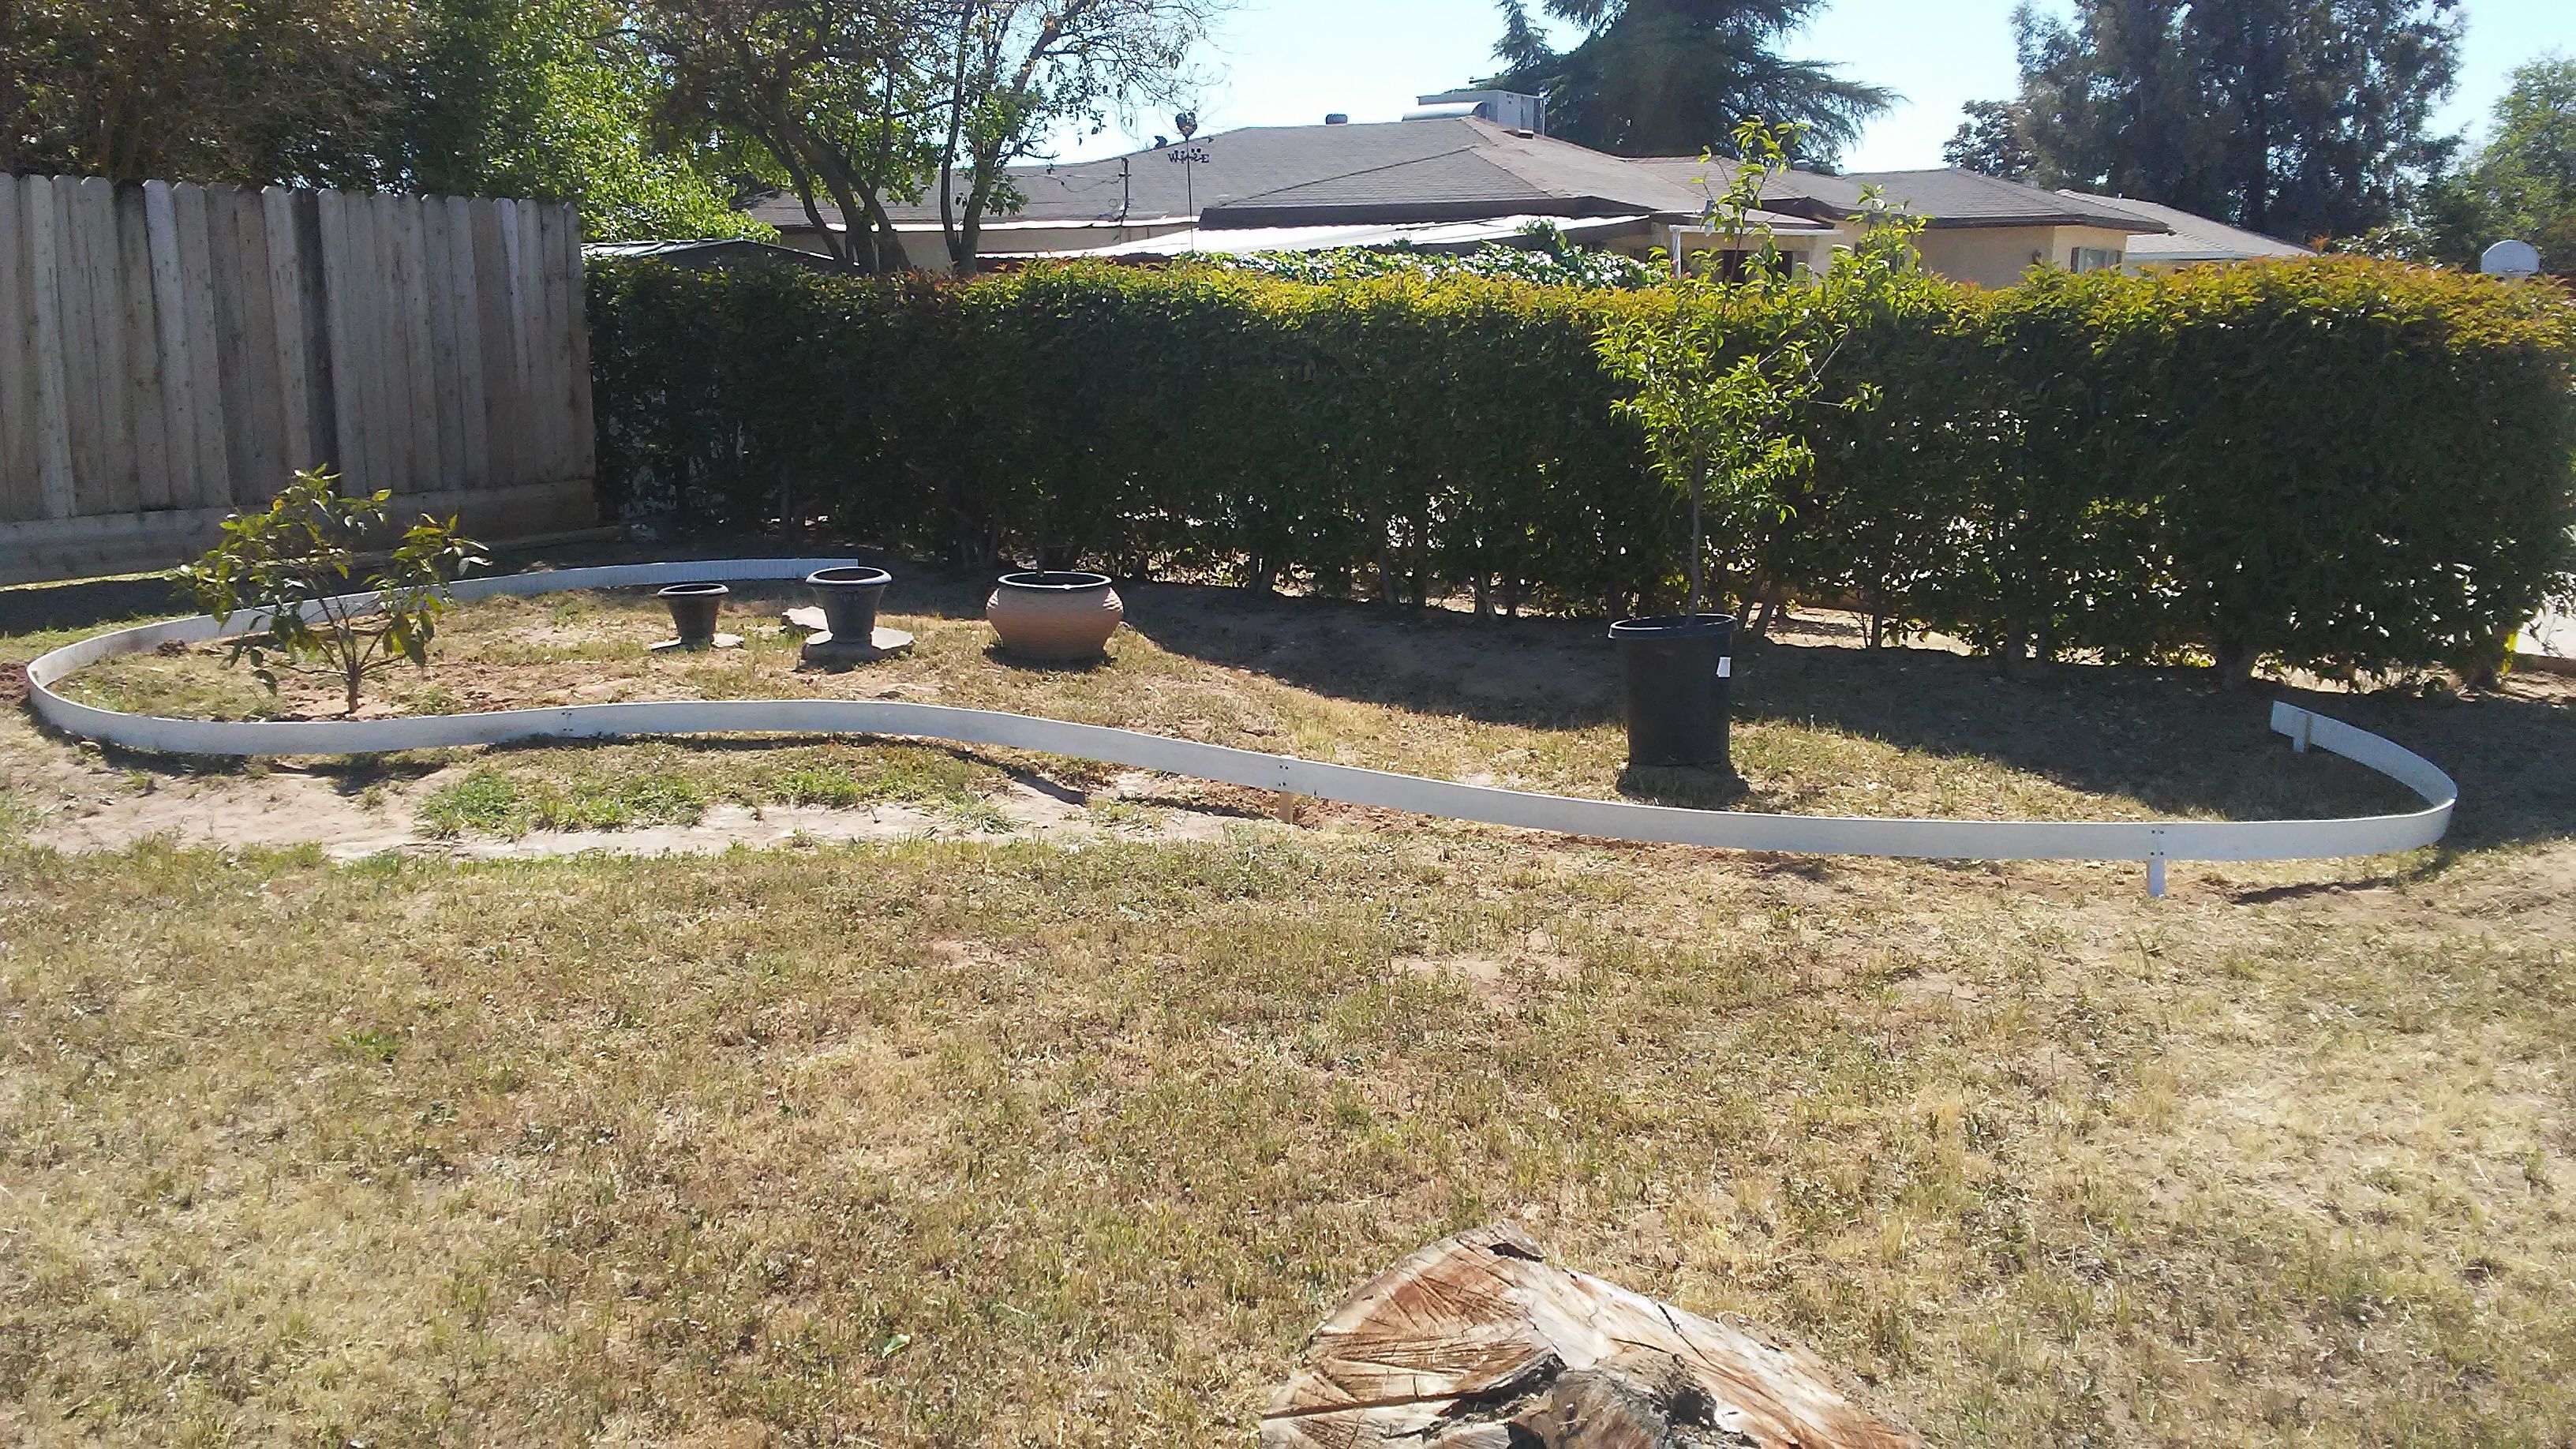
With the barrels filled with potting soil and watermelon seedlings, the front garden and flower bed is completed.
It's Finished!
before
after
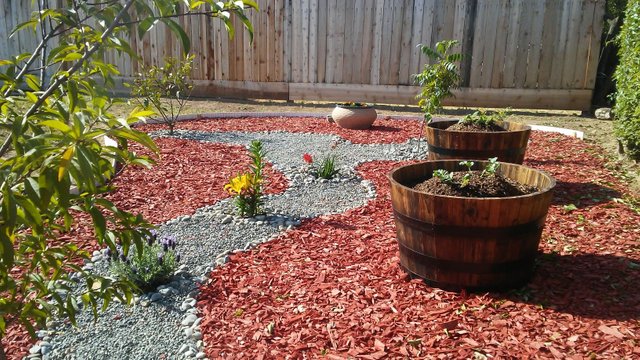
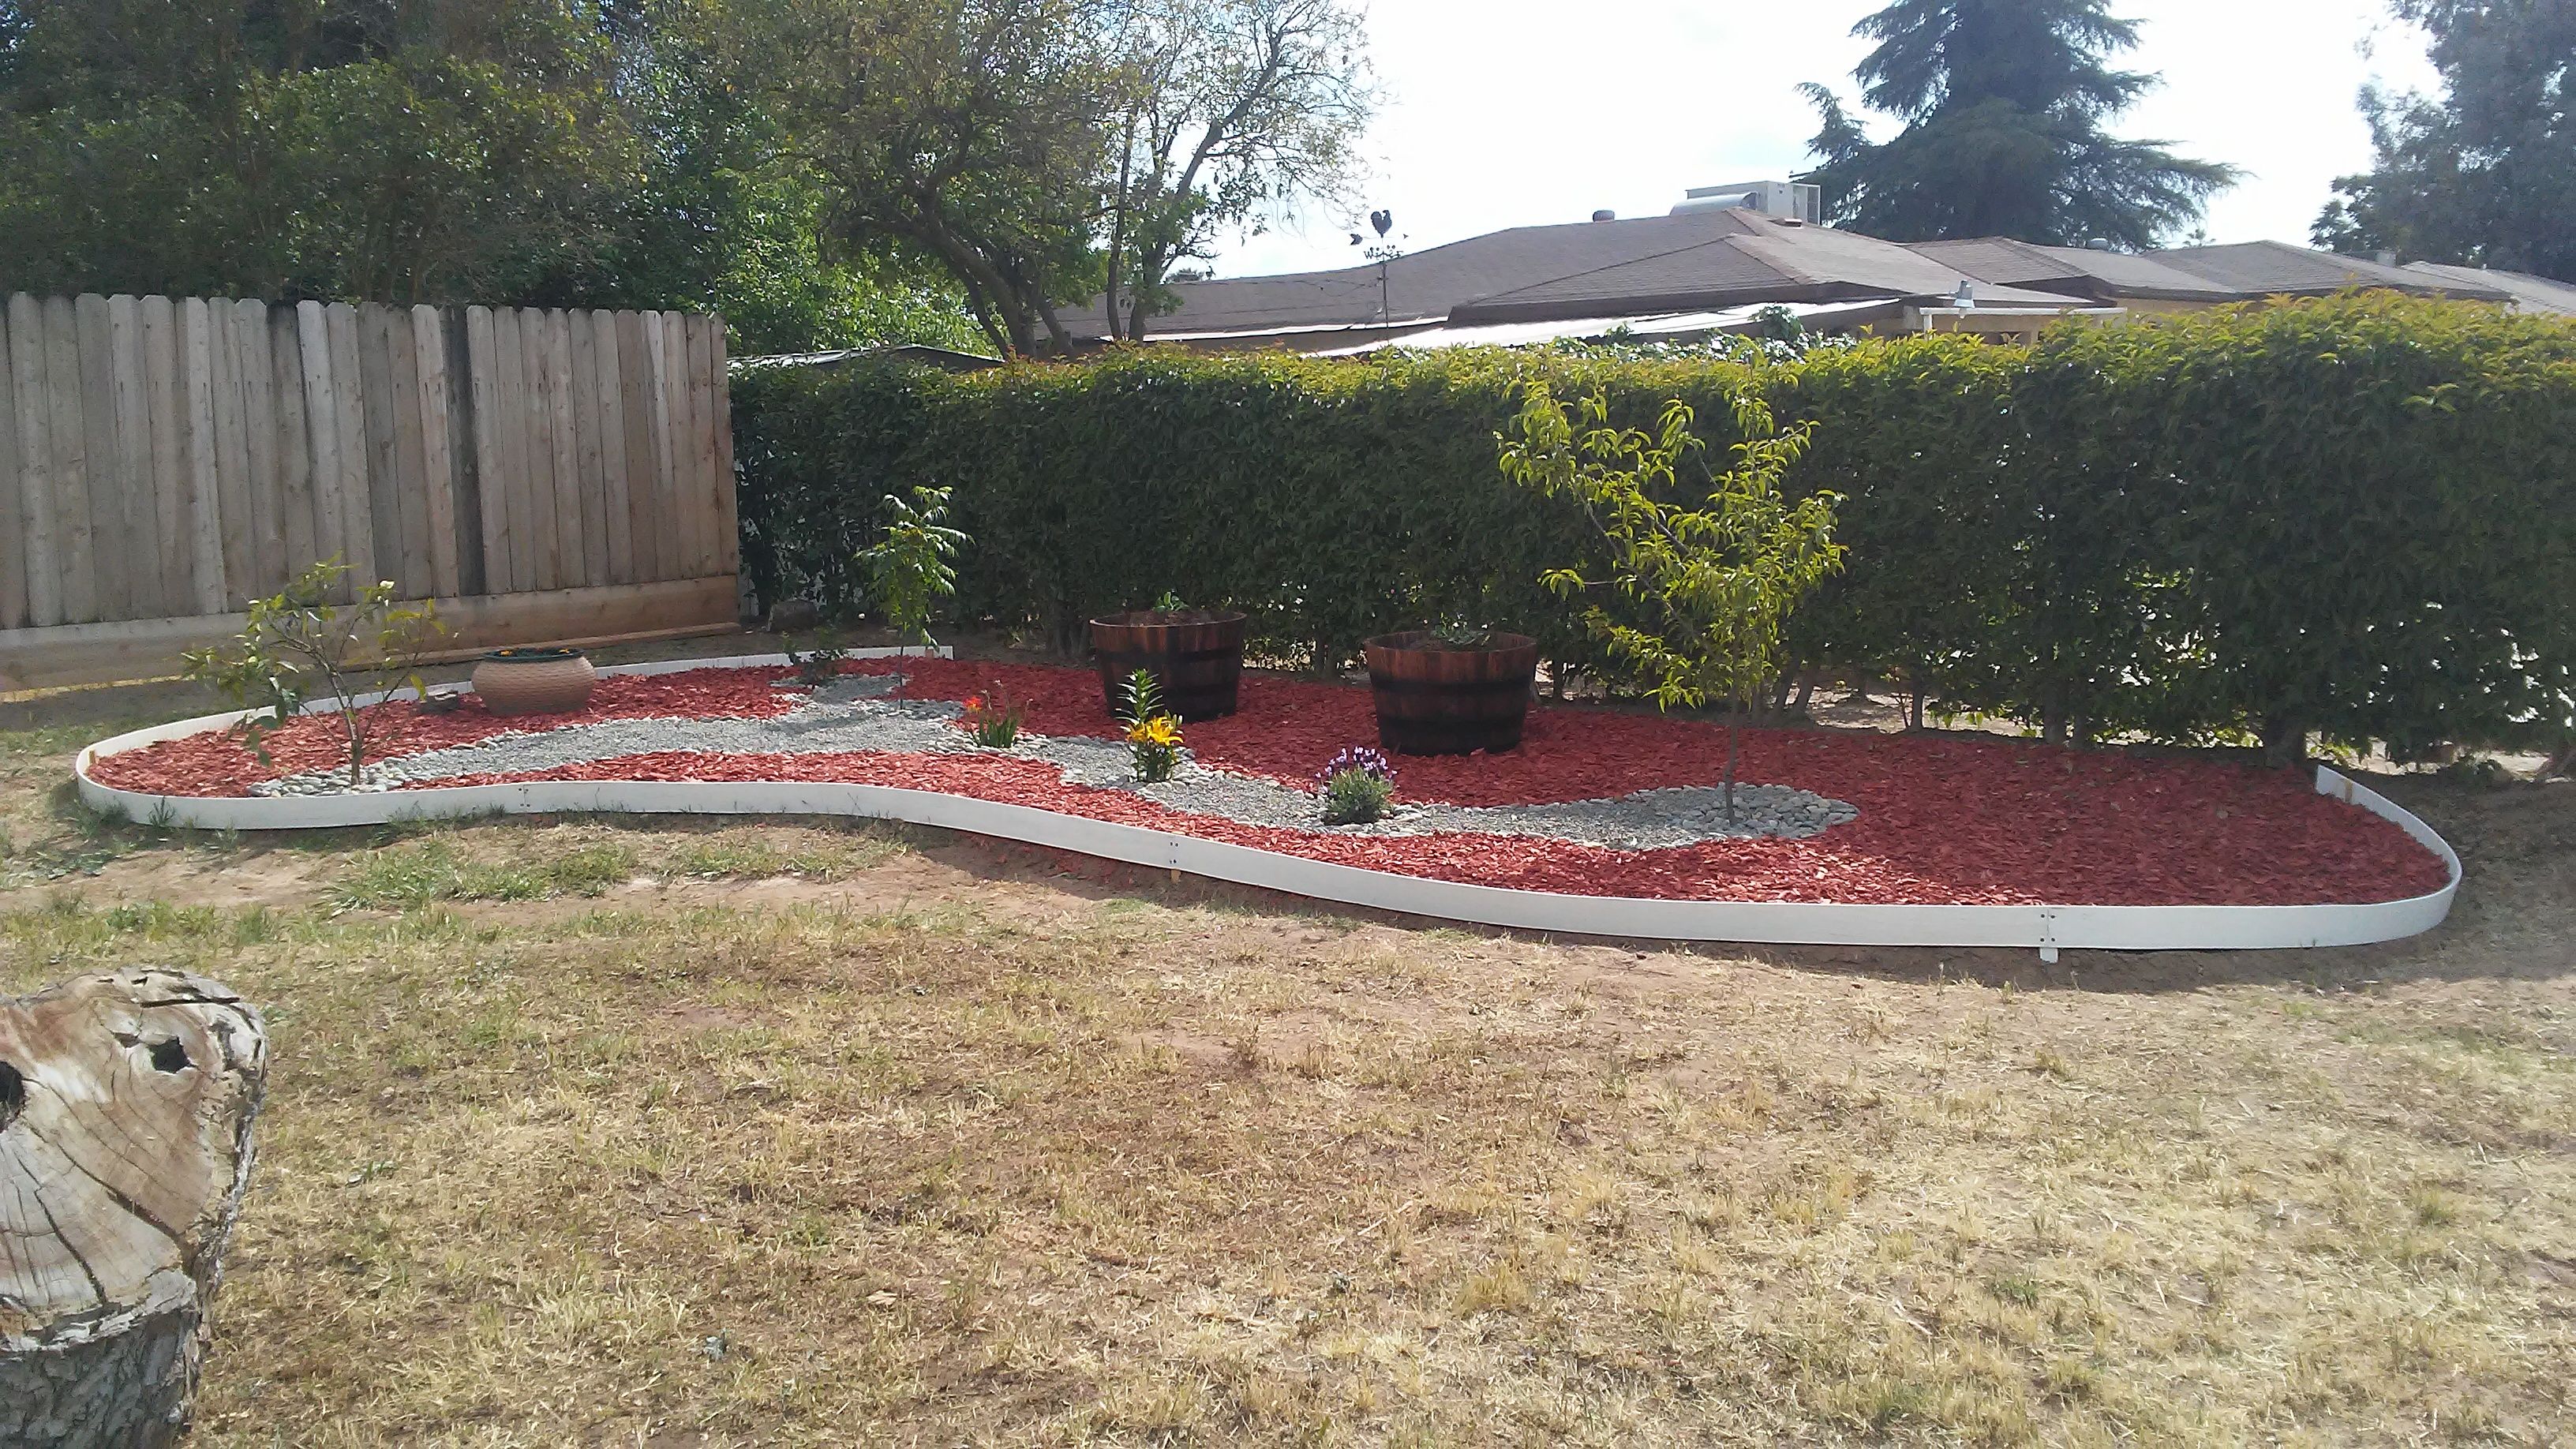
The space has been completely transformed from a bare, uneven sore spot in the yard to a beautifully colorful garden feature with fruit trees
Please be sure to check out my others articles on real estate, investing , and cryptocurrency ( and some other random dog stuff)
I always upvote comments to my blog posts
Oh my gosh! What a difference! I love how you did the edging. It makes such a huge difference and so much more inviting to sit outside and enjoy the sunshine!
Thank you! we really enjoyed making this and it's good to come home to this instead that nasty old dirt and weeds - speaking of sitting outside to enjoy the sunshine - wait till you see the firepit we put in this weekend - I can't wait to post it up. it's so nice we were sitting around it even without a fire... :)
Wow @jorlauski. You two completely transformed that yard. It looks amazing. I remember many parts of Fresno, all of the Central Valley really, do look like that wasteland in the 1st picture. I have friends in BakeTown still and their yard looks just as dry and desolate. Beautiful what you did turning that little piece of desolation into your own paradise. Thanks for sharing. :)
I'm not on as much anymore but I do enjoy visiting your blog when I'm abled. It's challenging with work, life...steemit.
thanks for the compliments - yes....there is a lot of brown dirt yards in Fresno - but there are more lawns than wasteland thankfully - we moved out to edge of town so there is a little more brown yards over here - but a lot less vagrants, criminals , and knuckleheads... so we are very happy to have gotten this place ....now we are just trying to carve out our own little paradise - I haven't been on Steemit much either lately - mostly because of what you see in these pics as well as other projects that I haven't had time to edit and post yet. I'm glad that took a moment of your limited time to check out my post and comment - Thanks a lot- I'm always happy to see your name show up on my feed and you always have the nicest things to say.
You are carving a nice paradise so far. :)
Why is it that we have to move to the outskirts for better neighborhoods? Always the case. I had to do the same here for a better school system for my kids. They're not even at the school age yet!
You always write great posts. I just wish I had time to stop by more often. If only communities like curie don't have such strict guidelines on who they choose to support. They try to support individuals with low reps and those that haven't been curied before. They usually don't show further support once you've been curied a couple times. Which sucks.
Try the hashtag ocd-resteem on your next good post. That's another curation team. They show support sometimes if a Curator sees the post with their tag.
Hi @beeyou - thanks for the advice - I'll take it into consideration. You've never steered me wrong before. I'm always glad to have you stop by my blog even if you cant always make it - you still show up more often than most - so thanks for your ongoing support.
very nice @jorlauski! I think it is a beautiful transformation! It really looks good and I like how you showed your story. You can come do my yard anytime you like ;)
I look forward to your next project :)
Thanks @davemccoy! I hadn't planned to put so many pics, but I had tons more and was trying to narrow it down - and of course I wanted to give a good explanation for everything that was going on - and it ended up taking me three days to post this! I finished another project in the same time that I'm really looking forward to showing you. Thanks for the kind words - and as far as doing your yard - I'll tell you the same thing I tell my friends here in Fresno - I charge THOUSANDS and THOUSANDS of dollars to do your yard! for some reason - no one ever takes me up on the offer...I enjoy it - but only because my wife and I do it together at our own pace and have no one to answer to but ourselves - I wouldn't want to do this as a job , but I love doing it!
Sharing your lovely work with the community. P.S., change the hashtag from #newbieresteem to #newbieresteemday. ;)
Congratulations you have been resteemed as part of #newbieresteemday's top posts for the day! We invite you to use our tag to connect with more of our members. To learn more: Come Join Us!!! (Newbie Resteem Initiative)
ABC's of Curation team member: @beeyou
Beautiful work, @jorlauski! How long did this take you?
Thank you very much @k0wsk1 - it took just a few days. I started with making the kerfed bender boards and that took about half a day - it took about another half day to put in the board - then my wife and I spent a day leveling the ground. We spend another day laying down the wood chips ,rocks, and trees...and finally the last day we put in the flowers and the barrels. It probably could have been done quicker but we were taking our time and only working when it wasn't hot like mornings or evenings.
That's the way to go! Its about hard work, not quick work. Enjoy your new space :)
Thinking about splurging on a more professional camera, what are you using?
my Android cell phone
😎