Simple 3D UV Mapping - Danbo
UV Mapping Danbo
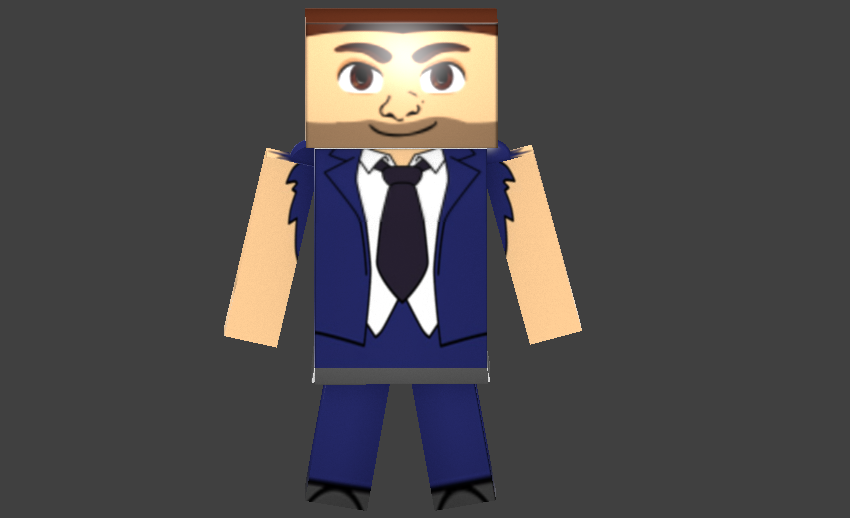
Greeting Everyone, today I will discuss about the simple 3D UV mapping I did on 3D models using blender.
according to the source I quoted from Wikipedia UV Mapping is :
This process projects a texture map onto a 3D object. The letters "U" and "V" denote the axes of the 2D texture because "X", "Y" and "Z" are already used to denote the axes of the 3D object in model space.
UV texturing permits polygons that make up a 3D object to be painted with color (and other surface attributes) from an ordinary image. The image is called a UV texture map. The UV mapping process involves assigning pixels in the image to surface mappings on the polygon, usually done by "programmatically" copying a triangular piece of the image map and pasting it onto a triangle on the object. UV is an alternative to projection mapping (e.g. using any pair of the model's X, Y, Z coordinates, or any transformation of the position); it only maps into a texture space rather than into the geometric space of the object. But the rendering computation uses the UV texture coordinates to determine how to paint the three-dimensional surface.
Source Wikipedia UV Mapping
In this UV Mapping process I using a Danbo object that I have previously done modeling.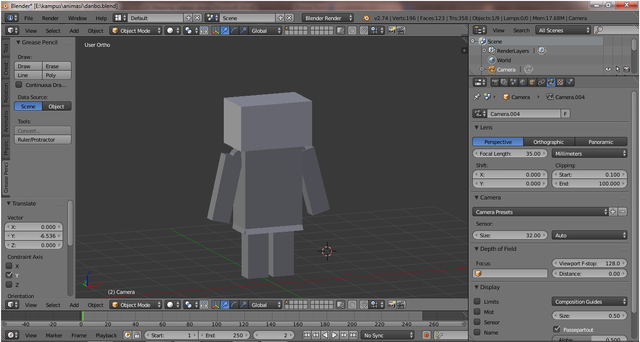
The first step to UV Mapping is to add material to the head object, as shown below :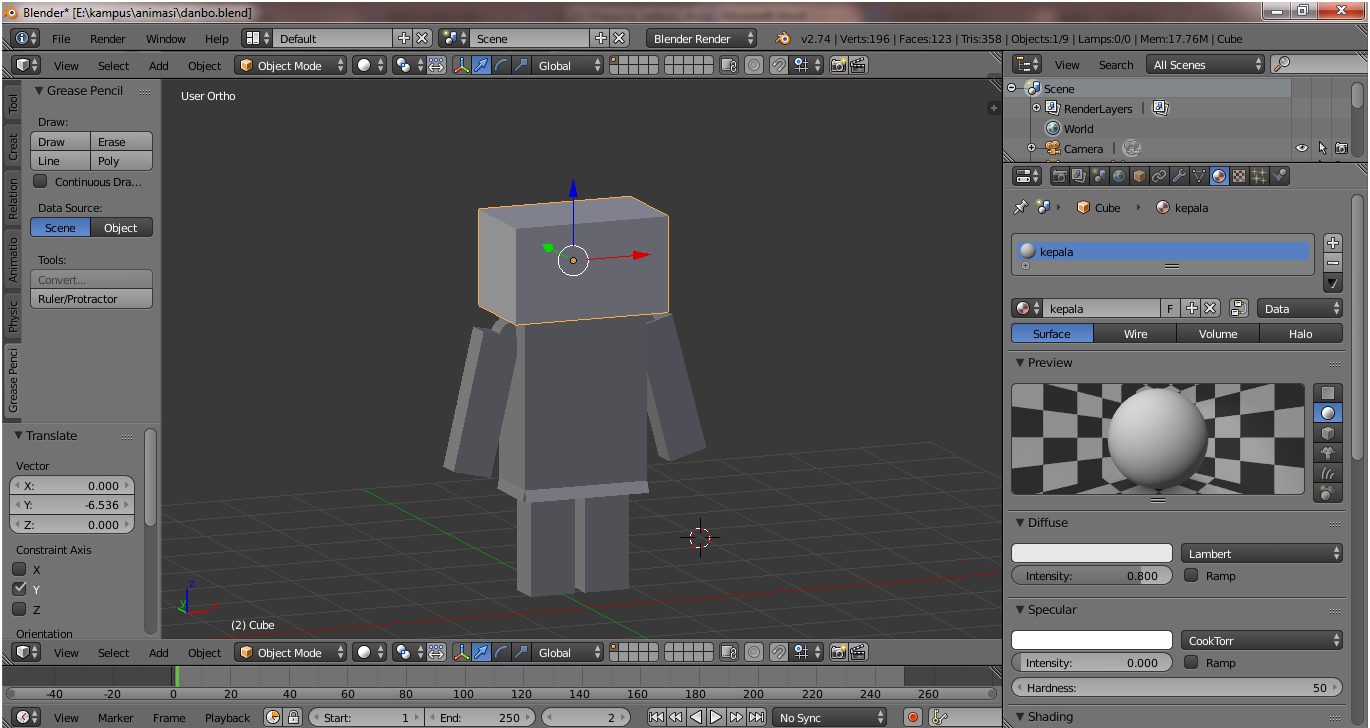
Next add texture by click on Texture then New, after that at Type select Image or Movie, as in the following image :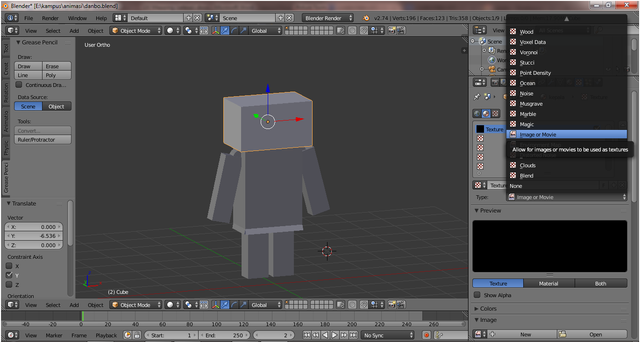
Next click on Open Image it will look like the following image :
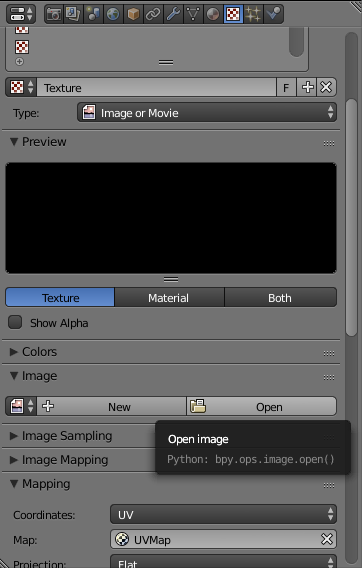
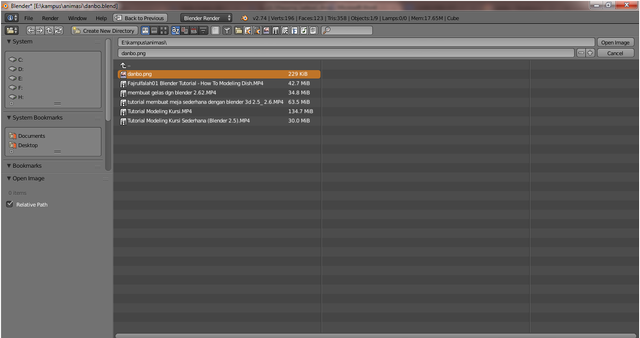
After the image in open then the preview will appear in the open image earlier, as in the following image :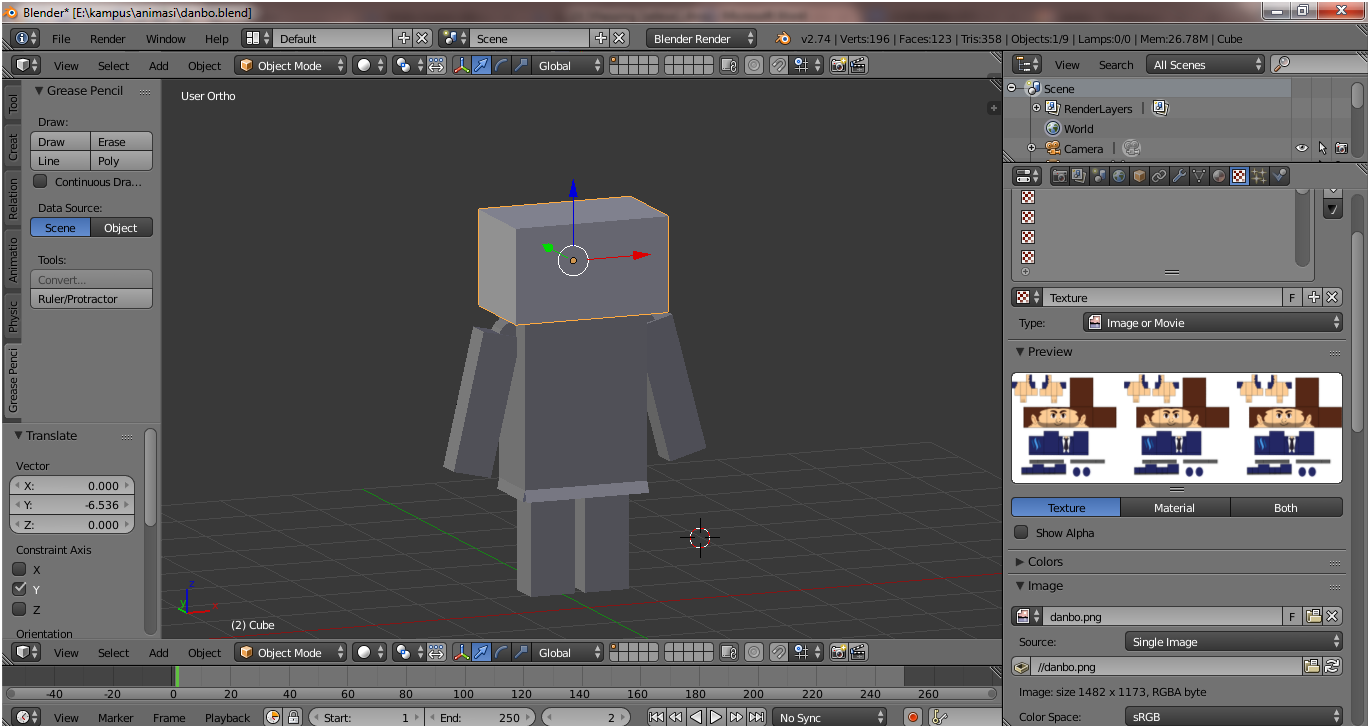
The next step is to make the display screen into two by way of left click and drag to the middle on the 3 upper right corner of the screen on the screen as shown below :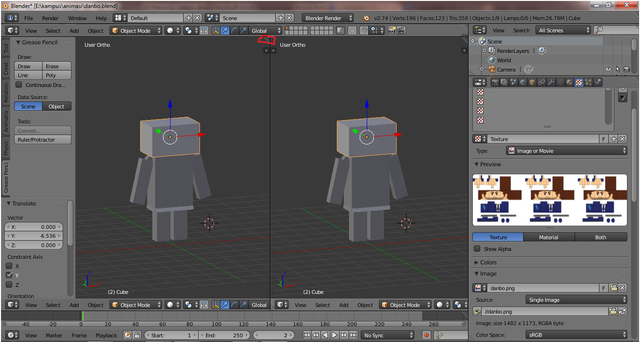
Then on the first screen display in Front Ortho and on the second display screen change to UV image editor by clicking on Type Area Editor then select UV / Image Editor, like the following image :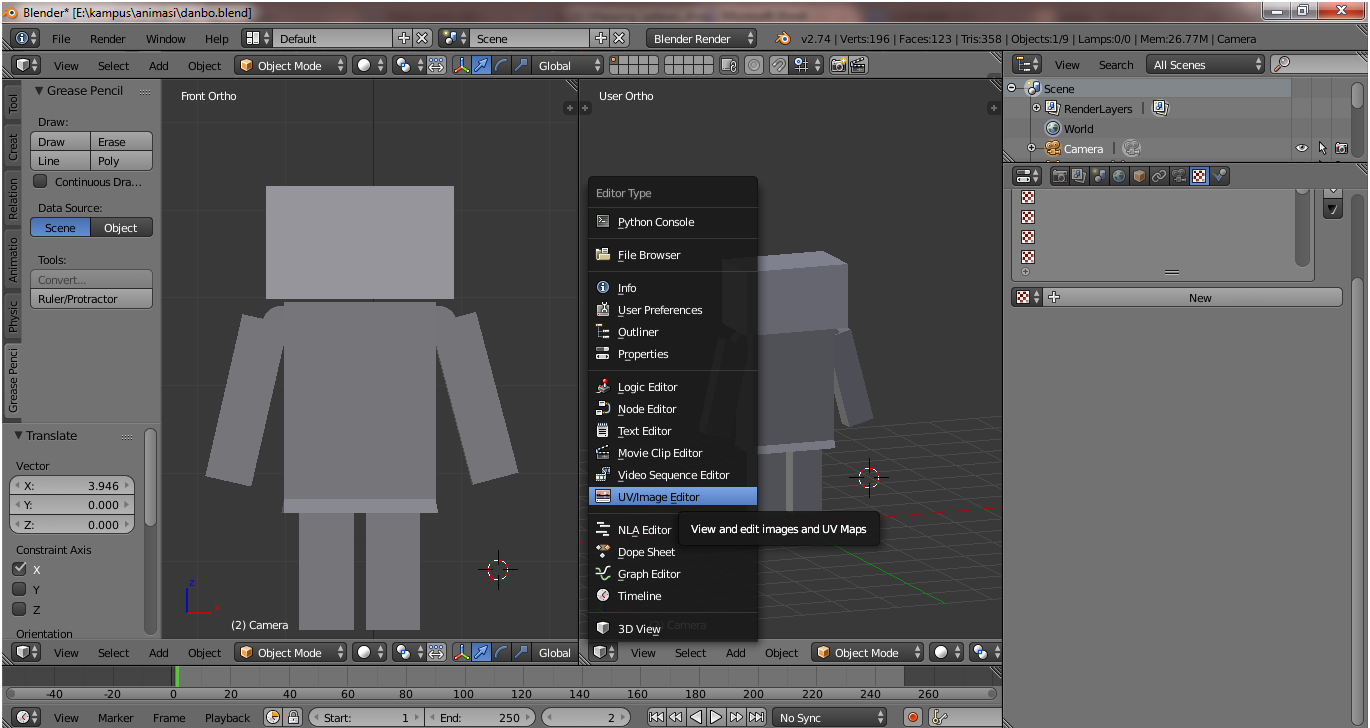
Then delete the Render Result on the 2nd screen by pressing close (X) on the Render Result, so it appears on the second display screen as shown below :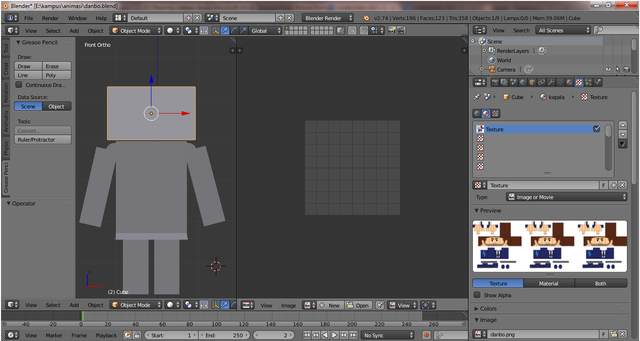
Next add a image mapping on the second display screen by clicking the Browser Image To Link that is next to the left New and select the image, as shown below :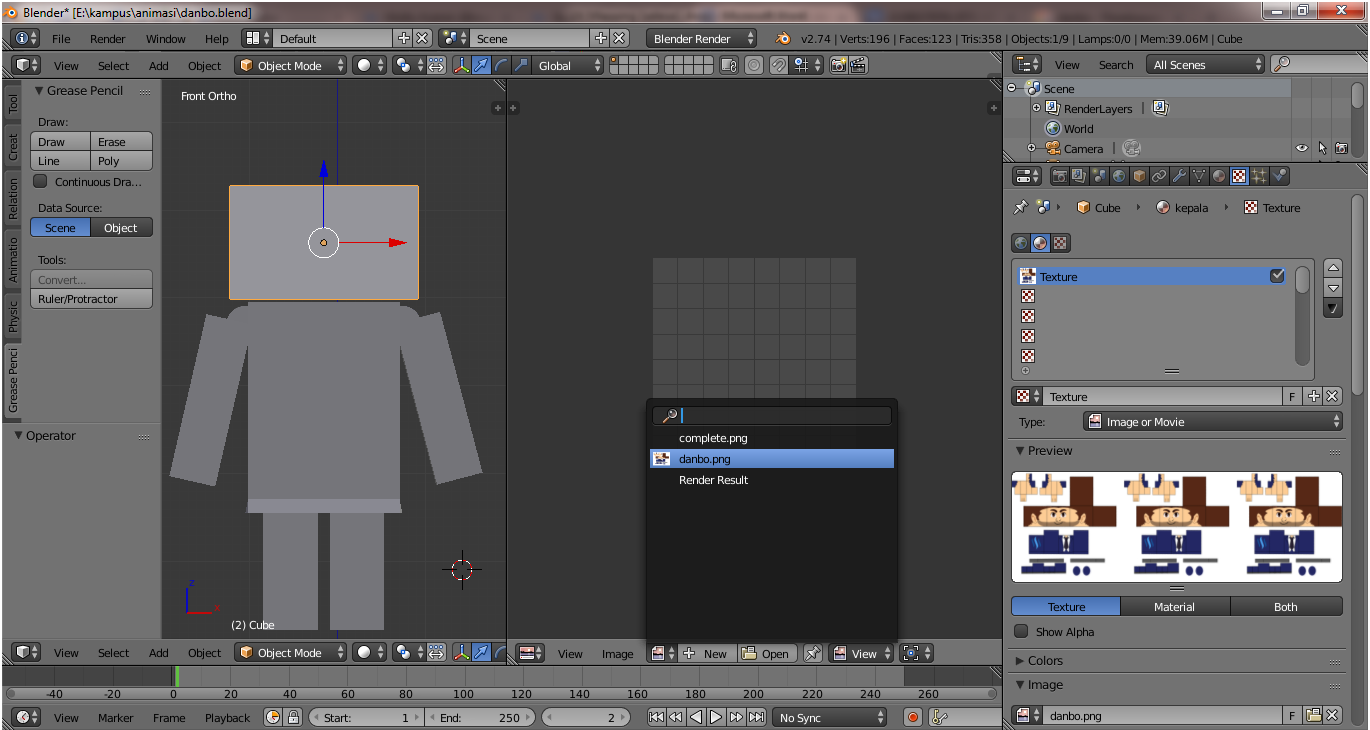
So on the second display screen will appear mapping images like the following image :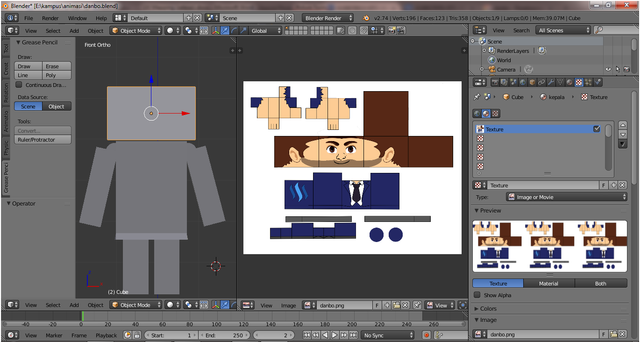
In the first screen press TAB on the keyboard then the selection of parts to be in mapping, like the following image :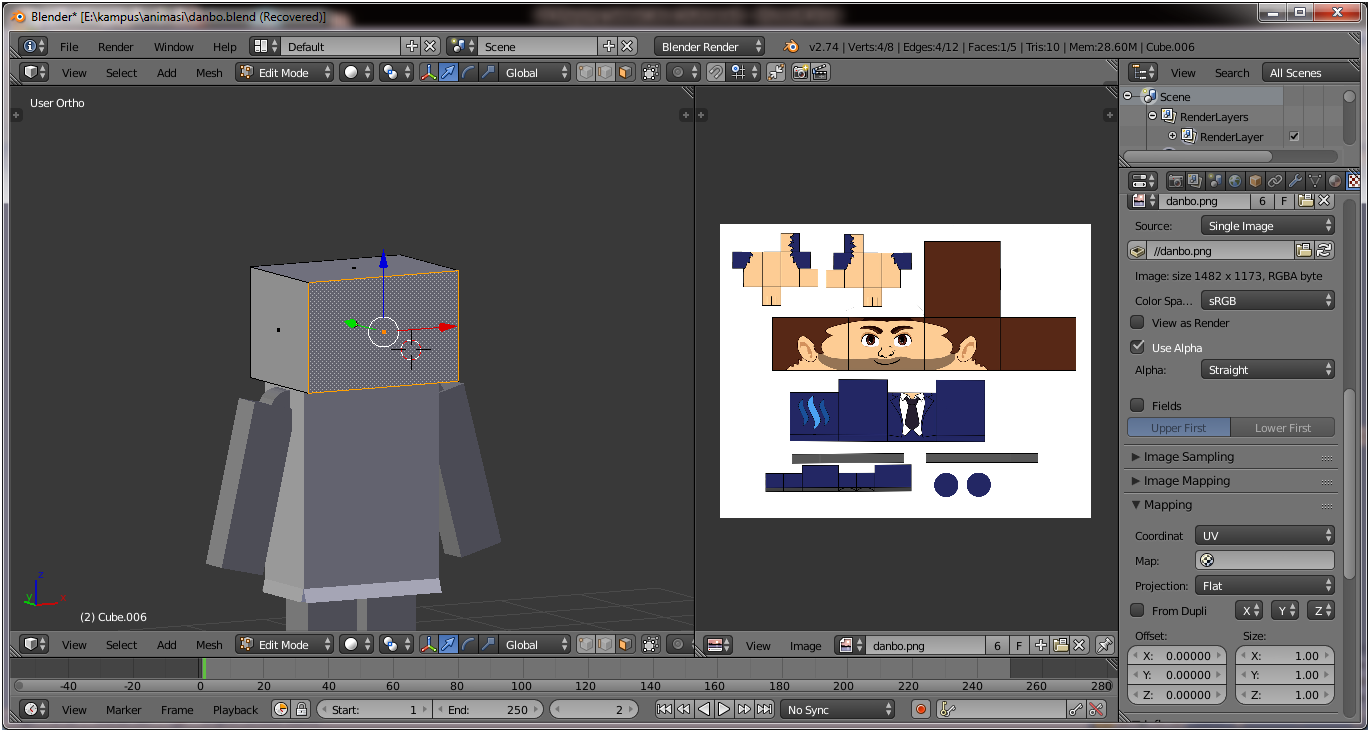
Next on the screen to 2 click Browser Image To Link and select image danbo, Back again on the first screen, press U on the keyboard and select Unwarp as in the following image :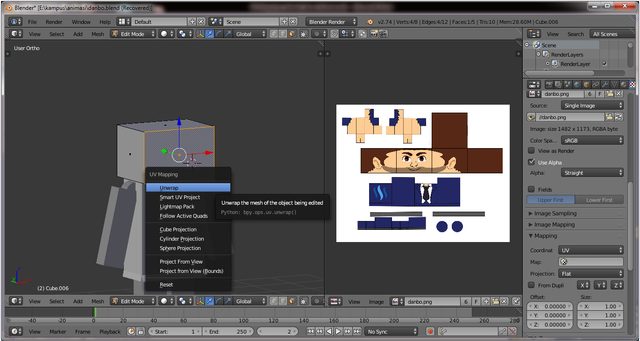
Press Alt + Z to change the viewport to Texture viewport then on the first screen will look like the following :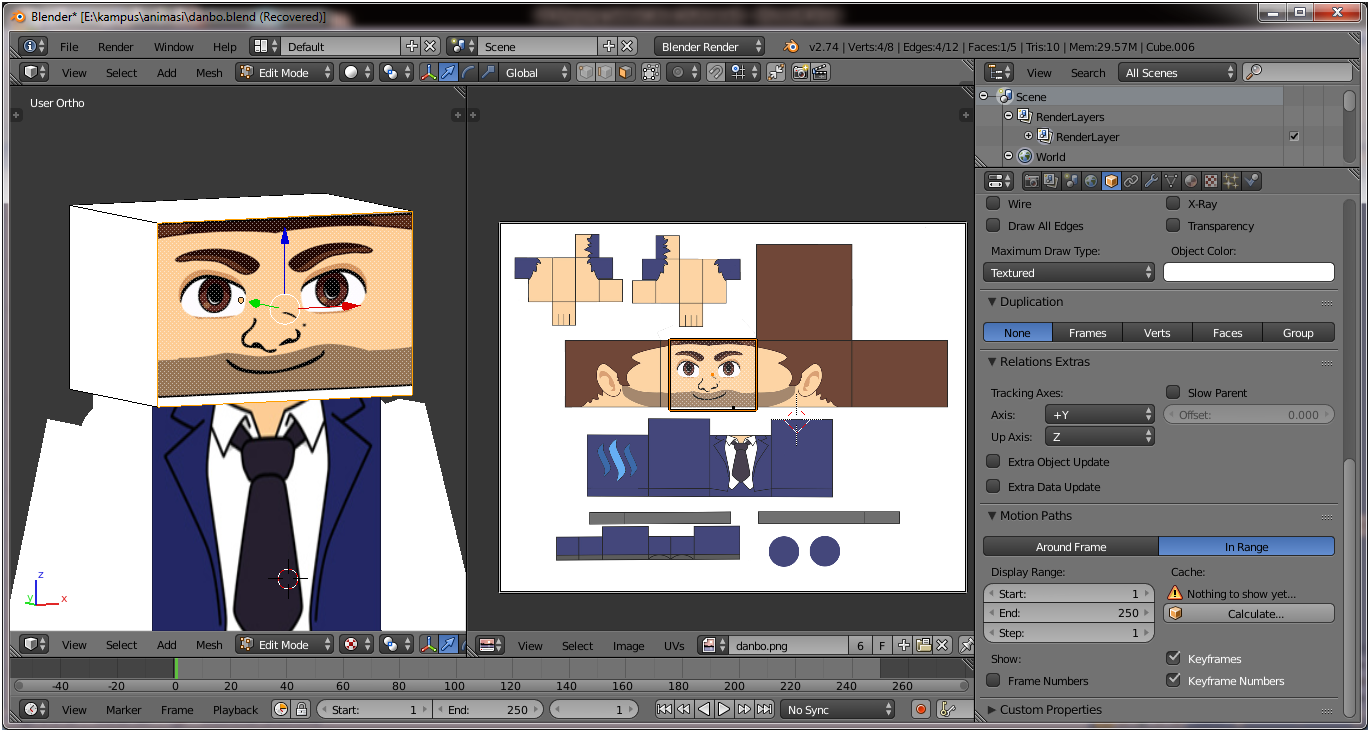
On the 2nd screen use S (scale) on the keyboard to adjust the mapping and use G (move) on the keyboard to adjust the position of the mapping area, adjust the shape of the mapping area with the image used as the following image :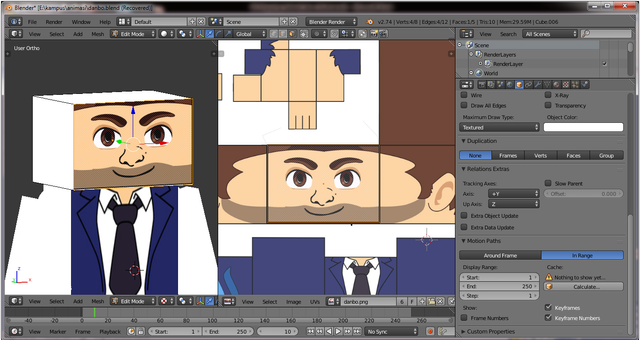
Next do a mapping on the next side by way on the screen 1 Press alt + Z to return to Solid Viewport, then click the other side will be in the mapping like the following image :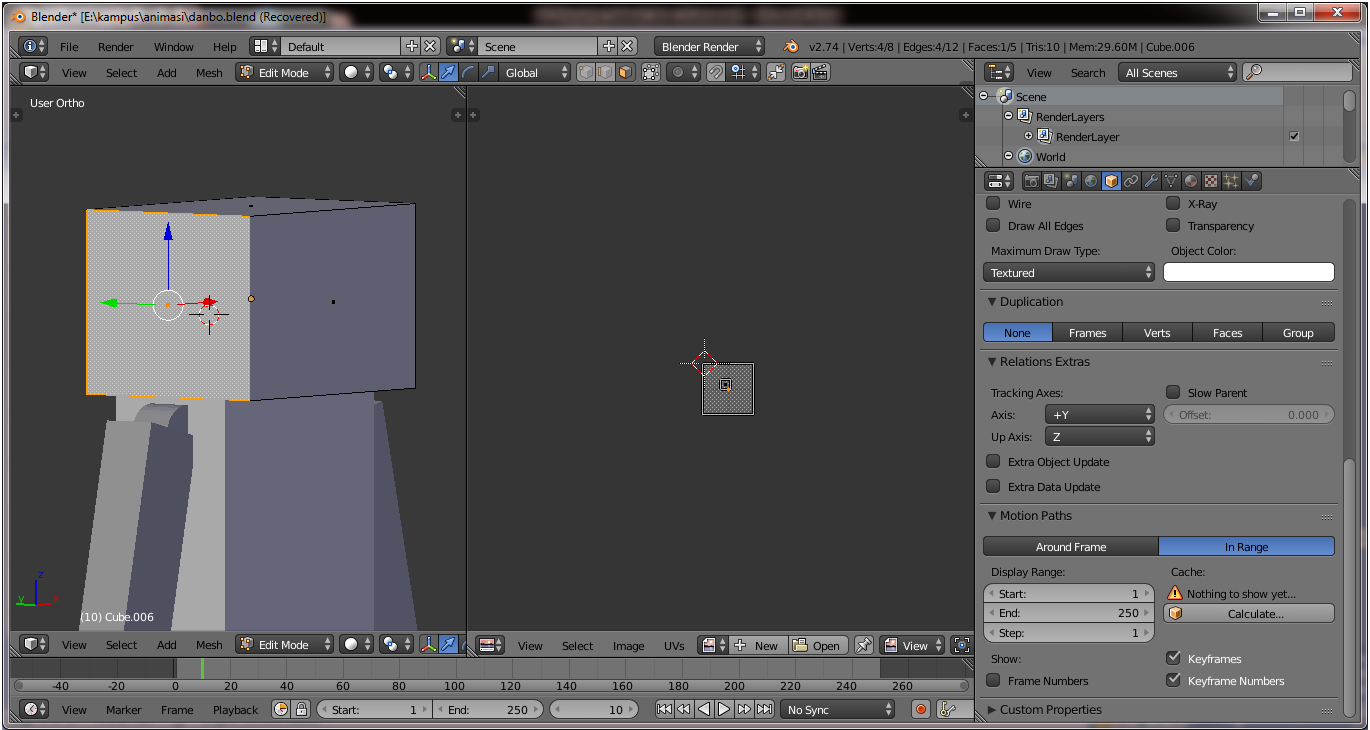
Then on screen 2 select in the Browser Image To Link section, select the Danbo image again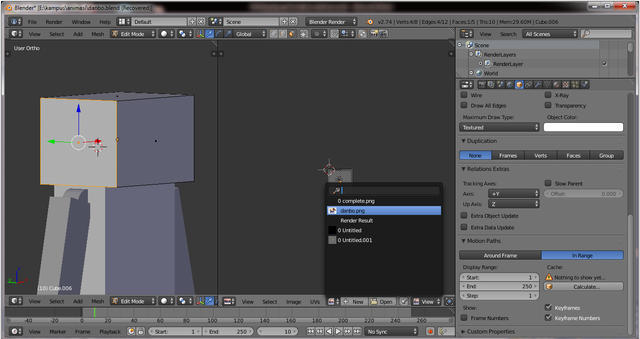
Do Unwrap for the side on screen 1 so that on screen 2 looks selection to be set in mapping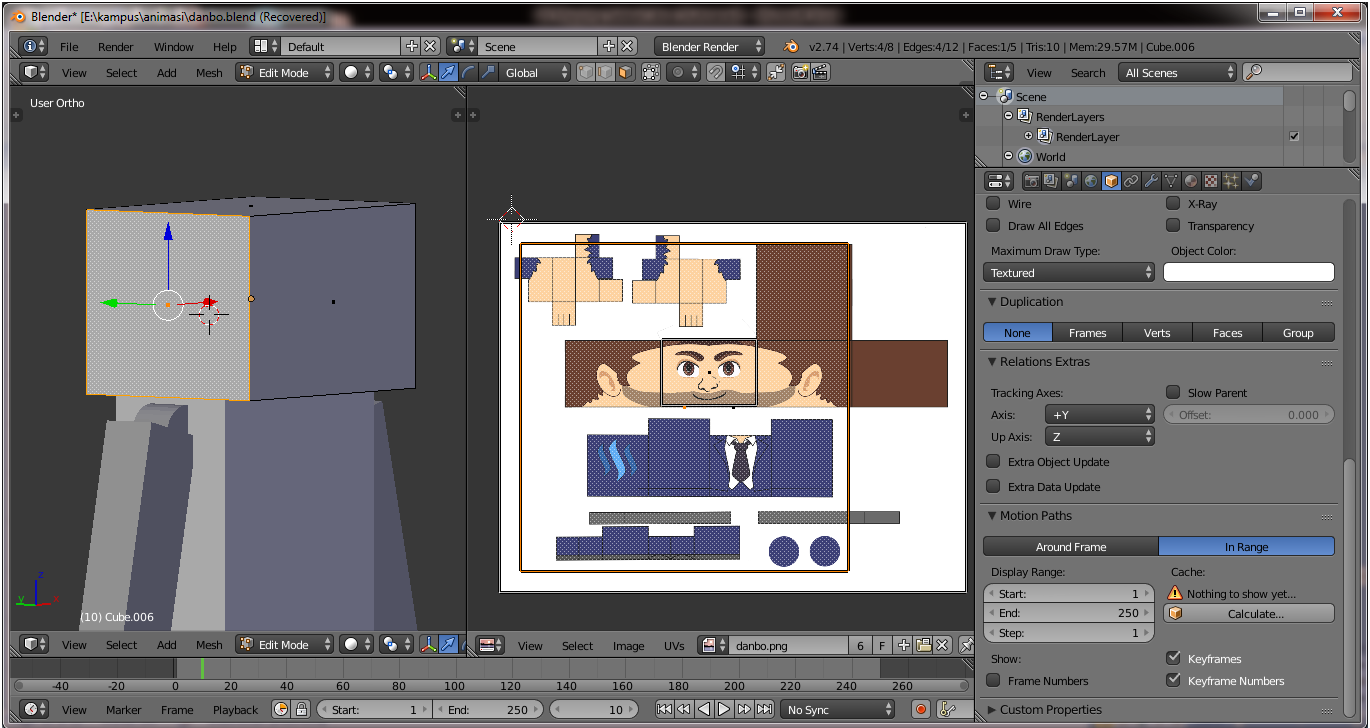
Press S to scale the selected area, as shown below :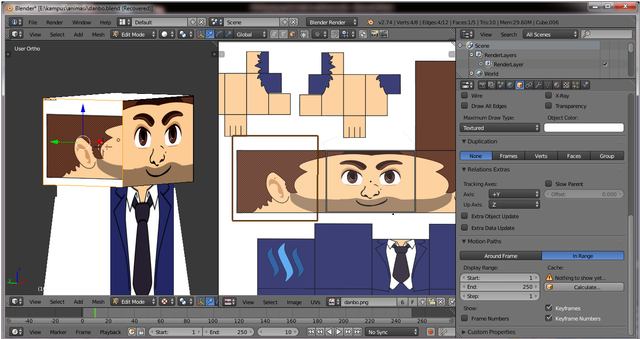
Then adjust the mapping with the object as shown below :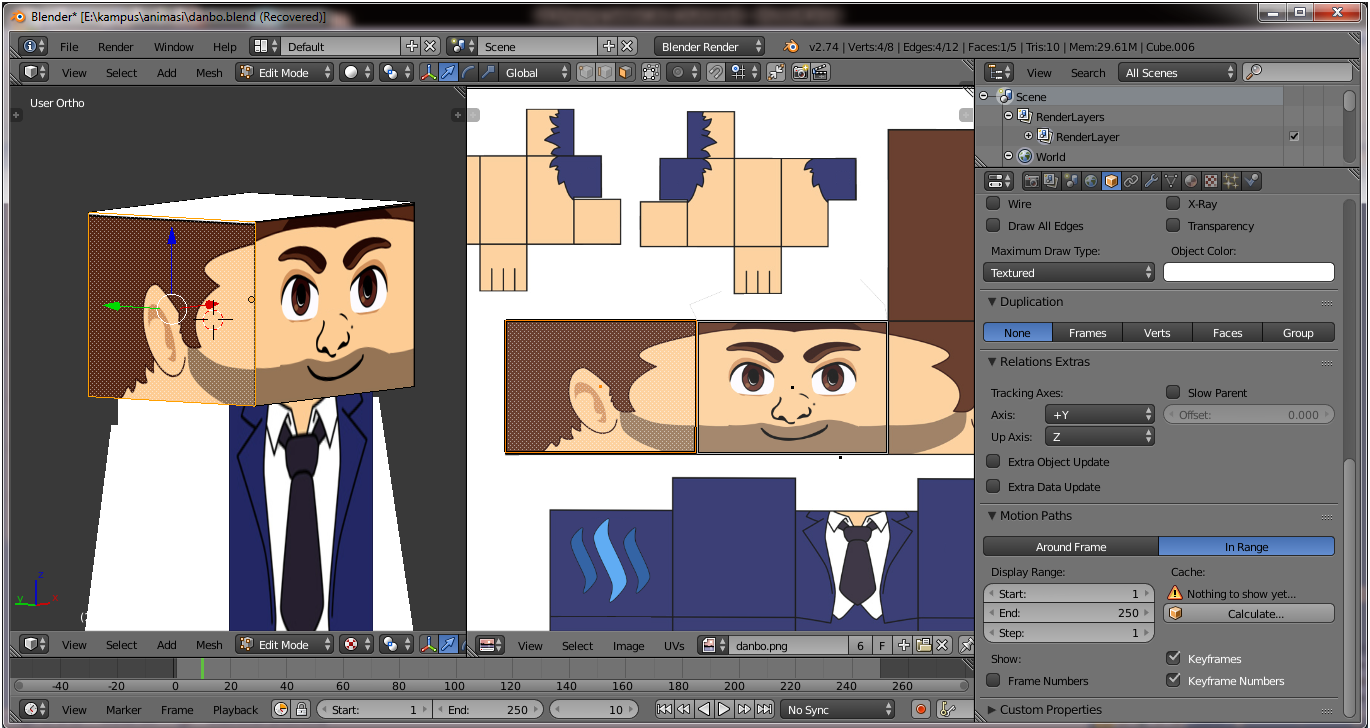
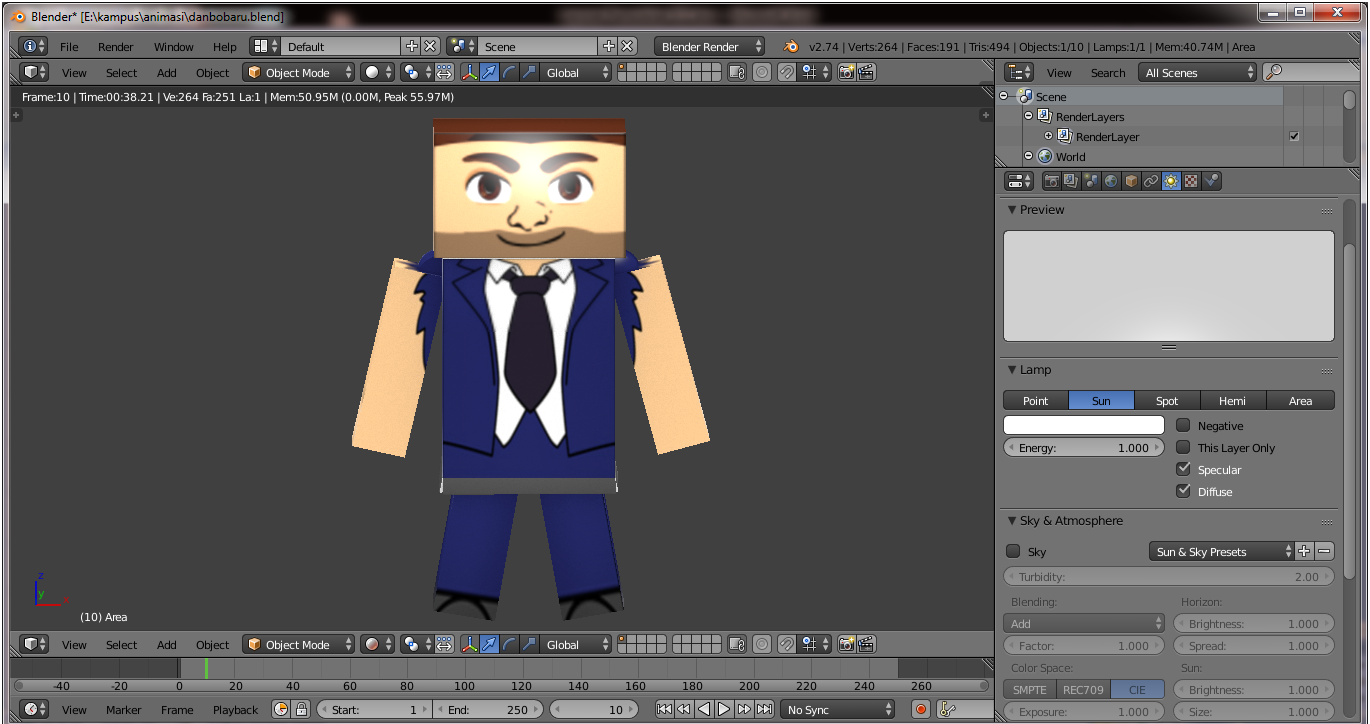
Repeat the mapping on the other sides as well on other Danbo parts in the same way as before to get the final mapping result as follows :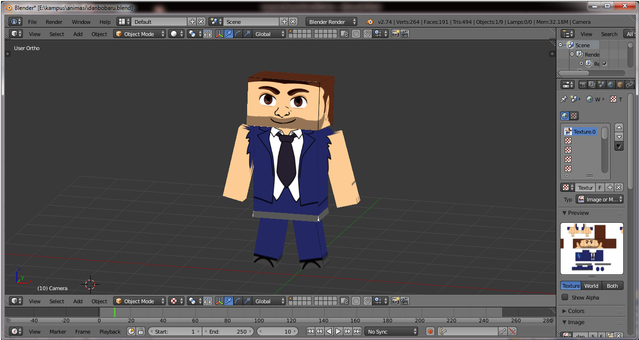
I saw a steemit member who wrote about 3D animation that started posting a lot of 3D works in steemit, so to make it easier to see 3D animation works from my steemit member create a tag for the author about 3D animation and propose that this tag is in the launch. the name of the tag that I will create and I use for the first time is #steem3D tag, hopefully with #steem3D tag can make it easier member steemit to see results and tutorial 3D animation. for writers who write about 3D animations please use #steem3D tags for writings and 3D works.
Join @Adsactly Community
Adsactly is a Autonomous Decentralized Society Acting Cooperatively to Leverage You.

Follow Me @muftykutink
I'M TEAM ACEH STEEMIT
My Recents Post :
Modeling 3D Candle
ColorChallenge - ThursdayGreen : 3D Animation
Trying Modeling 3D Planets Colliding
Simple 3D Animation Modeling - Dining Tables #7 Combine Object Tables, Chairs, Plates, Glasses, Bananas, and Breads
Simple 3D Animation Modeling - Dining Tables #6 Bread Object
Simple 3D Animation Modeling - Dining Tables #5 Banana Object
Simple 3D Animation Modeling - Dining Tables #4 Glass Object
Simple 3D Animation Modeling - Dining Tables #3 Plate Object
Fantasy 3D Animation
Simple 3D Animation Modeling - Dining Tables #2 Seat Object
Simple 3D Animation Modeling - Dining Tables #1
Children, What We Can Learn From Hime
📷 ColorChallenge ThursdayGreen - Historic Place
3D Modeling of Compost Grinder Machine
3D Modeling Steemit
Brother
Please upvote my post and grow me in steemit
Thanks