Modeling 3D Flashlight Part 2
Flashlight

Greeting everyone, today I am trying to make a 3D modeling Flashlight learning tutorial . Hopefully friends love it and can be a good lesson for friends who want to learn 3D animation. because the process of making a long, I divide this tutorial into 2 parts. previously i have posted part 1 Modeling 3D Flashlight Part 1 and today i will post part 2.
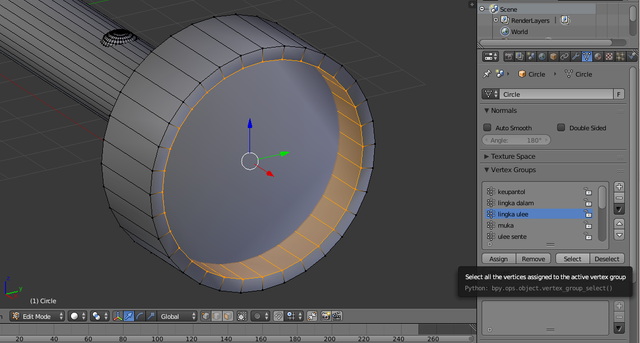
To do the coloring of materials, In the right pane click Data menu, then on Vertex Groups select Group (in the tutorial the name of the selected part group is "lingka ulee") which will be coloring material then click Select, as in the following image :
Next on the Material menu click the + sign, create 2 materials as in the following image :
Select the material into 2 then give the name "biru", then on Diffuse give the blue color for the material as in the image :
After the material is colored then click Assign to give color to the selected object, for the coloring result like the following image :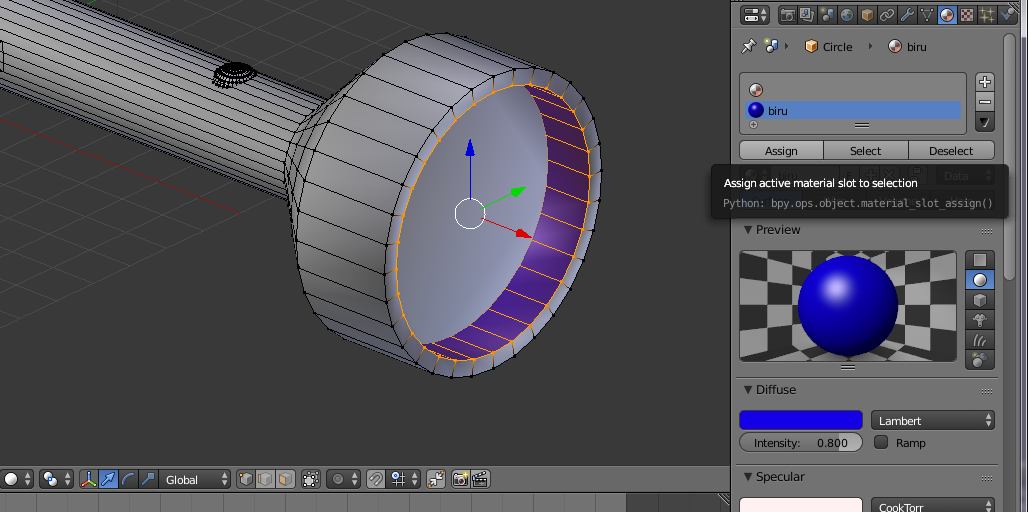
Still on the Material menu in the Specular section there is Intensity, change the Intensity to 0
Back again to the Data menu, in the Vertex Groups section select Group that will be given the color by clicking on Group then click Select and do in some group, here the selected groups are "ulee sente", "likot sente" and "tombol" like in the following image :
Click on the Material menu then click Assign, the Selected Groups have changed color to blue as in the following image :
There are some groups that can not be selected as well as group "likot 2", because when selected at once then groups who do not want to be color is also selected. Next select the group "likot 2" by selecting Data menu then search and click on group "likot 2" which is in Vertex Groups then click Select.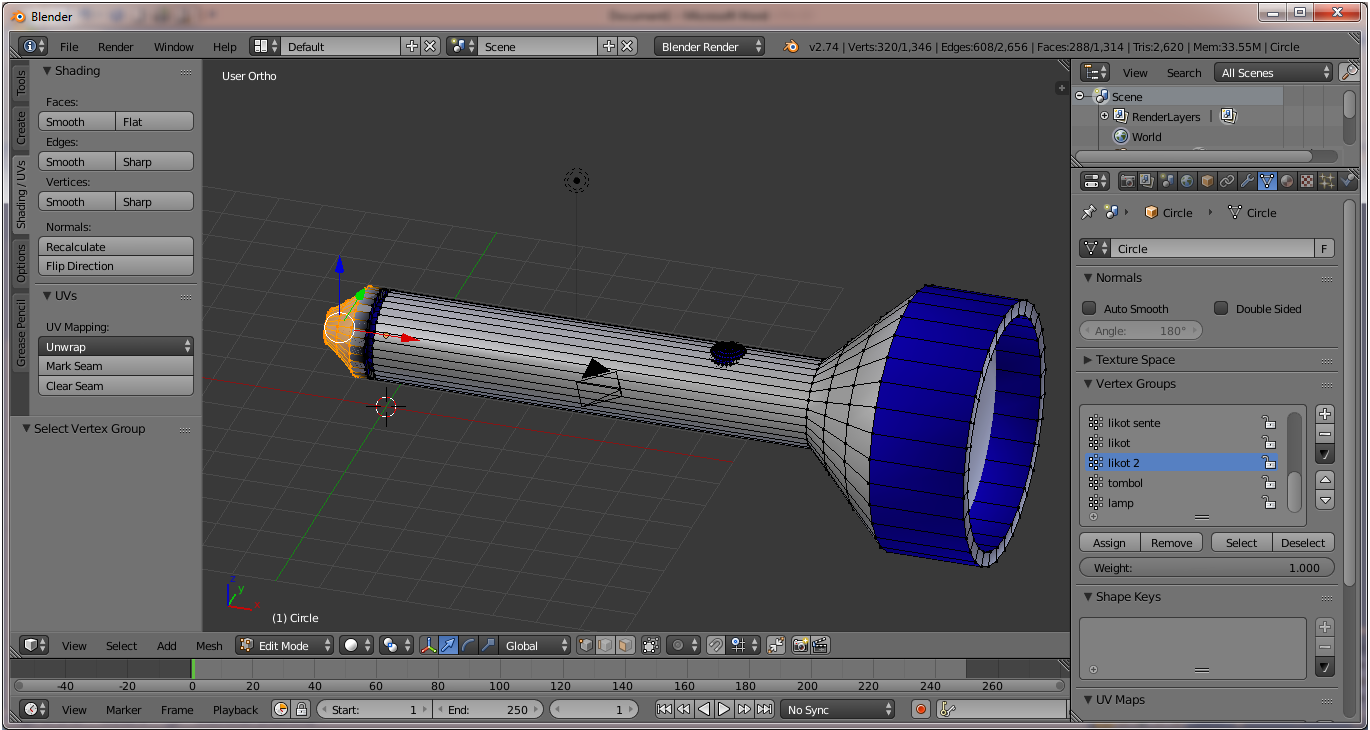
Go back to the Material menu and click Assign like the following image :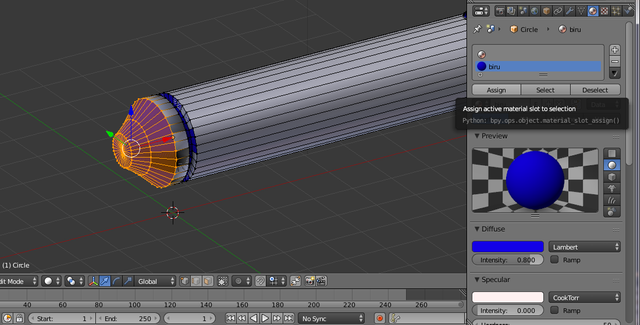
Next on the Material menu click + to add new material so that it looks like the following image :
Click New then name the material "biru muda" and give color to the material as follows :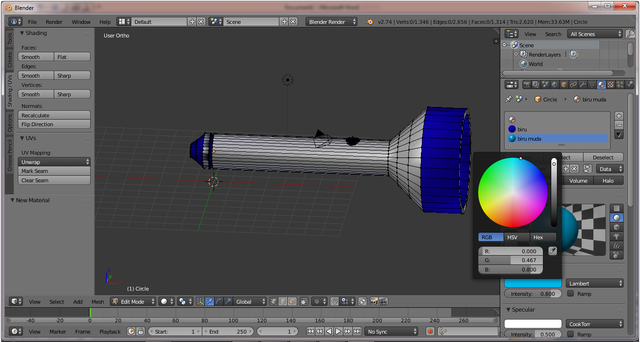
Next on Specular change the Hardness to 250 as follows :
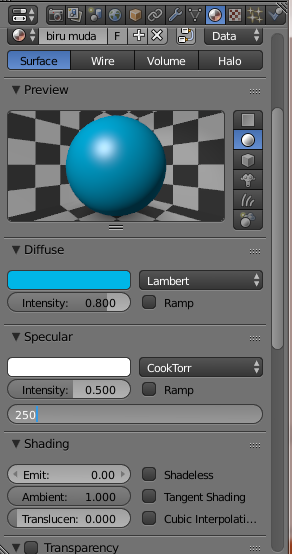
Next back to the Vertex Groups section and select the group "muka" and click Select
On the material menu in the light blue material click Assign, the "muka" has become light blue as follows :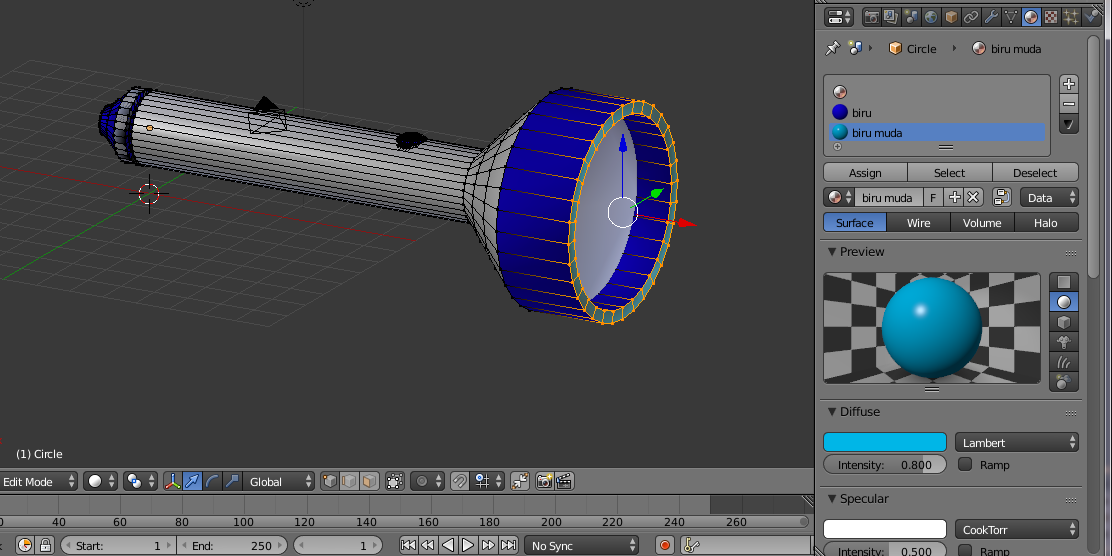
Next go back to Vertex Groups and then select some groups (ulee sente2, gee senter, and likot) like the following image :
In the "biru muda" Material click Assign then the group "ulee sente2", "gee senter", and "likot" change color to light blue like the following image :
Add new material by click + like as follows :
Click New then name the material "kaca", this material will be set to flashlight glass by doing some settings
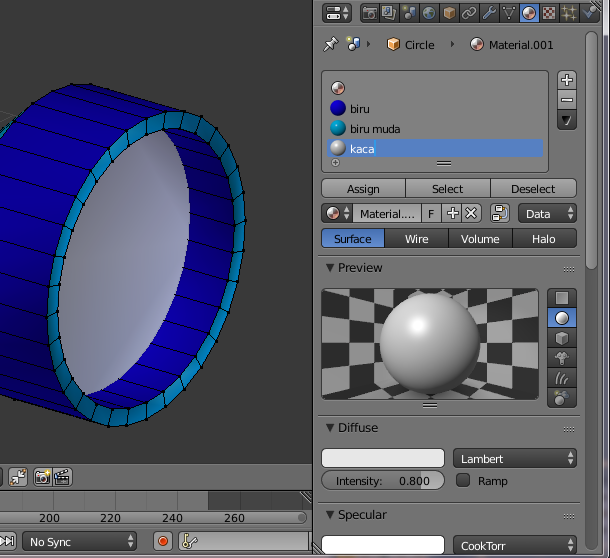
Make adjustments on the flashlight glass material as follows :

The result of the material arrangement then the material looks to be transparent like glass, the material results like the following image :
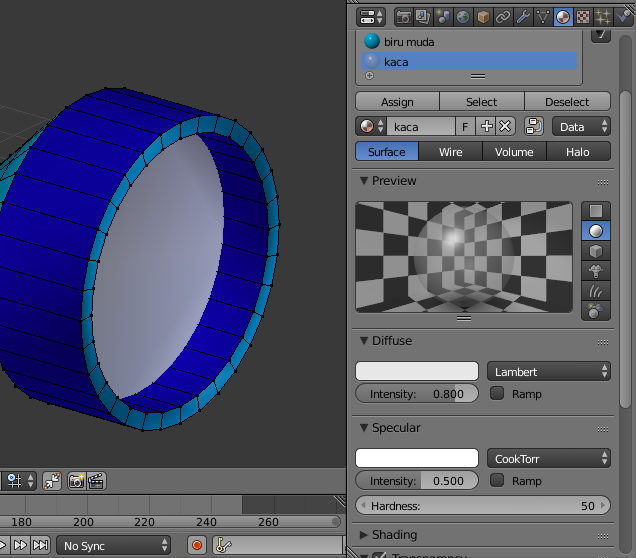
Then in the Vertex Groups group selection "lamp", as follows :
Go back to the Material menu and click Assign
Create a new material by click + like the following :
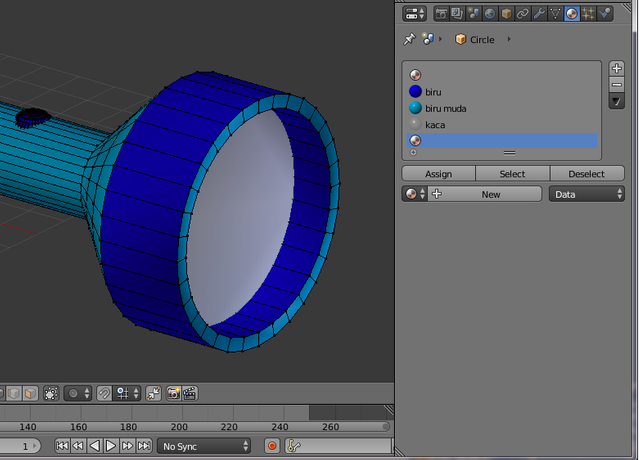
Name the material "pantol", this material will serve as a light reflector from a flashlight

Make the settings on the material as follows :

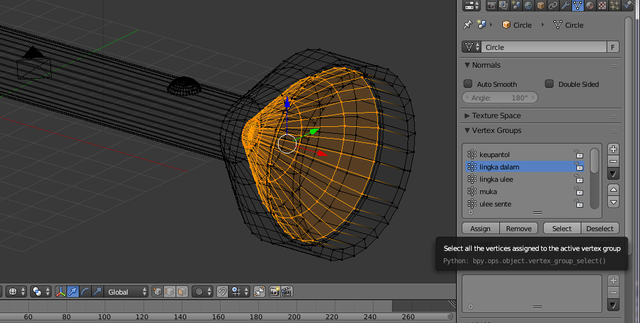
In Vertex Groups the "keupantol" group selection and the "lingka dalam" group are as follows :
Go back to the Material menu, on the "pantol" material click Assign, as follows :
After coloring the Viewport to Render, the result of the flashlight is as follows :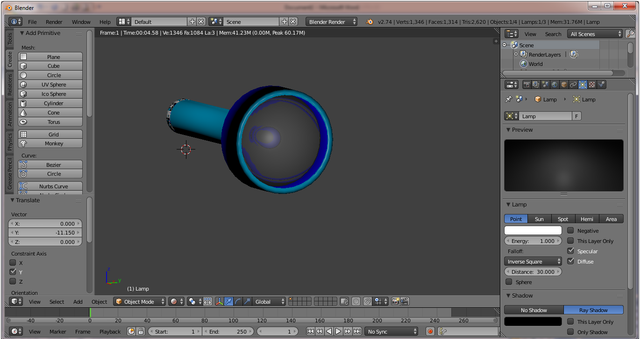
Next add the flashlight, change the view to Front Ortho by press Numpad 1 then press TAB to change to Object Mode and press Z to Viewport changed to Wireframe, press A to deselect all objects, add flashlight by press Shift + A select Lamp > Spot as follows :
After the Lamp spot appears set the spot position as follows :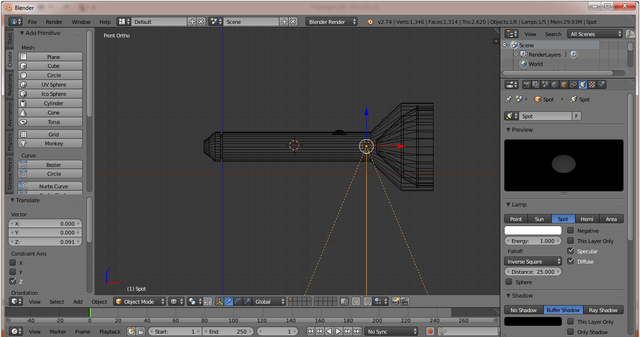
Then rotate the spotlight -90 degrees by pressing R + Z + -90 as shown below :
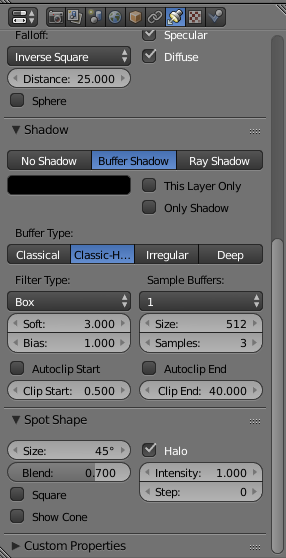
In the menu lamp, check Helo then do the following settings :
After the above steps are done then the results after the rendering as follows :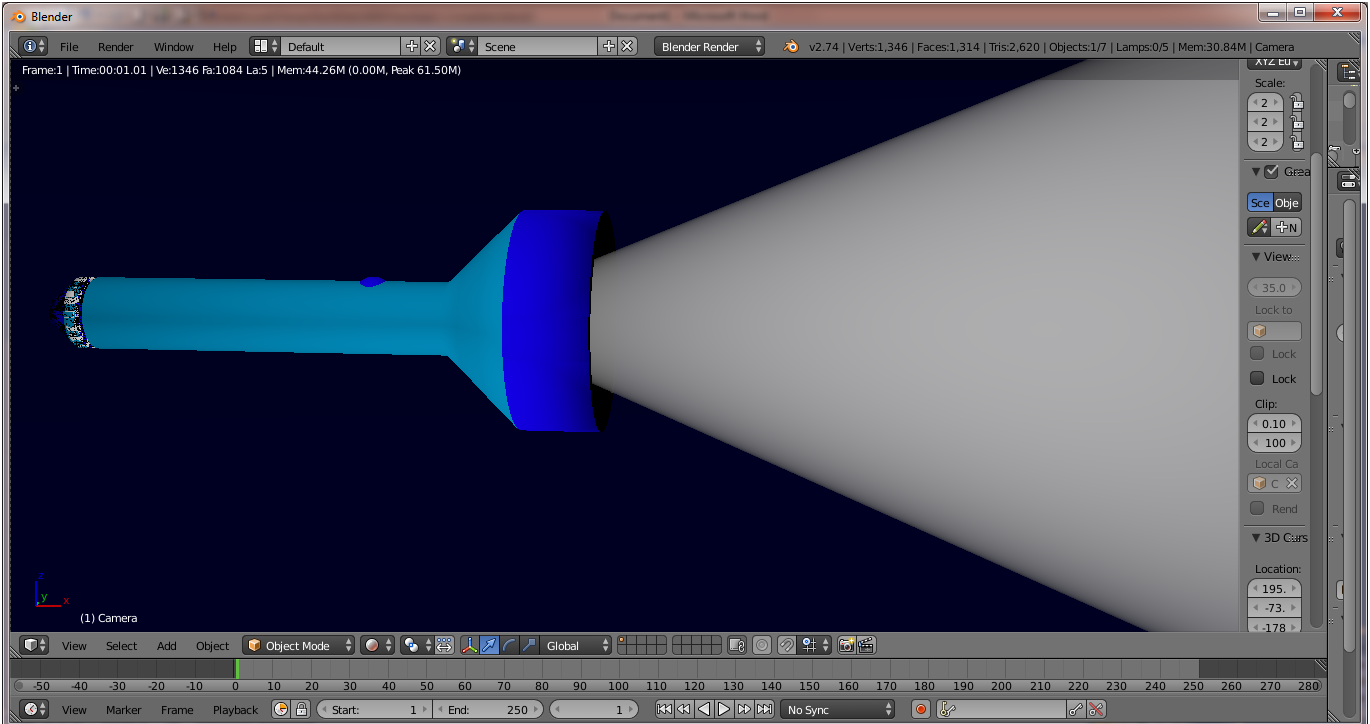
My tutorial on making a flashlight has been completed, for tutorial part 1 can be viewed at Modeling 3D Flashlight Part 1 , hopefully friends love it. I will continue to post interesting articles about 3D animation, thanks
I saw a steemit member who wrote about 3D animation that started posting a lot of 3D works in steemit, so to make it easier to see 3D animation works from my steemit member create a tag for the author about 3D animation and propose that this tag is in the launch. the name of the tag I use is #steem3D tag, hopefully with #steem3D tag can make it easier member steemit to see results and tutorial 3D animation. for writers who write about 3D animations please use #steem3D tags for writings and 3D works.
Join @Adsactly Community
Adsactly is a Autonomous Decentralized Society Acting Cooperatively to Leverage You.

Follow Me @muftykutink (Manager ADSactly ACEH)
I'M TEAM ACEH STEEMIT

Gif creation by @rituparnaghosh
My Recents Post :
Modeling 3D Flashlight Part 1
Simple 3D UV Mapping - Danbo
Modeling 3D Candle
ColorChallenge - ThursdayGreen : 3D Animation
Trying Modeling 3D Planets Colliding
Simple 3D Animation Modeling - Dining Tables #7 Combine Object Tables, Chairs, Plates, Glasses, Bananas, and Breads
Simple 3D Animation Modeling - Dining Tables #6 Bread Object
Simple 3D Animation Modeling - Dining Tables #5 Banana Object
Simple 3D Animation Modeling - Dining Tables #4 Glass Object
Simple 3D Animation Modeling - Dining Tables #3 Plate Object
Fantasy 3D Animation
Simple 3D Animation Modeling - Dining Tables #2 Seat Object
Simple 3D Animation Modeling - Dining Tables #1
Children, What We Can Learn From Hime
📷 ColorChallenge ThursdayGreen - Historic Place
3D Modeling of Compost Grinder Machine
3D Modeling Steemit



Congratulations @muftykutink! You have completed some achievement on Steemit and have been rewarded with new badge(s) :
Click on any badge to view your own Board of Honor on SteemitBoard.
For more information about SteemitBoard, click here
If you no longer want to receive notifications, reply to this comment with the word
STOPNice post Brother @muftykutink
I like it