Silhouette Photography Tutorial and My New Lens Causes a Fight Between My Cats

Introduction
I have been looking around for guidance on how to do high contrast black and white photos without having to go through the hassle of making multiple photoshop selections and doing massive numbers of curves adjustments for each individual selection.
After doing some research I have come to realise that there is no quick way to do it or at least not to do it well enough to have a gallery quality photo. (Why aim low?)
Anyway as often happens whilst doing research I got sidetracked by examples of beautiful twilight silhouette photographs. This inspired me to create my own and I thought I might do a short tutorial on how I created the shot above.
There is also a little update on my new lens and some fun photos of my cats at the end (feel free to skip them if you hate that sort of thing).
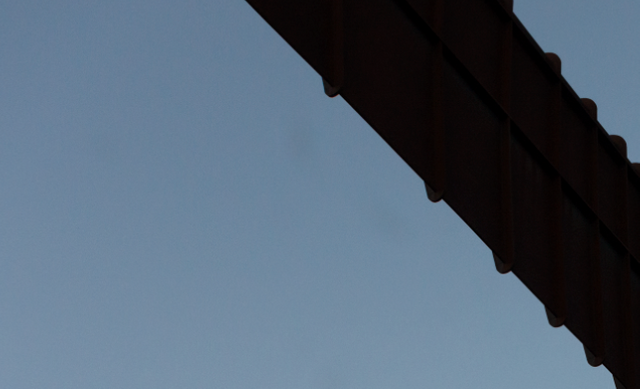
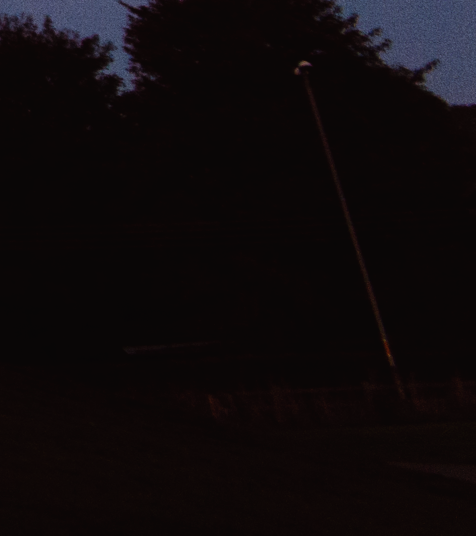
The Original Shot
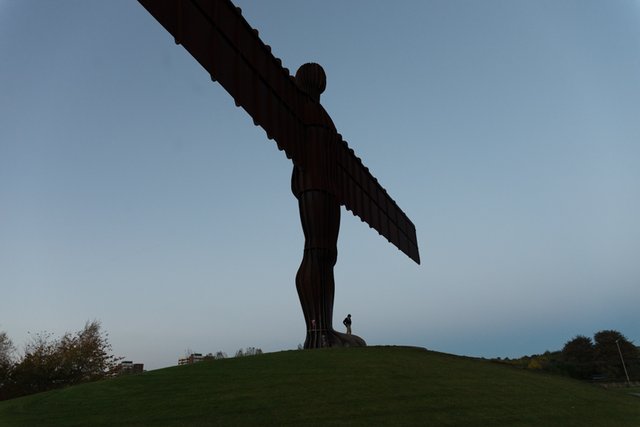
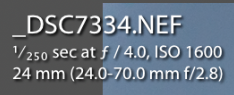
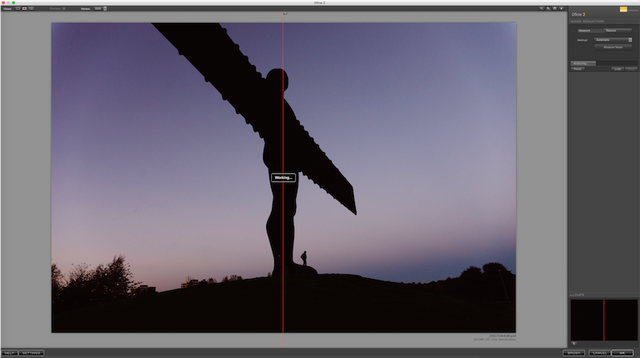
This is the RAW file I started with in Lightroom and I have also posted a screenshot of the camera settings. This shot was taken at sunset.
The clouds had cleared leaving a beautiful gradient in the sky.
There was a kid playing on the statue of the Angel of the North and I liked his pose - I thought it would work well in silhouette form by creating a contrast between the giant angel and his rather tiny figure.
To start with I selected the Photo (by right clicking in LR) and opened it in Photoshop.
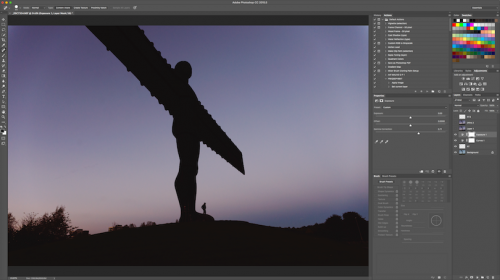
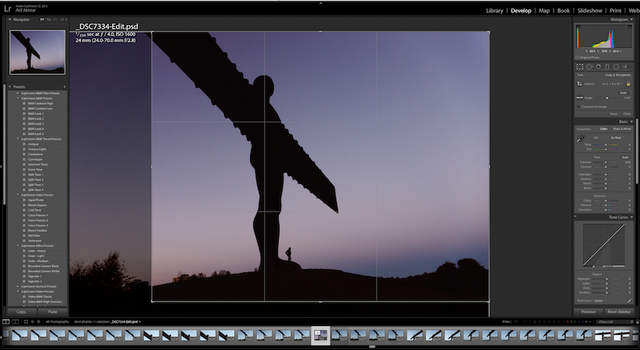
Summary of Photoshop Edits
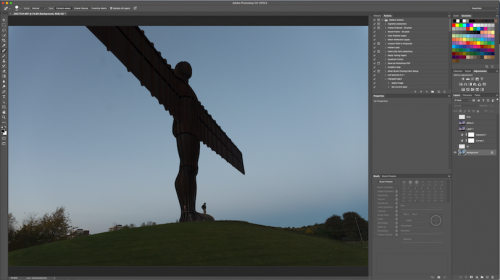
I took the screenshots after doing the editing so you can see my layers on the right hand side (above) and in the enlarged screenshot below.
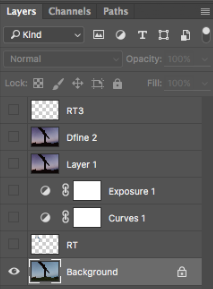
What each layer is:
- Background - the original shot.
- RT - an initial retouch layer where I removed some spots that were probably on the lens.
- Curves 1 - A curves adjustment layer - change colours and adjust contrast.
- Exposure 1 - An exposure adjustment layer to darken the silhouette.
- Layer 1 - a merged layer (CMD/Ctr+Shft+E)of all the layers below so I could use Nik Software's Dfine 2 to reduce noise.
- Dfine 2 - the layer with actual noise reduction from Dfine 2
- RT 3 - A final retouch layer to remove extraneous details that cause distraction from the silhouette. Don't ask why it is RT 3 rather than 2 - I obviously forgot how to count!
The RT Layer - create a normal layer (Cmd/Ctrl+Shft+N)
I'm not sure how clearly this will show up but I used the spot removal tool to remove some spots that appeared to be water marks or stains on the lens. This kind of lighting tends to make them show up more.
The Curves 1 Layer - create a curves adjustment layer
RGB Curve - this is all the colour channels combined - you can also think of it like luminance
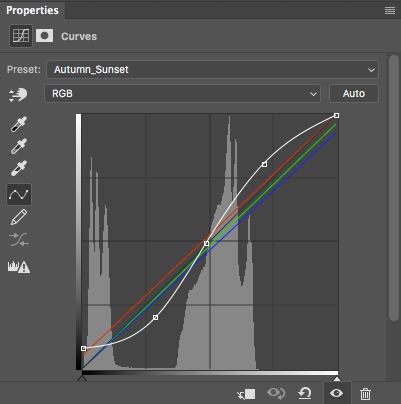
I first adjusted the overall combined RGB curve to increase contrast as shown above using a standard "S" shape.
I'm a big fan of film photography and one way of adjusting curves to do this that is used a lot is to raise the bottom part of the curve above zero.
This serves to reduce the dynamic range - it is not so apparent in this photo but it is a commonly used effect that gives more of a "printed" photo feel to an image.
The Separate Colour Curves - (same layer as before) use the menu to select each (R, G and B) in turn
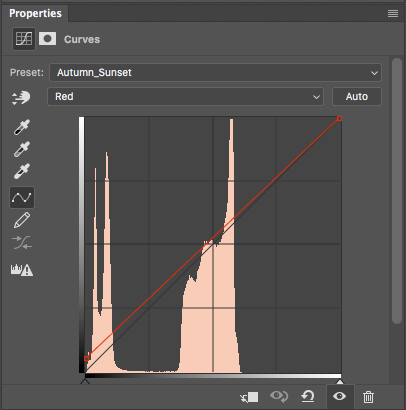
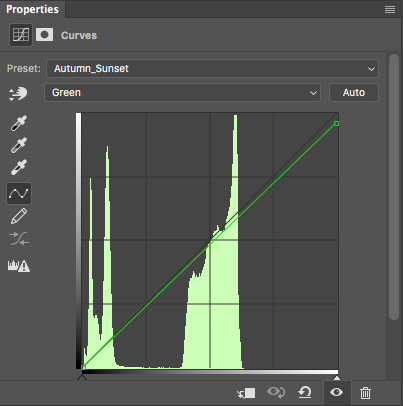
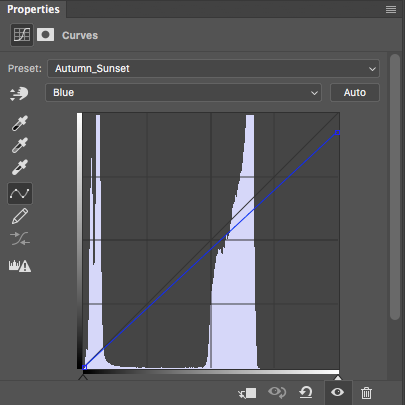
I adjusted the individual colour lines for each of the Red, Green and Blue channels to change the overall colour tone. In each screenshot the black line represents the default colour line and the adjusted line (or curve) is shown in colour alongside it.
This shot was taken during sunset and I wanted more of a twilight feel so used colour adjustments which seemed to fit this kind of feel for me. It is purely a matter of what kind of look you are trying to create and as always personal taste and what looks good to your eye is most important.
The Exposure 1 Layer - create an exposure adjustment layer
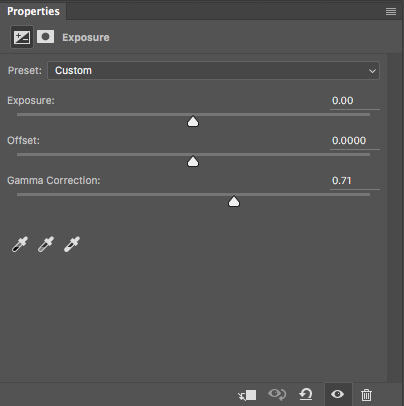
This is very simple. I increased the gamma to +0.71 to accentuate the silhouette.
The Dfine 2 Layer (create a new merged layer first using Cmd/Ctrl+Shft+E before using the plugin)
Dfine is Nik Software's excellent and FREE noise reduction plugin (get all their free plugins here). The great thing about Dfine is that it has a really powerful automatic noise reduction algorithm.
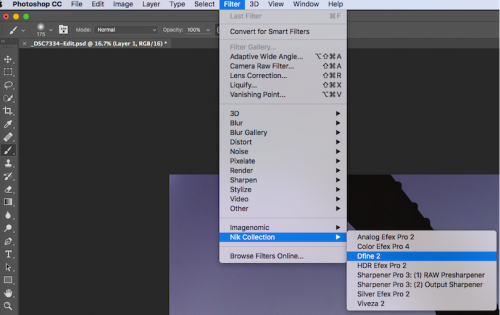
As soon as you select Dfine and open it (as above). It will open and start analysing your photo:
After analysing the photo it will calculate the best noise reduction parameters and apply them to your image. You can use it manually and in more complex ways too but I don't need that for this image.
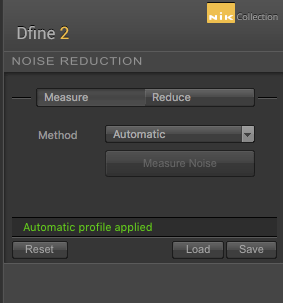
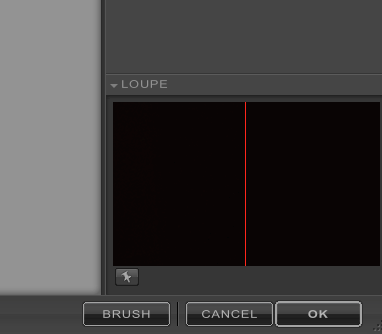
Once it was finished I clicked OK to apply the NR and take me back to PS.
The RT3 Layer
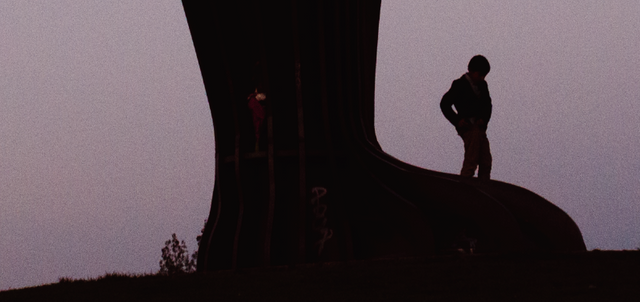
There were some extraneous details that were causing distraction such as a metal post and some flowers in the foot of the statue that were picking up the light. I used the spot removal tool to take these out.
I then saved the image and went back to Lightroom for final cropping.
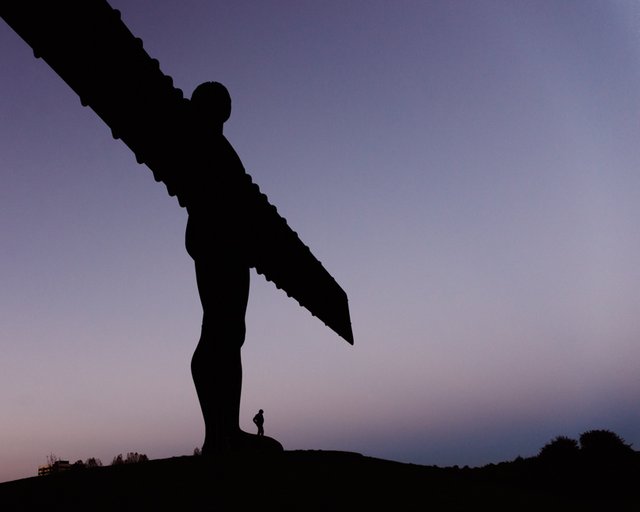
Final Crop in Lightroom
I cropped the image using a 4x5 aspect ratio and the rule of thirds to make the lines converge on the Angel as shown.
Personally I prefer the image this way but I will show both versions of the image to let you decide which works better.
Final Image (Cropped Version)
Final Image (Uncropped Version)
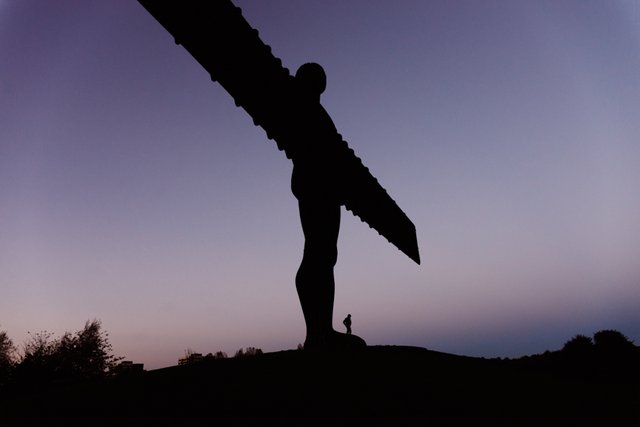
Which version do you prefer? Let me know in the comments.
Updates and a New Lens
One of the great things about Steemit is that it has rekindled my love for certain types of photography that I had stopped doing. It has reminded me how much I love landscape and architectural photography.
I don't have much experience in these areas compared to Portrait Photography and it has started me off on learning more about them.
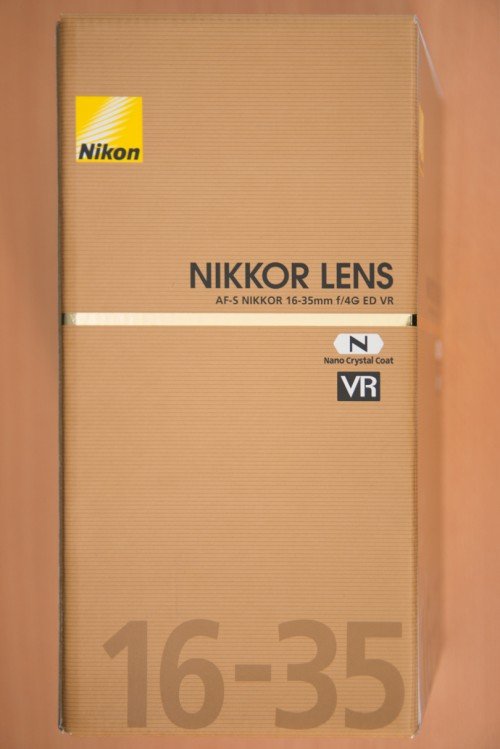
With this in mind I ordered a new lens - the Nikon 16-35mm f/4 VR. You can see some reviews of it here and here. It is generally very highly rated and also one of the few wide angle lenses with vibration reduction (VR).
Well it is now here:
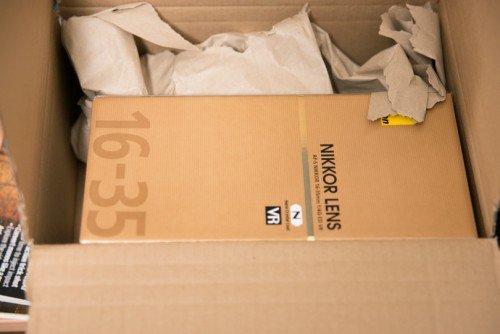
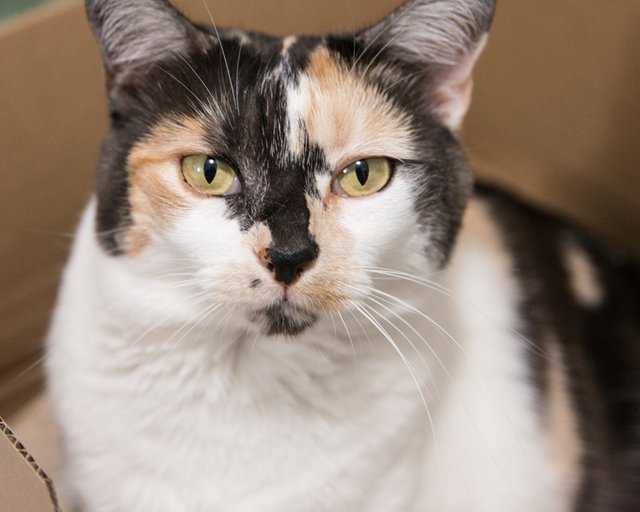
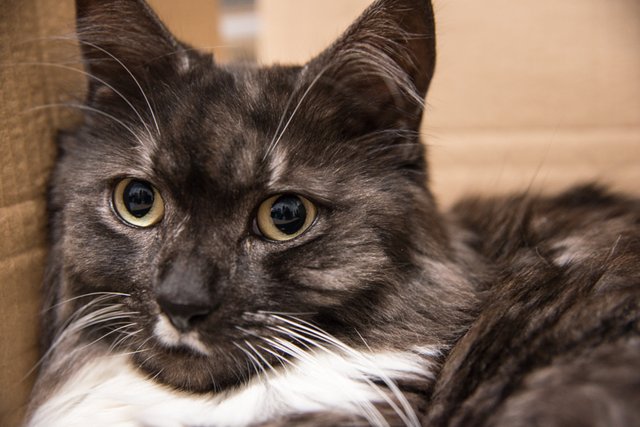
Before I even had a chance to open it my cats Snowy and Smoky became very interested in the box - boxes and particularly Amazon boxes are their favourite toys!
Cat fight
Snowy got in first:
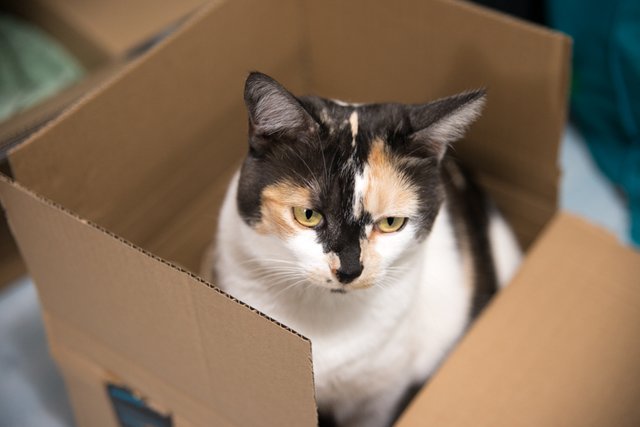
Then Smoky arrived.
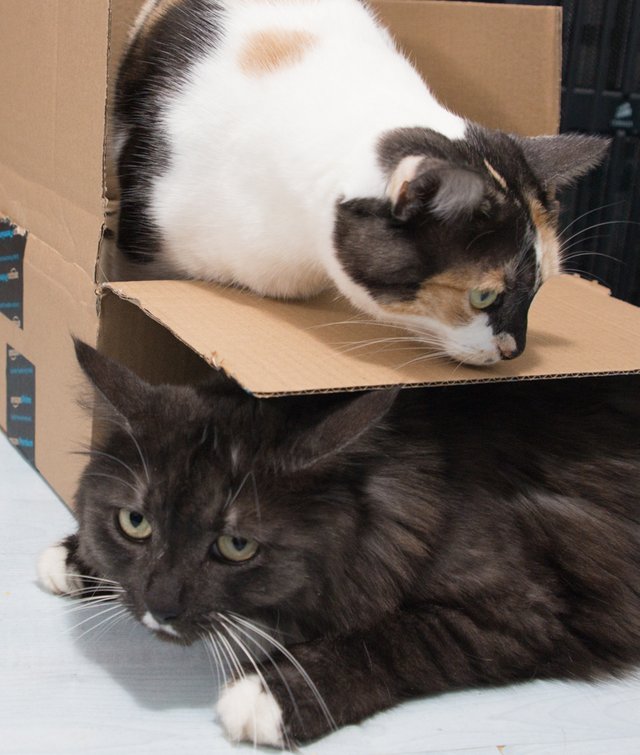
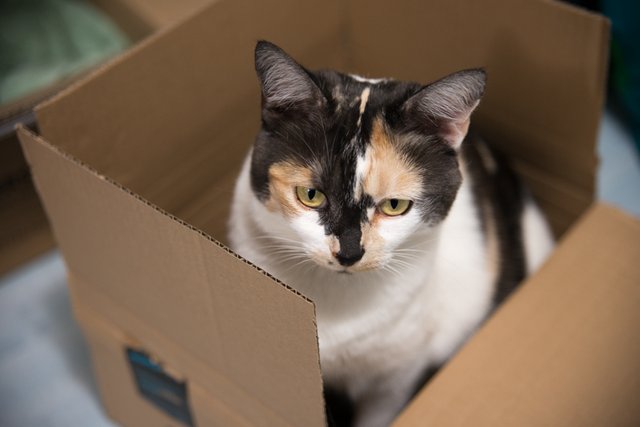
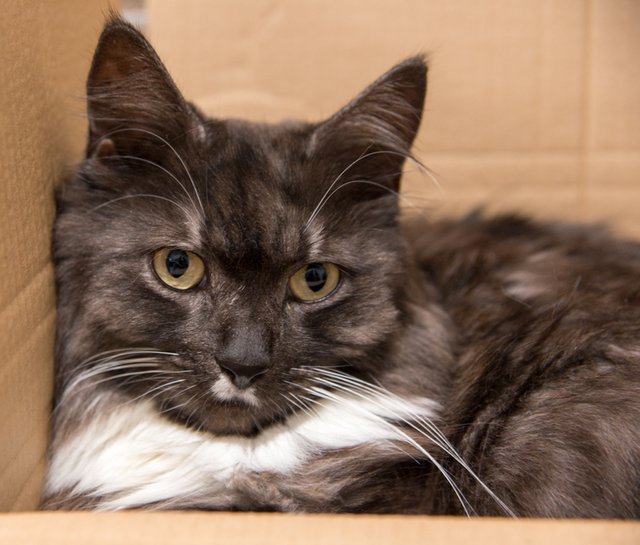
There was a little skirmish which was so fast that I couldn't capture it! After the cat hair settled, Smoky was in the box (this is the reverse of what normally happens with Snowy besting him).
With all the cat hair flying around I thought it best not to try the lens out or take the current lens off my camera. I will do some tests with it shortly though and post up some results.
These shots were taken with my usual Sigma 24-70mm/2.8.
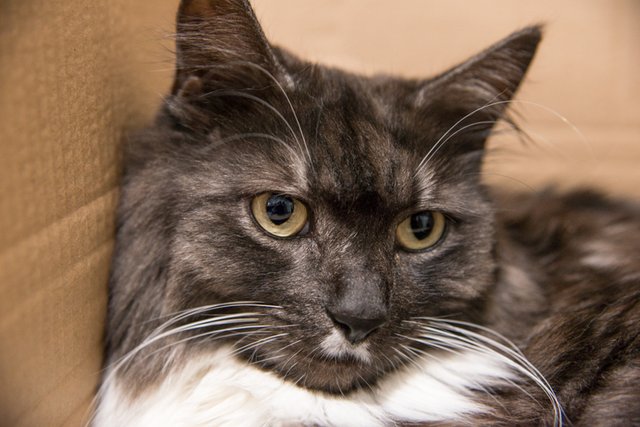
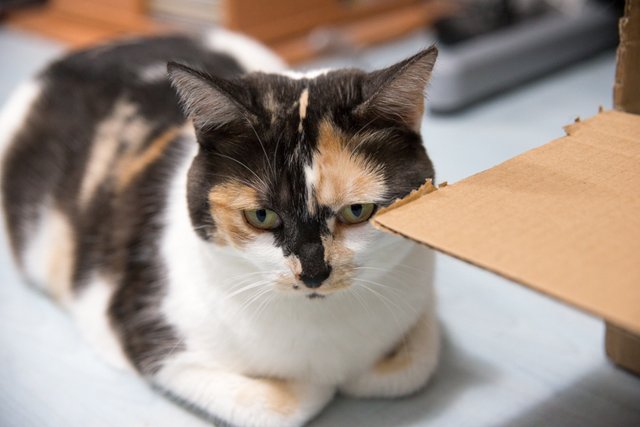
Snowy was not very happy but a little while after this she managed to trick Smoky out of leaving the box by distracting him with a toy and using the chance to occupy the box herself. She is very sly.
If you like my work and aren't already, please follow me and check out my blog (I mainly discuss photography but I do other topics too) - @thecryptofiend
Camera: Nikon D800 with Sigma 24-70mm/2.8 lens.
Photo Credits: All photos are my own unless otherwise stated and free for you to use under the terms of Steemit4free.
(Verification for me here: http://www.aapicture.com/about-me)
Some of my other recent posts
- More shots from Grangetown Cemetery - photos for you to use in your Halloween and other posts
- Are we being manipulated into a war with Russia?
- Westgate Hill Cemetery - photos for you to use in your Halloween posts
- Return to the Sage (Concert Venue) in Gateshead - (feel free to use in your own posts)
- The Face 2015 Photography Competition - I received a nice surprise in the post!
- The Only Piece of Art I have left from School and What Made Me Give Up Art for so Long
Are You New to Steemit and Finding it Confusing?
These resources may help:
- For a Quick FAQ - Try this
- To learn about Markdown (to help you post) - Try this
- Need to know Steemit Etiquette? - Try this
- Need some free images for your posts? Try Steemit4free - make sure to check which images it applies to.
- Need to talk to a human for help? - Try the chat
- Need Mentorship? - Try Steemprentice - here is a link that explains it, and here is the chat channel.
- Need a Free Image Host that works with Steemit? - Try SteemImg - it automatically produces markdown and html links for you, as well creating thumbnails and more.
- Need to Buy or Sell Steem/SD? - Try this tutorial for Blocktrades.
Nice tutorial, can't wait to see what you produce with your new lens!
Thanks. I just hope it doesn't rain the first time I try to use it. That is always the hazard here!
thanks for sharing valuable information congratulations for another magnificent post
Thank you:)
Great photo, like the cropped version. Cats and boxes hey!!
Thanks. Yes cats love boxes:)
I've been there, heh
:)
Beautiful, as always. I also love the boy and the pose -- perfect juxtaposition. Interesting to see the steps that lead to the end result.
Hahaaaaa Snowy is smart! ;)
Yes he happened to be in the right position just as I took the shot.
She knows it too:)
I like the cropped one. I didn't realize how big it was until I noticed someone at the foot!
It's 66 feet high:)