Part FOURTEEN: Working For Yourself
We've spent the last few in this series talking about specific Filters, NIK's Color EFex Pro 4, Viveza 2, Silver EFex Pro 2 in Photoshop. For this, I'd like to walk through my process for creating a multi image Panorama.
I was shooting at iconic Fenway Park, the home of the Boston Red Sox, for a corporate event. Wide park, and hard to capture all of the ballpark, left to right, in one shot. So, I'll use Adobe Lightroom to create a Panoramic Shot, and Finish it in Adobe Photoshop.

A while ago, a friend gave me a few tips for shooting multi image Panorama's (Pano).
• Mark Your Images
He said, before you take your first image, take a snap of your hand, (or the floor, or blank sky, etc) then, plant your feet for the perfect shot looking straight ahead. Before shooting, swivel your hips and face left (DON'T move your feet). Make you image. Swivel your hops towards the right, shoot, swivel right, shoot, swivel again, and finish the shot. Take a pic of your hand (or the floor, or blank sky, again) at the end of the pano shots to bookend your shots on the memory card. This makes it easier to see the pano series in Lightroom later when you are importing.
Typically, I do a few of these hip swinging Pan shots with my body, for a chance to get a few choices of Pano exposures.
Many people recommend shooting manually, and keeping the settings consistent, for aperture, exposure, etc. This is important, particularly if you shoot the sky, ocean or other large outdoor expanse. The angle of your camera relative to the sun may change significantly, and therefore the color temperatures, or exposure levels, etc in your images may be vastly different.
• Remember To Think Like A Computer
The computer is only doing math, when you combine images. It is comparing ones and zeros, looking for patters and combining the images based on duplicate patters. All that means is, remember to OVERLAP some major piece of the image.
Facing left, find a big tree, a series of significant rocks, a building, etc. at the right of your framed image, and make sure you include it in the enxt image after you swivel your hips to make the next. Find another bit on the right again, swivel, and make sure it s now on the left as you make the next image. Panoramas won't work if there's no overlap.
After you have arrived back at your computer, BACKUP you images then fire up Lightroom.
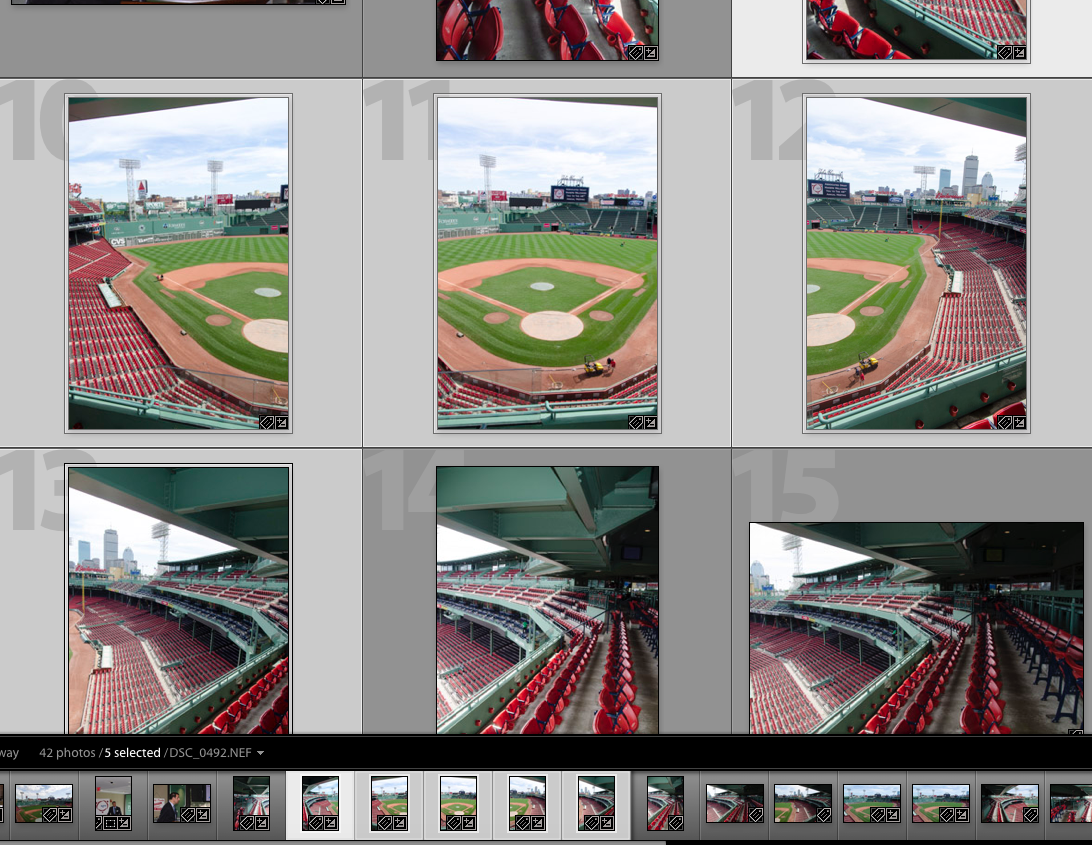
In Lightroom, I select the images I want to work on:
Then, I tell Lightroom I want to crate a Panorama.
In Library MODE, Go to PHOTO menu > PHOTO MERGE and choose Panorama
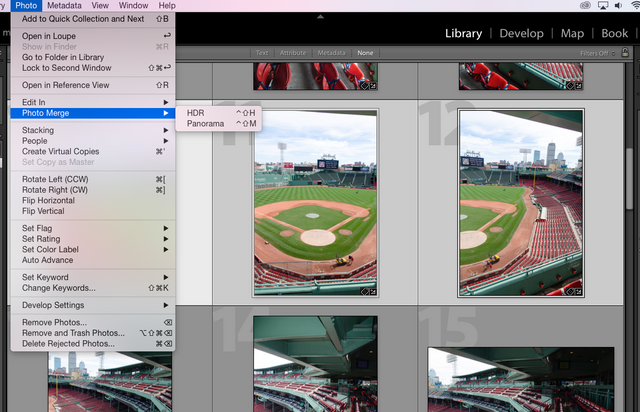
This should be the screen you get:
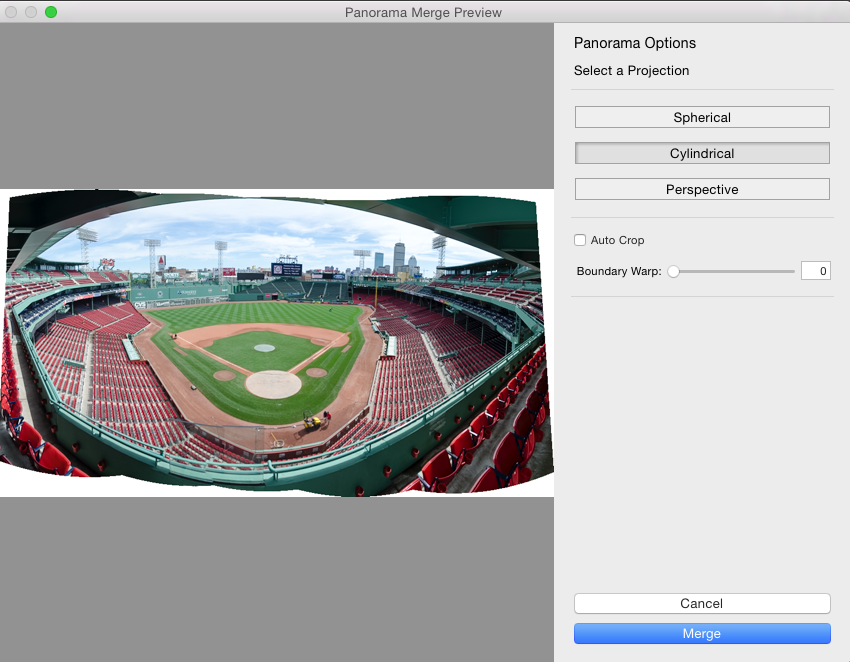
For me, when I create a 2, 3, or 5 image Panorama, I will typically click on Spherical, Cylindrical, or Perspective and see which result will give me the best looking image to start. (Best for me, means least distortion). You are viewing the results in a Preview image, before you click Merge
Once you feel the result will be OK, click Merge lower right.
Depending on how large your images were to start, and how many (for this I actually used 5 images), and how fancy your computer thinks it is, you may or may not get a cup of coffee or a Gin & Tonic... this may take a moment. For your first image, try with two images, and see the result.
When Lightroom is done, this is what you'll see:
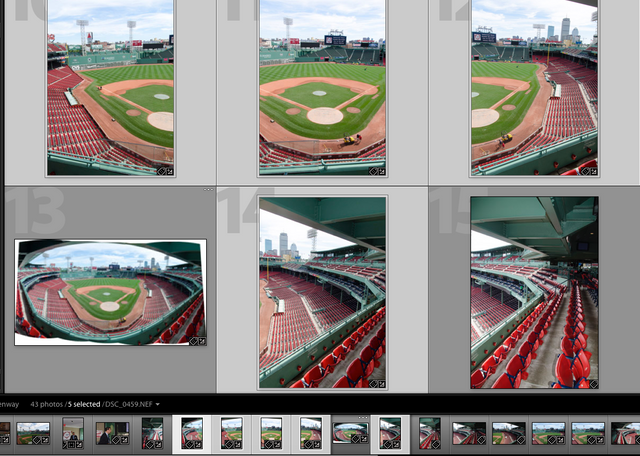
In the above image, notice that the 5 images I started with are highlighted, and now, there's an additional image in the middle of the bunch I was working on! That's my newly created Merged Panorama!!!
I click on the Pano, and time to finish processing the Pano image. I head to Develop Module, scroll to the bottom right, and click enable Profile Correction for the lens:
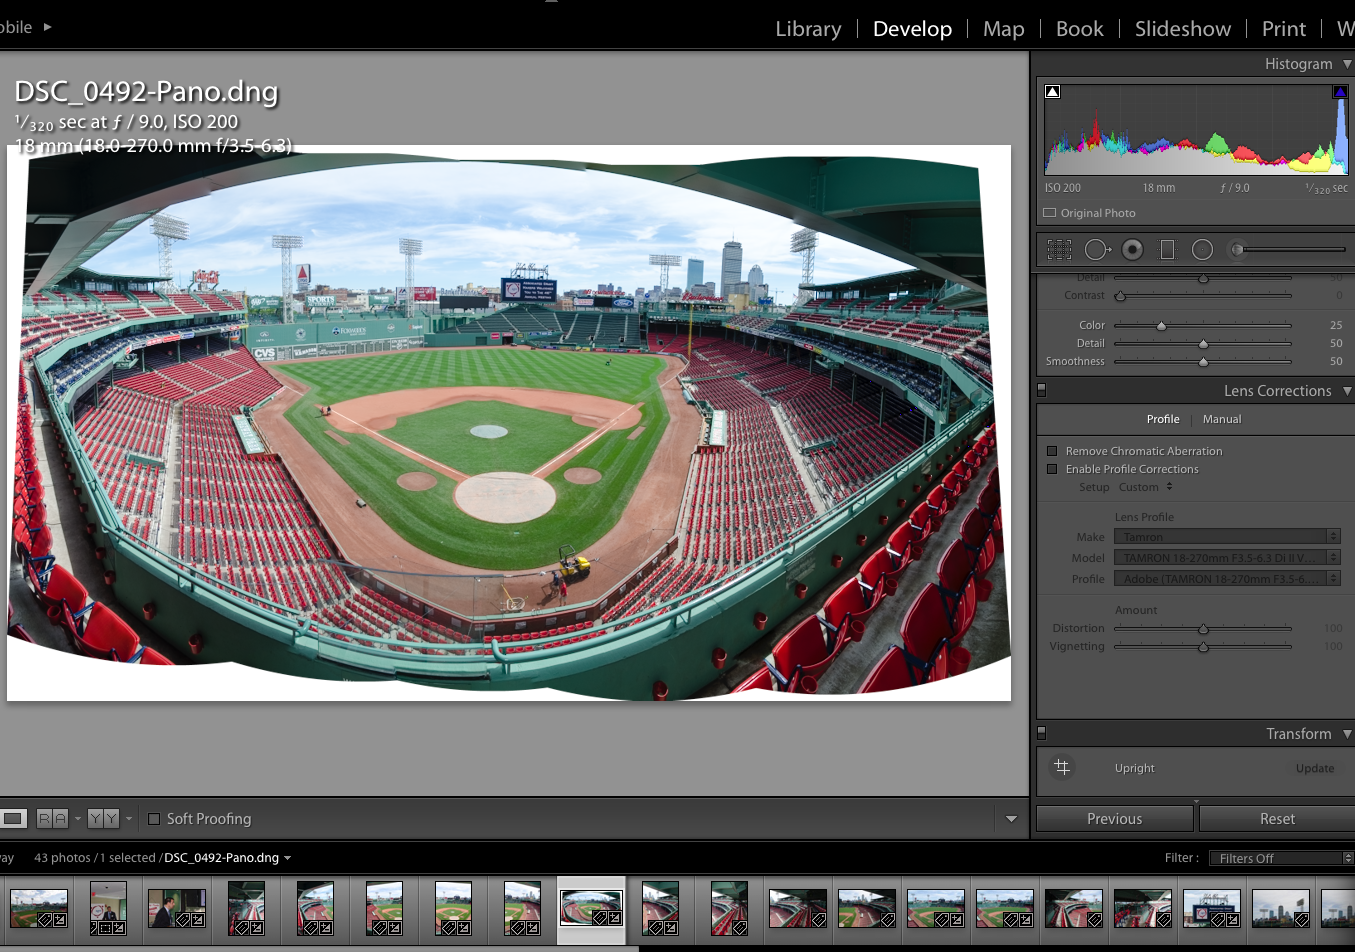
Finish my Work Flow Process for White Balance, exposure, highlights, white and black points, any noise reduction, vibrance, saturation, etc:
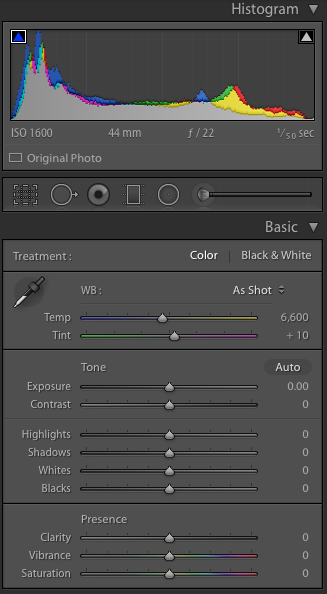
THEN, do a SAVE AS, and exit Lightroom.
Time for part two: Photoshop. Open the Saved image in Photoshop.
Go to FILTER menu > ADAPTIVE WIDE ANGLE.
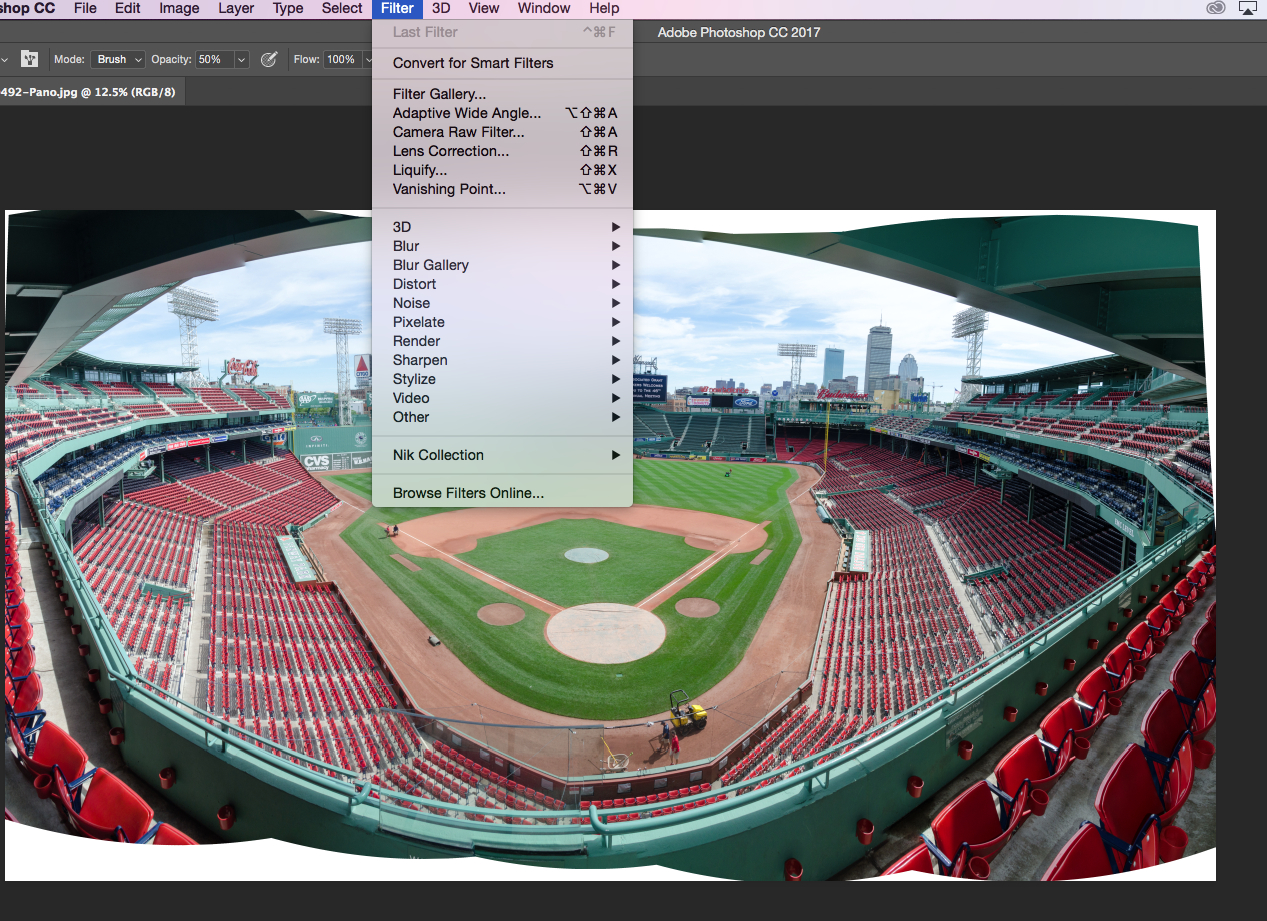
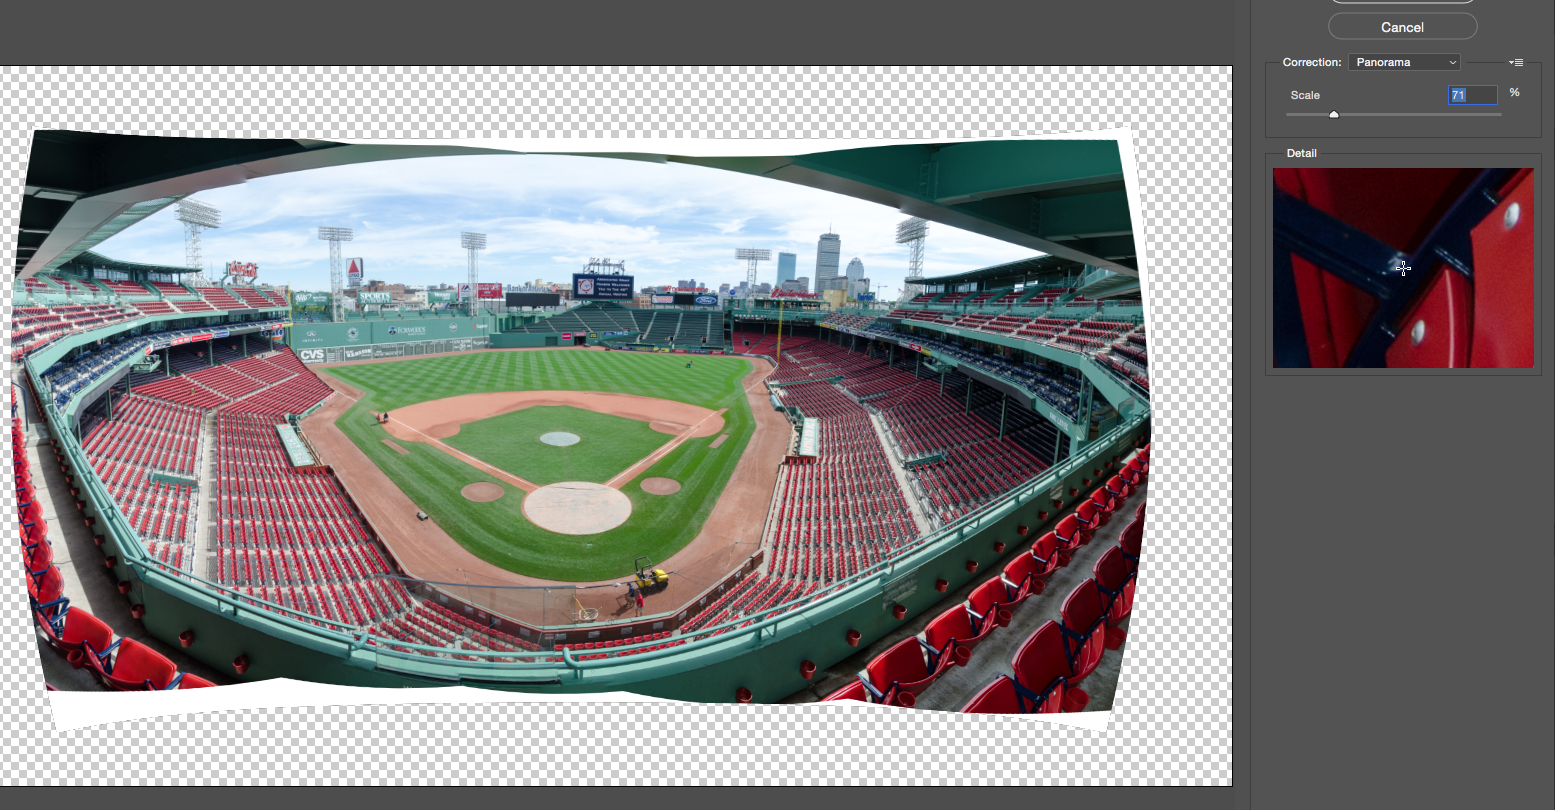
Look to the right and see this:
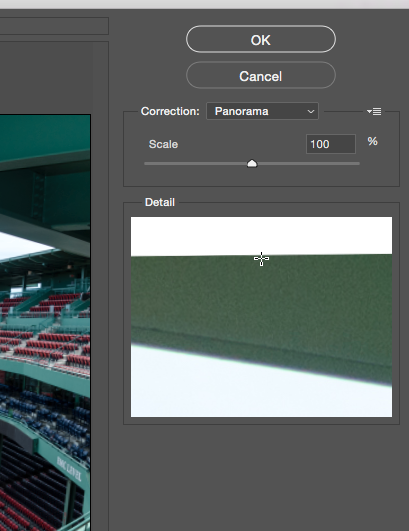
I select Panorama, and get a slider. As I move the slider right, or left, I can see the image changing.
In this instance, I moved Left, and noticed the image distort (actually it corrected in my mind.) NOTE: the ends of the image are pushing up and down, compared to the center.
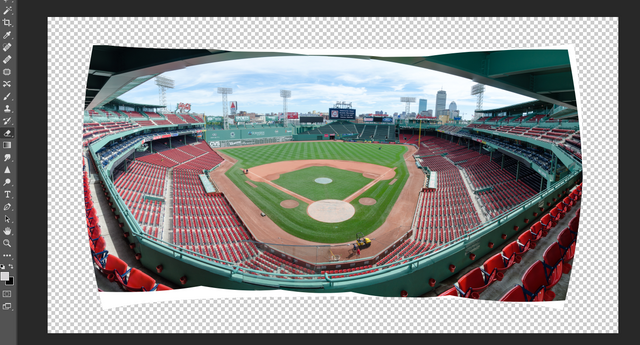
then, it's CROP
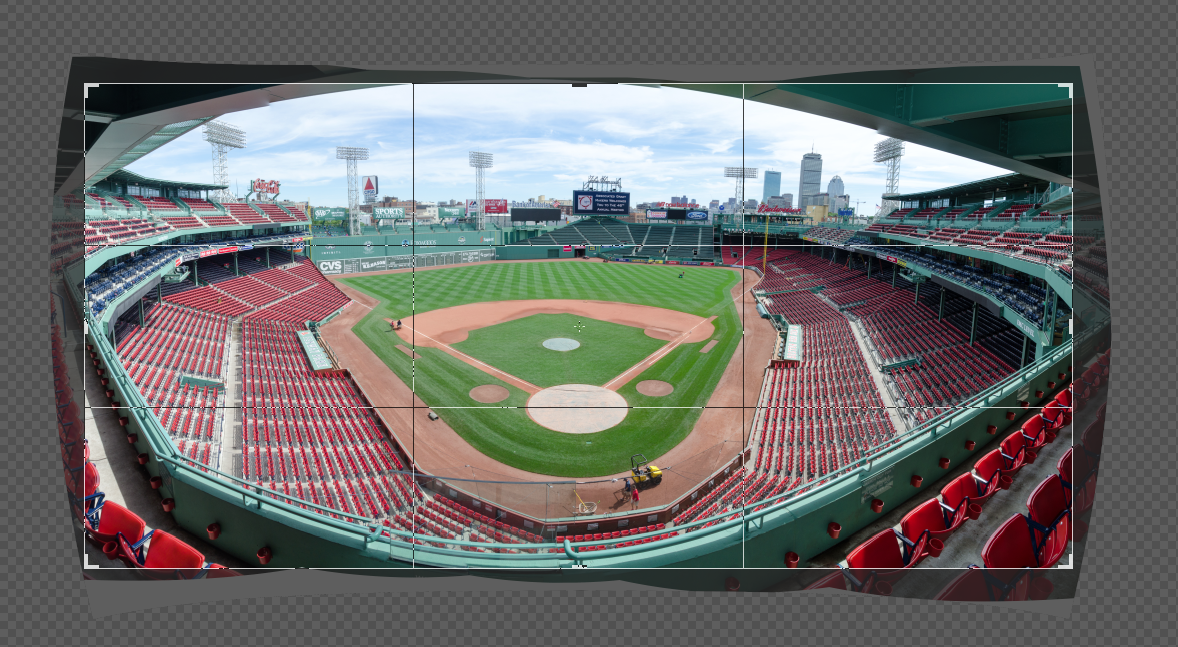
Flatten the image:
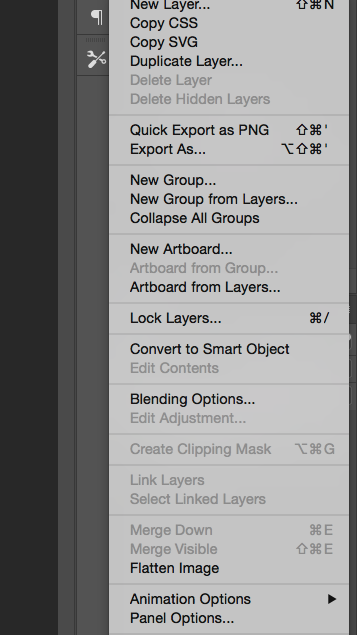
Save As and you are now the proud owner of a multi image Panoramic Shot!
Time for the second Bombay Sapphire and Tonic, and add two limes!
Well done!
Part 13 WORK for yourself: NIK’s Silver FX Pro Filter
Part 12 WORK for yourself: NIK’s Color Efex Pro Filter
Part 11 WORK for yourself: NIK’s Viveza Filter
Part 10 WORK for yourself: High Pass Filter
Part 9 WORK for yourself: Photoshopping’
Part 8 WORK for yourself: Go To The Light…room!
Part 7 WORK for yourself: From Here To There, My Workflow!
Part 6 WORK for yourself: RAW?JPG? Add Copyright Note
Part 5 WORK for yourself: My Machine, My Hardware!
Part 4 WORK for yourself: More Stuff? More Money!
Part 3 WORK for yourself: Camera? What Camera?
Part 2 WORK For Yourself: Wait? You Charge HOW Much?
Part 1 WORK for Yourself: How Much Can I Make?
Great tutorial ... and a great ending also ;-)
Bombay is always a pleasant way to end the day!
You got a 1.38% upvote from @postpromoter courtesy of @bluefinstudios!
Want to promote your posts too? Check out the Steem Bot Tracker website for more info. If you would like to support the development of @postpromoter and the bot tracker please vote for @yabapmatt for witness!