Part TEN: Working For Yourself
Deeper Dive In Photoshop Sharpening
Some days, I feel like I truly have no idea what I am doing. Some days… This is a bit more of a deeper dive into some of the really nuts and bolts of Photoshop, and in particular, how I approach Sharpening within it.

Sharpening
I’m struggling with sharpening my images. Or maybe I should say, I am struggling with getting Tack Sharp images.
Sharpening is hard to implement in Post Production.
Get it right in Camera
For the rest of us, we usually need a little help. In Lightroom, I've played with Clarity, some. In Photoshop., I am adding some structure, with NIK's Viveza2, to gain a bit more punch. I've been dabbling with Unsharp Mask. I understand what it is in theory. Theory I'm good with.
Unsharp Mask helps, but it's not quite what I need. Unsharp Mask works on my whole image. That is, the filter applies across too broad a spectrum within my image. I didn't really have enough control over how I applied it. With shots that have greater depth of field, I ended up with too much noise and color contrast when I applied the filters to the image. It was taking away the smooth silky parts, or any purposeful bokeh. That meant going into layers and masking out areas I didn't want sharpened, revealing only parts I did. Then, I stumbled upon another sharpening technique in Photoshop using the High Pass Filter
High Pass Filter
This new (to me) filter to add a bit of Sharpness to my images is the High Pass Filter.
I can control where within the image it applies. And for High Pass the where is: Edges
I can highlight and apply the High Pass Filter to edges. Places where I want there to be specific definition. And I control the definition.
So here's the step-by-step I learned:
• Shoot Awesome photos in camera, that need no correction.
• If (for me, when) your images need processing, Open the RAW image in Lightroom, and Adjust White Balance, set Black and White points, apply minimal Clarity.
• Export to Photoshop.
• Apply any Cropping, and other Photoshop work first. Sharpening should be last in your workflow.
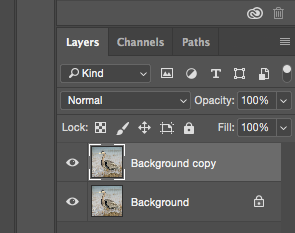
• Create a New Layer that's a Flattened Layer of all your visible layers. On a Mac, Command + Option +Shift + E
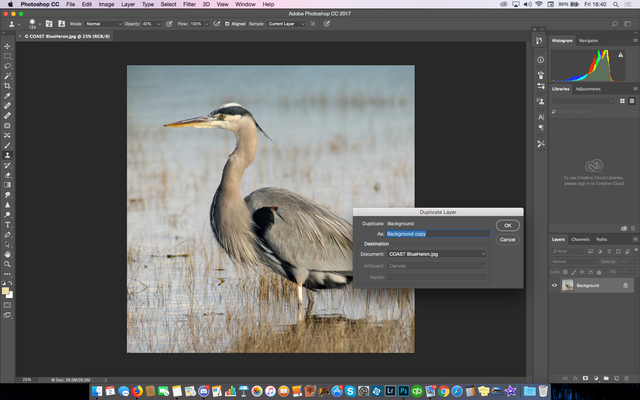
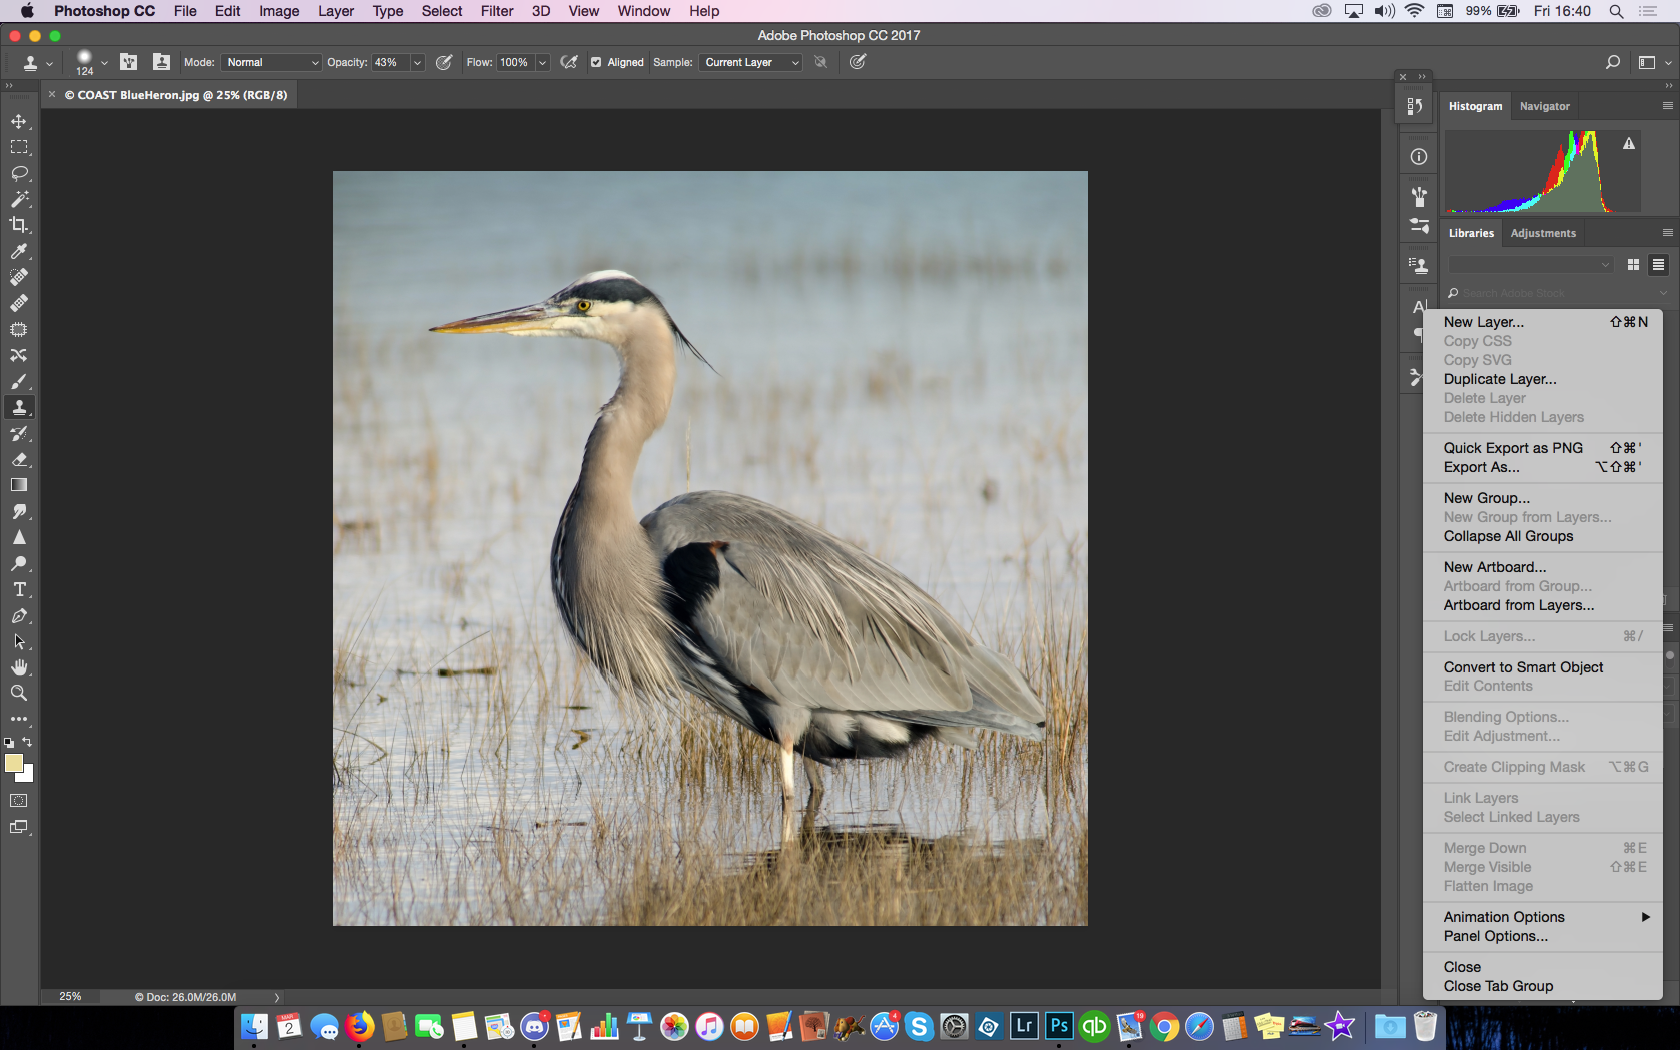
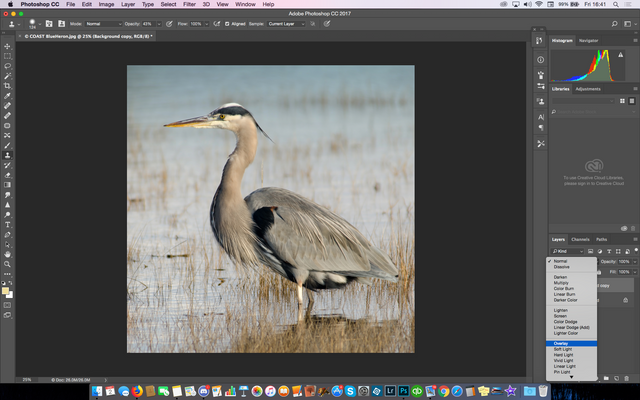
• Adjust the New Layer blending mode to Overlay
• Go to Filters > High Pass
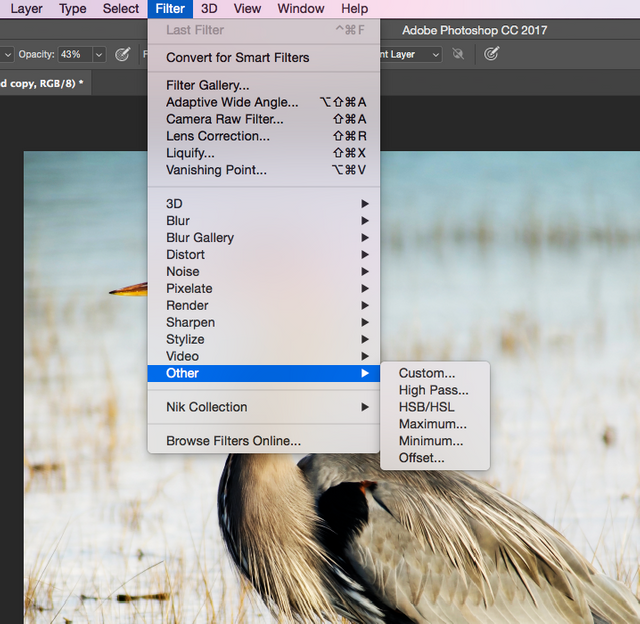
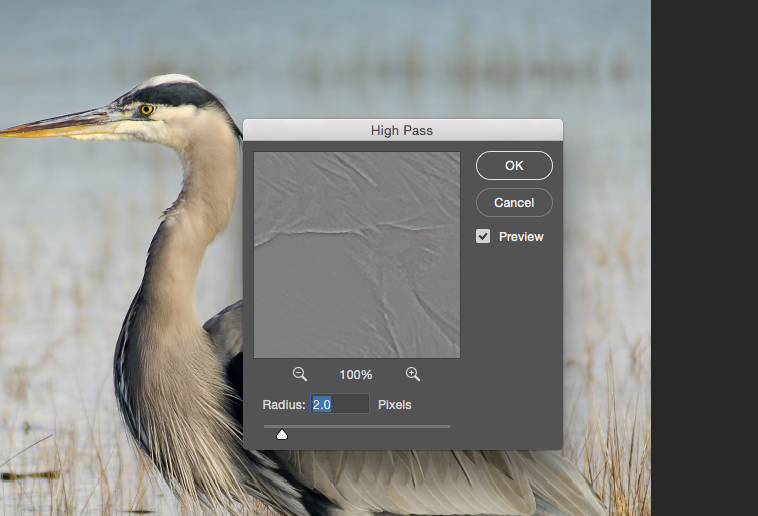
• Adjust the amount of High Pass. Select an area like an eye, or fine detail, for preview. Watch the image for Preview as you adjust. Go easy at first. Sometimes, you may need to do over and over, to get it right.
• Adjust the amount of Opacity for the layer until the image looks right.
• Save this as an image version. That way, you can always go back and make adjustments to your original exported JPEG.
Sharpening, Made Easier
So, there you are: a few options: Unsharp Mask, Clarity, and the High Pass Filter
No one method works best for every image. No method works best for every photographer. Try each one out. Try them on the same image. Try different images. Most importantly, always be open to trying new methods. You never know, you might find the new works for you. Some of these tips are updates and come from my Studio Blog.
Past in the series:
Part 9 WORK for yourself: Photoshopping’
Part 8 WORK for yourself: Go To The Light…room!
Part 7 WORK for yourself: From Here To There, My Workflow!
Part 6 WORK for yourself: RAW?JPG? Add Copyright Note
Part 5 WORK for yourself: My Machine, My Hardware!
Part 4 WORK for yourself: More Stuff? More Money!
Part 3 WORK for yourself: Camera? What Camera?
Part 2 WORK For Yourself: Wait? You Charge HOW Much?
Part 1 WORK for Yourself: How Much Can I Make?
Congratulations! This post has been upvoted from the communal account, @minnowsupport, by bluefinstudios from the Minnow Support Project. It's a witness project run by aggroed, ausbitbank, teamsteem, theprophet0, someguy123, neoxian, followbtcnews, and netuoso. The goal is to help Steemit grow by supporting Minnows. Please find us at the Peace, Abundance, and Liberty Network (PALnet) Discord Channel. It's a completely public and open space to all members of the Steemit community who voluntarily choose to be there.
If you would like to delegate to the Minnow Support Project you can do so by clicking on the following links: 50SP, 100SP, 250SP, 500SP, 1000SP, 5000SP.
Be sure to leave at least 50SP undelegated on your account.
I usually go the easy routes with a generic Sharpen or sometimes Unsharp Mask, but I've never used Clarity or High Pass Filter. Great explanations as to how they work and what to use them for. Sometimes we just don't have time to read the manuals on certain things (or maybe the manuals are just useless as to why/when you'd use a certain function.)
I used to use Unsharp Mask, but for my birds or lighthouse images, I definitely use High pass filter.
On my long Exposure, I almost never use High Pass.
I prefer the NIK Viveza2, and use some structure on rocks, etc. sometimes the water, too.
That's going to be a post coming later today
Great tutorial about the High Pass Filter ... depending on what kind of image I have, I'll go with the High Pass, other times I use a little Detail Extractor in Color Efex (Nik).
I use that, as well, Hetty-rowan!
Forgot to mention, most likely, tomorrow's post will be Color EFX Pro
Day after will be Silver EFX pro