Part EIGHT: Working For Yourself
Go To The Light!
OK.... so, we've made it this far... done some work towards becoming a photographer... thought about it, and now, want to really understand how to make your process smoother and more efficient? ...maybe, snapped an image or two?
You need to get the RAW images processed ( or not, this all works for JPG, too, but not as easy to do all the processing), organize images, make it easy to find them later, give a first pass on processing.
Let's really get into Adobe Lightroom.

Let's recap the first steps after shooting some images. See Last Post
- My SD Memory card goes in the laptop
- All images on the card, go on a folder in an external drive.
- That entire folder gets backed up on another drive.
- I fire up Adobe Lightroom, and grab a drink
- Once it's up and running, I click on IMPORT
- Find the folder you want to import images from. See the image below, I click on the left, find LaCie, and the folder.
- Select the images you want, note below, where I check only a few images.
- Add a new folder inside Lightroom. Note image below, on right, I check Into Subfolder and add a title.
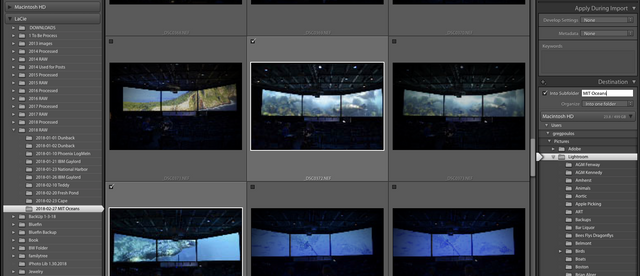
Once I am happy with selections, I click IMPORT (lower right)
After they are imported, at the top, I click on Library.
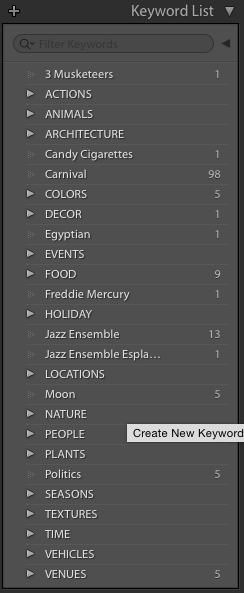
Then, I scroll on the right, to KEYWORDS. Before you play with the image, make sure to do some KEYWORDing.
It helps with organizing, etc. My keywords are general categories (see image below):
...with more keywords added, inside:
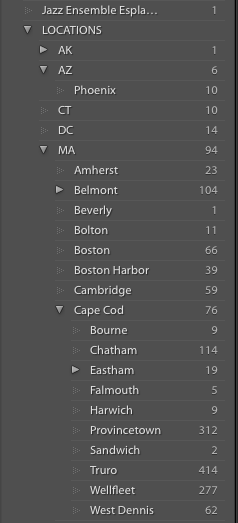
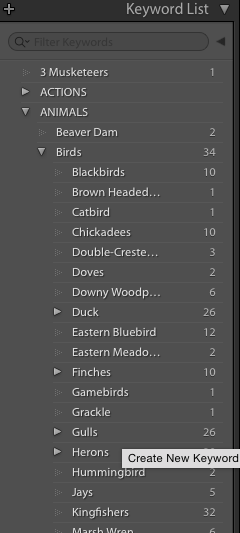
Once I have added Keywords to each image, I move on to the next step, letting Lightroom know what camera and lens I used. Click Develop in top of Lightroom, and scroll on the right, to the part called lens Corrections
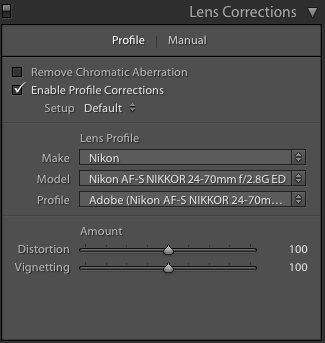
Click inside enable Profile Corrections, to match the image with the lens and camera that created it. This step removes some lens distortion, chromatic abberation, etc.
Scroll back to the top right, and find
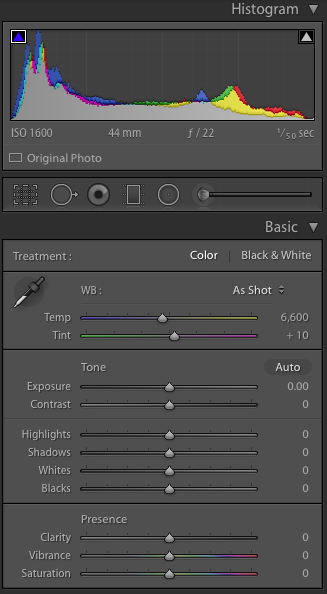
Here's where you fix any white balance issues, add contrast, pull any details out of the shadows that are missing, set your whites and blacks. When you move the sliders, try holding down the OPTION key, for Mac, and see the image. This shows you what is happening, and allows you to see the moment you make whites too Overblown, or the blacks lost. For now, I strongly encourage you to PLAY!!!
Don't like the result? Scroll to bottom right, and hit reset. No problem/No Damage to the image!
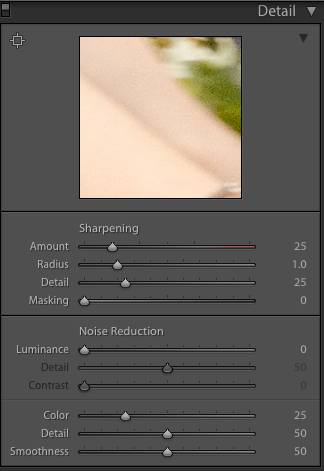
Add a little sharpening
maybe a little Luminance Noise Reduction... again, play.
I am NOT going to tell you what to do with your images. For one, don't trust my taste.
For another reason, it's your image. Your art. You decide what looks good and what doesn't.
After you are finished, Export the image as a JPG, and it's ready for the next step:
Next up: Adobe Photoshop.
Part 7 WORK for yourself: From Here To There, My Workflow!
Part 6 WORK for yourself: RAW?JPG? Add Copyright Note
Part 5 WORK for yourself: My Machine, My Hardware!
Part 4 WORK for yourself: More Stuff? More Money!
Part 3 WORK for yourself: Camera? What Camera?
Part 2 WORK For Yourself: Wait? You Charge HOW Much?
Part 1 WORK for Yourself: How Much Can I Make?
