Part ELEVEN: Working For Yourself
Deeper Dive In Photoshop and Viveza 2 filter from NIK
Last post, I looked at my workflow and Sharpening, with High Pass Filter in Photoshop.
This is a bit more of a deeper dive into some filters within Photoshop. there are others, but I use NIK's suite. For today, I'm going to describe my workflow process with NIK's Viveza2 to show you how to enhance detail, structure, and some depth of color.
For me, I know that most images with Trees, Clouds, Water, Feathers, Hair, and other fine details, will be enhanced by some small amount of Structure or detail enhancing.

NIK developed an entire suite of filters, perhaps some of Photographers favorites. A couple fo eyars ago, some bad news for many: Google Bought the suite of software. However, as of October, Dx0 bought NIK from Google. Development will resume again!
It pays to use VIveza2 earliest in your workflow, and do any Npise Reduction later, or Sharpening, etc.
First step, open an image within Photoshop.
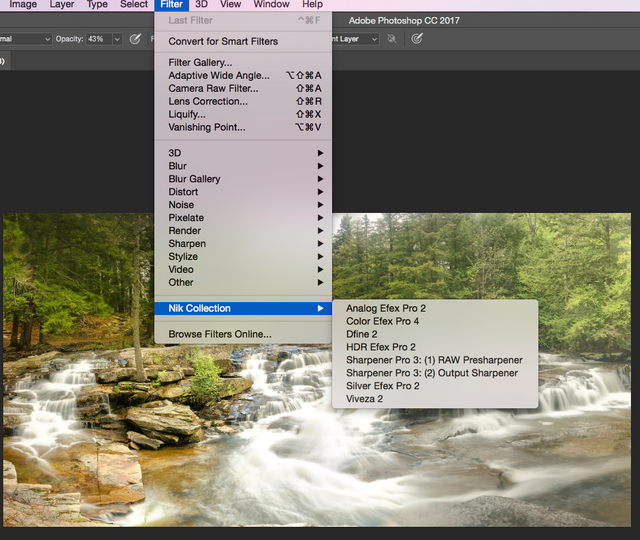
Then, under FILTERS>NIK Collection>Viveza2
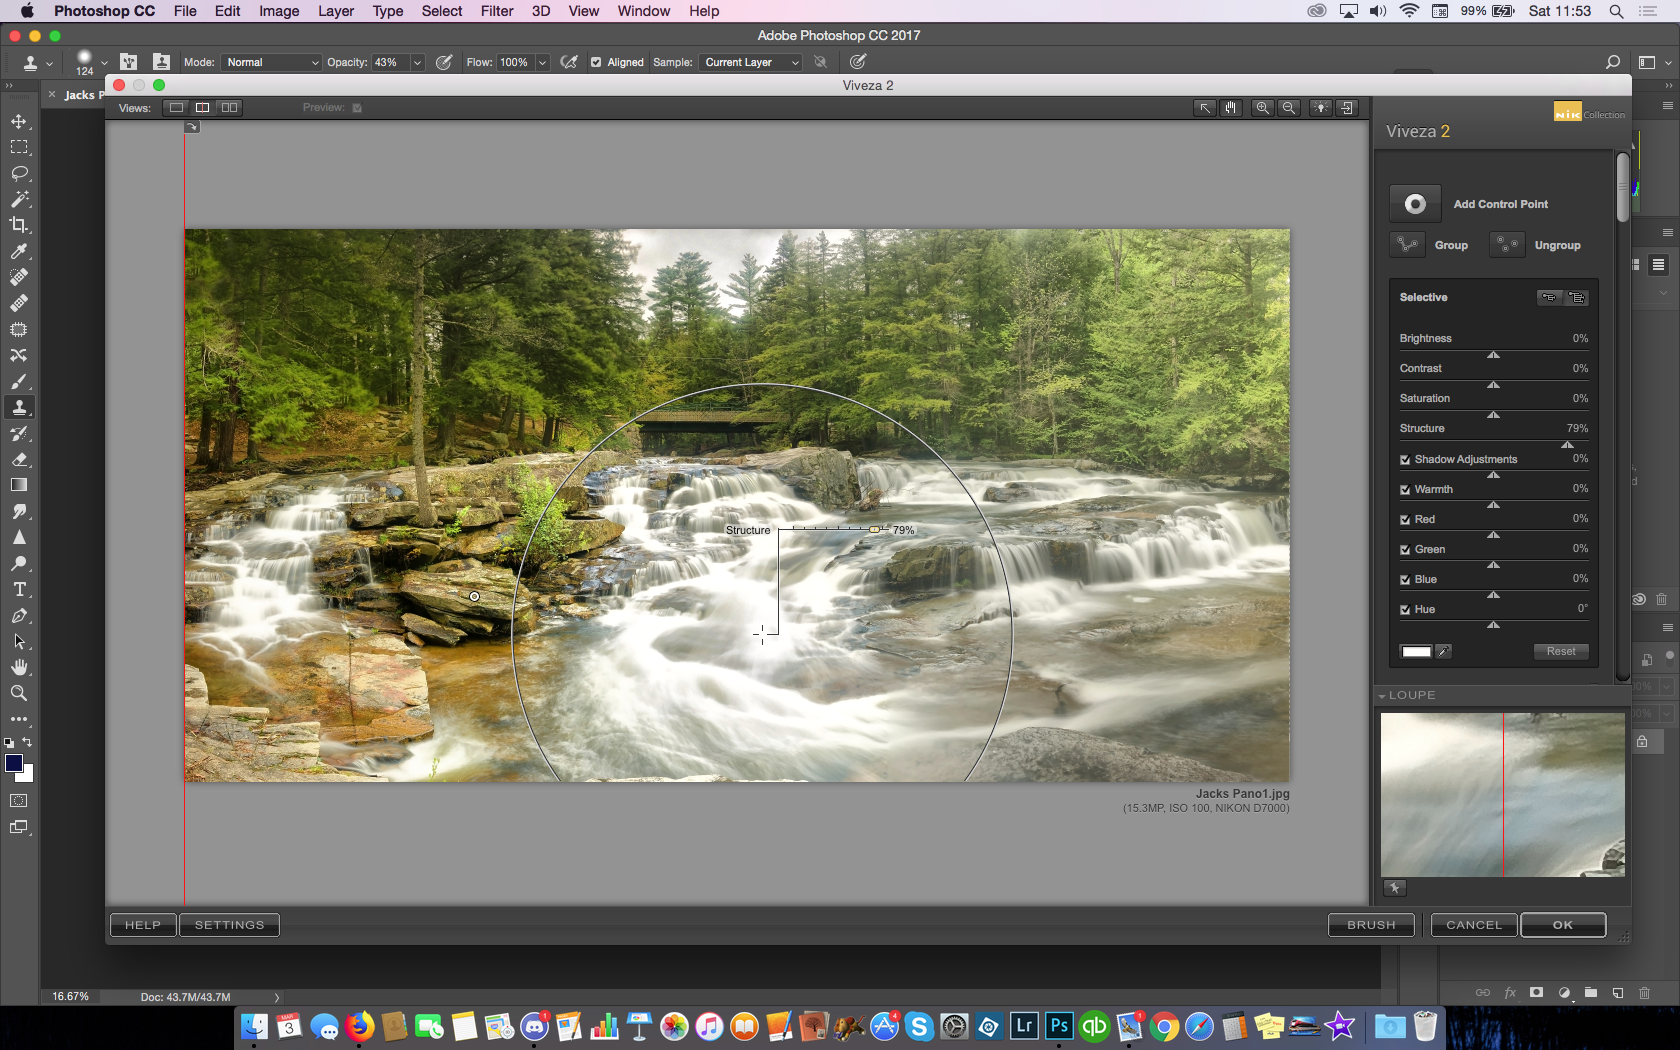
Off to the right, notice the small circle called ADD CONTROL POINT?
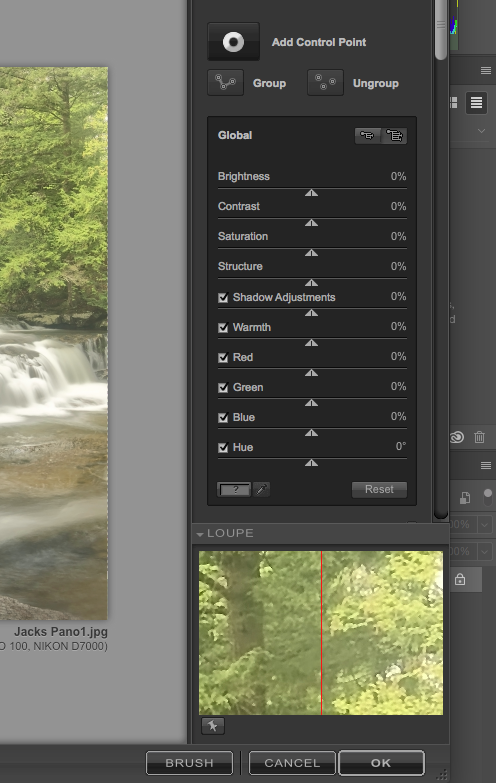
Click it, and click an area of your image to be adjusted:
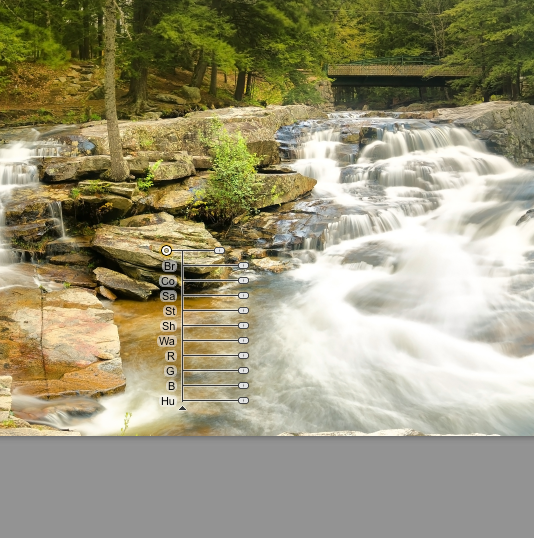
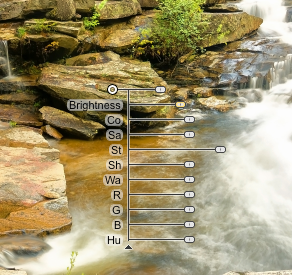
Once you click, notice you now have a series of sliders. Form top to bottom, the sliders are:
- Size (it matters, no matter what lies you've been told)
- Brightness
- Contrast
- Structure
- Shadows
- Warmth
- Reds
- Greens
- Blues
- Hues
The top one controls the SIZE of area affected. It is a relative representation. Some small areas outside will be slightly affect by the filter you apply, to blend into the rest of the image. I make the smallest area needed, to test effects of filtering, first. Click the top slider and go left or right, and see the small circle grow, or shrink. Since the Filter works on color of item selected, I make the circle small enough to fit most of the same type of rock as I dropped the control point. Go small now, and add more control points latter.
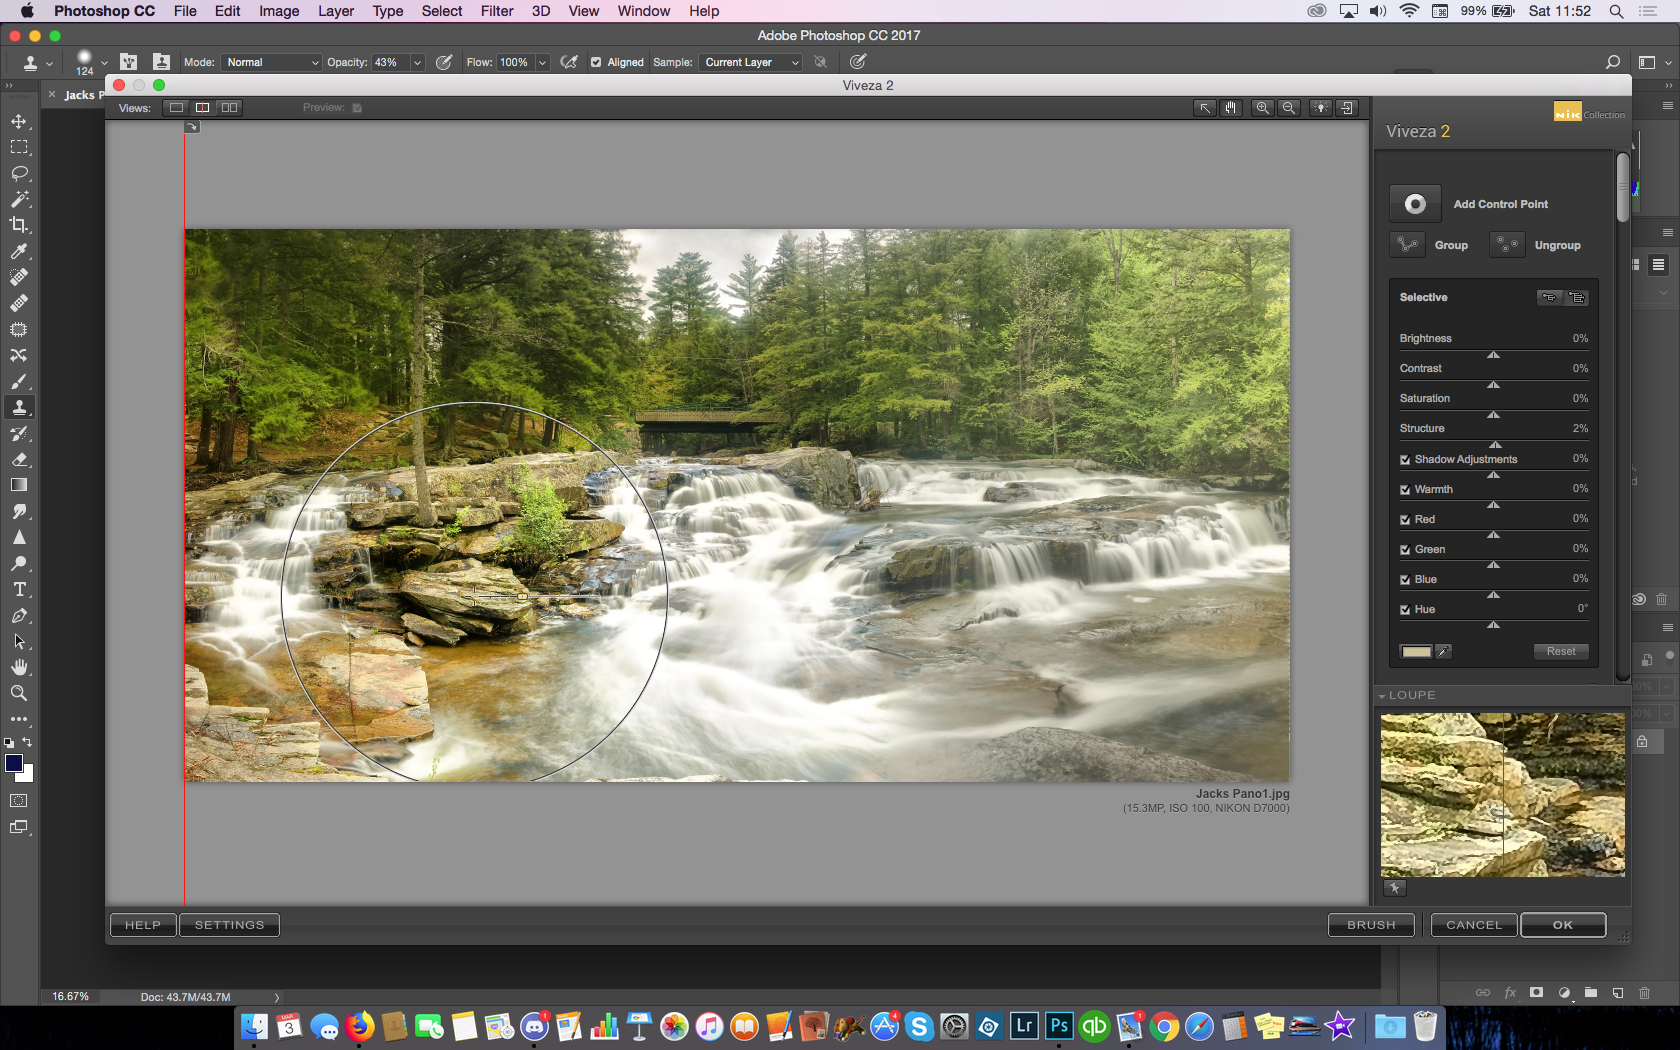
Next, I experiment with the STRUCTURE
Moving this will change apparent detail contrast. Kind of a mix of Contrast and Tone.
I may, in limited amounts, play with shadows in specific areas. Perhaps enhancing the depth in some rocks, or bricks.
I have, once in a blue moon, played with some color, but very rarely. Maybe some greens in some mosses.
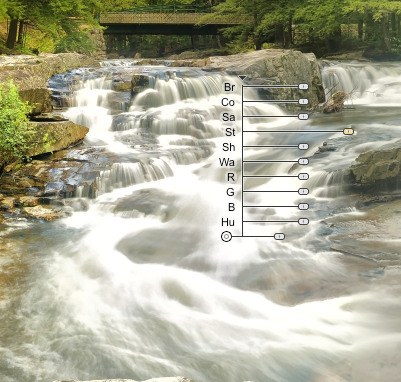
I actually do enjoy playing a bit with some structure detail in long exposure water. It can bring back some of the detail washed out.
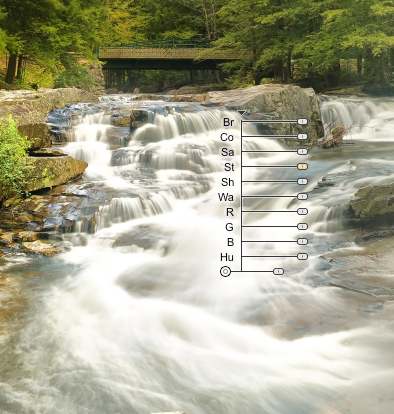
Note the before, and after of the water.
Too much white, and then, detail reappears, below!
When you are satisfied with all the control points, (for me, I did some detail structure in the trees, rocks and water) Your image has a bunch of dots.
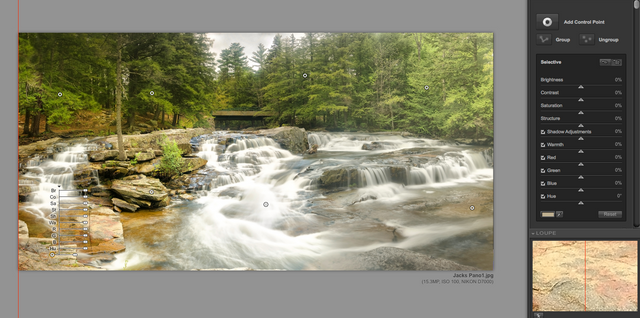
Time to finish out of VIVEZA2. Click OK, bottom right.
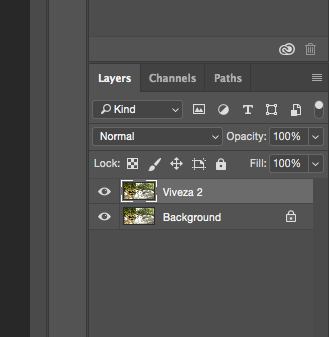
Then, on the right, you need to adjust how much of the FILTER layer, you want to affect the original image. Sometimes, it's 100%, but most times for me, after applying a filte,r I pull it back even more. Perhaps as little as 50% or more likely 70%
Bottom right, note the layers:
... and Opacity:
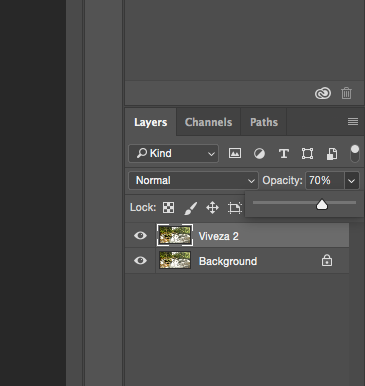
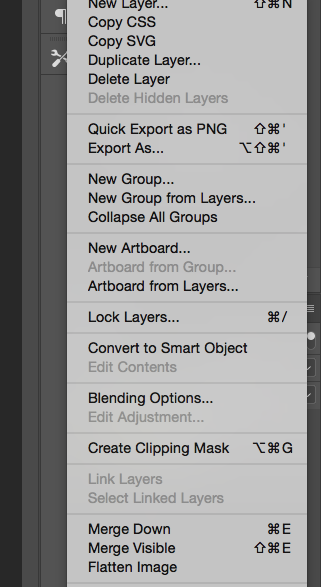
...after that, see above Opacity, there are three parallel lines?
That's where I got to Flatten the layers, to make it all one layer. I click Flatten Image.
A word of note:
Many people will actually make copies of the image at different stages of process.
One is the RAW, one the JPG export form Lightroom. One is the Image with layers from FILTER processing. One is Flattened, before Adding Sharpening, Noise Reduction etc.
All of this is your choice. How much do you want to go back and edit later? how diligent are you about record keeping/backup? Totally your choice. (Go buy more hard drives, now, 'cause it can get fun!)
That's my introduction to my workflow within Photoshop Filters and Viveza.
There's hundreds of steps for me... and I'll try and catch the basics and pass them along here.
I've said it before and I'll repeat it here:
No one method works best for every image. No method works best for every photographer.
Try each one out. Try them on the same image. Try different images.
Most importantly, always be open to trying new techniques.
You never know, you might find when something new works for you.
Some of these tips are updates and come from my Studio Blog.
Past in the series:
Part 10 WORK for yourself: High Pass Filter
Part 9 WORK for yourself: Photoshopping’
Part 8 WORK for yourself: Go To The Light…room!
Part 7 WORK for yourself: From Here To There, My Workflow!
Part 6 WORK for yourself: RAW?JPG? Add Copyright Note
Part 5 WORK for yourself: My Machine, My Hardware!
Part 4 WORK for yourself: More Stuff? More Money!
Part 3 WORK for yourself: Camera? What Camera?
Part 2 WORK For Yourself: Wait? You Charge HOW Much?
Part 1 WORK for Yourself: How Much Can I Make?
Thank you. Very useful for me!
great. Are you on the World Of Photography Discord channel?
Join us to chat about it in depth. (need an invite, let me know!)
Please invite me!
https://discord.gg/rHHRjR
Thank you!
Most filters of the Nik Collection I've used, but for some strange reason I've never dived into Viveza. Now that I see what it really can do, I see that I need to spend some time with Viveza. Thanks for showing!
the more I use Viveza, the less I use Color EFX Pro.
I feel that I can control specific areas, in Viveza, more so than Color Efx.
Thanks for that its very useful info. I will definitely be taking a closer at this when I have a little more time on my hands.
Have your husband do all the packing, and while he is, get a cocktail, and try out some filters in Photoshop and NIK.
hahaha, the poor guy already works so hard! but I will definitely be going through it, thanks
This post has received a 5.88% upvote from thanks to: @bluefinstudios.
For more information, click here!!!!
Try the new Minnowhelper Bots for more information here
Help support @minnowhelper and the bot tracker by voting for @yabapmatt for Steem witness! To vote, click the button below or go to https://steemit.com/~witnesses and find @yabapmatt in the list and click the upvote icon. Thank you.
Voting for @yabapmatt