The Amateur Mycologist #37 - How To Turn Your Christmas Tree Into Food, Part 2 - Materials And Prep
This particular mini-series DOES mention edible fungi, because the goal is to learn how to make fungus grow out of your Christmas tree. However, a few things should be kept in mind. First, I've only successfully inoculated a log once, and it was only a partial success. Second, attempting to grow mushrooms, even known, edible mushrooms, out of a log can still have unsafe results. If you are unsuccessful at growing the selected mushroom, inedible wild mushrooms can take over your log and grow instead. Additionally, failed grows can sometimes result in mold growth, which can also be dangerous to ingest. Finally, even if you successfully grow your chosen species, you may still have a personal allergic reaction to that species, or a reaction to specific toxins in the specific log you used.
My only point is that no process, however careful you are, is 100% free of risk, especially when it comes to growing or eating mushrooms. If you choose to try to grow mushrooms from logs, of course, as always, you do so at your own risk. If you're interested in doing so, I would suggest reading up in other sources as well, including Fungi Perfecti's website, or one of the many books on this awesome and rewarding topic.
Part 1 - The Biology Of Log Inoculation

How awesome would it be to harvest food directly off the side of an old Christmas tree log?
When I say "turn your Christmas tree into food", I mean that quite literally. Last time we discussed the biological processes behind log inoculation - how we will be inserting whole, living fungal mycelium into the wood substrate directly. This should give the fungus we've chosen a super charged head start in the growth department, allowing it to spread evenly throughout our log for several months until, at last, edible mushrooms begin to spawn.
I'd like to imagine readers, overwhelmed by excitement after reading the last post, ordering plug spawn from the Fungi.com and roaming their local streets or dump with a hacksaw chopping off the bottom couple of feet of every stout, discarded Christmas tree in the neighborhood. Now they're plug spawn arrive in the mail and they are eager to get inoculatin'!
Not so fast! This is a process that involves a little patience at every step. Let's take a closer look at what I mean.
#1 The "Plug Spawn"
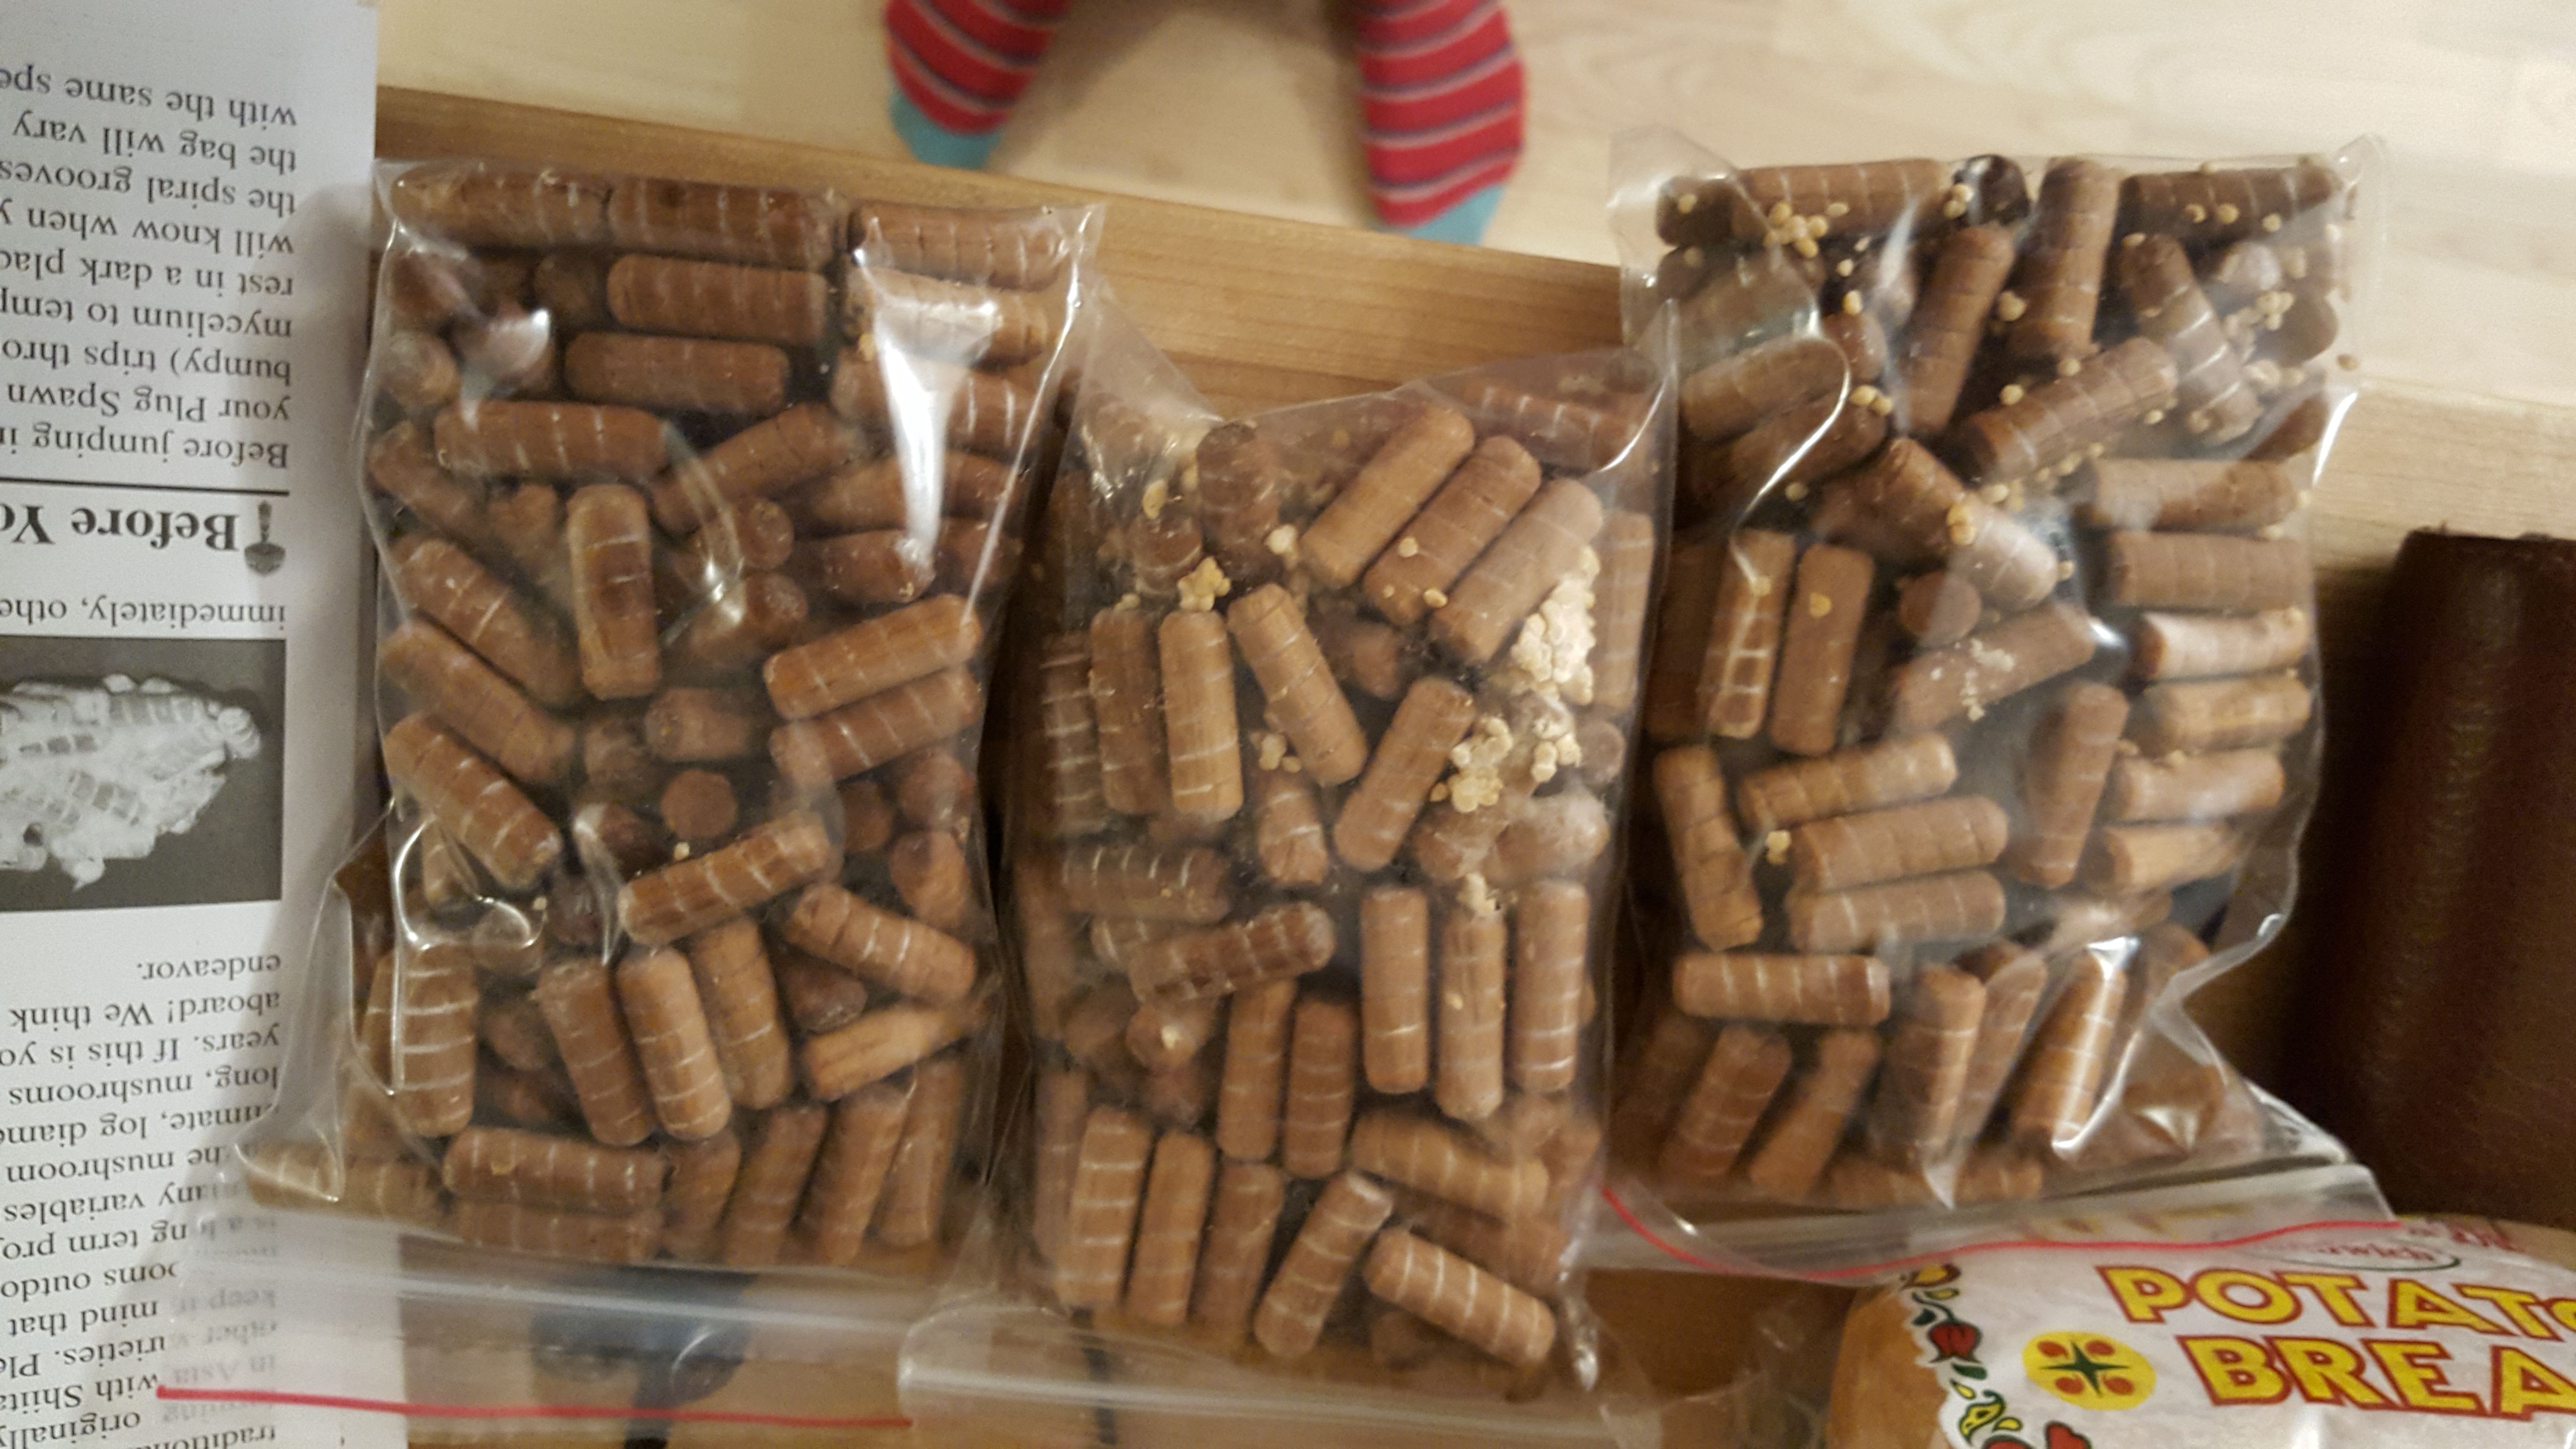
This is the Phoenix Oyster plug spawn I ordered from Fungi.com
There are several ordering options. You can either get bags of 100 Phoenix Oyster plug spawn, or bags of 1000 plug spawn. I decided to get three bags of 100, even though this is less cost effective than a single 1000 dowel bag. However this made sense for a few reasons:
I only have a tiny log right now, that won't need more than a single bag. I'm hoping to use one bag in some kind of growth experiment separate from this process. The third bag came free with the first two - so I need to find another log...
Once you open the bag of plug spawn, you need to use them. You can't really open them, use some, and then close them back up again. The plug spawn begins as a carefully sterilized growth medium, and the bags are sealed to maintain an environment heavily dominated by the chosen mycelium. Once you open a bag, you contaminate that environment and the risk of mold growth increases substantially.
So, even though I've been known to like a good deal, I decided to pay for two little bags with more overall utility than one giant bag I had less use for. If you have multiple christmas tree logs, especially of larger sizes, then you can by all means by the larger bag - just make sure to use them all in one session.
Go back up to that photo of the plug spawn and take another look.
Notice anything strange? I sure did. Where is the mycelium?! Those bags look like they're filled to the brim with plain old wooden dowels and some grains of rye. There is some hint of white in the grooves of the dowels, but no masses of healthy white mycelial growth. What gives Fungi.com?!
What gives is mycelial collapse. Here's how the bags look as of this morning.
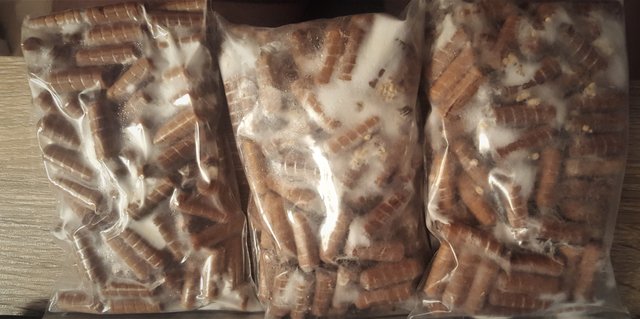
This is more like it!
Almost all of the dowels have grooves clearly suffused with white mycelium, and there are great white patches of cloudy mycelial growth scattered throughout the dowels and rye. What happened here?
Time! This is something that fungi.com includes in their instructions when you receive he plug spawn in the mail, but it's also something that the over eager first time inoculator might over-look. (Take my word for it - I did the first time I tried this a number of years ago.)
Remember, when you order these dowels to come to your house, You are ordering a living organism. The mycelium is being ripped out of a habitat designed by the distributor to be ideal for its healthy growth, tossed into plastic bags and then dragged around the country by truck in a shipping box with widely variable temperatures for nearly a week.
The result of the chaotic shipment process is not dissimilar to what might happen if you shipped a new parakeet to your house via UPS truck in a small cardboard box filled with food and water. That would be one messed up parakeet if it survived the trip. You wouldn't want to take that parakeet immediately out of the box and show him in a parakeet competition, cause he's gonna look like shit.
The same idea applies to mycelium. When you first get the package, unless you live very close to fungi.com's distribution centers, the mycelium is gonna look pretty dead. But don't give up hope. Just find a room temperature, dark place to hide the bags for a week or so and leave them there unmolested. When you return to them, you will find the same transformation I did as the mycelium recovers from its arduous journey.
Once the mycelium has grown back, you don't need to use these right away. They will keep in the refrigerator for several weeks at least - which might be a good idea if you ordered them right after Christmas and live in a place where it is insanely cold during the winter. You don't want to be inoculating the log if its going to be extremely cold unless you have a place indoors - like a garage, or your apartment if you're like me - to keep them during those deep freezes. If you don't want to micromanage the log during the coldest months, simply wait a month or so for things to warm up.
The mycelium should be fine for at least a month in your fridge - but beware! if you leave them in there too long, edible mushrooms might literally burst directly from the plastic bag!
Now your plug spawn are regenerating in a dark drawer somewhere - let's go turn that Christmas tree into a log ready to be inoculated when the time is right.
#2 The Christmas Tree, A Saw, And Some Soy Or Bee's Wax
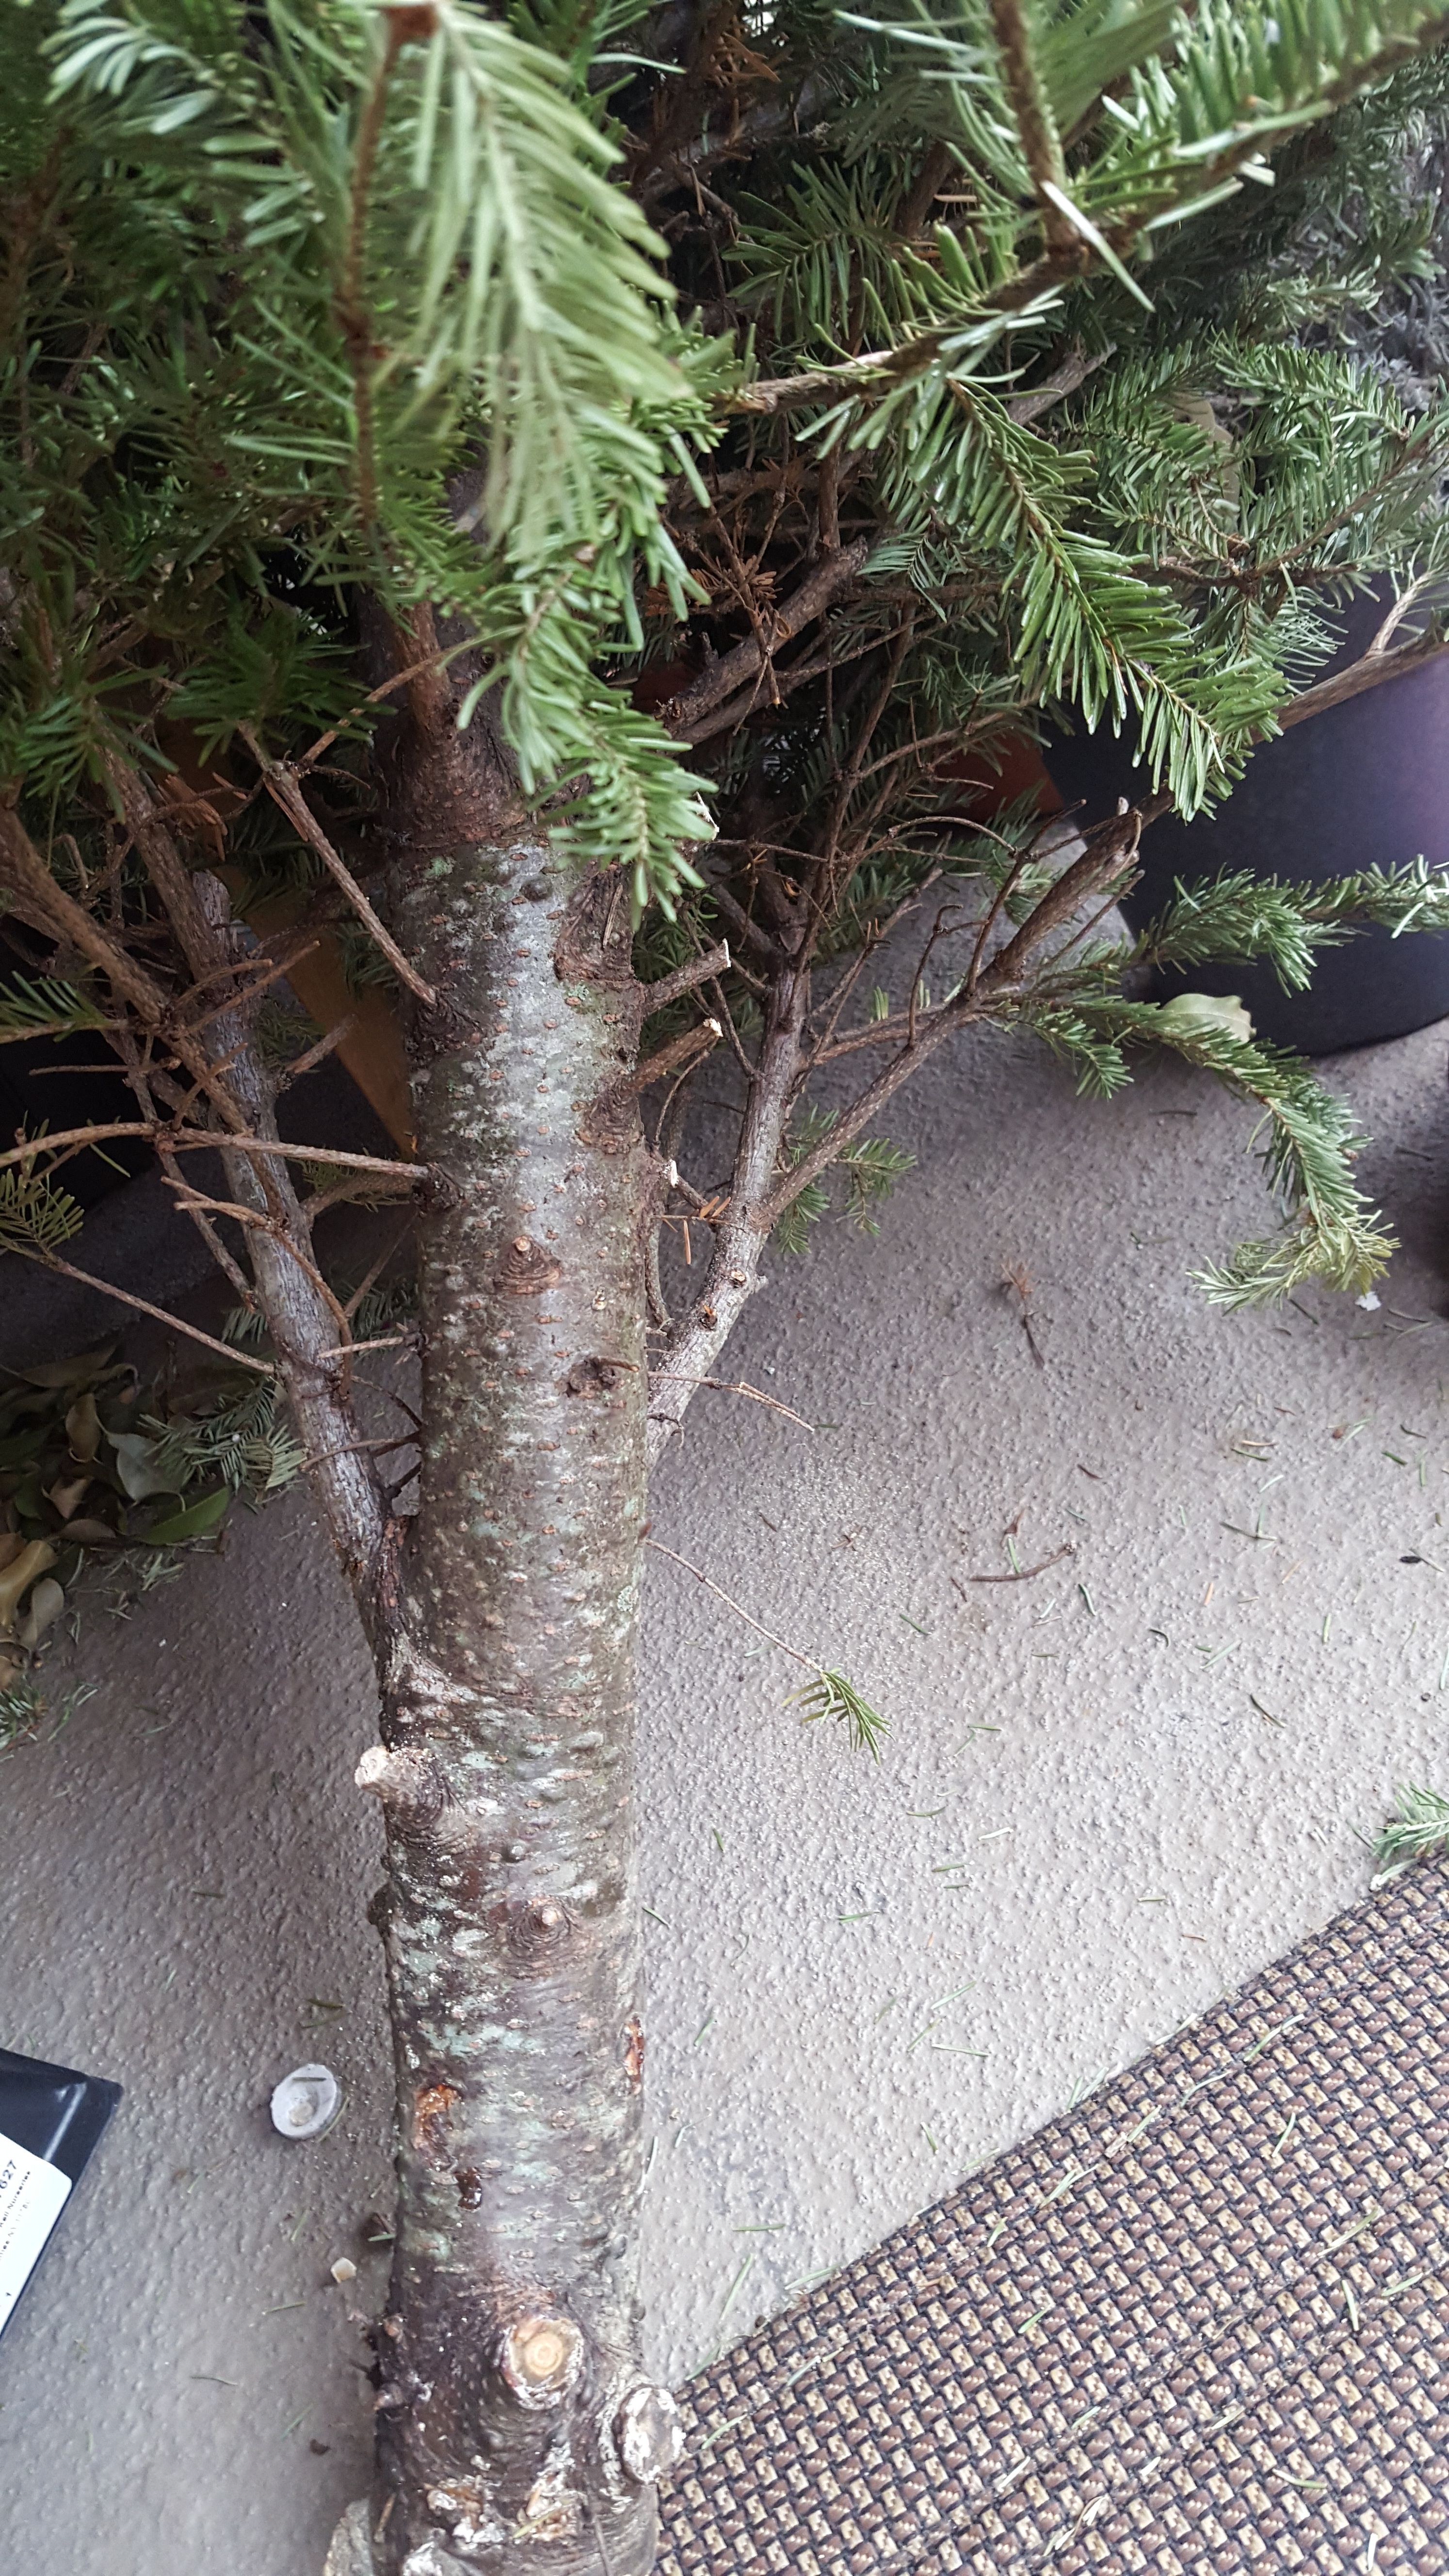
Here we have the unchanged Christmas tree.
This one is actually sub-par for this process in several ways. First, the log, at its thickest, is just over 3 inches, which is too thin. Second, because the fir log tapers the further up the tree you go, the most I could get out of this was a couple of feet. The ideal log would be 4-8 inches in diameter and 3-4 feet long.
Now, does this mean we won't get any mushrooms from this log - not necessarily. In fact, we might get mushrooms faster because there is just a lot less nutritional material for the mycelium to spread to. However, we will probably get much smaller amount of mushrooms, and fewer harvests of those mushrooms.
For my purposes, doing this essentially for demonstration purposes this time, fewer and smaller harvests are hardly a problem. However, if you're doing this because you really want a cost effective way to grow a ton of delicious mushrooms, then I would suggest following the guidelines and only taking the widest christmas tree logs you can find.
Obviously we can't just start drilling holes in a Christmas tree - we need to prep this log.
What I've done here is saw off the log about 2+ feet up the length of the tree.
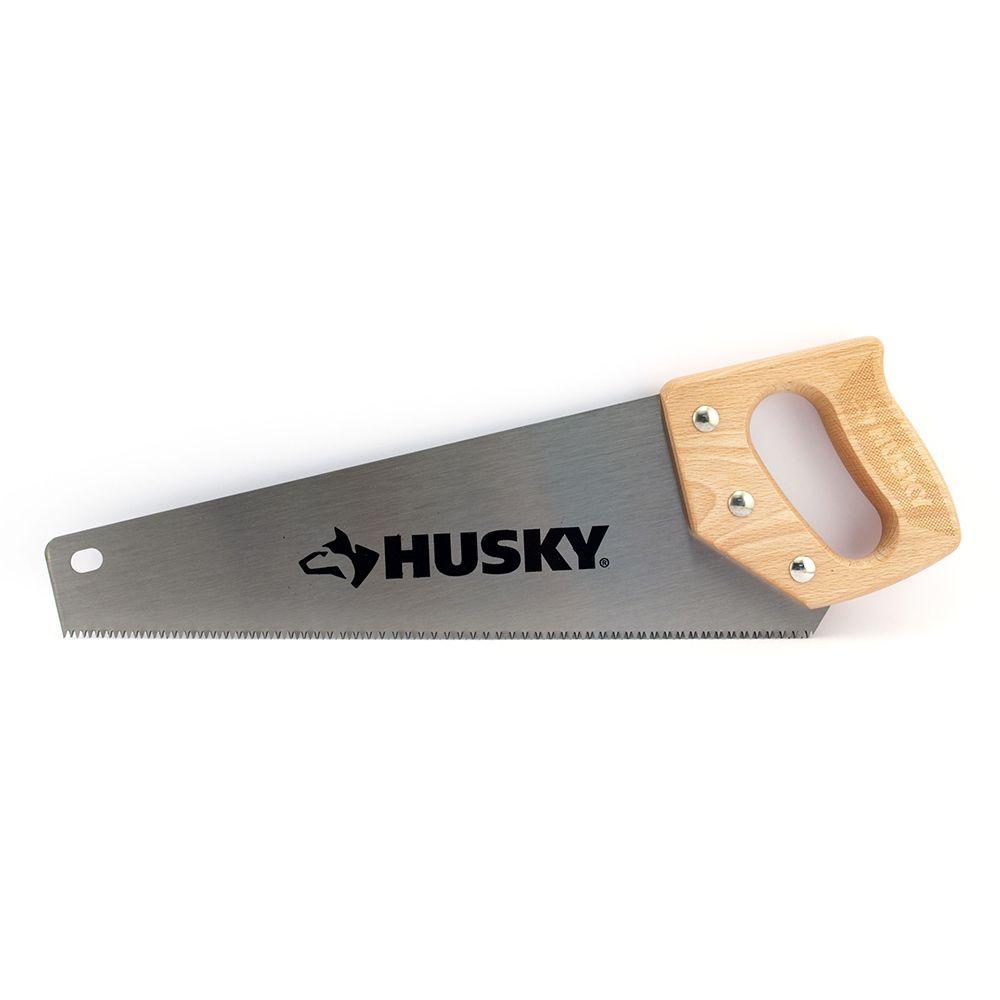
If I went further than this the log was going to get way too skinny on one end. Now, as an apartment dweller, I did not have a chainsaw to do this. If you live in the suburbs or a rural area, more power to you, because this part will be hella easy with the right tools.
But here on my balcony I needed to revert to something substantially less ideal. All I had was a flush cut saw that's intended to be used for cutting small pieces of pre-processed wood, a hammer and a chisel. That saw eventually got the job done, but the blade is now pretty mush FUBAR. If you need to do this by hand and have limited space, I would suggest a more traditional hand saw.
By hook or by crook, you'll eventually get your log sawed off the greater part of the tree. Then you need to saw off all of the appendages as well - a task the flush cut saw is actually quite good at. Once it's cut and trimmed, if your mycelium has re-grown, then you could just jump in and start inoculating.
That's the beauty of using a Christmas tree - it isn't a freshly cut log! It's been dying for over a month already by the time you get to this point, so the wood's internal defenses against fungal invasion are substantially reduced.
However, if, like me, your mycelium is still recovering, and you just want to get rid of the Christmas tree you took off the street that's been taking up your entire tiny balcony, then you want to do some further prep of this log to protect it from fungal invasion in the interim.
This calls for wax!
Soy Wax in this case.
There are a number of different wax products available, but you really want to use either bee's wax or Natural soy wax. A petroleum based wax is not edible or food safe and, well, made with petroleum by products. In this case, I bought 10 pounds of white soy wax because it doesn't go bad and my wife and I would like to start making candles.
Now, you're going to need to melt this wax down and brush it onto the wood a bunch. You could just use one of your pots for this purpose, but trust me this is a bad idea. Melted wax is incredibly difficult to clean up and basically takes over whatever vessel you use to melt it in. I learned that the hard way some time ago.
So I decided to buy a dedicated pouring/melting pot and wax brush. These two products now don't need to be cleaned - instead you reheat the wax when you want to use it again, reheat the brush in the melted wax, and your set to go.

Place some of the white soy wax into the pouring pot and put it over low heat on the stove.
Don't leave your wax unattended over an open flame - this stuff is still highly flammable!
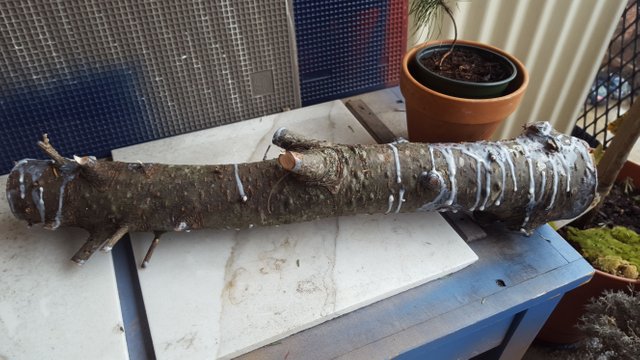
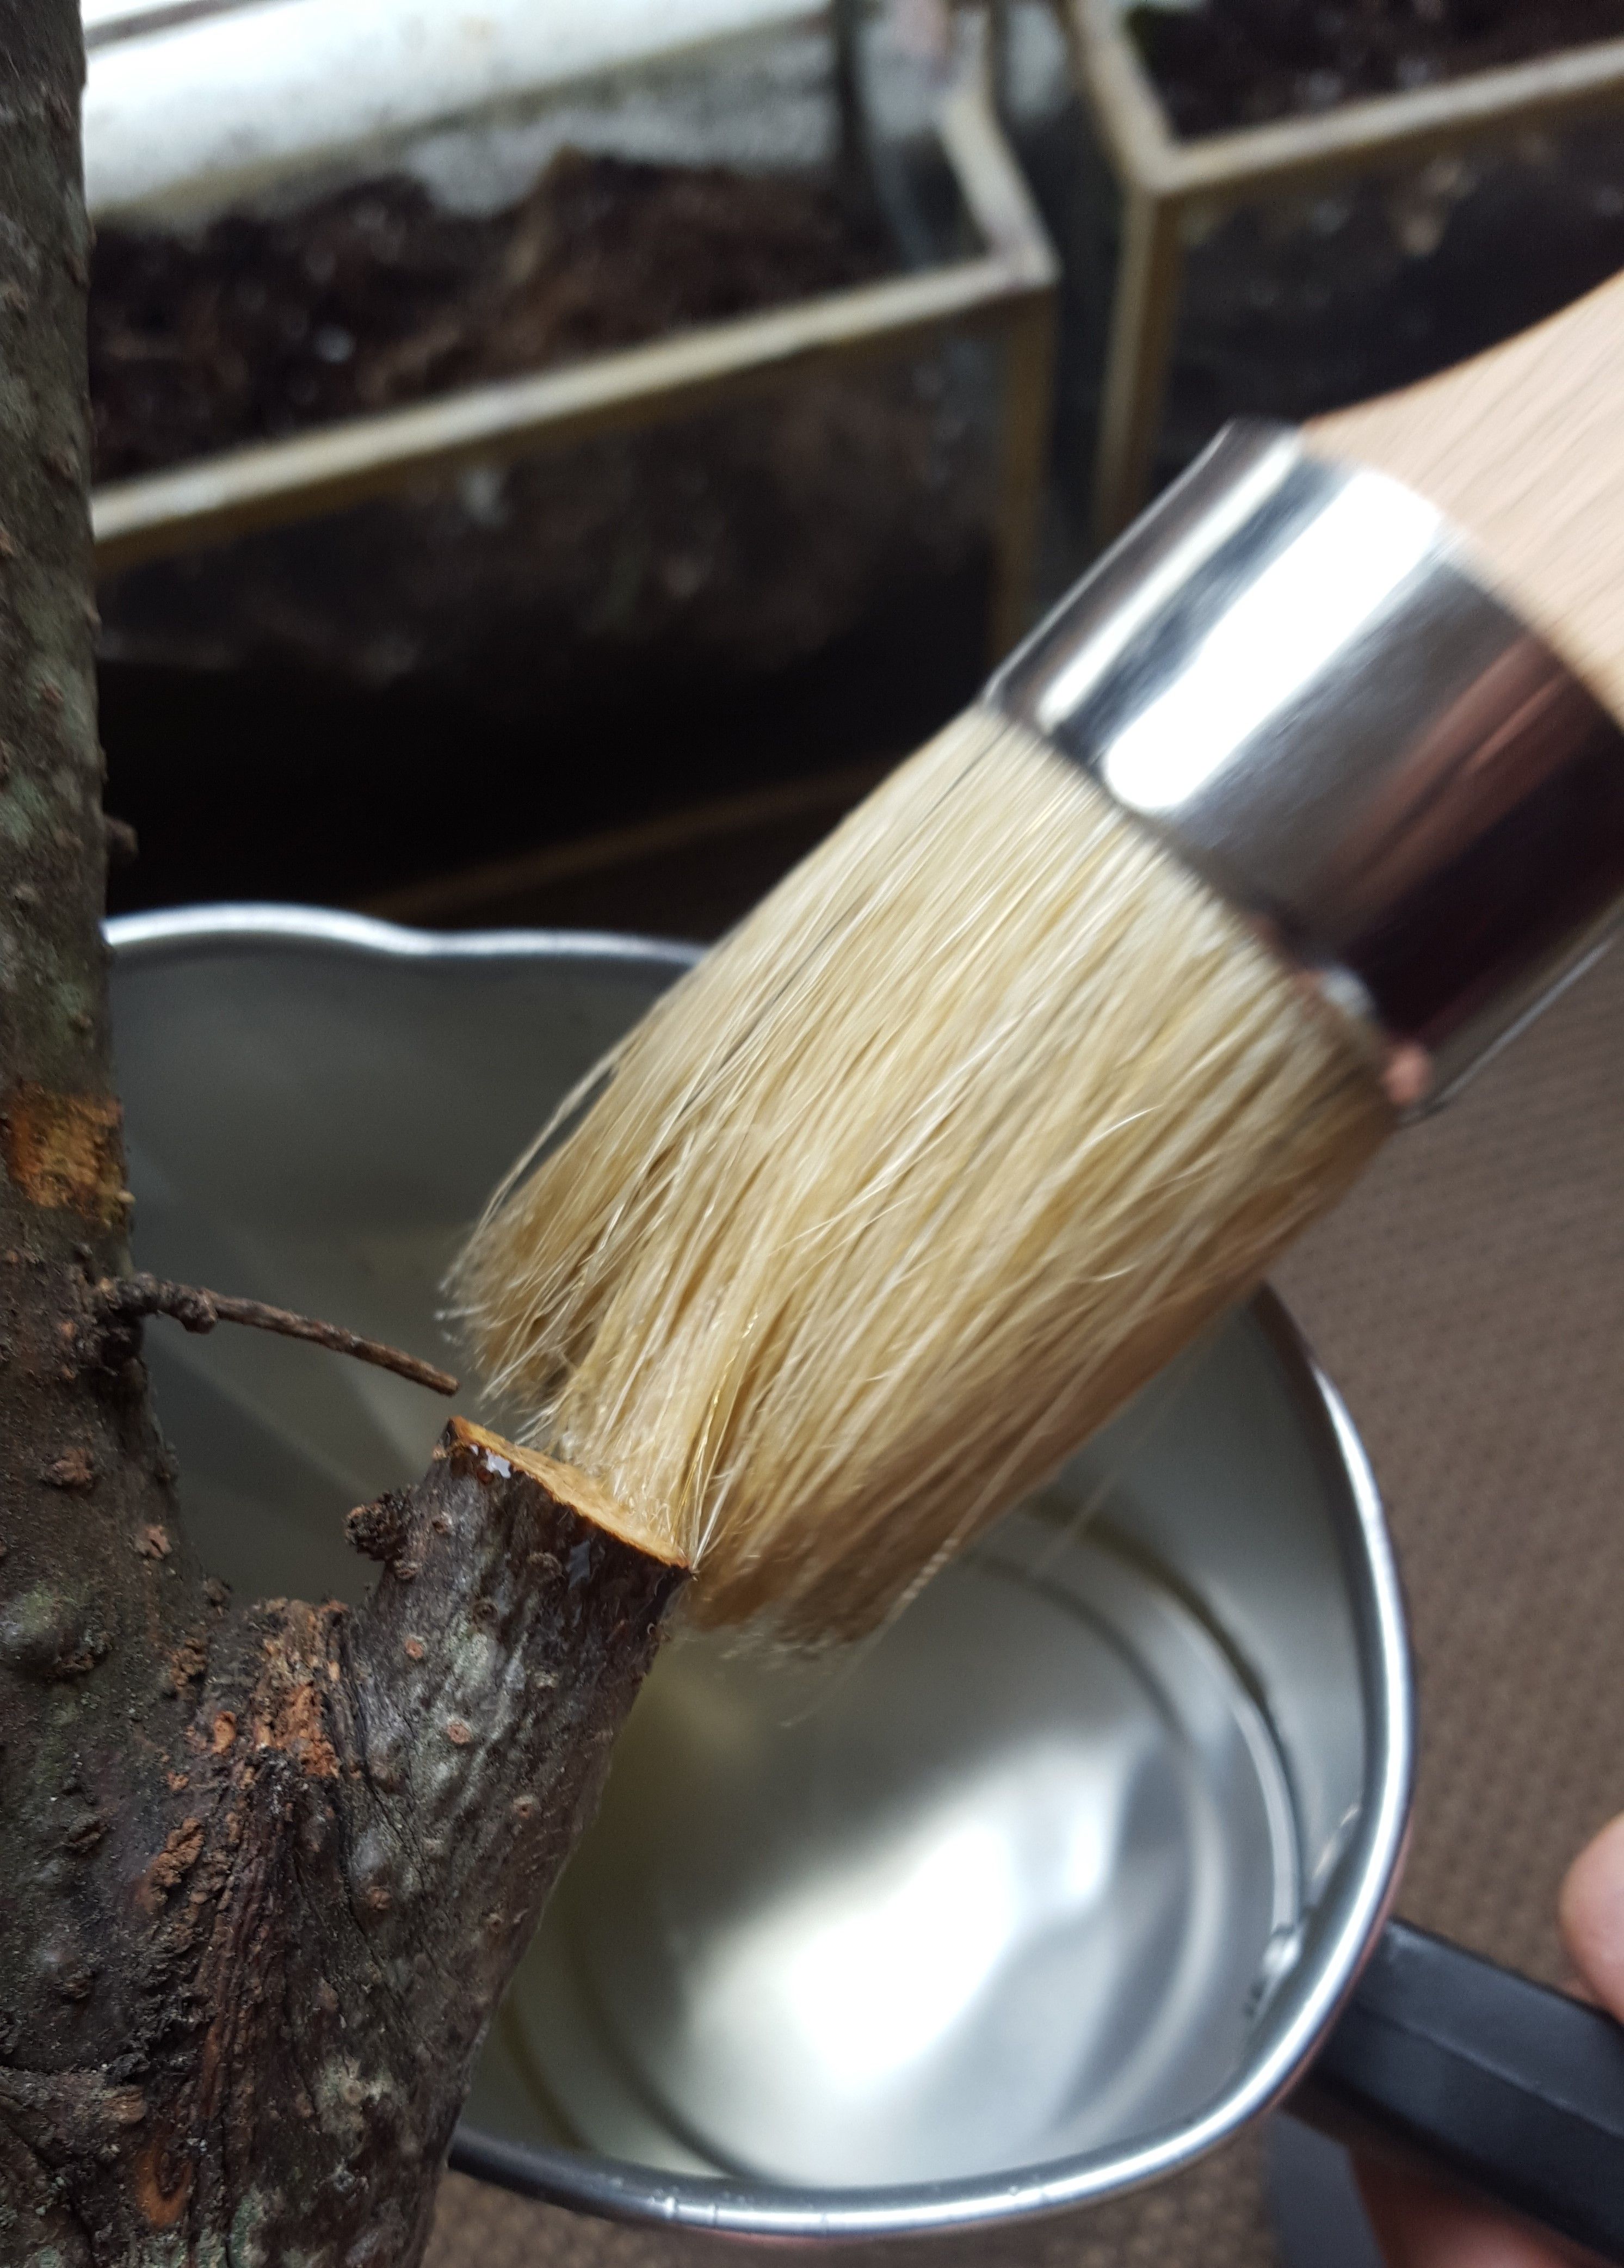
Once the wax is completely melted your ready to begin applying it to the wood. Now, you do not want to cover the entire surface of the wood with wax - only the areas where the bar has been removed or disturbed. This is a very satisfying process. It feels like you're administering some tender love and care to a dear, wounded friend - Mr. Log. In the photo to the right you can see my wife applying the wax to a trimmed appendage. You can also see my giant hobbit foot in the lower left hand corner.
Why not wax the entire log? Take a look at this helpful diagram I made.
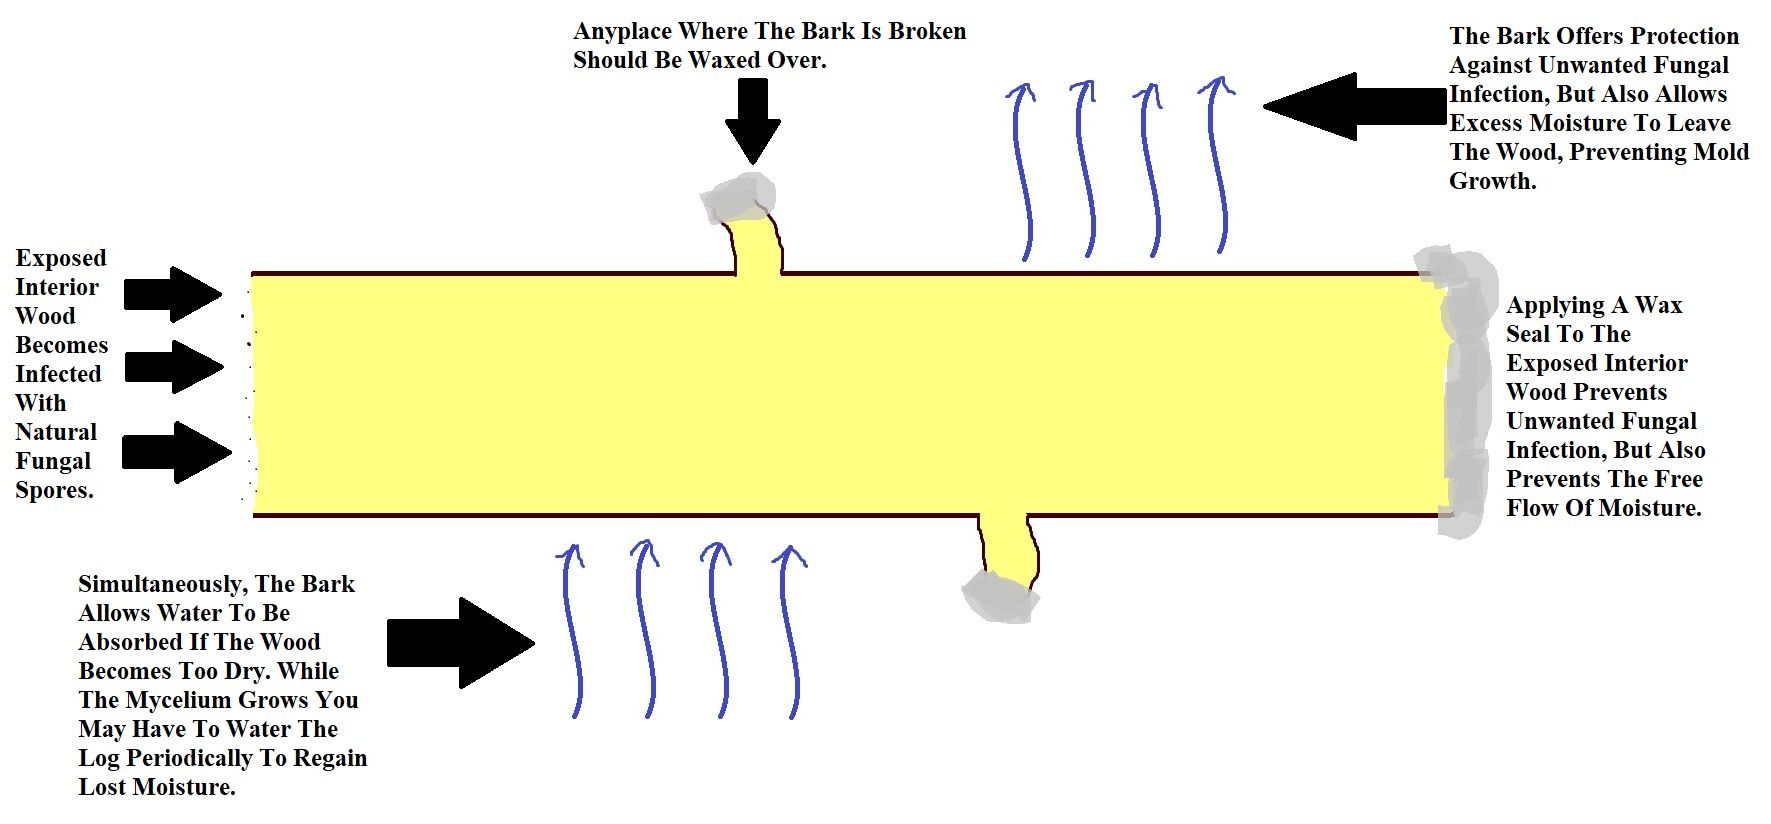

The goal with the wax is to prevent unwanted fungal invasion.
However, it does create an air and water tight seal, which would be bad if we covered the entire log. It's best to consider the log as a stand alone ecosystem wherein your mycelium will be growing. If you cut that eco system off from either giving out moisture or receiving new moisture through the water porous bark, you are setting it up to either stagnate or dry out.
Instead, you just want to put a couple of layers of wax on the barkless parts, as in the image to the left. By doing this you ensure no unwanted spores will get access while leaving the bulk of the bark free to take in and release moisture.
One piece of advice, for the thorough minded.
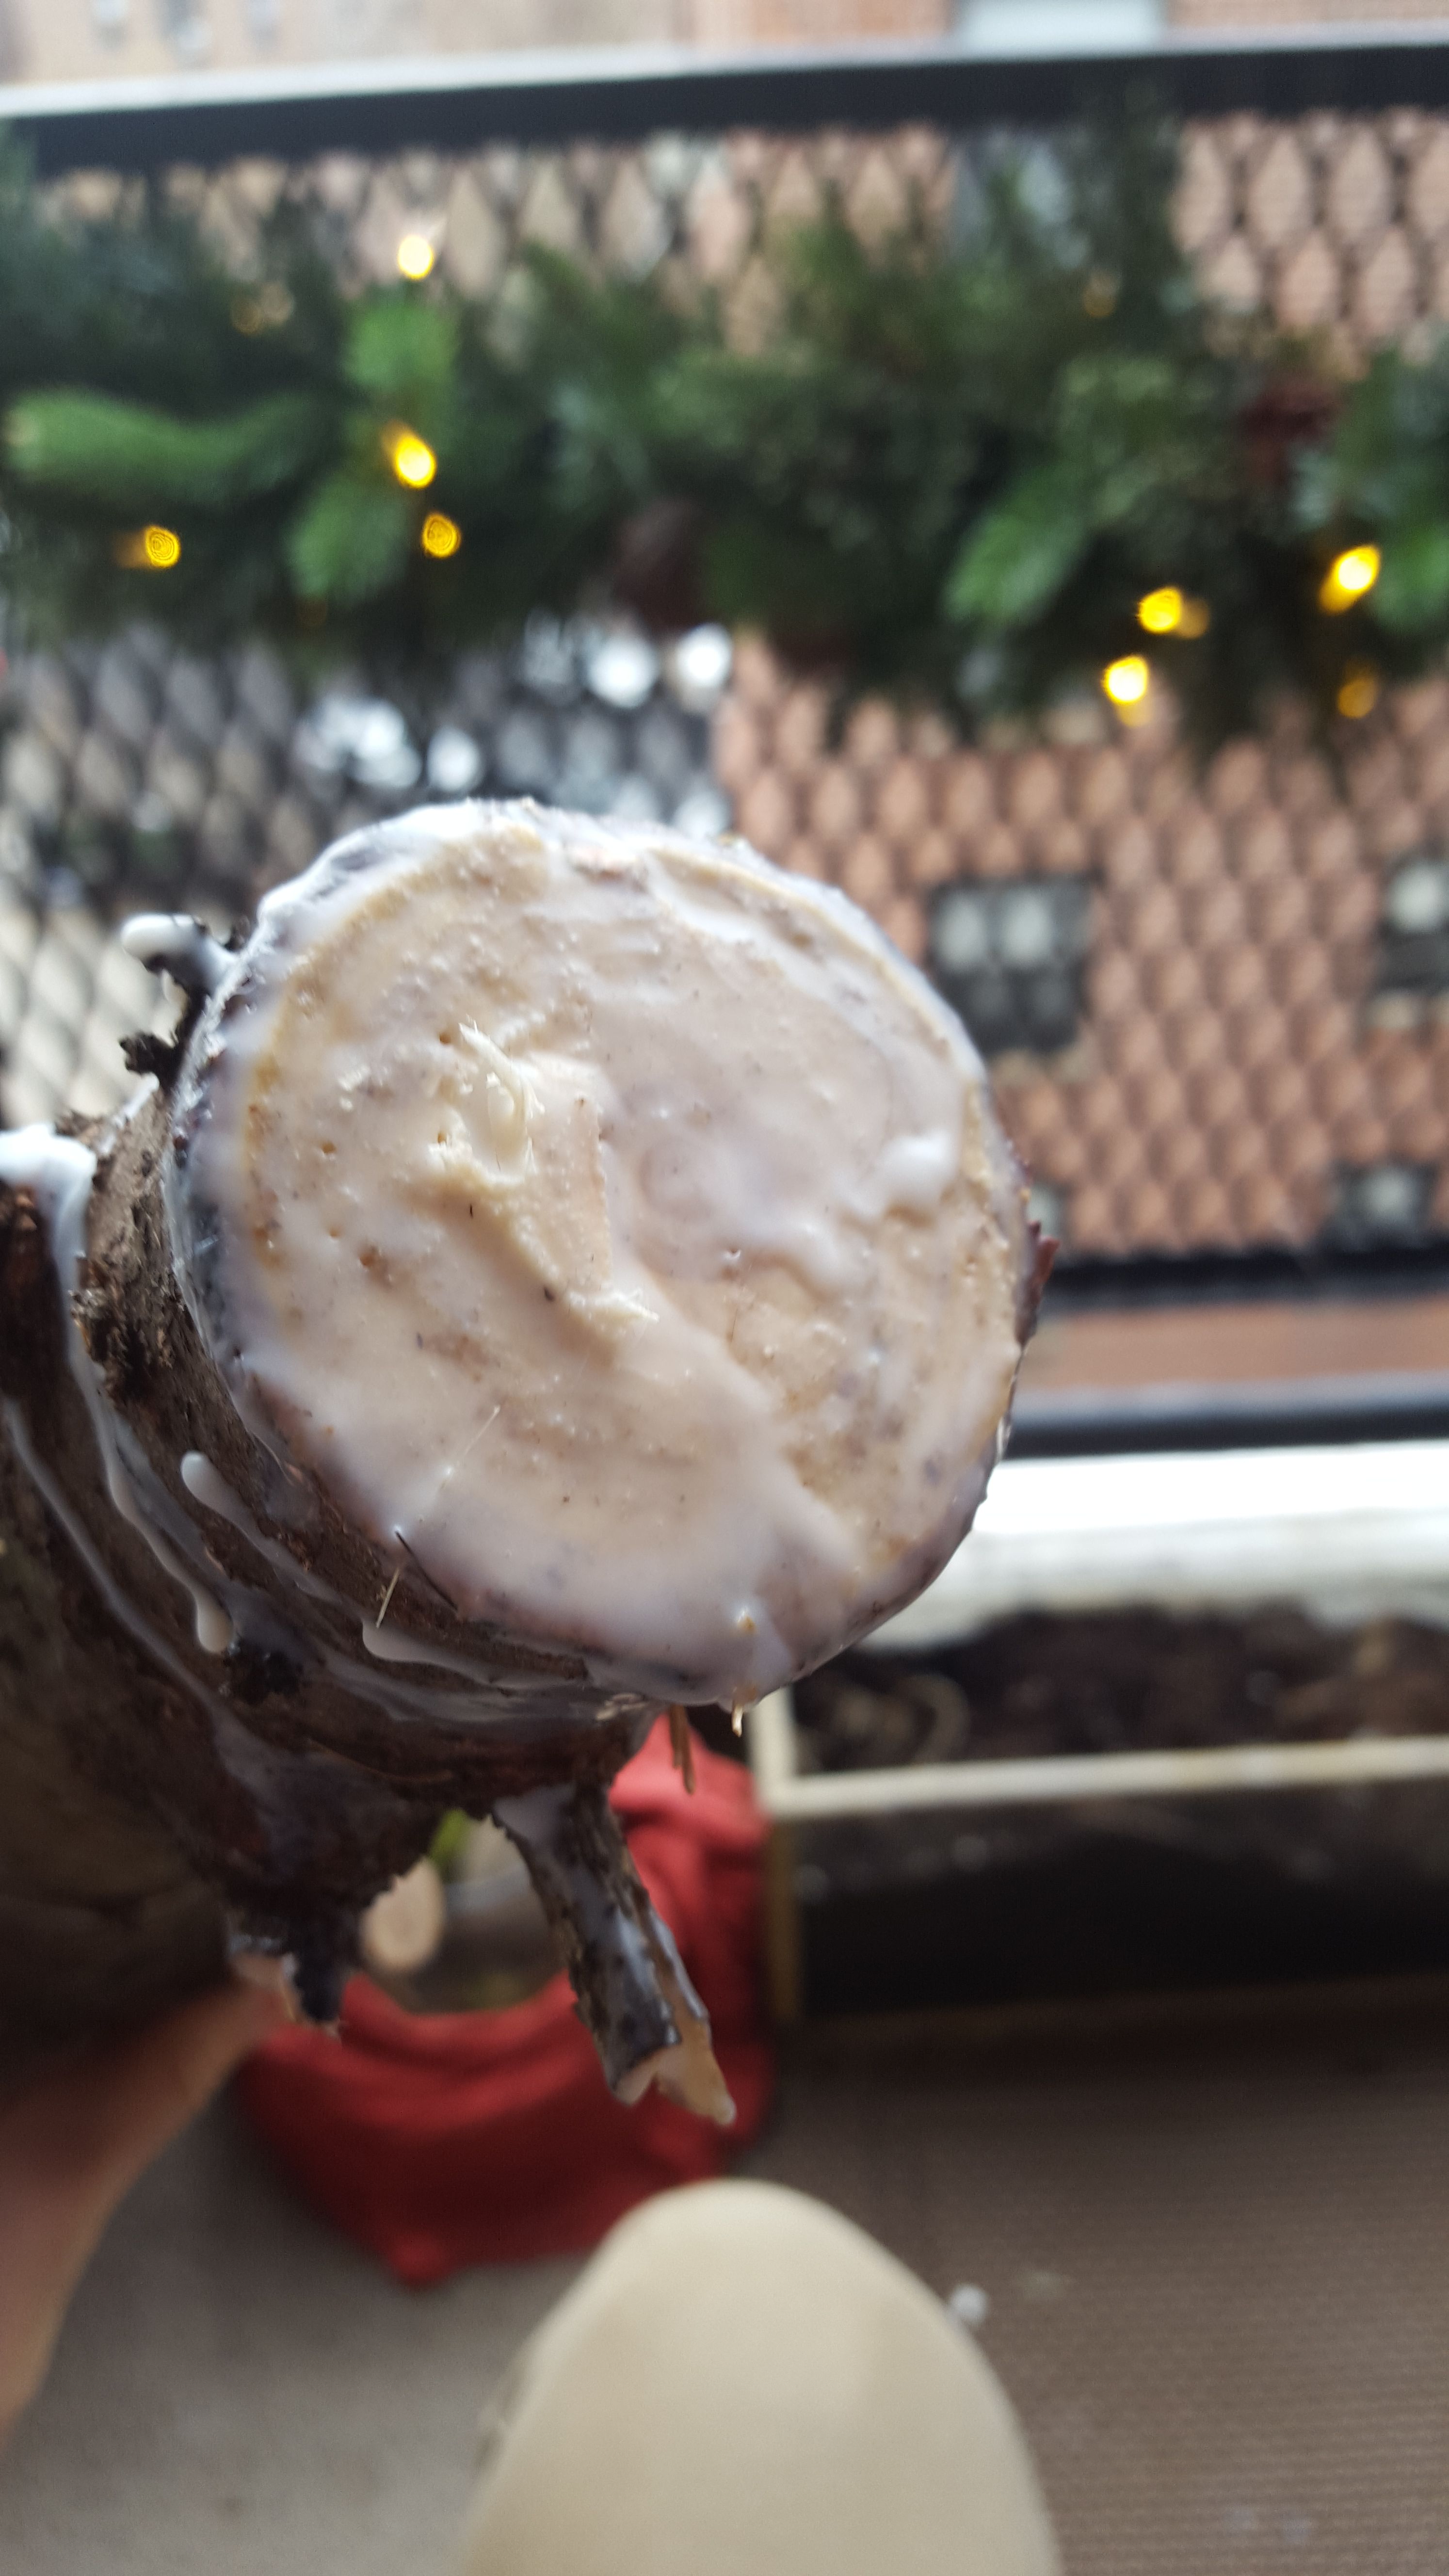
You definitely want to wax both ends of the log either after inoculation or before if its going to sit around for awhile.
These are the primary entry points for hostile fungal spores. However, you might already see a bit of a problem. The Christmas tree has had an exposed portion of the log since it was cut back on the farm. And yes, this portion has probably taken on some external spores. If you are not lazy, like me - and certainly if you are better equipped than me, it would make sense to take off perhaps an inch from the bottom of the log. By doing so you should be able to cut away most of the wood affected by any pre-existing spores.
I didn't do this, because to do so with my little hand saw would have been torture and I'd already spent half an hour hacking and hammering away at the damn thing. The result might be a less robust final grow, or a log that has internal fungal competition and more than one species at a time. This is how it works in nature all the time - but when you're growing your own mushrooms, you ideally want to avoid this.
Now our mycelium is healing up well in a dark drawer somewhere, and we've carved up our Christmas tree and prepped it for inoculation. For me, I may wait a couple of weeks before the actual inoculation, both because it has been VERY cold out and because next week I will be headed to Geneva for the #steemstem meetup and won't have much available time to devote to the process. But that's OK - the mycelium will keep in the fridge for at least a month, and the log will keep like this for longer.
Part 3 will come soon enough, and we will get down to the nitty gritty of log inoculation.
Photos And Videos Are My Own Except:
[1]Stu's Images [CC BY-SA 3.0 (https://creativecommons.org/licenses/by-sa/3.0)], via Wikimedia Commons
![Stu's Images [CC BY-SA 3.0 (https://creativecommons.org/licenses/by-sa/3.0)], via Wikimedia Commons](https://commons.wikimedia.org/wiki/File%3ABranching_Oyster_Mushroom%2C_Pleurotus_conucopiae.jpg)
Microscopic photos were taken using an AmScope SM-4TZ-144A dissecting microscope and an AMScope M150B entry level microscope. The camera lens is also AMScope, MU300.
Information Sources
[1]Kuo, M. (2017, December). Pleurotus pulmonarius. Retrieved from the MushroomExpert.Com
[3]Mushrooms of the Northeastern United States and Eastern Canada by Timothy J Baroni, p.210, P.pulmonarius
[4]Cool Lumenlearning Course on Fungi Basics
[5]Tons of quality information and reading on Fungi.com about plug spawn and log inoculation
Being A SteemStem Member
"The third bag came free with the first two - so I need to find another log... "
dber equips his axe.
Hah - i was seriously considering walking around my neighborhood with a saw and just taking the last two feet of all the trees. End of the day I chickened out - but now I'm wondering where they dispose of them all - I bet there's tens of thousands somewhere in a pile.
OH, I am so glad you made this post, I am bookmarking it now. I have wanted to do a mushroom farm as part of our tiny homesteading for awhile. Whenever we get the little 'grow your own' mushroom kits, they are always so fun.
I once saw a video of someone using plugs in cut lumber in a pile of wood and wanted to try it. Where I keep my quail I have a wonderful wood log wall built by @winstonalden for me. I really wanted to add 'mushroomed logs' (if that is a term) to this pile.
Thanks for this. We have so many felled trees and limbs we get each Autumn and Spring.
This looks like a great project to do together with kids!
With proper supervision, absolutely!
Just found your blog and am happy I did. I liked reading about this as we too love fungi and plugged our first logs last year. Your post was greatly detailed and informative, well done, excited to seem if the mycelium will run on your xmas trees.
Out of the 50 or so we plugged last year, much of the soy wax was eaten by rodents!!! Live and learn I guess. Beeswax for this season I guess.
I'll be following you from now on, looking forward to seeing your other posts ;)
Always happy to find another mushroom lover - don't discard the logs where the wax was eaten - just maybe keep them in a seperate pile. You might still be able to get the intended species out of them
This is great, I'm going to have to save both these posts for later as this is something I really want to get into and it would be great to do it with my kids. Your instructions are really clear and easy to follow. Thanks @dber for doing these posts x
information is very good, I will try to practice it.
you are a mushroom expert. @dber
I am really really not an expert - there are scientists who go to school to study mycology exclusively and then spend their lives devoted to the topic - and amateurs who devote more energy and thought than I am able to spare - it's important to me to keep my amateur status in strong focus and proper context - I'm at the low end of a very tall totem pole, I've just gotten lucky enough to write about my learning process on this very specific medium and at this very specific time.
you are welcome. I salute hear your explanation about yourself.
Cool @dber
all mushrooms look very good to me, you ever make a post about rice straw mush. it's a very nice mushroom @dber