Swordmaking in details : from bytes to bronze #1, designing and printing a sword pommel.
Swordmaking is not only complicated, it is also time consuming and fraught with risks, both in the sense that you may harm yourself during the process, but also because a small error at a critical point in the process will probably destroy your work.
So to make swords you will have to be both patient, careful, skilled at every part of the process , and knowledgeable about the tools and materials that you work with.
To not make this post far to long, I have chosen to cut it up into two parts. In this part, I will describe the 3d modeling and printing of a master for a pommel. In the next sword making post, I will show the sand-casting of the bronze-pommel .
Todays post is about the most artistically free part of making a sword, the pommel.
A sword is a precision instrument and needs to be very carefully balanced to function properly, so the pommel is primarily a counterweight. It is however, also a great opportunity to add some decoration, to the sword.
One of the main features about a sword (and one of the most ignored or misunderstood) is the fact that a sword is balanced in such a way that it is quite impractical to hit hard with it. The blunt impact from a sword is, and should be , negligible.
A sword is first and foremost a slicing or cutting weapon. Therefore it makes sense to place the point of balance close to the hand. That makes the sword seem lighter in the hand, and faster to move around. We have no need for a lot of force because the sharp edge will do all the damage to the opponent.
In the hand, a sword works like a lever, which means that since the blade is 5-10 times longer than the handle, we need something heavy at the end of the handle to compensate. This is why there is a pommel.
On my longswords the pommel weighs between 250 and 400 grams out of the total weight of 1500 grams. I make the pommel out of either steel or bronze. simple pommels are best made from steel, which is cheap, while more elaborate ones are best made from bronze which can be cast.

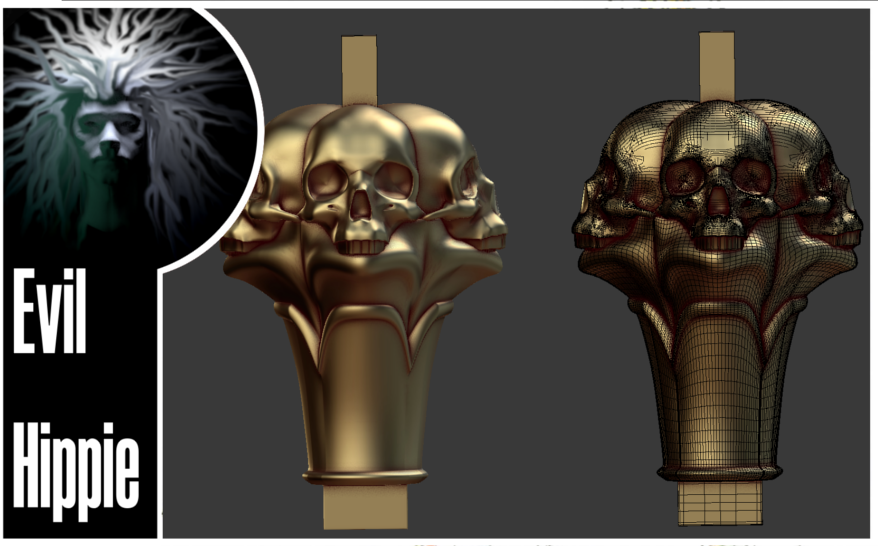
I wanted to make a Memento Mori inspired swordpommel for this one, so skulls was the obvious choice.

I just so happened to have a skull that I have modeled earlier ,see the post here, that i could use with very little modification

The pommel should be both pleasing to grab and have a profile that was similar to historical swords when seen from a distance.
I went for a design with 4 skulls looking in different directions the base of the pommel was shaped to resemble a flower, or some leaves, out of which the skulls grew like petals.

It does look a bit corny, but Memento Mori tends to do that.
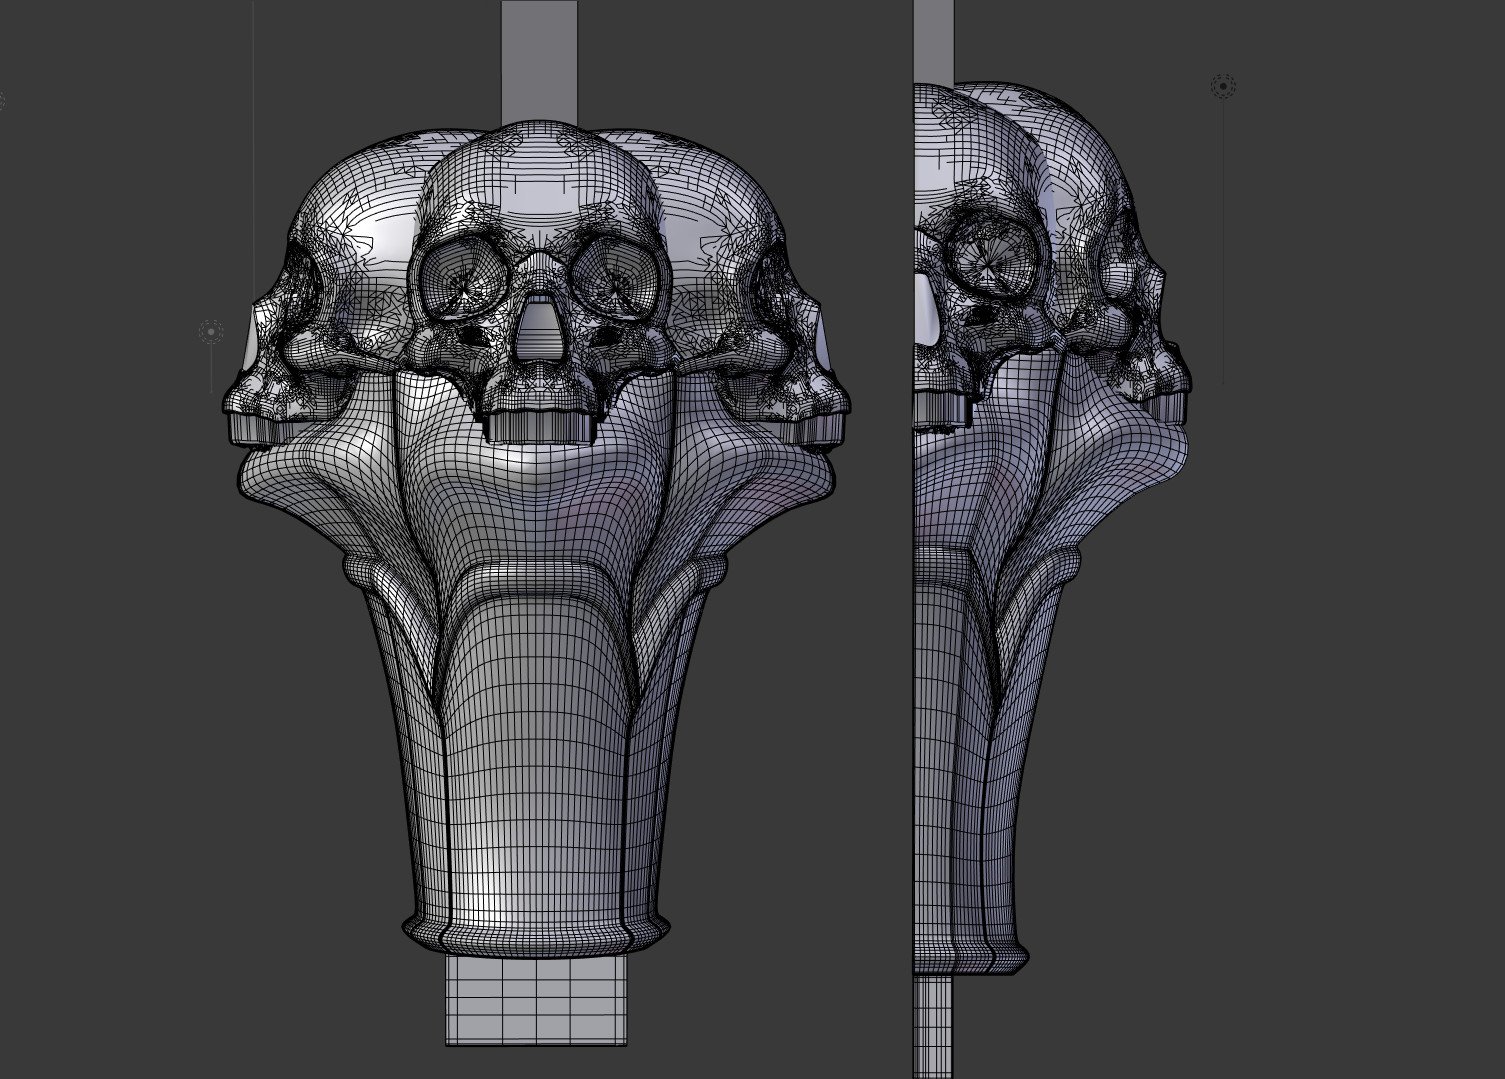
To be able to cast it, I have to cut up the 3dmodel in two parts. This is because I use a two part mold and I have to be able to remove the master before casting, I also add a pin, all the way through. This is where the tang goes through and it should be clear when I describe the moldmaking why it is done this way.
Hopefully I will have a functioning investment casting facility in a few weeks, which will give me the ability to make much more complicated (and precise) castings using the lost wax method.
I decided to print it on my Ultimaker 2 since the size and degree of details was best suited to this printer. It would have taken ages on the Wanhao, and anyways, it is being upgraded at the moment, so isn,t ready for use.

The 3dmodel was "sliced" using Cura with the next-best setting.
Depending on the use it makes sense to use the best setting, and for this project, I probably should have since it is to be used for casting, but I was to impatient to wait the 10 hours it would have taken.
For those who does not know, slicing is the process of changing the 3d-mesh into gcode(the format that is understood by the printer) this is a necessary step every time you want to 3d-print something, but it is not very hard and, doesnt take long.
Usually there is a specific piece of software supplied with each printer, which takes care of everything. You just need to export an stl file from your 3d-program (blender in my case), import the stl into the slicer, choose your settings, and transfer it to the printer (using wifi, a usbstick, an sd-card, or whatever method the printer supports).

After printing I have to clean up the print. I sand it down with fine grit sandpaper(400-600 grit, I could probably have taken something a bit more coarse to begin with).

Then I paint it and sand again. Repeat until an acceptable finish is obtained. As usual I was to impatient and ended up doing the casting after the first sanding.
I should probably have waited, but it turned out ok.

Just to check the size and so you can all get an impression of how the finished piece will look I placed the print on the sword and took an image of it. It looks fairly nice I think, what do you think.
In the next swordmaking post I will show you all the detailed walkthrough of the sandcasting process and the finished pommel ready for mounting.

Im EvilHippie, a compulsive creative and jack o' trades. If you want to know more about me, check out my introduction post here
If you like what you see, feel free to upvote, follow and resteem
or you can check out these recent posts
The grind
Male Model
Forging swords
The Draw
Straight
girl in a forest
a Pegasus
sword forging metal craft
That is an awesome pommel.
It seems a bit smaller than my imagination made it out to be when placed like that on the sword, but that might just be my ignorance talking XD
When I get a proper job, I'm definitely going to try some metalworking of some kind.
thanks. that's probably just because it is a fairly large handle. The sword is app 1.3 meters long and the handle is 30 cm. the cross guard is app 20 cm.
Congratulations! This post has been upvoted by SteemMakers. We are a community based project that aims to support makers and DIYers on the blockchain in every way possible. Find out more about us on our website: www.steemmakers.com.
If you like our work, please consider upvoting this comment to support the growth of our community. Thank you.
I afraid this picture.