How to create your own knobs (part1) / Wie du eigene Griffe erstellst (Teil1) [EN/DE][🇬🇧/🇩🇪]
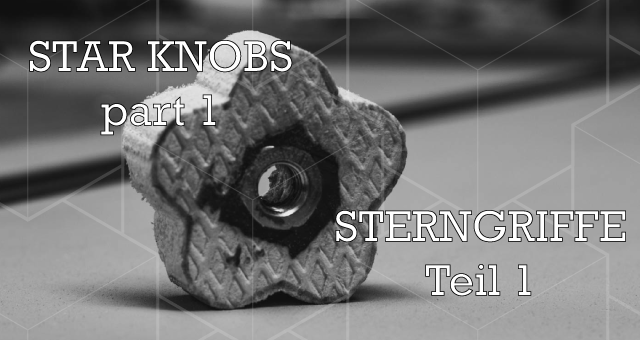
You know this problem!
There are small parts that can always and everywhere be used.
But just then, when you need them they are all used or not
available in the right size.
Option 1 - order them and wait
Option 2 - hope that the DIY store has the parts in stock.
Parts where it happened to me over and over again are knobs.
Mainly star knobs, which are used to hold other parts in place.
If you feel the same way, I'll show you how to make your own knobs.
Theory
With a more or less concrete idea in mind I started with
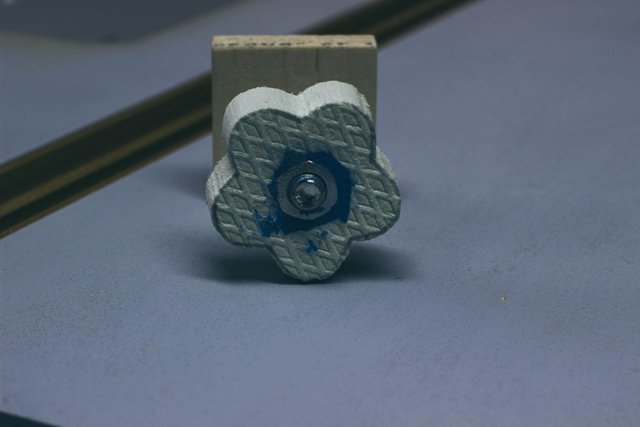
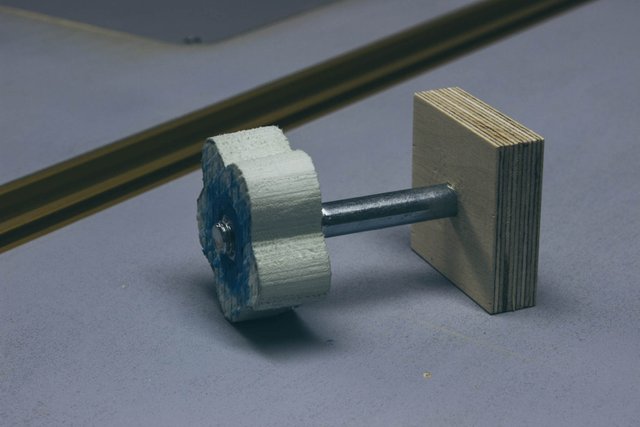
prototyping. I used material from my scrap box. In this
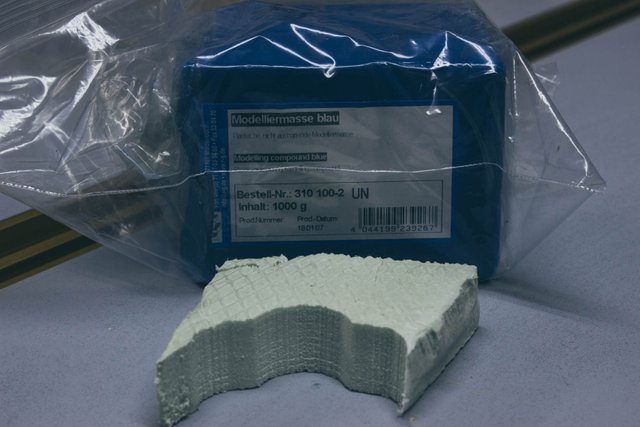
case a piece of XPS panel and some modelling compound
to fix wrong decisions during the thinking process. With
a fretsaw, a drill, some normal and a forstner bit I created
a M10 prototype and tested it on a real example.
It worked and had also the right dimensions, maybe a
little bit thinner.
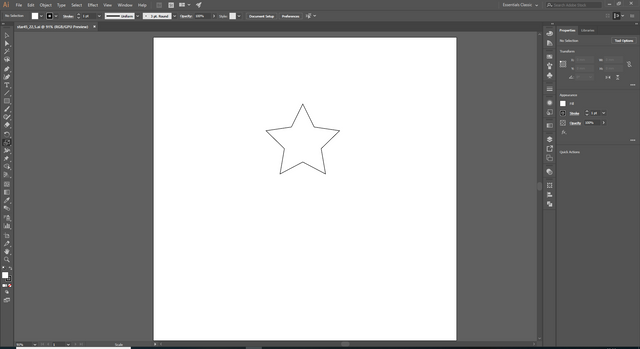
With that in mind I started to design the star knob in
Adobe Illustrator. The perfect tool is the "star tool"
which can be found mostly on the left side hidden in
a submenu of the rectangle tool.
I made the star R1 = 45mm, R2 = 22.5mm, 5 points,
no fill color and a 1pt black stroke.
After this was finished I saved it as an SVG.
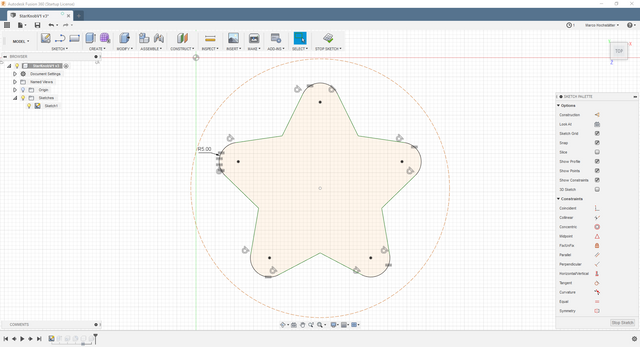
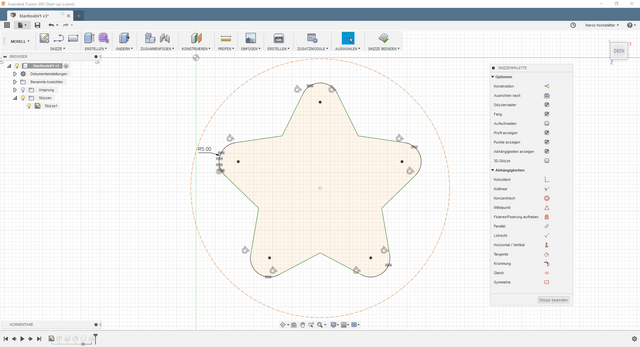
The file was imported in Autodesk Fusion360.
With the 3-Point Circle Tool I marked the center
of this shape.
With a tool called "fillet", I created rounded corners
with a 5mm radius.
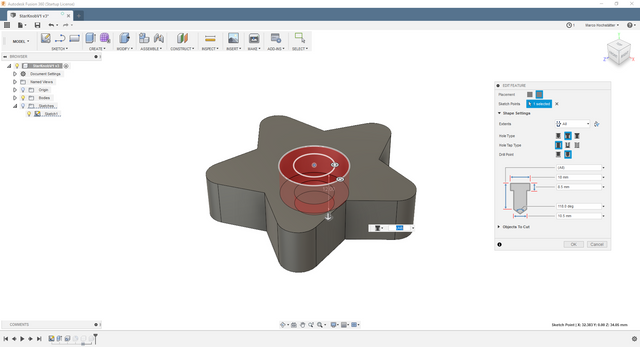
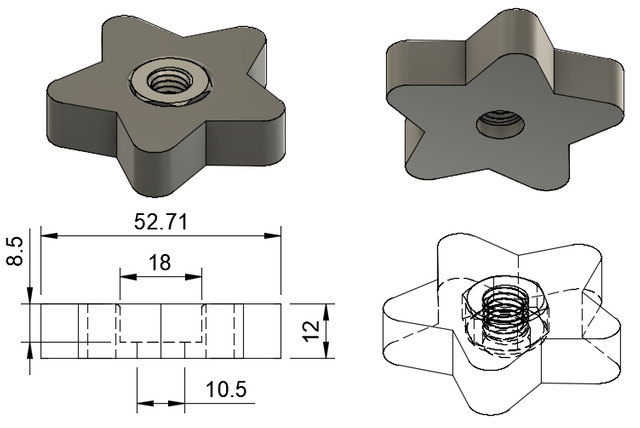
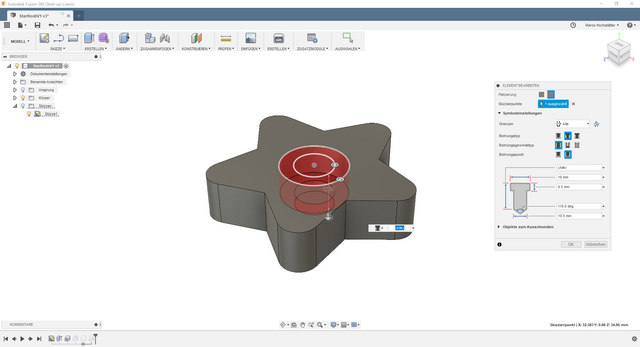
After that I extruded the face to 12mm which is the
thickness and also my material height. Then I added
the 10.5 / 18mm hole for a M10 hexnut to the object.
And this is the result.
What's next?
In the next update I will show you the practice part.
Servus and cu next time!
Du kennst dieses Problem!
Es gibt Kleinteile die man immer und überall
gebrauchen kann. Aber gerade dann, wenn
man sie braucht sind sie alle verwendet oder
nicht in der richtigen Größe vorhanden.
Dann hilft nur bestellen und warten oder hoffen,
dass der Baumarkt das Teil auf Lager hat.
Ein Teil, bei dem mir das immer wieder passiert
sind Griffe. Hauptsächlich Sterngriffe, die als
Befestigung andere Teile dienen.
Wenn es dir genauso geht, zeige ich dir, wie du
deine eigenen Griffe erstellen kannst.
Theorie
Mit einer mehr oder weniger konkreten Idee im Kopf
begann ich mit einem Muster. Ich habe Material aus
meiner Schrottkiste verwendet. In diesem Fall ein Stück
XPS-Panel und etwas Modelliermasse, um falsche
Entscheidungen während des Denkprozesses zu korrigieren.
Mit einer Laubsäge, einem Bohrer, einigen normalen
und einem Forstner-Bit habe ich einen M10-Prototypen
erstellt und an einem realen Beispiel getestet.
Es funktionierte und hatte auch die richtigen Maße,
vielleicht etwas dünner.
Entschuldigung für das englische AI Interface. Leider lässt sich das nicht so einfach umstellen.
Mit der Info im Hinterkopf begann ich, den Sterngriff
in Adobe Illustrator zu entwerfen. Das perfekte
Werkzeug ist das "Sternwerkzeug", das sich meist auf
der linken Seite in einem Untermenü des Rechteckwerkzeugs befindet.
Ich habe den Stern R1 = 45mm, R2 = 22.5mm, 5 Punkte,
keine Füllfarbe und mit einer 1pt schwarzen Kontur gezeichnet.
Danach habe ich es als SVG gespeichert.
Die Datei wurde in Autodesk Fusion360 importiert.
Mit dem 3-Punkt-Kreiswerkzeug habe ich den
Mittelpunkt dieser Form markiert und mit dem
Werkzeug "Abrunden" habe ich Ecken
mit einem Radius von 5 mm versehen.
Danach habe ich die Fläche auf 12mm extrudiert,
das ist die Dicke und gleichzeitig meine Materialhöhe.
Dann habe ich das 10,5 / 18mm Loch für eine M10 Sechskantmutter eingezeichnet.
Und das ist das Ergebnis.
Was kommt als nächstes?
Im nächsten Update werde ich euch den Praxisteil zeigen.
Servus bis dann!



We have a woodworking community here on steemit and would welcome you. We have a discord channel, link here: Woodworking on Steem Discord Channel
Join our Discord Channel to connect with us and nominate your own or somebody else's posts in our review channel.
Help us to reward you for making it ! Join our voting trail or delegate steem power to the community account.
Your post is also presented on the community website www.steemmakers.com where you can find other selected content.
If you like our work, please consider upvoting this comment to support the growth of our community. Thank you.
Well done @theguymasamato! You successfully guessed the match result.
Click on the badge to view your Board of Honor.
Do you want to know your current ranking? Read this post
Do not miss the last post from @steemitboard:
SteemitBoard World Cup Contest - Round of 16 - Day 3
Well done @theguymasamato! You successfully guessed the match result.
Click on the badge to view your Board of Honor.
Do you want to know your current ranking? Read this post
Do not miss the last post from @steemitboard:
SteemitBoard World Cup Contest - Round of 16 - Day 4