Permaculture - Saving water by contouring and creating swales; Mary Zemach techniques (lesson 35)
Contouring to catch water
That's the second part with the description of Mary Zechman's techniques to save the water in our gardens. To check the first part, go to the previous lesson (link included at the end of this publication). Today we will be talking about landscaping the garden in such a way that as much rainfall as possible can be stored in the soil. This can be achieved in two ways:
Concave circle
The terrain can be shaped in such a way that the plants are planted in a small concave circle. The point is not to create a ditch, but only a 2-3 cm deep concave invisible to the naked eye. Although the terrain will be imperceptible, in rainfall, the water will flow down to the concave and naturally irrigate the plants planted there by slowly sinking into the ground.
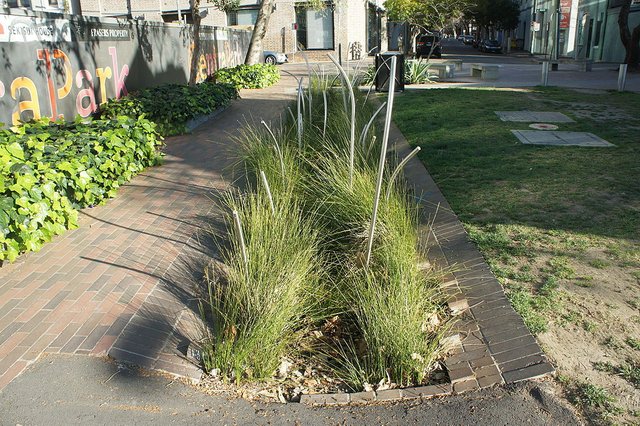
Swales
Ditches that keep the water from raining and irrigate the entire area. Properly prepared, they are barely noticeable and very aesthetic. Swales are more effective than small concave circles and are suitable for irrigation of all types of plants, while the first method is rather a solution for plants with low water requirements. As a method accelerating the building of humus and increasing biodiversity, swales are suitable for any type of climate, although they were ultimately designed as a solution in an environment with low or very low rainfall.
How to prepare DIY swales?
First of all, create or purchase a special A-shaped spirit level, preferably 50x50cm or 60x60cm, with a string with a weight and a center marked on the transverse board. You will need it later.
Initially, based on the amount of rainfall, estimate the size of the future swales and the ranges in which they are to be distributed. Make sure swales will not overflow. The general rule is that the more rainfall, the closer the drains are to each other.
| Rainfall per year | distance between swales |
|---|---|
| 1400 mm | 2,5 m |
| 1200 mm | 5 m |
| 1000 mm | 7,5 m |
| 800 mm | 10 m |
| 600 mm | 12,5 m |
| 400 mm | 15 m |
With a rainfall of 1000-1300 mm per year, place the swales every 5.5 meters, with 400 mm of rainfall every 15 meters. For slopes or soil with little water absorption, the swales should be closer to each other.
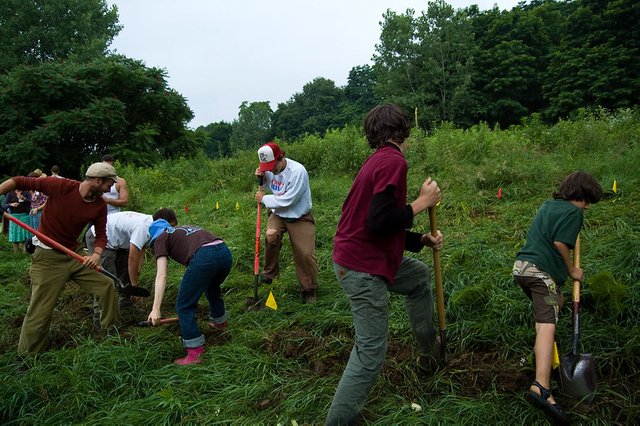
Mark the contour of the drains like topographic lines on a map. The spirit level you made earlier will be useful for this. The purpose of correct leveling is to ensure that the water is distributed and soaks into the ground evenly. Mark the contour of the drain with pegs, spacing them 2 meters apart so that they are visibly at the same height. On flat ground, you can place them every 3-4 meters, an unevenly constructed drain will settle much faster.
After marking the ebb line, you need to dig a trench 30 cm deep and 45 cm wide, the aesthetic impression is not the most important thing. The dug-up soil should be placed on the sloping side of the ditch, forming a small shaft. When digging, make sure you keep the level (both the edge and the bottom of the swales). If the drain passes over a plant that likes humid soil, a deeper hole can be dug there
The dug trench can be partially filled with mulch, which will help absorb the water and mask the runoff. The embankment formed along the outflow can be planted with plants to stabilize the structure. Any type of plant is fine for this, but trees and shrubs are best - deeper roots give more stability, fallen leaves complement the mulch, the crown of the branches maintains moisture and slows evaporation.
Table of content
(previous lessons)
(previous lessons)
Chapter 1 - Fertilizers
2 - types of manure and when to use it
3 - Compost. Basics
4 - advanced composting
--------------------------------------------------
6 - Green manure
7 - Phytosanitary plants
8 - Mineral fertilizers
--------------------------------------------------
Chapter 2 - Soil and minerals
10 - Boron, Molybdenum, Copper, Magnesium
11 - Zinc, Calcium, Iron and other elements
12 -soil components: sand and clay
--------------------------------------------------
14 -soil components: calcium, microorganisms, minerals
15 -soil components: water and air
--------------------------------------------------
Chapter 3 - Space design
17 - Sectors in Permaculture
18 - Zones & sectors, practical use
19 - Perfect size of your garden
20 - What to choose lawn or meadow?
--------------------------------------------------
22 - Water reservoirs in the garden
23 - Rock Garden
24 - Patchwalks
--------------------------------------------------
Chapter 4 - Basics of traditional permaculture
26 - Basic tips for permaculture gardeners
30 - Herbal spirals
--------------------------------------------------
34 - Saving water; Mary Zemach techniques (I)
--------------------------------------------------
Chapter 5 - Different types of beds
28 - Raised beds/Lazy beds
31 - Hugelkultur
--------------------------------------------------
Chapter 6 - Unconventional food production
29 - homemade sugar in non-tropical climate

Good sharing 😊
Hola @papi.mati tus publicaciones como siempre muy informativas y educativas, me encantan
Feliz Día ;)
Muchas gracias amiga!
Congratulations, your nice post has been upvoted by the steem.skillshare curation trail!
If you wish to join as well our trail and support our community, other users, and earn the curation reward, please check out this post:
steem.skillshare curation trail post