Permaculture - Raised beds / "Lazy beds" (lesson 28)
Raised beds
There are several types of raised beds, which differ slightly in shape and soil structure. In today's post, I will describe the most basic raised beds, called by the Irish "Lazy Beds" due to the low workload that they require once we create them. Their use was mentioned in the previous lesson at keyhole gardens.
What can we use to build raised beds?
| Raw material | Can we use it? |
|---|---|
| Aluminum | YES It looks nice in modern gardens. It does not require any maintenance, apart from washing and disinfecting every few years |
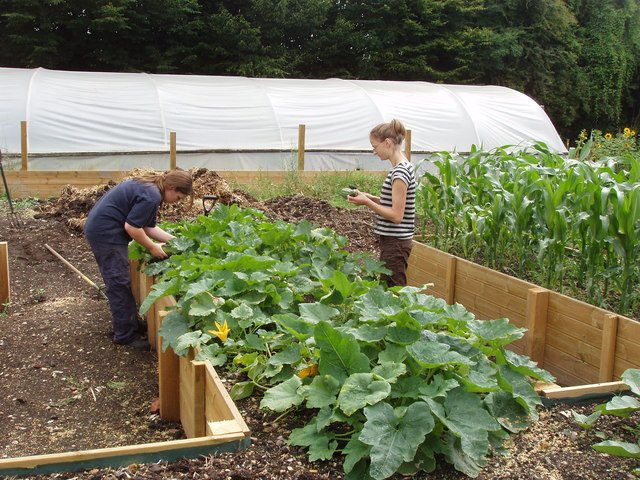
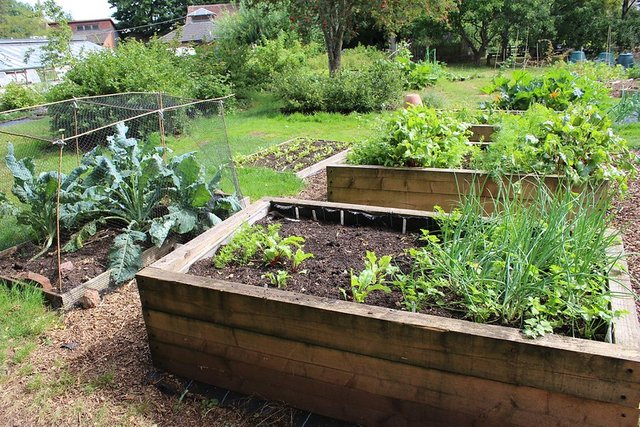
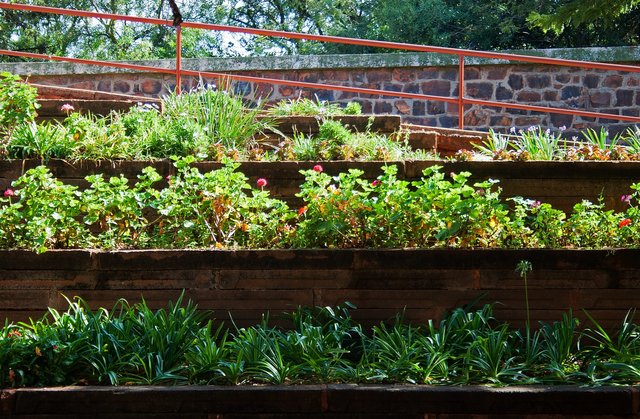
| Wood | YES Thick boards reinforced with square timber every 80 cm will work best. They should be well impregnated, using oil on the inside. It is less durable than other raw materials |
| Pallets | YES They are suitable for small beds, for example for a herbarium. The assembled four pallets are sealed from the inside with, for example, PVC foil or jute bags |
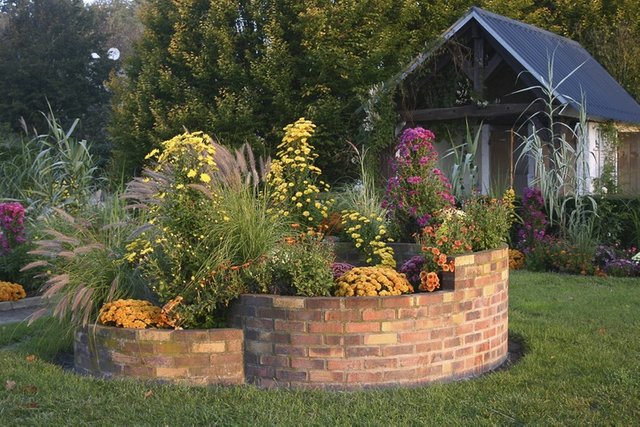
| Concrete or brick | YES They look aesthetically pleasing when used solely as an accent. The entire garden consisting of concrete or brick beds loses its aesthetic value |
| Railway Sleepers and Other CCA Timber | NO Railway sleepers contain toxic impregnations that release harmful substances into the soil over the years (copper, arsenic, chromium, and others). Their use in the garden can be very harmful to your health. |
| Tires | NO If you have no other choice, theoretically tires can be used to create raised beds, but they gradually release harmful substances into the soil, so this will not be the healthiest solution. Besides - the tires in the garden look very unattractive. |
How to build raised beds?
Find a suitable place to build beds. The soil will not be a significant factor, because you will build it from scratch, but sunlight (preferably 7-11 hours during the day), protection against wind, and other terrain properties should be adapted to the plants that we want to grow on our raised bed. Perfectly if the beds can be situated in such a way that the longer side is on the east-west axis. Ideally, the beds should be in an area that is at least partially sheltered from the wind.
Design the size of the bed. Some people use raised beds 20 cm high, but they are only decorative. The optimal size is 40-60 cm high (this height also allows easy access to the beds for people on wheelchairs), 5 meters long and 100 - 150 cm wide when we have access to the bed from both sides, or 70-80 cm when the raised bed is located next to a wall or fence and we can only use it from one side. The width of the paths between the beds should allow for free movement with a wheelbarrow.
Remove the soil layer together with the turf to a depth of about 30 cm. The best time to dig the soil is in the early morning or evening in spring or autumn. The air temperature is cooler at these times so less soil organic matter is lost in the process. Dig only when the soil is evenly moist. It is easier and also better for the soil. After digging the hole, the bottom can be lined with a fine metal mesh, thanks to which we will protect vegetables against damage caused by moles and voles.
Set up the bed frame using one of the materials mentioned earlier in this article. On the outside, you can harden the ground by pouring gravel or arranging paving stones, which will further strengthen the structure.
Optionally, you can insulate the walls of the raised bed with polystyrene and agro textile. Such an insulating layer will protect the wood from getting wet and will additionally warm the substrate. This is especially important in cases where we plan to plant perennial plants on the plot where they have to survive the winter.
Fill the crates with layers:
- pour out the broken branches 20-30 cm high. Cover the space between them with soil and pour plenty of water over everything
- the second layer should consist of organic matter. This can be compost, grass clippings, leaves, turf, or manure. Thanks to this, the substrate will not dry out so quickly. While compost is preferable, if one chooses aged manure, assure that it is a two-year-old cow or horse manure or chicken manure with no or almost no sawdust
- at the very top, insert high-quality soil
Such a prepared bed will not require additional fertilization for 4 to 6 years, after this time it may require additional supplementation. The rotting processes taking place in the compost layer will additionally heat the substrate, thanks to which planting will be possible earlier in spring, and the cultivation will be completed later in autumn.
Advantages of raised beds:
- it allows cultivating plants even in the most unfavorable conditions. By separating the land in raised beds from the poorly fertile soil, we can practically cultivate plants even in the middle of the desert
- it enables the construction of different soils in different beds. Thanks to this, we can grow plants that like heavy soils, as well as sandy, wet and dry soil in one garden
- increasing the bed area separates the vegetable garden from potential pests (snails, moles) and domestic animals (for example dogs), additionally securing it
- elderly people and gardeners with back problems can take care of the garden without bothersome bending down
- garden work takes much less time. The soil practically does not require removing weeds or fertilizing
- The soil remains highly loosened because nobody walks on it
- insolation on the raised bed is slightly higher, thanks to which the plants grow more abundantly.
- the heat from the underground (compost) have a positive effect on the growing season
- Raised beds help to prevent erosion, recover and store water and nutrients
- they look very attractive in any garden
Disadvantages of raised beds:
- not the best for perennial plants. In winter, there is a greater risk that the plants will freeze
- it requires a lot of work when setting up (a 10m2 raised bed prepared alone is about 9-11 hours of work) and additional costs
- it should be watered more often (the soil dries up faster)
All my lessons are shared totally for free with a CC-0 license (which means you can copy my text and share it wherever you want to, without the need to mark me as an author). I hope it will bring you joy.
Previous lessons can be read here:
Fertilizers
2 - types of manure and when to use it
3 - Compost. Basics
4 - advanced composting
6 - Green manure
7 - Phytosanitary plants
8 - Mineral fertilizers
--------------------------------------------------
Soil and minerals
10 - Boron, Molybdenum, Copper, Magnesium
11 - Zinc, Calcium, Iron and other elements
12 -soil components: sand and clay
14 -soil components: calcium, microorganisms, minerals
15 -soil components: water and air
--------------------------------------------------
Space
17 - Sectors in Permaculture
18 - Zones & sectors, practical use
19 - Perfect size of your garden
20 - What to choose lawn or meadow?
22 - Water reservoirs in the garden
23 - Rock Garden
24 - Patchwalks
--------------------------------------------------
Basics of traditional permaculture
25 - Three ecological principles from the Gaia's Garden School
26 - Basic tips for permaculture gardeners
27 - The Keyhole bed
Thank you for reading,
@papi.mati
Wow lovely
Es exactamente lo que necesito para mi jardín. Verás mi mascota hace sus líquidos en mis plantas. Con esta publicación obtengo varias ideas. Muchas gracias!
Estoy feliz que podria ayudarte :) Gracias por su comentario, amiga!
Congratulations, your nice post has been upvoted by the steem.skillshare curation trail!
If you wish to join as well our trail and support our community, other users, and earn the curation reward, please check out this post:
https://steemit.com/hive-197809/@the.journal/73zhqx-active-user-list-on-steem-skillshare-2021-10-21
“Such beds won’t require additional fertilizer for 4 to 6 years” Amazingly great post. I didn’t know all these about beds. Thanks for your effort
I make some beds high with the help of old boards.
Creative! Basically, everything that is non-toxic is fine, so old boards will be great too ;)
That's exactly what I wanted - environmental friendliness.
a neighbor made it out of an old slate from his roof.