Permaculture - Herbal spirals (lesson 30) || #club5050
Herb spirals
We have already said a lot about traditional beds and raised ones. The raised beds are great for our gardens, but not necessarily everything is worth planting in them. Imagine a house with a garden that aspires to food self-sufficiency, in which a lot of space is planted with herbs. If we placed them in traditional linear beds, raised or not, it would take us a long time to reach the farthest point.
We usually reach for herbs while cooking. If we are to walk 50 meters away into the garden just for some oregano, we are more likely to use a dried counterpart instead of putting on our shoes and going that "far". Bill Mollison, one of the fathers of permaculture I have mentioned many times, used to say that if you go out in the morning for the herbs and when you come back your slippers are wet with dew, your herbarium is too far away.
The previously described keyhole beds are a bit better, but they also take up a lot of space. In the case of herbs, it is especially recommended to install the so-called "herbal spiral" as close to the house as possible, preferably at the exit door from the kitchen, if you have one. The location of the herbal spiral is described in the lesson about zones in the garden.
But what are those herbal spirals anyway?
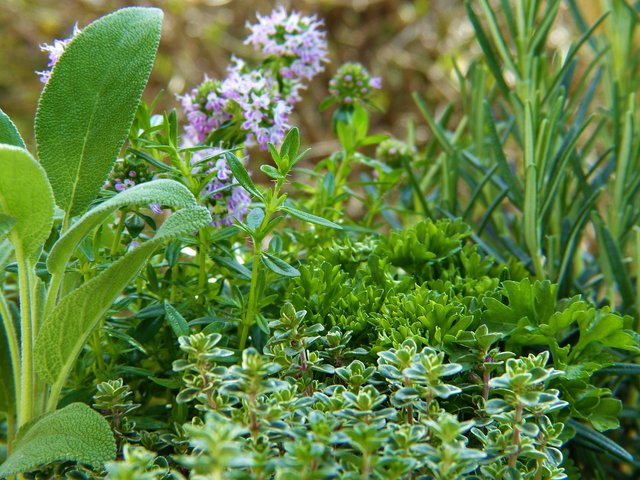
The herbal spiral, as the name suggests, is… a spiral. Thanks to its unusual shape, it allows you to create several different zones in a small space: some are more exposed to the sun, others partially darkened, some dry, others more humid. It is important because the herbs we use every day in the kitchen come from very different parts of the world and can significantly differ in soil requirements.
The herbal spiral should be about 1.5 meters in diameter, preferably 1 meter high (maybe up to 1,5m). Thanks to this, we will have easy access to all plants. Of course, you can adjust the dimensions to your needs, but if you require a lot more space, I recommend creating two spirals rather than building a very tall or very wide mound. Otherwise, the harvest will be impractical and troubling.
First, make a hill, then cover it with ball-sized stones - first at the base, and then spirally upwards, creating terraces about 30 cm wide. In the end, plant herbs.
 source
 A few tips on how to build more effective herbal spirals:
- To save on topsoil, place a few stones, concrete rubble, or a pile of subsoil at the base of the hill, then build over it
- To easily water the spiral, insert a plastic irrigation tube (6 or 12 mm) inside it emerging from the top. Connect the mini sprinkler
- The loose soil of the new spiral is quite possible, so after making the soil it should be thoroughly watered. After doing this, you may need to add more soil
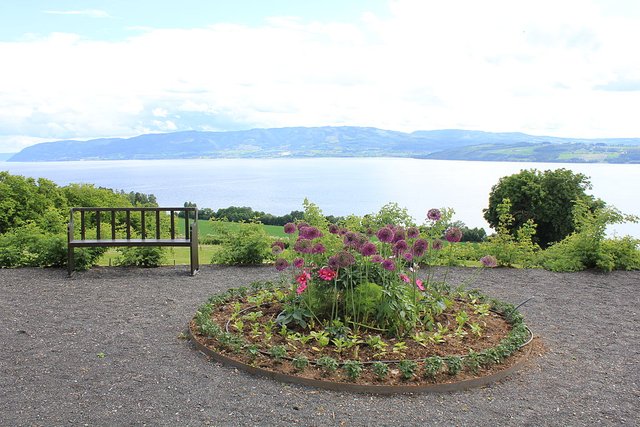
- Consider building a small pond near a spiral. Watercress, water chestnuts, and other edible pond plants can grow here. The herb spiral next to the pond can be an eye-catching centerpiece of any garden
- The best time to start a herbal spiral is the beginning of spring
- The bottom of the spiral should be insulated from the ground with cardboard or mulch fleece while ensuring its water permeability
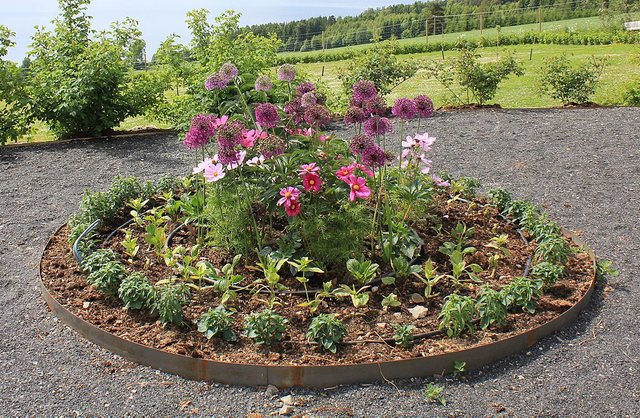
Advantages of the herbal spiral:
- over 9m2 of space for herbs on a wheel with a diameter of only 1.5 meters
- you don't have to bend down to pick plants. Easy access to all herbs
- slants directed in all directions, different insolation, allowing the cultivation of a greater variety of plants
Where to plant herbs:
Below are some tips on how to distribute herbs on the spiral. Adapt the spiral to your needs - if you are not using a herb, there is no need to plant it. If you have too much space on your spiral, fill it with salads or other vegetables or flowers.
Southside - warmer and sunnier.
Northside - cooler and darker.
Eastside - drier
Westside - keeps moisture longer
Lower - more shade and moisture
Higher - more sun and drier soil
| ZONA | plants |
|---|---|
| south high | Oregano rosemary lavender sage savory Ruta |
| south low | Tarragon lemon verbena lovage |
| northern high | thyme chamomile echinacea |
| north low | feverfew parsley chives mint |
| eastern | coriander licorice marigold lettuce and spinach |
| western | marjoram St. John's wort lemon balm |
| by the water | watercress loosestrife |
All my lessons are shared totally for free with a CC-0 license (which means you can copy my text and share it wherever you want to, without the need to mark me as an author). I hope it will bring you joy.
Previous lessons can be read here:
Fertilizers
2 - types of manure and when to use it
3 - Compost. Basics
4 - advanced composting
6 - Green manure
7 - Phytosanitary plants
8 - Mineral fertilizers
--------------------------------------------------
Soil and minerals
10 - Boron, Molybdenum, Copper, Magnesium
11 - Zinc, Calcium, Iron and other elements
12 -soil components: sand and clay
14 -soil components: calcium, microorganisms, minerals
15 -soil components: water and air
--------------------------------------------------
Space
17 - Sectors in Permaculture
18 - Zones & sectors, practical use
19 - Perfect size of your garden
20 - What to choose lawn or meadow?
22 - Water reservoirs in the garden
23 - Rock Garden
24 - Patchwalks
--------------------------------------------------
Basics of traditional permaculture
26 - Basic tips for permaculture gardeners
27 - The Keyhole bed
28 - Raised beds/Lazy beds
--------------------------------------------------
Food production
29 - homemade sugar in non-tropical climate
Thank you for reading,
@papi.mati
It's a wonderful post, thanks for educating us on permaculture!
Congratulations, your nice post has been upvoted by the steem.skillshare curation trail!
If you wish to join as well our trail and support our community, other users, and earn the curation reward, please check out this post:
steem.skillshare curation trail post
I realized my posts did not qualify for #club5050 for three days (shame!) and I didn't even notice that. Sorry for using the tag without being allowed to.
I bought and powered up some steem so now everything should be more than fine :)
CC to all admins:
@daytona475 @milakz
Thank goodness you realized before more days passed. All good @ papi.mati you are a great enhancer and example for everyone ;)
Exactly. I've been lucky I realized quickly :) thank you for your comment :)