Online store on Steemit blockchain| Step Six | Admin panel V1 + add categories to the Catalog.
Hello, friends!

Today we will create and register our model in the admin panel. And let's consider what forms will be created to create the content. And also add categories to the catalog.
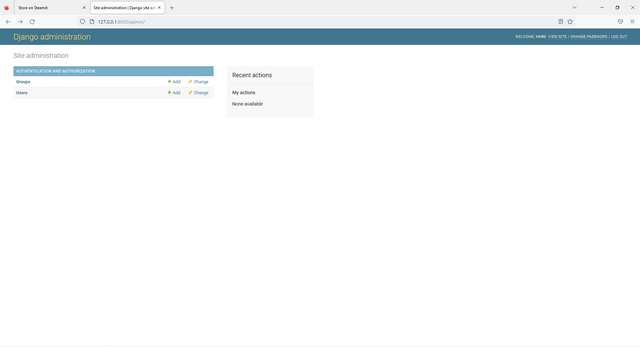
So far, our admin panel looks very empty and we can only see the user interface. But as we finish, a block of work with our products and catalog will appear.
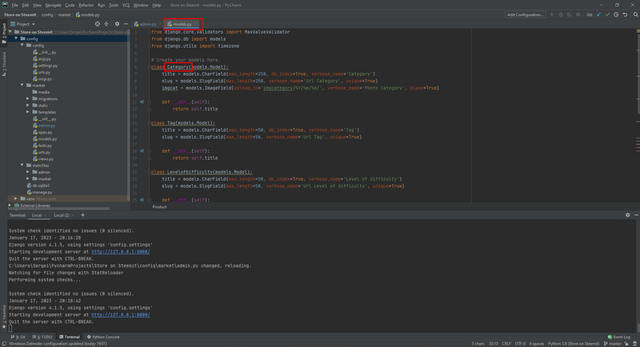
Go to paycharm and find the admin file in the market folder.
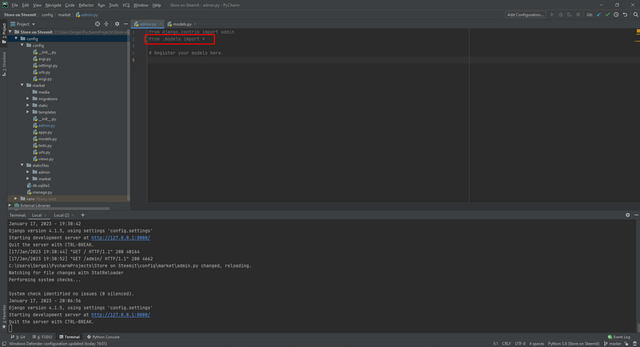
We import all classes from the model file using a star.
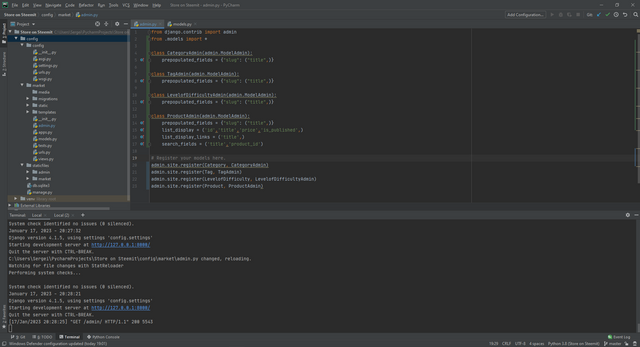
Now we need to create an admin class and specify what to display. So that in the future we have quick access to products that users add.
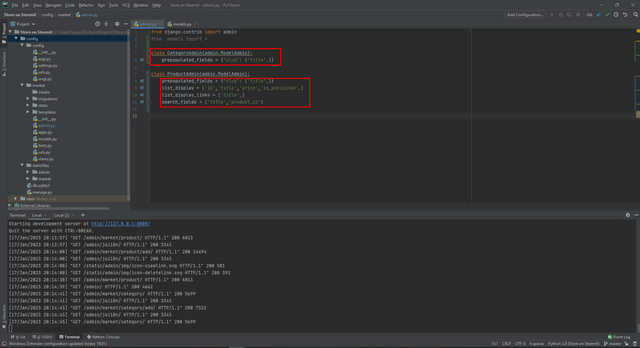
Where in the class we refer to our title. If we do not do this, then we will have object 1 and object 2 without the name of the products.
Now we need to register these classes in the admin panel.
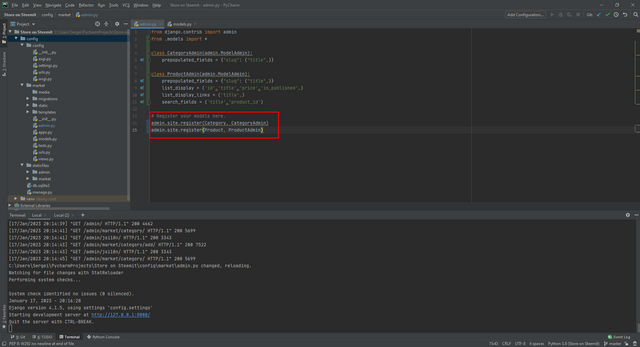
Where to get data?
Everything is simple! We take the class name from the model file and add it first, and then we add the class that we created in the admin panel.

After everything is done, go to our admin panel. And we check what data we have displayed.
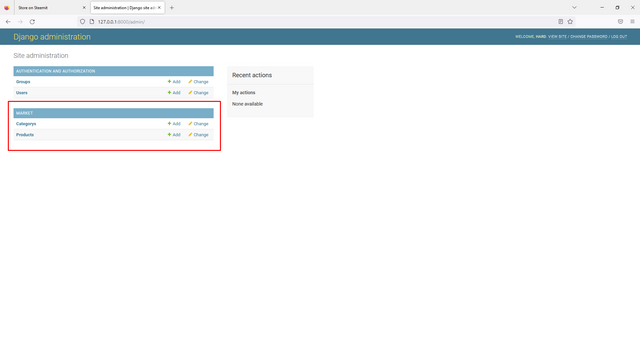
I propose to add the missing points and examine them in more detail.
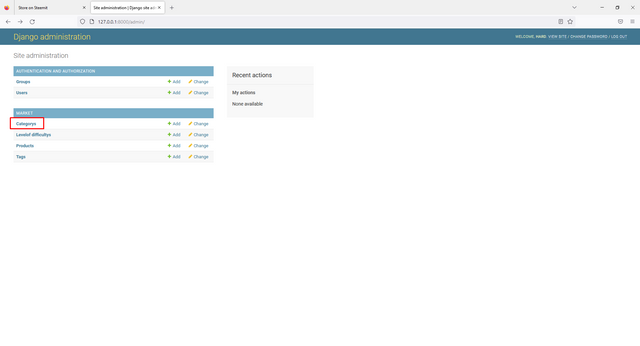
In the future, we will still update the admin panel, but for now these are the minimum settings that we need. New items have been added to the admin panel.

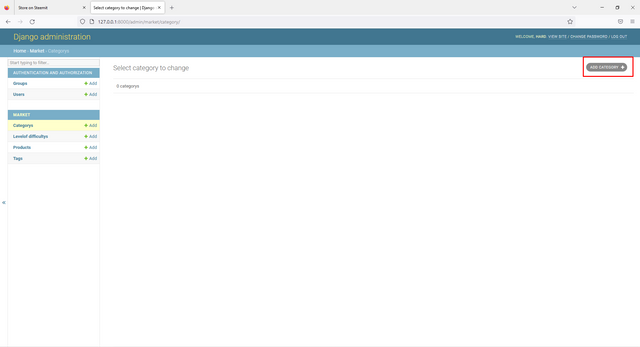
Now let's go to the categories. And let's create a few. So that later it would be possible to create our product and indicate in which category it should be located.
So far we have zero categories. Let's fix this. Click on the Add button.
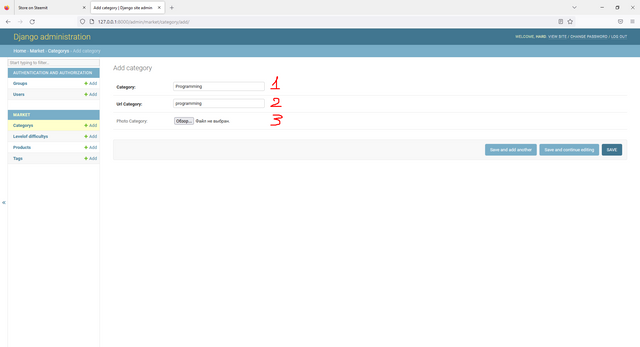
Our form for filling menu categories has appeared. We also added an item with a photo in our form, but it is not required to be filled in and for now we will write only our categories.
1) The name of the category that will be displayed in the menu.
2) A universal slug by which the browser will display all the products that have been added.
3) The picture that will be displayed when this category is selected.
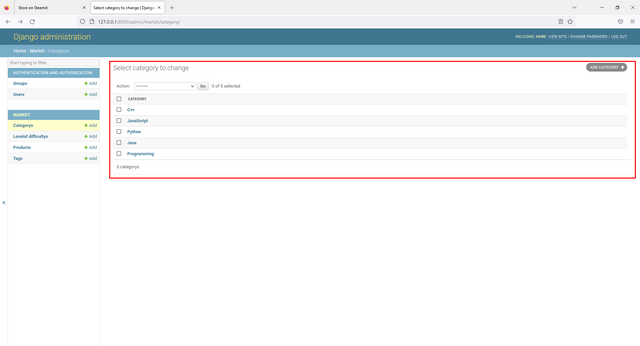
Our categories were added but they were added incorrectly. Since programming is the main category, and programming languages are subcategories. We will fix this in the next post.
It should be like this:
Programming.
-Java
-JavaScript
-Python
-C++
Also today we will look at the form of our product. Since in the tags everything is the same as in the categories, but only there are no corrections to be made.
Click on products.

And just click on the button to add a product.
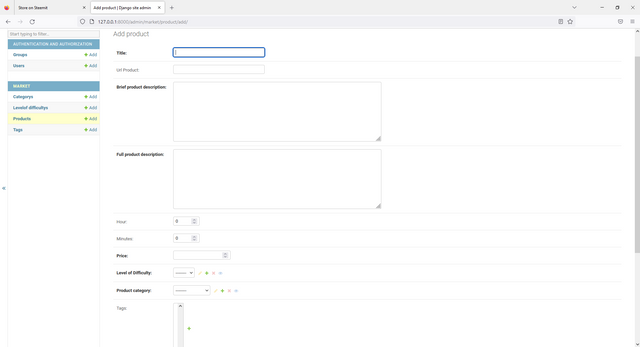
And we see that all our points are created and ready to be filled.
In the next post, we will fix the category addition and create our first test product.
Is the admin panel user-friendly?
@rme , @rex-sumon , @shy-fox , @hungry-griffin, @pennsif
The project is being created in partnership with @steemit-market.
Above may be wrong. Since I wrote the code from memory and then corrected it. But git will have no errors.
Link to the git.

You can get acquainted with the project here.
This is the first part: Step one
This is the second part: Step two
This is the third part: Step three
This is the fourth part: Step four
This is the fifth part: Step five
To be continued...
Sincerely, your @HardPhotographer
Thank you, friend!


I'm @steem.history, who is steem witness.
Thank you for witnessvoting for me.
please click it!
(Go to https://steemit.com/~witnesses and type fbslo at the bottom of the page)
The weight is reduced because of the lack of Voting Power. If you vote for me as a witness, you can get my little vote.
Upvoted! Thank you for supporting witness @jswit.