DAZ 3d Studio - Genesis 3 to Unity PBR Setup (Blender for AO Maps) [Graz'zt]- How to get a character into Unity and set it up with full Physically Based Shading

In this tutorial we are going to export a Genesis 3 Male character from Daz Studio and bring it into Unity. I am then going to go through the steps of setting it up properly to take full advantage of Unity's PBR shader. This will include where to get normal maps and if time permits I will explain how to use Blender to generate the ambient occlusion maps as well which can enhance the detail. I will also explain how to get the eyes working properly which was not covered in the past tutorial. I am using male characters so that when showing them nude I do not need to tag the posts NSFW as seeing female nipples is often all that is necessary for some societies/people to decide something is NSFW. For this reason I am using Genesis 3 Male. I am going to use the Damien Demon for Genesis 3 Males just to make this tutorial a little different from the standard tutorials I've done prior to this. I am also going to apply the black FW Aran HD for Genesis 3 Male material to it. I am imagining this guy as being Graz'zt[1|2|3] from the old AD&D and Gary Gygax days. I also used some other morphs and such I have. I wanted this to look different. I believe I succeeded in that.

Though, yes for those of you strict on your lore if I remember Graz'zt had six fingers on each hand. I am not going with that detail and I took a little liberty with the feet too in the interest of making this a humanoid more than a human. Daz can be used to do some pretty nifty things.
Daz Studio
STEP 1: Create your character in Daz.
STEP 2: Highlight everything for export.

STEP 3: From the File Menu in Daz Studio Export your character as an Autodesk FBX file. Use the following settings:

STEP 4: The export process will not export all of the textures we need for full PBR setup so now in DAZ Studio we need to determine where those other textures are located. These are things like the normal maps.
A: Click on the main character next to the parameters tab in this example where it says Damien Demon HD.

B: Click on the surfaces tab.

C: Expand the character by clicking on the arrow next to it so it rotates downward and shows you the other contents.

D: Expand surfaces in the same way by clicking the arrow next to surfaces.

E: Click on a surface such as Torso so that it loads the properties for that surface.

F: There are properties that are actual textures and they usually have RGB values 1.0,1.0,1.0 listed next to them and look something like this.

If you click on a texture (the square image) this menu will pop up.

Click Browse at the top of that menu.
G: That will open an actual folder showing you where the textures are stored. This is useful for us when we start working with Unity and we need additional textures that are not typically included in the export process

For example we can see the normal maps in there as the kind of light blue textures. Keep where this folder is, or just minimize it for now. We will want to drag some textures from here when we are in Unity.
AT THIS POINT
You should know where the other textures are stored on your computer, and you should have exported from Daz Studio as an FBX.

Blender
STEP 5: For a full PBR setup in Unity we really need an Ambient Occlusion map, but Daz Studio doesn't use those. It doesn't use them as it uses a slow ray tracer itself and doesn't need them. AO maps are useful for adding realism and detail to games and other rendering systems that do not use ray tracing and thus are much faster. You can skip this step if you don't care about Ambient Occlusion as this step is going to require the use of Blender which is free(it is also available on the steam platform here). You can use other tools if you prefer, but in this tutorial I am going to use blender.
A: Delete the cube in the center of the screen in Blender.

B: Also delete the Lamp, and the Cube on the upper right hand section of the screen.

It should look like this:

C: Press Shift+S to bring up the SNAP menu and click on CURSOR TO CENTER. This will set it to the origin.

The screen should look like this:

D: Go to the file menu and import the FBX that we exported from Daz.

The model should appear in Blender and it may be really messed up looking. Don't worry about that as that is not important for our needs in terms of making Ambient Occlusion maps.

E: Expand the Genesis3Male (or whatever yours is called) on the upper right.

F: Click on the armature.

G: Delete it.

It likely will get really big. This is okay we will fix that.

H: Press the A key to select everything. Press R for rotate, and then press X for the X axis. Type 90 to bring it back to standing upright. Press enter to keep the changes. Press S for scale and type in 0.01 and press enter.

I: We need to normalize all of those changes to zero. We need to click on the Object menu while everything is selected. Then apply, and Rotation & Scale. That will set the current values to be considered the "normal" values.

J: We only need the parts we want to create Ambient Occulsion maps for so go ahead and delete the clothing, and hair. In this case I am going to delete the horns too. Though this technique can also be used on all of these items in the future if you want.


K: In lower left corner menu click on UVImage Editor.

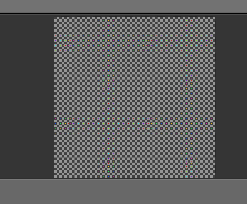
Create a new image:


We're going to call it something that makes sense for the model that we are applying it to. The first texture we are going to work with is the face. Our exported textures called it fwaranfacedemon_1001 so we're going to call ours fwaranfacedemonAO_1001.

I am also going to change the texture to be 2048x2048 instead of 1024x1024.

We also want to use it as a UV Grid:


L: Select the Genesis3Male.Shape or whatever yours is called and press A a couple of times to make sure it is all selected. (The model should be surrounded by an orange outline)

Down in the left corner where it says Object Mode. Change that to Edit mode.

Press A again so nothing is selected.

Go into the Materials Mode:


Find "Face" since that is the texture we want to work with.

Click the Select button.
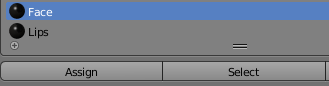

Select the "Ears" as well, because the DAZ model includes the ears in the face mapping. Also select the "lips"

Now make sure the image fwawandemonAO_1001 is selected to project on our UV Map.


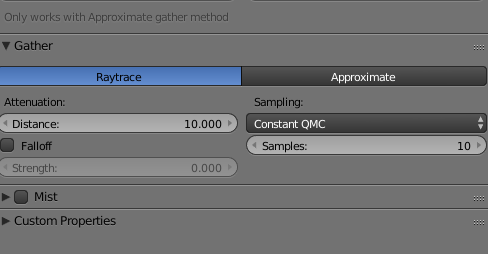
Go to the world tab.

Check the Ambient Occlusion box.

Change the samples to 10.
Go to the Render Tab.
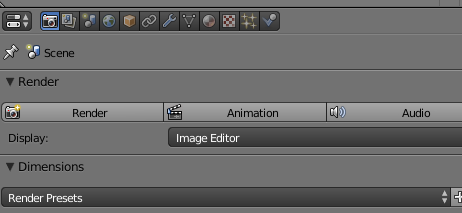
Expand the Bake section towards the bottom.

Change from Full Render to Ambient Occlusion.

Check the Normalized box.
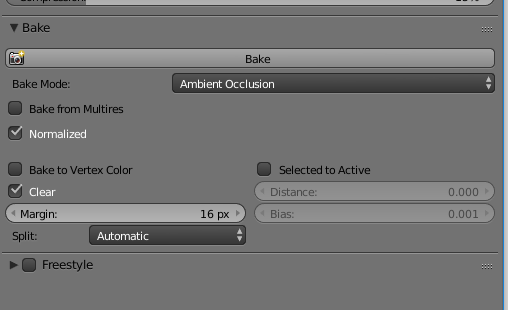
Click the BAKE button.

Click on the IMAGE menu in lower left and then SAVE AS IMAGE.

You can save it where you want, but I recommend putting it in the same folder that Daz exported the other textures to.
M: Repeat the steps in L until you have done arms, legs, and torso. Arms includes fingernails. Legs include toenails. You can use these steps for anything else you wish to do AO for as well.
Sometimes the UVs will not be positioned correctly as such.
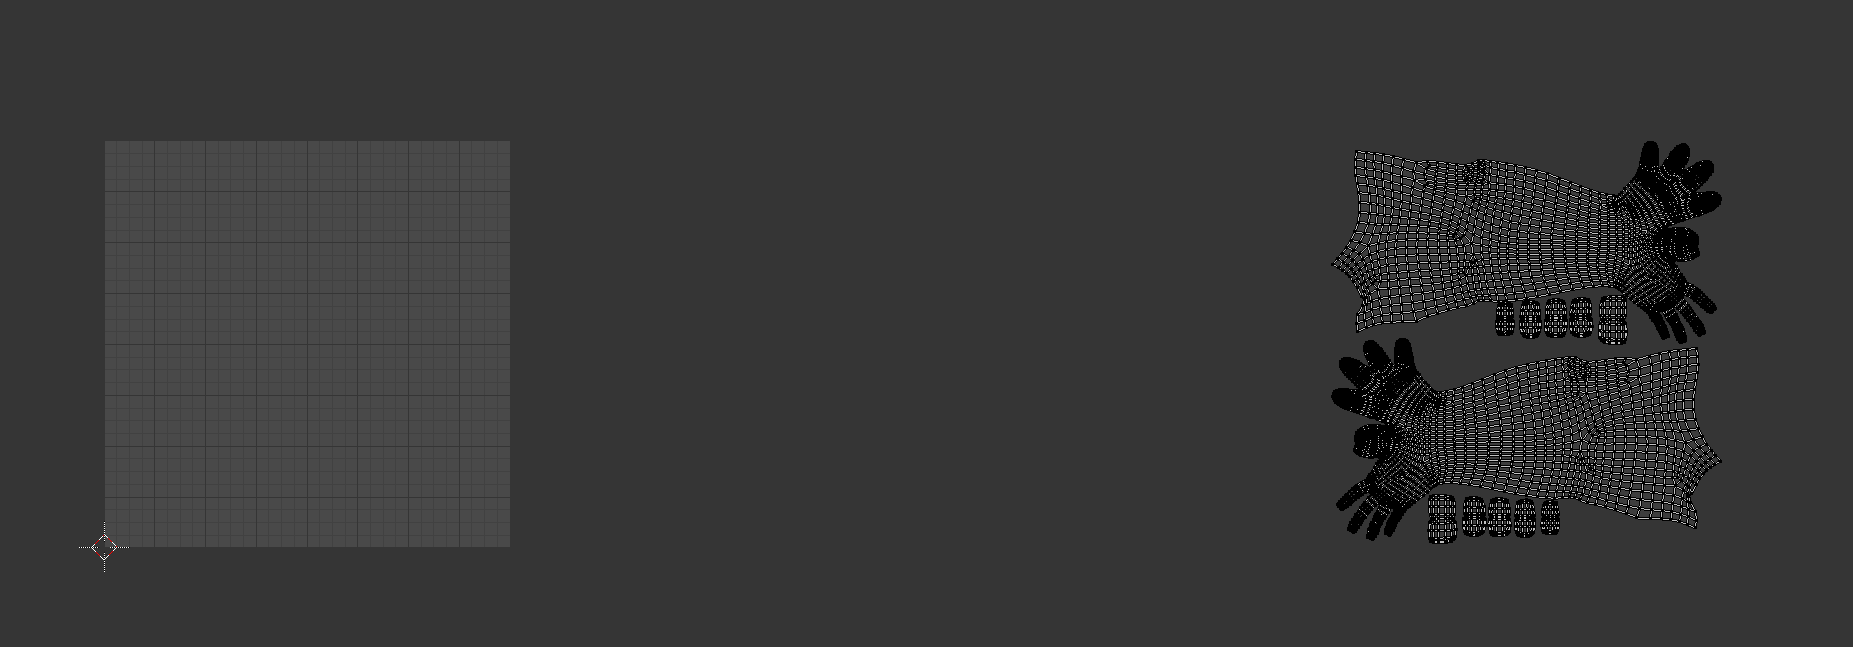
Select the original image and then we can drag the UV over it as closely as we can get it. You can select the uvs by hovering over the UV map and clicking A. When they are all orange/selected you can go to UVs menu and click on translate to be able to move them around.


Switch back to your new image instead of the one you were using to line things up.

Unity
STEP 6: Inside of Unity create a folder for your model. In mine I called it DemonPrince.

STEP 7: Go to where you exported the FBX and drag it onto that folder so that Unity can import it. It will import the Materials and the FBX model. Notice there are no textures.
STEP 8: Create a folder under DemonPrince (or wherever you prefer) and call it Textures. Make sure you select that folder.

STEP 9: Where you exported the FBX to was a folder full of textures. Drag the content of that folder into your new textures folder in Unity.

STEP 10: Under your folder you created (DemonPrince in my example) click on the model (Graz'zt in my example) and change the Rig Animation Type to Humanoid and click apply.

STEP 11: Drag your model you just changed to Humanoid into the hierarchy. With the default camera they will be facing away so I go ahead and tell it to rotate on Y 180 degrees so that it is facing the camera.

I also will usually move my camera closer, but that is totally your call.

STEP 12: Let's go ahead and apply the textures we have while we are at it and tweak some material settings.

Those are my materials. The texture names will generally relate directly to what your material in some way.

This one is arms...

I'll drag that top texture that mentions arms into the albedo on this material.

Keep repeating that process and then we'll tweak a few of them.

STEP 13: Fixing the eyelashes...

In your textures folder select your eyelashes texture.

Check the box that says ALPHA IS TRANSPARENCY and then click Apply.
Go back to your Lashes Material and select it.

Change the rendering mode to FADE.

NOTE: Ideally you would want to use a double sided shader for the eyelashes (and hair) as the eyelashes will be invisible from one direction without them.
STEP 14: If you have hair from Daz (not usually very optimized) you can play with variations of FADE and OPAQUE on different parts of the hair. As with eyelashes this is one of those items that would benefit from a double sided shader as some parts of hair will become invisible depending upon the viewing angle. I will not be fixing that in this example and in fact this demon has no hair other than the eyelashes.
STEP 15: You will want to drag normal maps and specular map textures from that folder we minimized way back in STEP 4. They should be dragged into your Textures folder. The normal maps you'll have to click on texture and tell Unity it is a normal map.

STEP 16: You will want to apply your specular maps to the materials and the default value will likely look way more metallic than you would like for skin. Also change the material to Standard(Specular Setup)

Play around with the smoothness until you get the result you want. A good value that often works is 0.2.


Repeat this process with all of your materials that you have specular maps for from Daz.

STEP 17: Add the normal maps into the materials like you did with the specular maps above. You should be able to leave the value for these at 1, but you can play around with making it lower if you want the normal details more subtle or higher if you want them more extreme.
Here is with normals set to power 1

Here is with normals set to power 10

STEP 18: If you made Ambient Occlusion maps in Step 5 then at this point you will want to apply those just like you did the other textures.
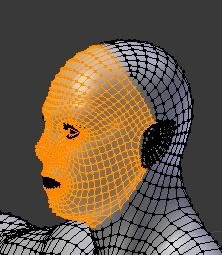
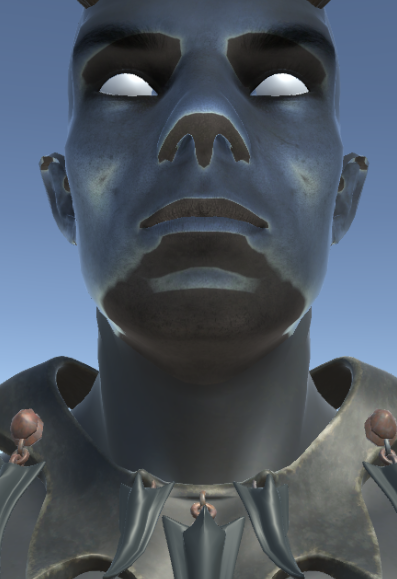
Here is the face before AO.

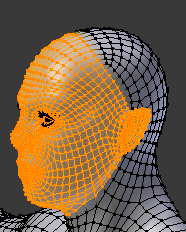
Here is the face after AO.

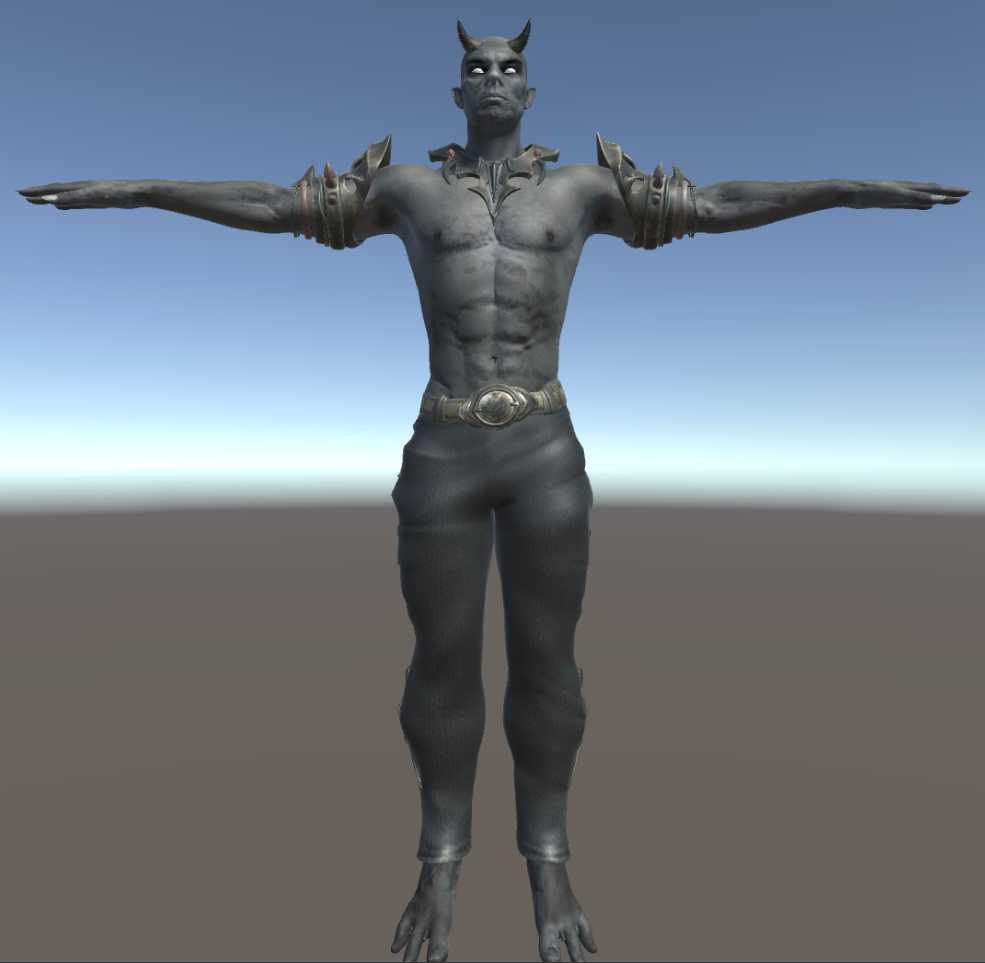
Here is the entire Demon after AO. Still haven't fixed the eyes.

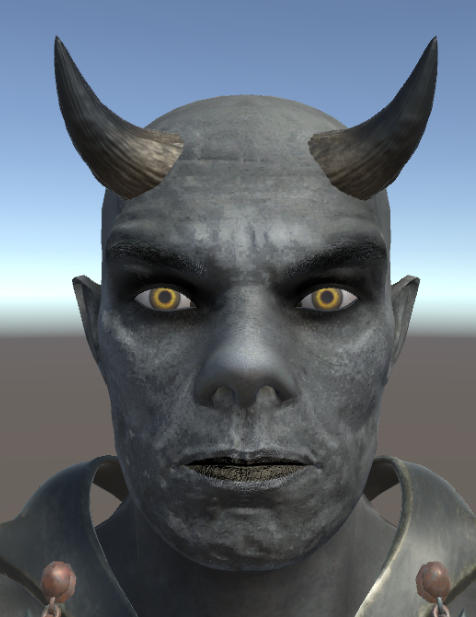
STEP 19: Edit the eye texture like we did the eye lashes earlier and apply the Alpha is Transparency check box to the texture. Then stick that texture on the eye moisture material and set that material to Fade.

Make sure you set the demon eyes which have that same texture to Fade. This will make the eyes work, but in reality you will want some different alpha transparent texture for eye moisture in the future... something like a highly transparent white or something of that nature. For the purposes of this tutorial though you have working eyes.
Closing
The above steps provided a PBR Genesis 3 character inside of Unity. I want to play with some of the PBR settings to get him looking more like Graz'zt.


Past Daz 3D/Daz Studio Tutorials
- Daz Studio - Different types of Export data Michael 5/Genesis, Michael 6/Genesis 2, Michael 7/Genesis 3, and Michael 8
- DAZ3D-DAZ Studio - Genesis 8 Male/Michael 8 figure released today... first look [3D Character Models]
- DAZ3D-DAZ Studio Genesis 8 Male/Michael 8 - NSFW version includes male Genitalia
- Importing Daz Studio Characters into Unity - Use them in your game... Unoptimized version
- DAZ 3D: Releases new version called Genesis 8, and Victoria 8...
- DAZ3D - Introductory Post - Use it for still images, videos, and even game development...
- Game Development - My Journey To Daz Studio - and how I plan to use it in Unity
- Daz 3D - Figures - Different figure appearances - nude also will show anatomical add-ons NSFW

A very worthy experience worth if people call you the best professor. Hy profesor
It will not let me edit this post. I found an update. Unity actually works much better if you use the Standard shader that is the Metal setup rather than the Specular setup.