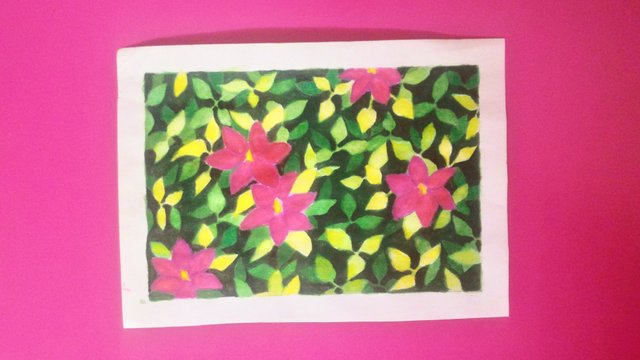
How to Paint Clematis Flowers | Step by Step Tutorial | Water Colour Painting
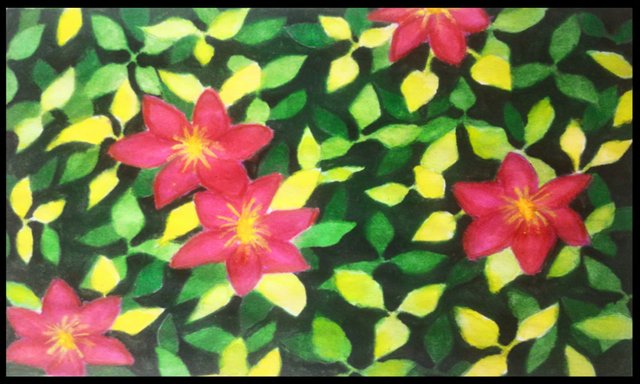
Hello dear Steemians! Today I would like to share a tutorial on how I painted clematis flowers with a background full of leaves. Before I jump into the tutorial, a fair warning to you is that this painting can be time consuming because it involves some repetitive work and patterns, but it can also be therapeutic, like an active form of meditation. So, if you are going to attempt this, I suggest you to look at it as a 'half full glass' i.e. in a positive way. It was a fun experience for me as I enjoyed painting while listening to some relaxing music. In addition, this is a layered painting involving depth adding techniques, which is another reason why it may be time consuming but I believe that it is a skill that will be helpful to produce artworks that require similar techniques. The following is some basic information on the technique that I used. The source of this is one of my own posts where I painted a simpler painting using the same technique. Click here to check the full post.
Negative Painting Technique As the name suggests, the way to paint using this technique is by painting around the drawing/picture. Yes, you heard it right. This is not a typo. Paint everywhere but the picture itself. This technique is best used for artworks that require depth and ranging colour values. It is done in several layers before the whole painting comes together. You might feel confused right now or feel that it doesn't make sense but you will see it as you keep reading until the end of the tutorial section. The original source of where I learned this technique from is on Makoccino's YouTube Channel. Click here to check it out.
Tools and Materials
- A good quality artblock that can absorb water
- Buncho water colours
- Round paint bruses - small and medium sized
- 2 containers of water (one to mix paint and one to clean the brush)
- A tissue paper to absorb excess paint / water
- Luna water coloured pencils
- A mechanical pencil with 2B lead
- A dust free eraser (just in case to correct mistakes)
Step by Step Tutorial
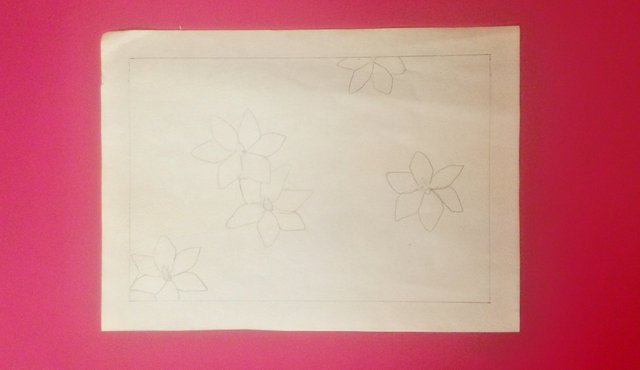
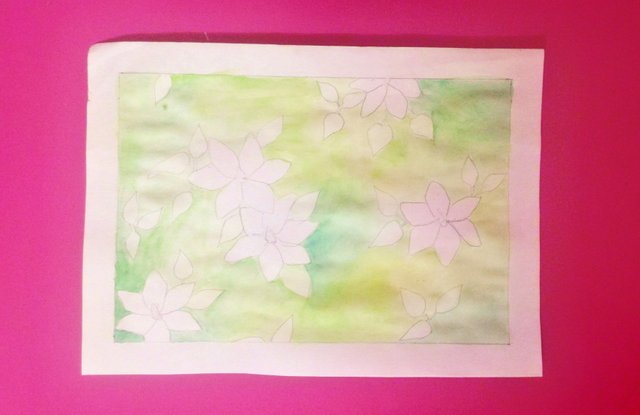
First of all, I drew some clematis flowers with a mechanical pencil with 2B lead. I like it to be 2B because it is soft and I used a mechanical pencil for my convenience. You are free to use a normal pencil if you like. Keep in mind that clematis flowers have more than 5 petals, such as 6 or 7, depending on the species.
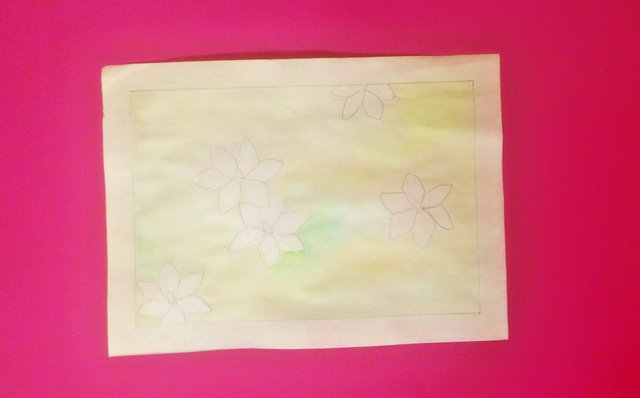
For the first layer of paint, I used the wet-on-wet technique. I used a medium round brush for my convenience but it is up to you if you would like a small round brush. Pick up some water using your brush and apply a thin layer of it on your paper. Then, using the same brush just pick a small amount of paint using the tip of your brush bristles and place it on the wet surface. You can see the paint spreading through water. The colours that I chose were yellow, light green and dark green. I suggest you to do it by sections by wetting and painting one part of the paper at a time unless you can do it fast because the thin coat of water dries quickly, if it is too dry then the paint won't be able to spread. In case the water on the paper did dry too much and you only realized that after applying the paint, don't worry, just paint some water on that section of your artwork.
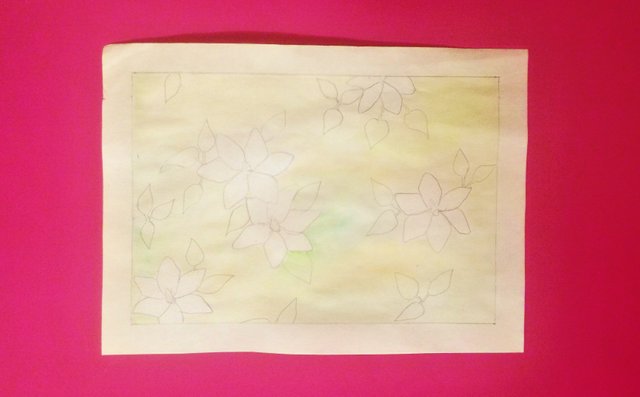
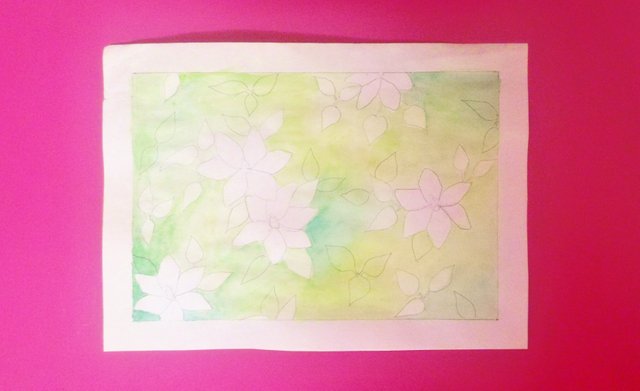
Then, I drew some leaves to prepare the artwork for the next layer of paint. The leaves in this layer will be the uppermost leaves i.e. the leaves on the surface. You can draw them randomly anywhere you like, but in my opinion it will look nice if some of the leaves are close to the flowers. Just keep in mind that you need to keep them in the same size as the leaves in all layers. As I was looking up for the pictures of clematis, I noticed that the petals seem to be around the same size of the leaves. So, I drew them in the same way.
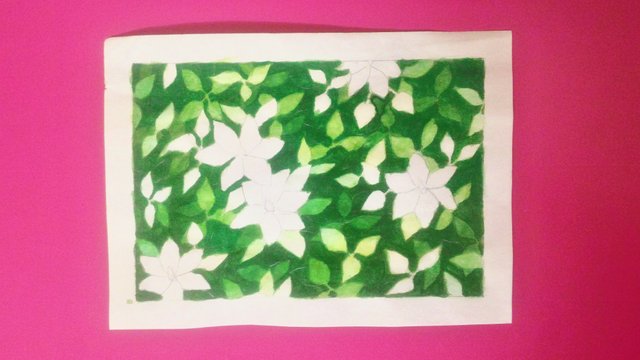
Now, contrary to the normal way of painting, we need to paint around the drawing like you can see in the picture above. It might seem strange but it really isn't because that is what negative painting technique is. It is about adding colours around the subject instead of painting the subject itself. From this stage onwards, I switched into a small round brush because it is easier to paint in smaller areas with more precision and control. I also increased the amount of paint so that it will appear darker compared to the previous level.
Then, I left it to air dry. If you are not a patient person like me, then you can try using a hairdryer to dry your artwork faster. However, please be careful not to hold it too close to your paper because it might end up pushing the paint to the wrong directions. After drying, I drew more leaves on a random basis.
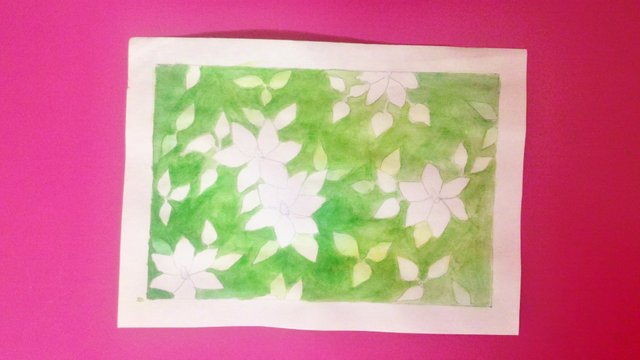
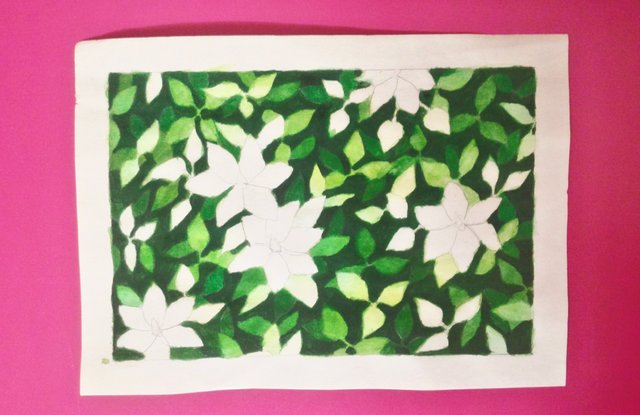
Then, I repeated the steps by painting around the drawing. I mixed the paint in such a way that it was less dilute compared to the previous layer. To make the colours warmer, I added a small amount of orange to the dark green.
I repeated the process by drawing more leaves to paint around in the next layer.
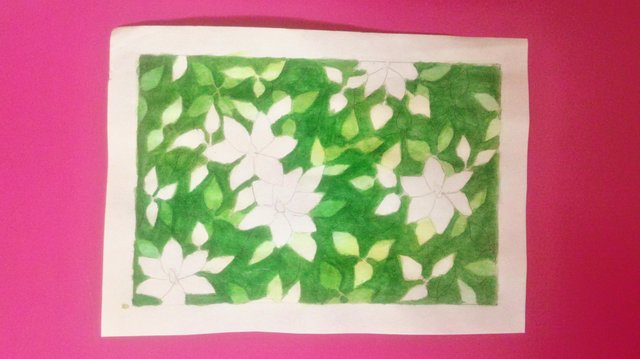
I painted around the previous drawing with a darker mixture of paint. Then, I left it to dry and drew more leaves for the next layer. I know it seems tedious, but it will look great and worth it in the end.
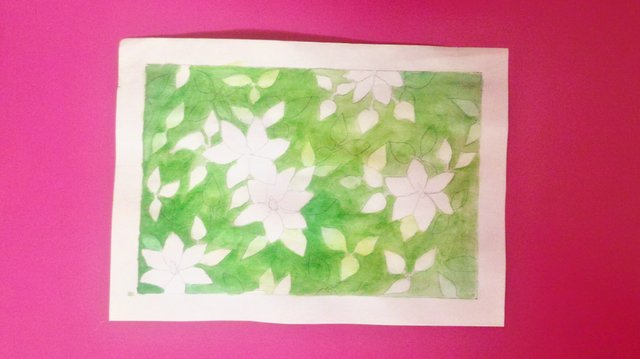
I painted around the leaves again as the cycle goes but I added some black to the dark green to make it darker. This helps to add more depth to the painting. Then, I left it to dry and drew more leaves.
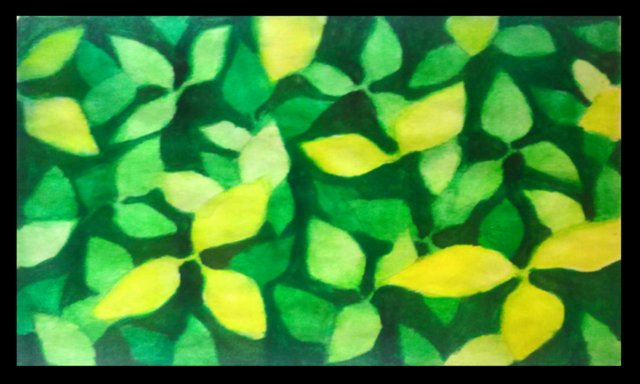
I painted the around the leaves. This time, I added more black to the dark green to make it very dark. As you can see, there is no more space left to draw more leaves, so I decided that this will be the last layer.
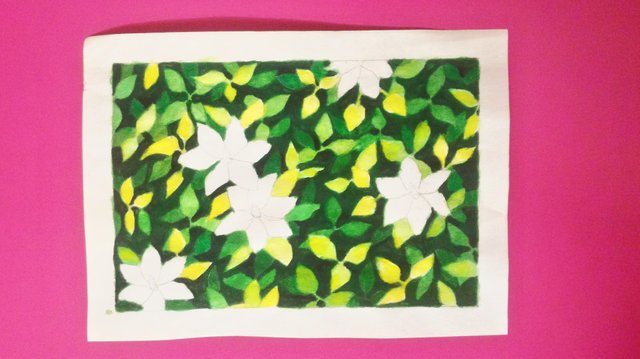
Now it is time to touch up. I like my leaves to be warmer, hence, I added some yellow to the leaves on top, which is the first layer. I also added slightly diluted yellow to the leaves in second layer as well. Then, I painted some black to parts that were closest to the petioles (forgive me and do correct me if I am wrong) of the leaves. In simple words with the reference to my artwork, it is the center point part where multiple leaves meet. If you are going to do this, then blend it well into the green areas. I did it by picking a small amount of water and drying the excess water using a tissue. Then, I used the leftover water to blend the black with the green areas.
.jpg)
I started painting the flowers. I wanted them to look warm with a mixture of red, pink and purple. The pink alone was too soft for me so I opted to add some red.
I mixed some red and painted over them. I had to build the colour up gradually to get this result. It does look flat at the moment so I decided to add more details.
.jpg)
To add some details, I used my water colour pencils and dipped them into a cup of water. Water based colour pencils work well with water and the colour appears more vibrant when it comes in contact with water. I dipped them for about 5 to 10 seconds and then they were ready to use. It is best to use a tissue paper and softly wipe off any water dripping from the coloured pencils before using them on your masterpiece. We don't want unnecessary water dripping on our artwork. I used the red pencil to draw around the petals. Once the pencil was dried, I also coloured softly at the sides of the petals because clematis flower petals look lighter in the middle. Then, I used a light orange and a yellow coloured pencil to draw the stamen (the center part) of the flowers. This is the completed artwork.
I hope that you enjoyed reading my tutorial on how to paint clematis flowers with depth adding techniques and I wish you happy painting if you wish to try it. Here is another painting tutorial that I made using the same painting technique. Thank you for reading and blessings xx

If you like this post, please upvote and leave your feedback below.
If you would like to see more posts from me, follow me.
Stay tuned! xx

Click the Images to View My Recent Posts:
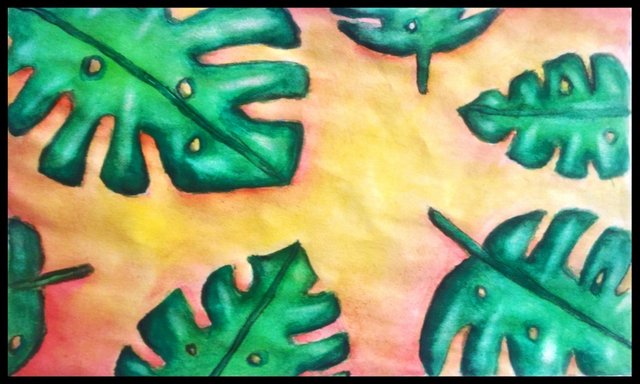
How to Paint Monstera Leaves | Step by Step Tutorial | Water Colour Painting
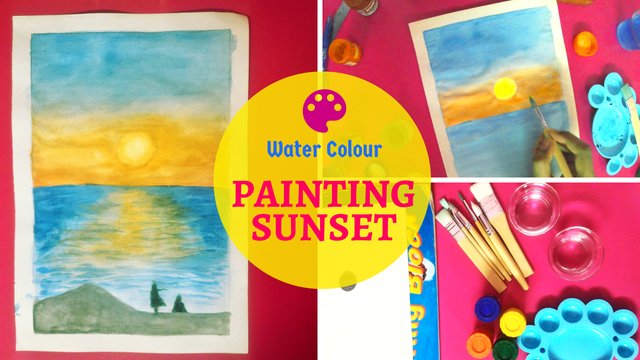
Sunset Painting | Step-by-Step Tutorial | Water Colour Painting
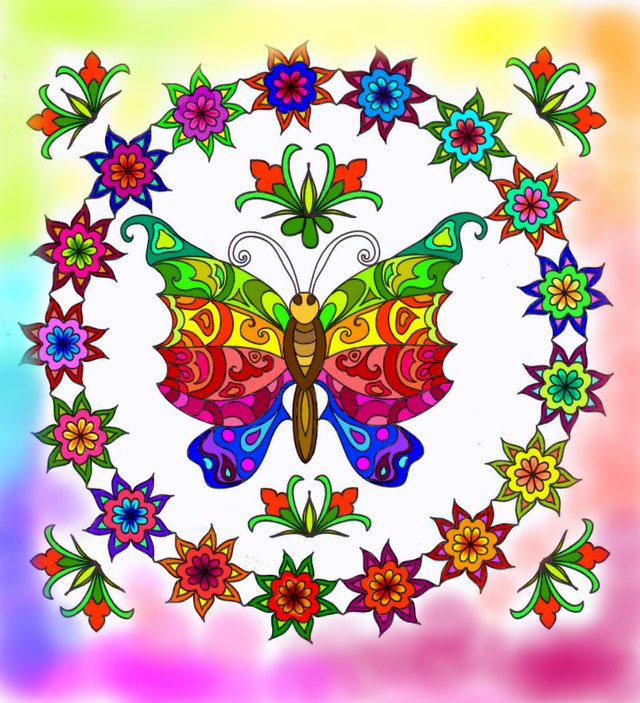
Butterfly Colouring Contest #3

How to Treat Cough at Home | Cough Home Remedy | Traditional Ayurvedic Medicine
Painting Leaves with Depth Adding Technique | Step by Step Tutorial | Water Colour Painting

Follow me: @yashny
My Dtube Channel: Yashny
About me:
I'm a chill, happy go lucky person. I am a feminist. I love food, art, books, numbers, psychology and occult science. I am in the process of healing and diving into spirituality. I think life is a gift and we should appreciate the little things of life more. Everything that I post is a little piece of my life. I believe that everyone is carrying their own cross, so don't judge anyone and be kind!
♥♥♥♥♥♥♥♥♥♥♥♥♥♥♥♥♥♥♥♥♥♥♥♥♥♥♥♥♥♥♥♥♥♥♥
Thank you for your support and encouragement
♥♥♥♥♥♥♥♥♥♥♥♥♥♥♥♥♥♥♥♥♥♥♥♥♥♥♥♥♥♥♥♥♥♥♥
If you would like to see more posts from me, follow me.
Stay tuned! xx
Click the Images to View My Recent Posts:
How to Paint Monstera Leaves | Step by Step Tutorial | Water Colour Painting
Sunset Painting | Step-by-Step Tutorial | Water Colour Painting
Butterfly Colouring Contest #3
How to Treat Cough at Home | Cough Home Remedy | Traditional Ayurvedic Medicine
Painting Leaves with Depth Adding Technique | Step by Step Tutorial | Water Colour Painting
Follow me: @yashny
My Dtube Channel: Yashny
About me:
I'm a chill, happy go lucky person. I am a feminist. I love food, art, books, numbers, psychology and occult science. I am in the process of healing and diving into spirituality. I think life is a gift and we should appreciate the little things of life more. Everything that I post is a little piece of my life. I believe that everyone is carrying their own cross, so don't judge anyone and be kind!
♥♥♥♥♥♥♥♥♥♥♥♥♥♥♥♥♥♥♥♥♥♥♥♥♥♥♥♥♥♥♥♥♥♥♥
Thank you for your support and encouragement
♥♥♥♥♥♥♥♥♥♥♥♥♥♥♥♥♥♥♥♥♥♥♥♥♥♥♥♥♥♥♥♥♥♥♥
Thank you for your support and encouragement
♥♥♥♥♥♥♥♥♥♥♥♥♥♥♥♥♥♥♥♥♥♥♥♥♥♥♥♥♥♥♥♥♥♥♥
Dear Artzonian, thanks for using the #ArtzOne hashtag. Your work is valuable to the @ArtzOne community. Quote of the week: Art, freedom and creativity will change society faster than politics. -Victor Pinchuk
@yashny, I gave you a vote!
If you follow me, I will also follow you in return!
Enjoy some !popcorn courtesy of @nextgencrypto!
The green background you used made the flowers to pop out really nicely, I just love it!
And the tutorial, it is detailed and concise.. Your work is nothing short of beautiful!!
Thank you so much for your encouraging feedback @audreybits! I add detailed guidelines so that it can help and motivate people who are new to water colour painting without fearing of making mistakes. I am glad that you like it x
It was so thoughtful of you! It definitely did made it easier to understand and less overwhelming...
I feel happy to hear that!
Congratulations @yashny! You have completed the following achievement on the Steem blockchain and have been rewarded with new badge(s) :
Click on the badge to view your Board of Honor.
If you no longer want to receive notifications, reply to this comment with the word
STOPDo not miss the last post from @steemitboard:
This is cool tutorial @yashny, thank you for the detailed tutorial. I thank you also for introducing the wet-on-wet technique. I didn't know there was such a thing :D. This is definitely worth a try. I like what you say here:
I think I will like it too, painting while listening to some relaxing music :)
Forgive me for seeing and replying late, you are welcome. Yes it is certainly worth a try. It helps us to relax and music adds up to it. I am glad you like it =)