Painting Leaves with Depth Adding Technique | Step by Step Tutorial | Water Colour Painting

Hi Steemians! Today I would like to share how I made this simple leaves painting. The technique that I used is the negative panting technique. I love anything related to nature and greenery and that is why I chose this particular theme before trying it out with other themes. Initially I thought of painting a picture of fall leaves, but I changed my mind later. Before jumping into the steps, I would like to explain a little about the technique first.
Negative Painting Technique
As the name suggests, the way to paint using this technique is by painting around the drawing/picture. Yes, you heard it right. This is not a typo. Paint everywhere but the picture itself. This technique is best used for artworks that require depth and ranging colour values. It is done in several layers before the whole painting comes together. You might feel confused right now or feel that it doesn't make sense but you will see it as you keep reading until the end of the tutorial section. The original source of where I learned this technique from is on Makoccino's YouTube Channel. Click here to check it out.
Tools and Materials
.jpg)
- A good quality artblock that can absorb water
- A mechanical pencil with a 2B lead
- Buncho water colours
- A palette to mix paint
- Paint brushes
- 2 containers of water (one to mix paint and one to clean brush)
- A tissue paper to absorb excess paint/water (just in case)
Step by Step Tutorial
.jpg)
First of all, I gave the paper a light wash because I wanted to use the wet on wet technique. I applied some water using a medium round brush. Then, I applied a very light coat of green and yellow. I also added a teenie bit of blue on the top left corner. Then I left it to dry for a few minutes.

Then, I added another layer of paint using the same colours and brush, but this time with less amount of water. Then I left it to dry for a short while.

After it was dry, I drew a few leaves on the paper. The leaves will be the first layer, i.e. the top most layer of my painting. Then, I started painting around the drawing with less water beginning at the bottom right as you can see the colour difference. This is so that it will be a darker shade of the existing green.

I was done painting all around it and left it to dry.
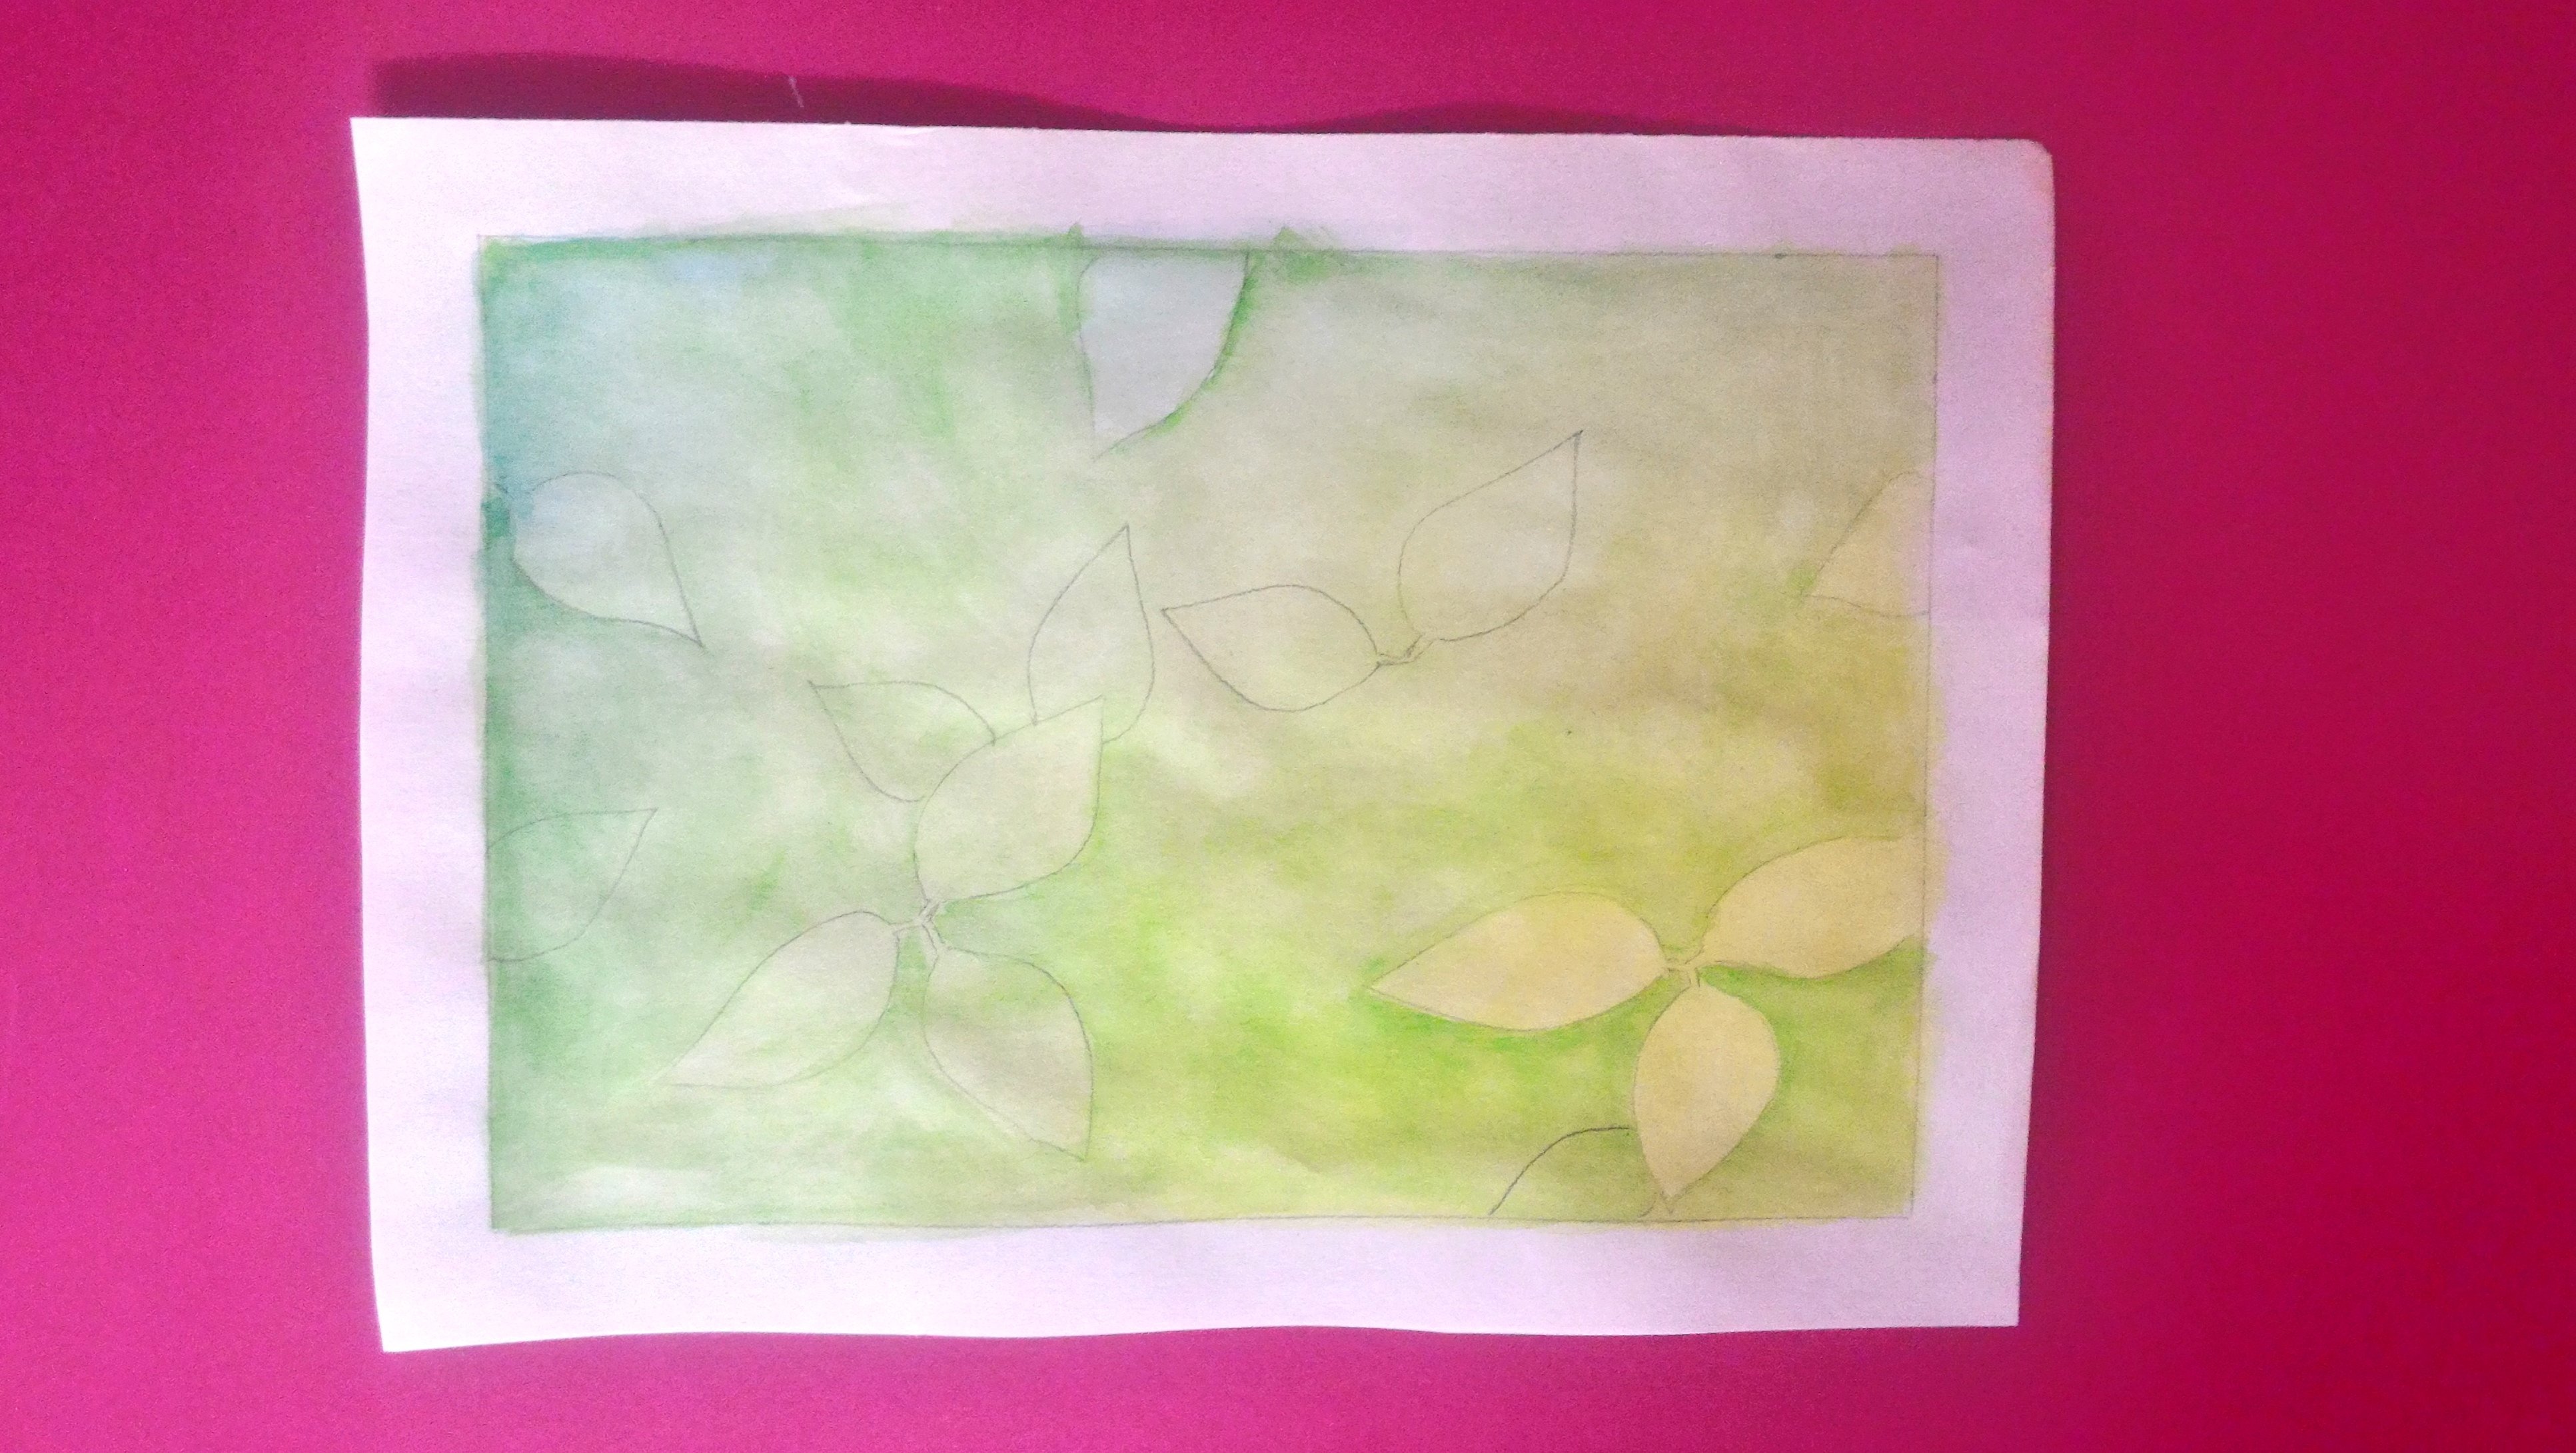
Then I drew more leaves. It does look weird now but it will work as we keep repeating the steps. The goal is to keep adding layers.

Then I painted around it with less water compared to the previous layer so that it will look darker.

So here you can see I repeated the steps but I have added some dark green to make the shade appear darker. Then I drew more leaves.

I added more dark green and more leaves.
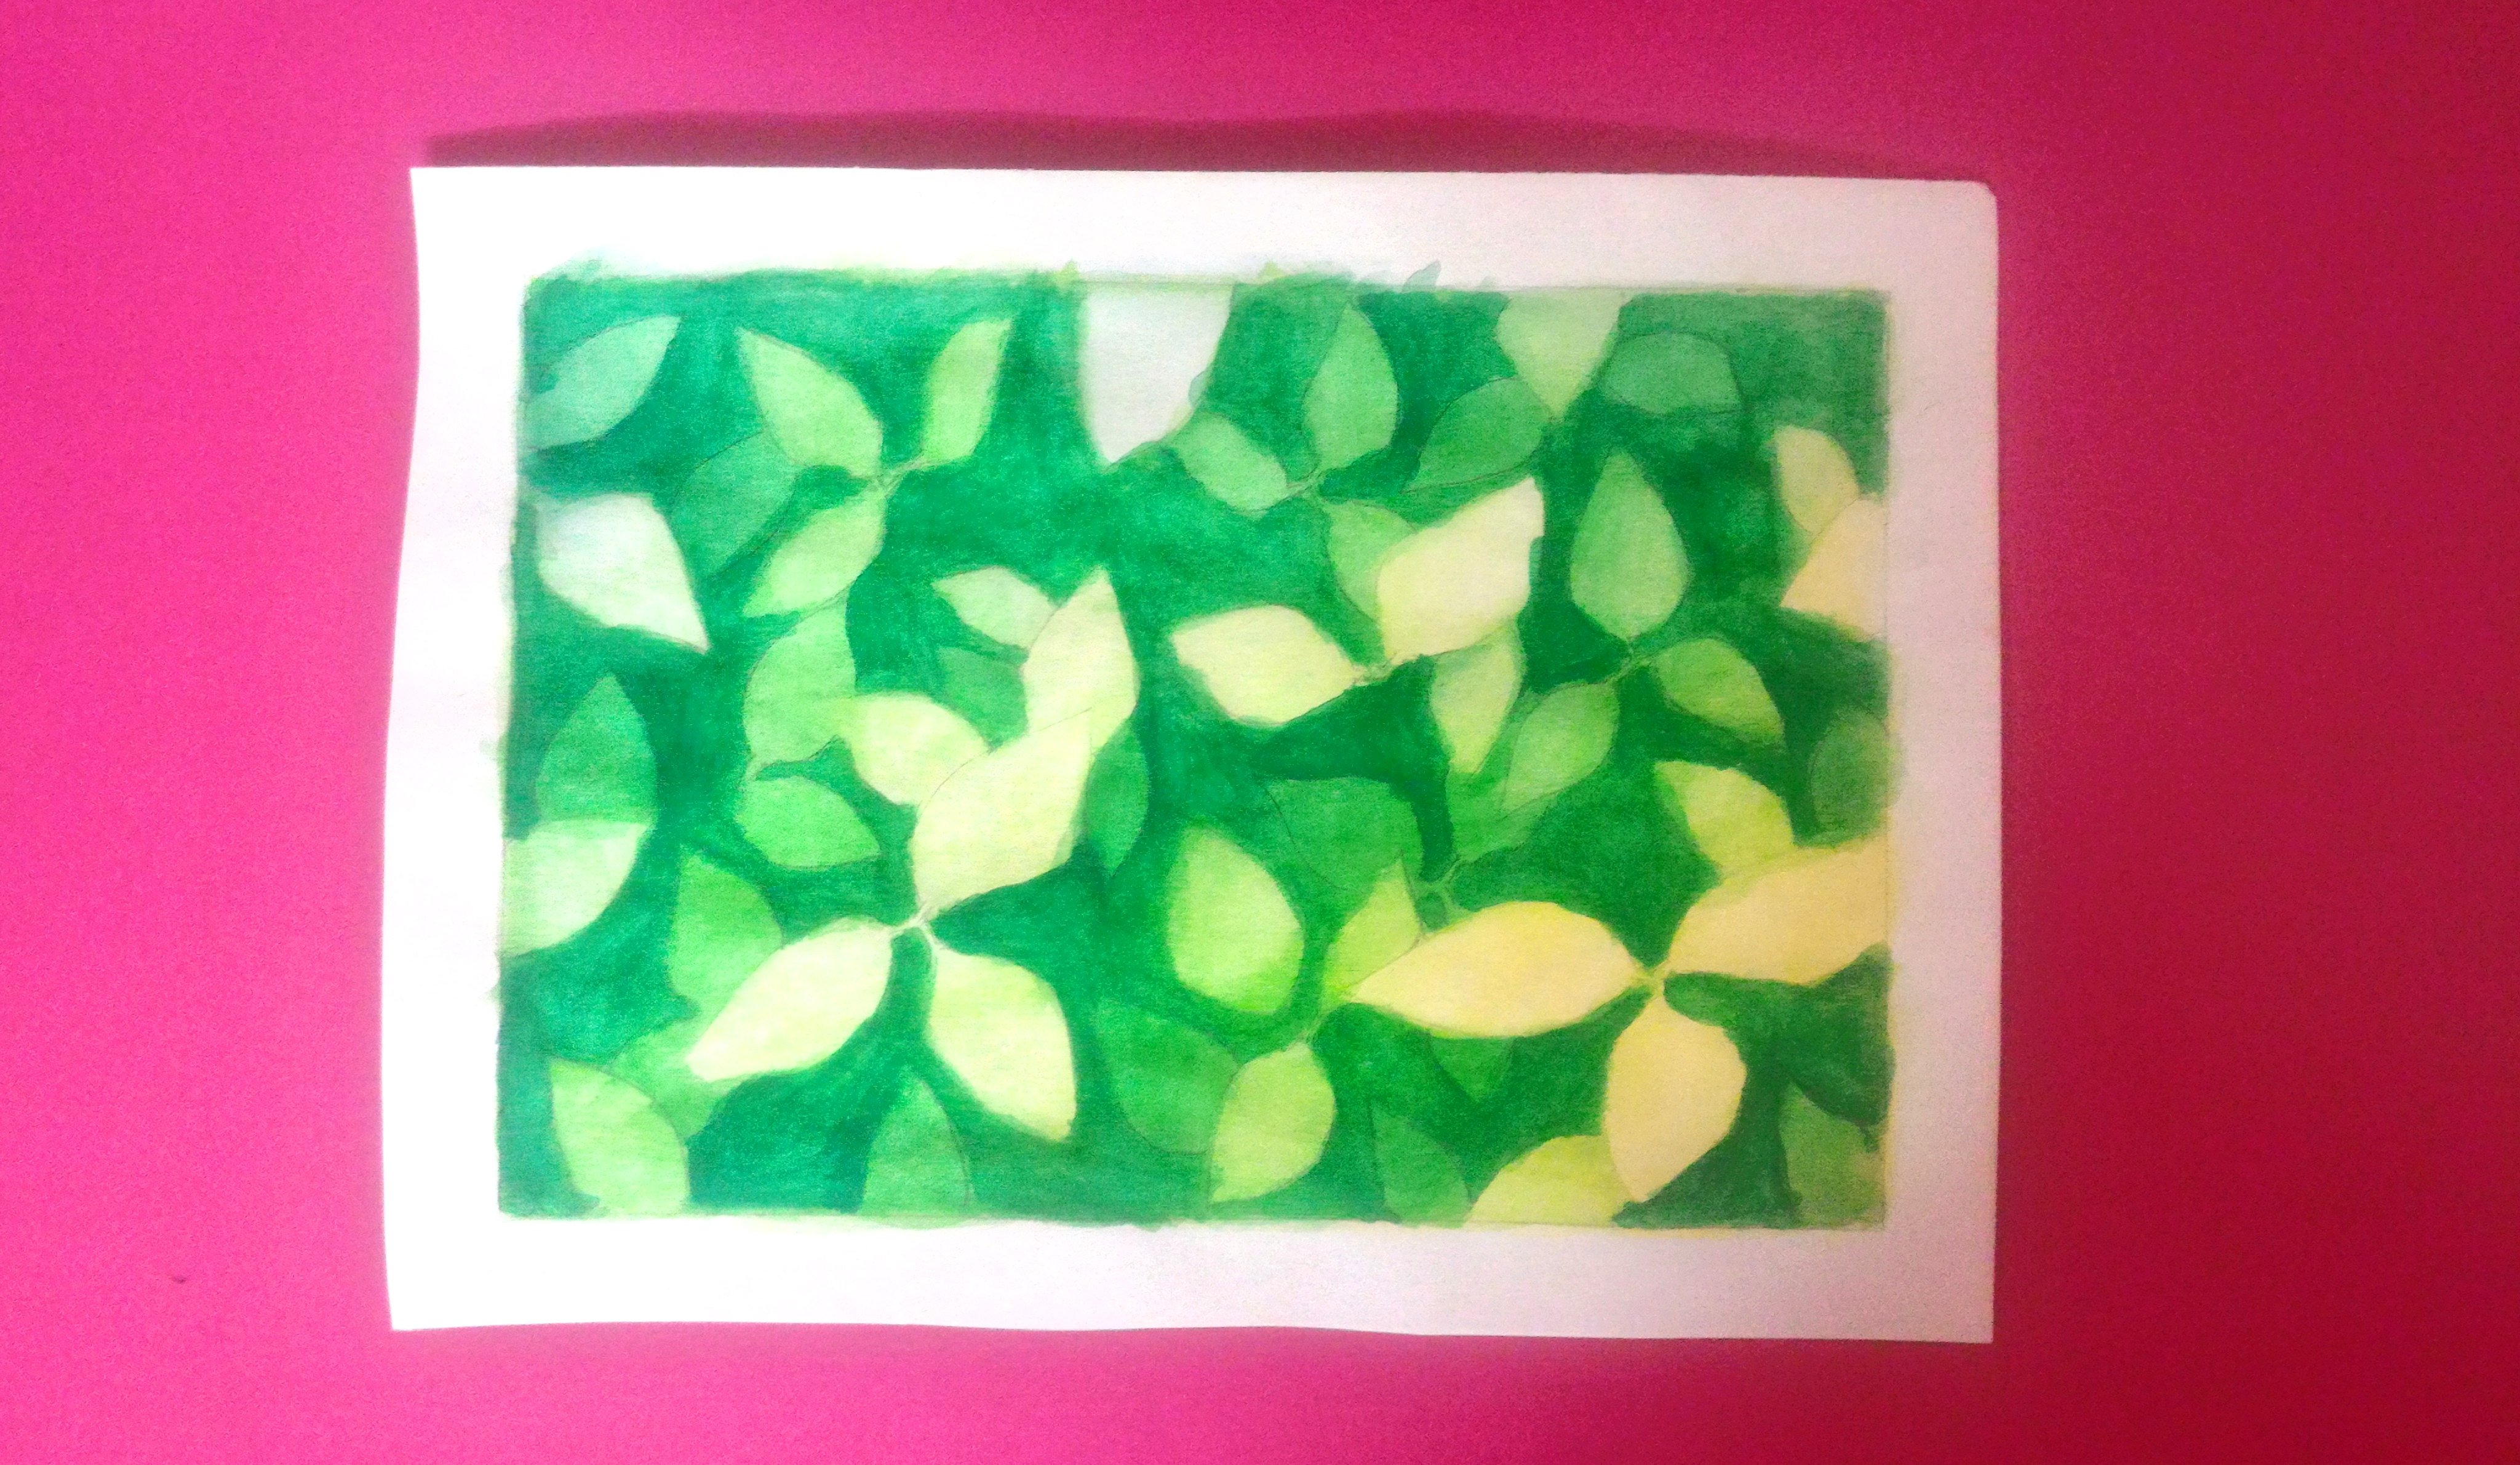
More leaves, more greens and more layers. Take note that I started using a small round brush because it was more suitable to paint in small areas unlike the medium brush.

Well, here the last layer is not very visible. I needed to fix that.

I mixed some black with the dark green to make it darker. So, now the bottom layer of leaves is visible unlike earlier.

For the final touch ups, I added more black to deepen certain areas and to add more depth as well as to add more dimension so that it doesn't look flat. Another thing that I did was I added some yellow mixed with a very small amount of light green on the leaves to make them look warmer and brighter. If you zoom in and take a closer look, you can notice that I also corrected some mistakes where I linked some leaves correctly unlike in the previous layers. The artwork is complete. It was time consuming but as I kept going on, the painting came together and it looks beautiful that I might put it up on display in my room. I hope that you enjoyed reading my post and I will be very happy if you find it helpful too. Till next time, happy painting and blessings! xx

If you like this post, please upvote and leave your feedback below.
If you would like to see more posts from me, follow me.
Stay tuned! xx

Click the Images to View My Recent Posts:
HOW TO MAKE YOUR OWN WASHI TAPE! | DIY Planner Supplies
Plan With Me | HARRY POTTER RAVENCLAW THEME | DIY Planner
Video: Indian Spicy Chilli FIsh Cooking Recipe

ART: DIY Harry Potter/Ravenclaw Stickers and Embellishments from Scratch

Butterfly Colouring Contest

Follow me: @yashny
My Dtube Channel: Yashny
About me:
I'm a chill, happy go lucky person. I am a feminist. I love food, art, books, numbers, psychology and occult science. I am in the process of healing and diving into spirituality. I think life is a gift and we should appreciate the little things of life more. Everything that I post is a little piece of my life. I believe that everyone is carrying their own cross, so don't judge anyone and be kind!
♥♥♥♥♥♥♥♥♥♥♥♥♥♥♥♥♥♥♥♥♥♥♥♥♥♥♥♥♥♥♥♥♥♥♥
Thank you for your support and encouragement
♥♥♥♥♥♥♥♥♥♥♥♥♥♥♥♥♥♥♥♥♥♥♥♥♥♥♥♥♥♥♥♥♥♥♥
If you would like to see more posts from me, follow me.
Stay tuned! xx

Click the Images to View My Recent Posts:
HOW TO MAKE YOUR OWN WASHI TAPE! | DIY Planner Supplies
Plan With Me | HARRY POTTER RAVENCLAW THEME | DIY Planner
Video: Indian Spicy Chilli FIsh Cooking Recipe
ART: DIY Harry Potter/Ravenclaw Stickers and Embellishments from Scratch
Butterfly Colouring Contest

Follow me: @yashny
My Dtube Channel: Yashny
About me:
I'm a chill, happy go lucky person. I am a feminist. I love food, art, books, numbers, psychology and occult science. I am in the process of healing and diving into spirituality. I think life is a gift and we should appreciate the little things of life more. Everything that I post is a little piece of my life. I believe that everyone is carrying their own cross, so don't judge anyone and be kind!
♥♥♥♥♥♥♥♥♥♥♥♥♥♥♥♥♥♥♥♥♥♥♥♥♥♥♥♥♥♥♥♥♥♥♥
Thank you for your support and encouragement
♥♥♥♥♥♥♥♥♥♥♥♥♥♥♥♥♥♥♥♥♥♥♥♥♥♥♥♥♥♥♥♥♥♥♥
Thank you for your support and encouragement
♥♥♥♥♥♥♥♥♥♥♥♥♥♥♥♥♥♥♥♥♥♥♥♥♥♥♥♥♥♥♥♥♥♥♥
Dear Artzonian, thanks for using the #ArtzOne hashtag. Your work is valuable to the @ArtzOne community. Quote of the week: Art, freedom and creativity will change society faster than politics. -Victor Pinchuk