Making Your Own Ink From Black Walnuts
As a writer, pens, ink, and writing instruments of all kinds fall under the umbrella of my many interests. I've been at my current residence for nearly 8 years, and at some point, I came across the fact that you can make ink with black walnuts.
Oh, so you mean those big green balls all over the back yard in the summer aren't just ankle-breaking lawn mower obstacles?
Well, now...
Over the summer, I gathered 2 large batches of walnuts with the intention of making ink in the Fall.
Lesson #1
I saved one batch in an old coffee can with the lid on to kill any bugs that might be present and allow the nuts to turn black. I saved the second batch in a plastic grocery bag which was less than ideal. Moisture got inside the bag, and the walnuts basically turned to ink by themselves.
Easy work, right? Not exactly. The first thing you should be aware of when working with black walnuts is that if they get wet, they will stain anything they come in contact with including you, your clothing, carpet, counters, and anything else you don't want to be permanently brown.
I trashed the nuts in the bag.
What You Will Need
- 15 to 20 black walnuts - let them turn black - the fresh green ones won't work
- A deep stock pot that you never plan to use with food ever again
- Utensils that you never plan to use with food ever again - Dollar Tree is great for this - A slotted spoon and ladle are helpful
- Highest percentage rubbing alcohol you can find - I used 91% - this is your preservative
- Glass containers - DO NOT use plastic
- Funnel
- Filters of some kind - I used coffee filters
- Paper towels
- Mr. Clean Magic Erasers (optional) - great for cleaning up stains
- Drop cloths of some type
Stove and sink are a given.
Prep
Everything that matters in my kitchen is white...the counter, the stove...I had to be stupid careful not to create permanent brown stains on everything.
I just used old towels and paper towels, but you can use pretty much anything. You can get drop cloths and plastic table cloths cheap at the Dollar Tree and probably use them over and over.
No Dollar Tree? Order online - https://www.dollartree.com/
I used this tutorial - http://yougrowgirl.com/make-black-walnut-ink/
As I said, I gathered my nuts over the summer and let them sit and turn black. The nuts fall to the ground throughout the season either naturally or via squirrel.
Some people only use the husks, but I just put the entire nut in the pot. Let's jump into this.
Making the Ink
Step 1 - Place nuts into large, deep pot and fill with water to desired level. I did this the night before. I filled mine 2/3 full or so. I wanted to produce a good amount of liquid, but have plenty of room to contain splashes inside the pot.

Step 2 - Slowly bring pot to a boil.

This was where my first mistake occurred. My intention was to heat the pot slowly, and I certainly did that. I started it out on Medium heat, and after half an hour, it still hadn't boiled. I kicked it up a notch. Still no boil. So, I went for the gusto and put it on High. Within 30 seconds, the pot boiled over.
Worst case scenario achieved!
Yeah, so, don't do that!
A clean-up ensued and nut-boiling was on hold temporarily. No stains...whew.
Step 3 - Bring temperature down to a simmer. I found this to be between Medium and Medium Low on my old-school stove.

Let it simmer ALL DAY. The longer it simmers, the thicker and darker your ink will be. I covered my pot to prevent the liquid from evaporating out.

To me, it kind of smelled like tea brewing. It didn't produce an unpleasant odor in my opinion, but I did vent with a fan and window just in case it was gross.
I let mine simmer for about 5 hours. As a result, you will notice in the usage examples that my ink is a little on the lighter side. The longer you simmer, the darker your ink will be. Also, take into account that 20% of each container will be rubbing alcohol and lighten the color a bit as well.
I tested it throughout the day with a brush on a paper towel.

You can see how it gets progressively darker. This was my first time, and I was nervous about making a mess and anxious to complete the process. If/when I do it again, I will probably let it simmer longer.
Bottling Your Ink
There are many, many options available and it really depends on your style. I originally picked these cute 3-inch jars:

Unfortunately, I'm too broke at the moment to buy them and I wanted to get this ink done for an upcoming birthday gift, so...I improvised.
I went to the Dollar Tree and I bought some colored wine-style bottles and also some mini Mason-type jars. The bottles weren't ideal, but they were pretty much the largest glass container available. Also, I can simply pour the ink into smaller containers in the future.
I spent more than an hour trying to make the small jars leak-proof; a necessity with this liquid stain-maker. No dice.
I resorted to using a couple of Kerr pint-sized canning jars I had on hand. Again, not ideal, but there are some benefits. These jars are large enough that accidental spills are less likely than with a smaller jar or bottle.
Once you have your containers ready, it's time to package your ink.
Step 1 - Remove your pot from the stove and place it in the sink. Remove all nuts with a slotted spoon. I quadruple-layered plastic grocery bags and put the nuts in them and then trashed them.

** Step 2** - Pour rubbing alcohol into your container. The alcohol should be 20% of the alcohol/ink mixture in your containers. I eye-balled it. You can wait until after you bottle your ink and then add alcohol to make up 20% of the liquid content.
Sorry, I didn't do a pic of this.
Step 3 - Place your funnel in your container and fit a coffee filter inside it.
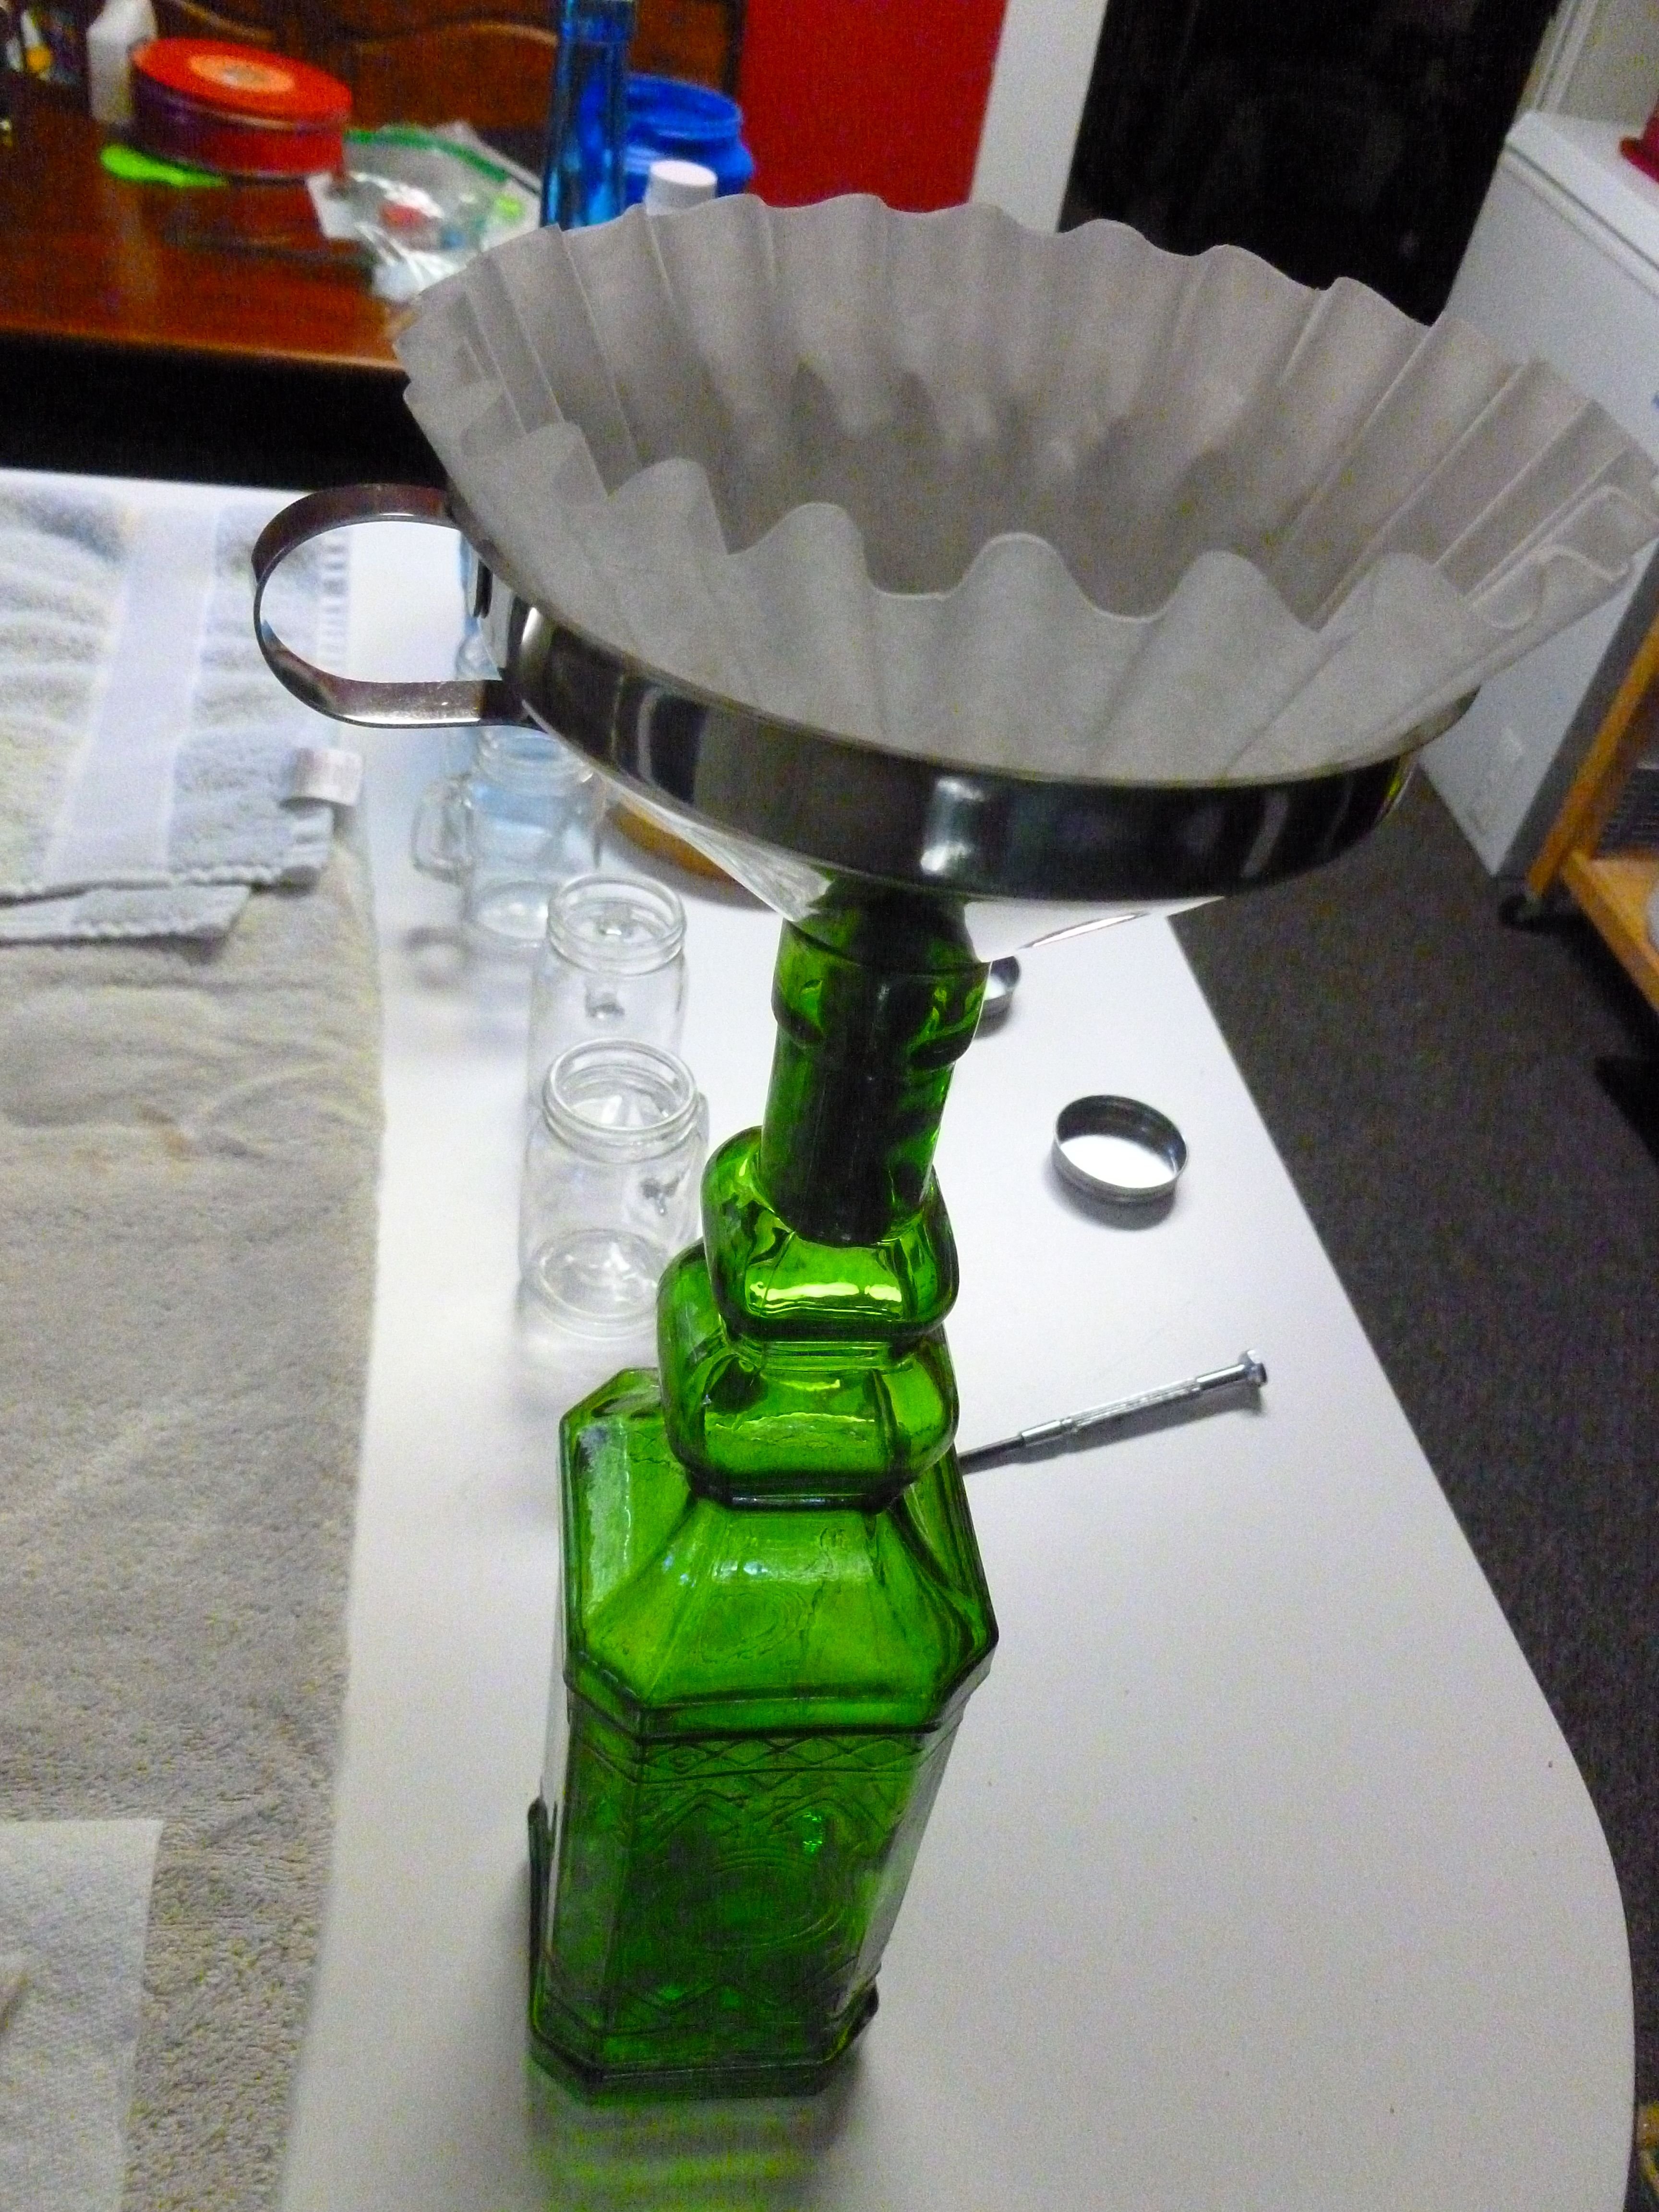
I bought this funnel particularly for this project. It's stainless steel and has its own removable strainer. Essentially, if you have an additional container, you could strain the larger stuff from your ink quickly and use the entire pot of liquid. You will still need to filter the smaller particulate from your ink with something like a coffee filter.

You can grab this funnel on Amazon fairly cheap - http://amzn.to/2yVdAhX
Step 4 - Place your bottle in the sink and pour ink from your pot into your filter/funnel. I used a throwaway container for this, but you can use a turkey baster or ladle from the dollar store.

For me, this was the longest part of the process because the liquid filters quite slowly. I also used several filters, changing them out when they stopped working.
The funnel/filter set up made it easy to switch between containers.

Step 4 - Keep going until you've filled all your containers.
For my first batch, I ended up with one large bottle and 2 pint jars of ink. Not bad.

I could have gotten a bit more from my pot, but I was just done messing with it that point.

I felt I had enough for personal use, to give as gifts, and a little to sell as well.
So, How's It Write?
Y'all, I'm lazy, so I just tried them out on some crumby printer paper, but I have pads and pads of fancy calligraphy paper that my mom gave me. I just didn't feel like getting it out.
I started with a brush, because I was also too lazy to get my pens...

The ink is a nice brown color. I found that it layered very well, and would make a very nice drawing ink. It flows well, and dries quickly thanks to the alcohol.
This morning, I went and grabbed a couple fountain pens: a Parker and an Alvin. I loaded them up with ink, and here's the result:

Not too shabby. Again, the color would be darker and richer had I simmered longer and perhaps heat-reduced the ink a little as well, but this is great for sketching! The ink flows well and both examples would probably look a lot better on better paper.
So, I couldn't stand it. I dug out some better paper.
Sorry for the crumby image:

I'm used to black ball points, Sharpies, and dark ink, so this is light to me. However, I don't think it's too light to be useful, and I actually like it a lot. Quality paper makes a difference, but I'm also looking forward to using these pens in my journal and just going Old World on things for a while.
Writing with ink that you made yourself is a really cool feeling.
I'm Set for the Apocalypse
I've ensured that I'll be able to continue my craft even if every pen-maker in the world goes under.
I'd love to hear from you if you tried this out. I really had fun with this process and I'm definitely considering doing it again next year.
UPDATE
I wanted to share a couple of additional things. First, this ink is permanent and will not run if it gets wet. This is important probably only to me. haha
Also, I found cute bottles at my local craft store (A.C. Moore) and wanted to share a picture or two:


The bottles with the hinged lids were $1.29 each. The cork-top ink wells were $3.99 for 3.
I loved this project!
Enjoy This Post?
I hope you'll consider giving me a follow. Here is a bit of my other work:
Recent Vacation Stuff:
Regular Stuff:
- My Help Comes From the Lord Wallpaper
- Why Didn't I Think of That!?! #1 - Art-O-Mat - The Ultimate Upcycle
- Learning WordPress with ProWebWriter - and ongoing series of tutorials
- Social Networks Paying or Trading in Crypto - A Steemit Un-Competition Overview
- Create Snazzy Title Graphics with Canva
- How to Back Up Your Steemit Articles
- Self-Publishing with ProWebWriter on a ZERO Budget - This is an ongoing series with currently 5 parts
- That Time in 2012 When I Saw UFO's!
- Where Are You Sleeping Tonight, Amelia? - I've been known to write a poem...
- Warm Summer South - ...or two


You are amazing. That is a whole heck of a lot of time effort an work.
Add all that to your substantial step by step and photos, holy cow, I'm following you out of shear respect! That gigantic black walnut tree in my backyard will be strictly for the squirrels. But thank you, you are inspirational.
Why thank you very kindly. I appreciate your words and thanks for taking the time to stop by and comment....and for the follow!