Tutorial #7: Shading the Hair - Pencil Portrait Sketching for Complete Beginners - SBD Reward for Best Sketches
This is the seventh tutorial in a series of portrait sketching tutorials for complete beginners. I have been taking a break from Steemit because it's the school holiday and it's hard to be productive when both kids are at home. I think most parents can relate to that. This tutorial is the continuation of the past tutorials. You can check out the rest of the tutorials below.
My Previous Posts - Pencil Portrait Sketching Tutorials for Beginners
Tutorial #1: Pencil Portrait Sketching for Complete Beginners - SBD Reward for Three Best Sketches
Tutorial #2: Drawing Face Outline
Tutorial #4: Shading Areas Around the Eyes
Tutorial #6: Shading the Mouth
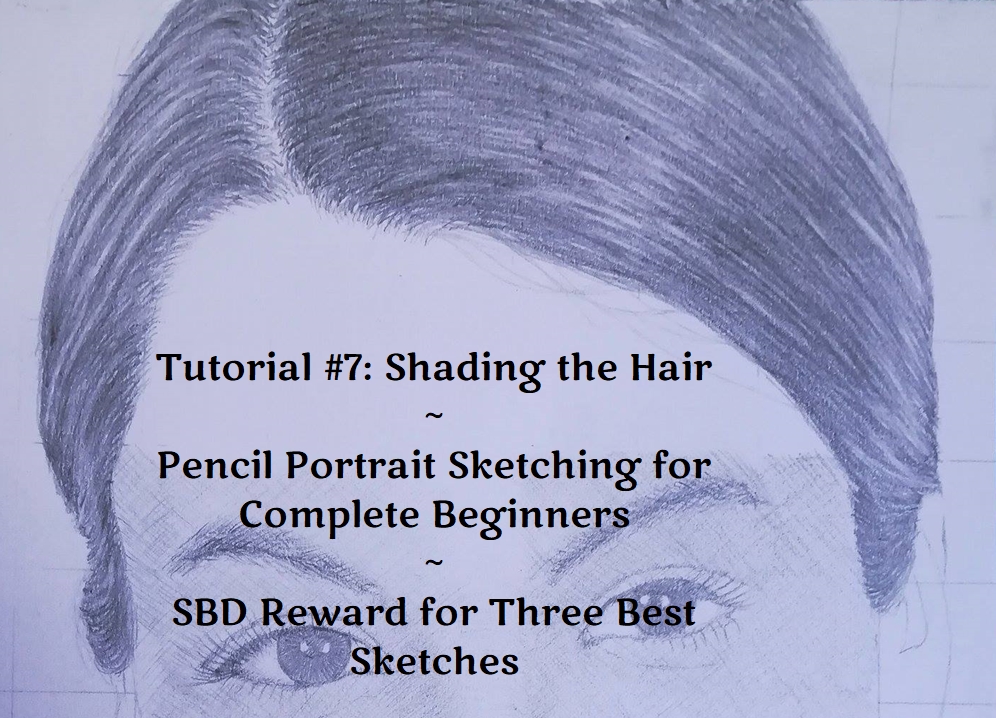
In this tutorial, I will teach you to shade the hair. Shading the hair is a tedious process because you need to draw it strand by strand to achieve that realistic look. You can't simply blacken the whole area or else it will appear flat and look lifeless. Draw each strand from the top of the head to the tip. Don't drag your pencil back and forth because the process is boring and tedious. Be patient and you will achieve the outcome you desire.
In this tutorial, the hair is fairly easy to draw because her hair is straight and tied up in a ponytail.
I used 4B and 5B pencils throughout this tutorial.
So let's begin!
Shading the Hair
Step 1
Draw some lines to create 'partitions'. This will make it easier to draw the hair later on.

Step 2
Draw the hair strand by strand. Make sure each strand is following the curve of the 'partition'.

Step 3
Use your art eraser to erase the hair outline. Next, draw the hair line.

Step 4
Continue to draw the hair strand by strand.

Step 5
Continue to draw the hair strand by strand until all section is covered.

Step 6
Refer to the reference image, use your 5B pencil to darken certain sections of the hair.

Step 7
Use your art eraser to create the highlights on the hair.

Step 8
Draw some errant strands of hair.

Step 9
Draw hair strands on the other side of the head. Make sure the strands are curved.

Step 10
Continue to draw the hair strand by strand.

Step 11
Continue to draw the hair strand by strand.

Step 12
Continue to draw the hair strand by strand until all section is covered.

Step 13
Refer to the reference image, use your 5B pencil to darken certain sections of the hair.

Step 14
Use your art eraser to create the highlights on the hair. Make sure to draw some errant strands of hair.

Step 15
...and the hair should look like this!

So that's it for tutorial part 7. Is it too hard or does it help you to draw better? Please leave your comments below! Thank you.
Note: In the next tutorial we will learn to shade the rest of the face. I hope that one will be the last tutorial but if there are too many images I might have to break them into two posts.
Stay tuned!
NOTE: I have thought long and hard about this. To encourage people to learn, I would like to offer some reward in the form of SBD to 3 people who could sketch the best portraits by the end of this tutorial series. I haven't decided on how much the reward will be though. I am thinking of giving SBD3 to the best portrait, SBD2 to the second one and SBD1 to the third. I know it's not much but I am just a lowly minnow who doesn't earn much yet, unless we have some sponsors or the response is encouraging.
So here are the rules:
- Upvote and resteem this post
- Draw a portrait exactly the way I taught it in this tutorial series (there will be several posts covering different facial features)
- Make a post for your entry (add pencilportraitnoob in the tags). Make sure you spell it correctly.
- At the end of this tutorial series, please link to your post in the comments so that I could find your entry
Is this too complicated? If you are not clear, maybe you can leave me a comment.
Some of my pencil portrait posts on Steemit:
Jerry and Barbie - A Tribute to Meteor Garden On 16th Anniversary
Pencil Portrait of My Mother - Madam Veronica G. Bedindang
Pencil Portrait of My Husband and Son
Pencil Portrait: Luciana Zogbi - A Brazilian Lebanese Beauty
Pencil Portrait: Sabina Altynbekova - The Living Anime-Girl

Welcome back!
Woow.. Wonderful.. Thank your hand please for me :-)
Keep up the good job.
Thank you =)
Love every single one of your tutorials
Thank you. It takes me a lot longer to finish it than I originally planned.
Fantastic!!
Thank you!
This post has received a 1.53 % upvote from @buildawhale thanks to: @bitrocker2020. Send 0.100 or more SBD to @buildawhale with a post link in the memo field to bid on the next vote.
To support our curation initiative, please vote on my owner, @themarkymark, as a Steem Witness
Thanks a lot @bitrocker2020 :)
Nice and useful tutorial ^^ Thanks for share ^^
Thank you @silviabeneforti :)
Congratulations @coloringiship! You have completed some achievement on Steemit and have been rewarded with new badge(s) :
Click on any badge to view your own Board of Honor on SteemitBoard.
For more information about SteemitBoard, click here
If you no longer want to receive notifications, reply to this comment with the word
STOPYou are a great artist, it is good that you are sharing your skills here.
Thank you @positivesteem . I am glad I could share something valuable for the Steemit community. It takes me a long time to finish this though :)
As long as you are able to help others.