Tutorial (Godot Engine v3 - GDScript) - Create lots of Sprites!
.png) Tutorial
Tutorial

What Will I Learn?
This tutorial builds from the last which explained how to move your first Sprite!.
I will now move on to using scripts to create many Sprites on the screen. My intention is to demonstrate how simple and easy it is to create a 'Space Invaders' clone in Godot.
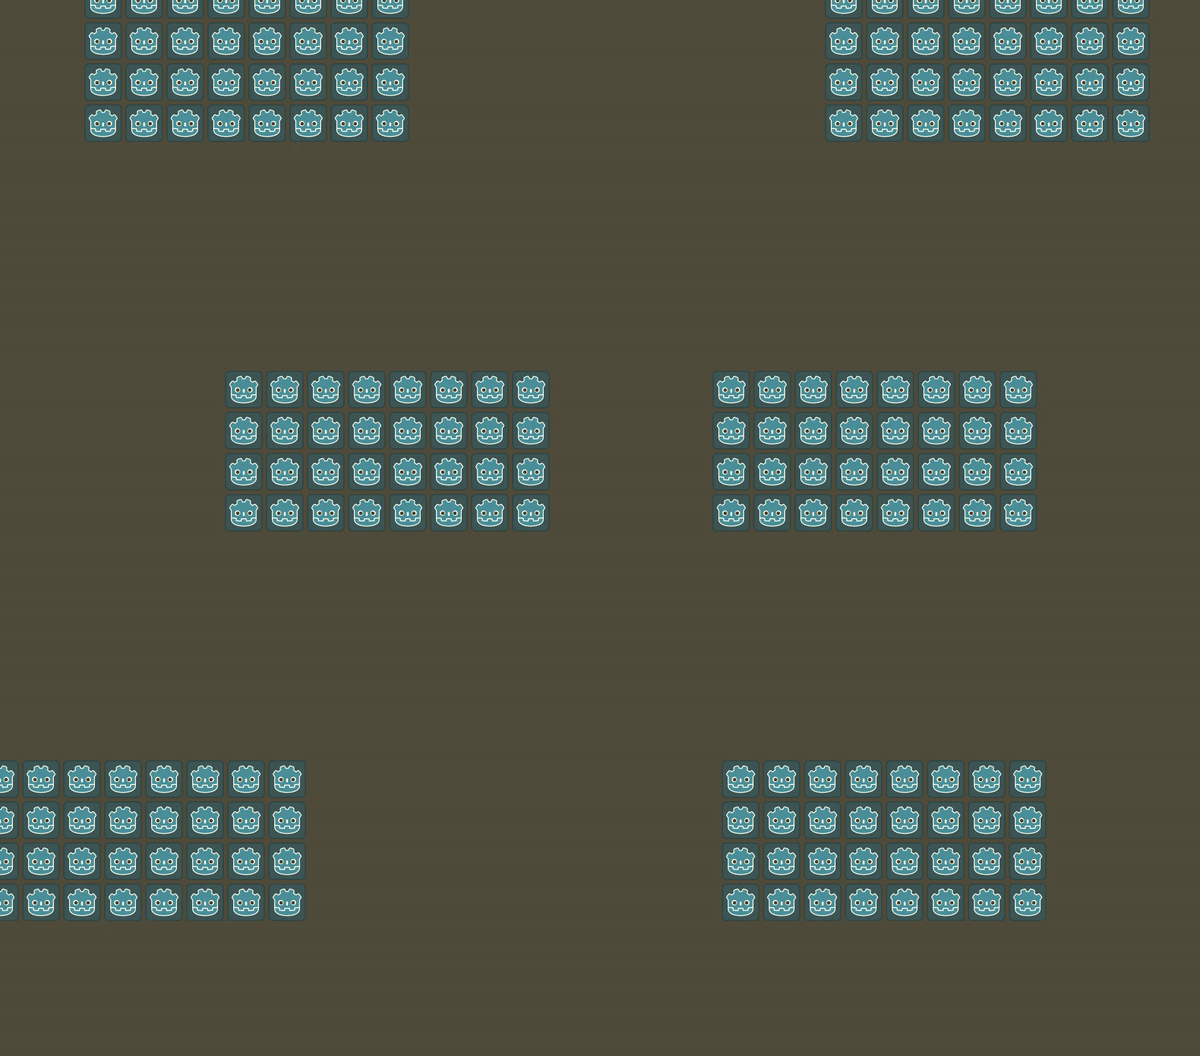
My hope is that seeing how easy this is to do will inspire you to build great games in Godot Engine!
Assumptions
- You have installed Godot Engine v3.0
- You've completed the previous tutorial to move your first sprite and that you now understand how Scenes & Nodes are constructed and how to add Script
You will
- Gain a little insight into the programming mindset
- Learn to create Node Instances
- Add movement to the Invader Scene
- Add formations to the Invaders
- Add Invader instances by Game Scene Script
Requirements
You must have installed Godot Engine v3.0.
All the code from this tutorial will be provided in a GitHub repository. I'll explain more about this, towards the end of the tutorial.
A little wisdom
A good programmer will always explain to a learner that there is NEVER one single, pure/best/true way to program an entire game or solution.
There will always be an alternative way to develop an algorithm, a routine or an implementation!
The beauty and appeal of programming, for me, is that it provides an endless diversity for new solutions to be learnt or invented. Great programmers and academics have studied for years, gathering and learn patterns that best fit certain needs. These will always have trade-offs, for example:
- Simplicity of code, allowing it to be easily understood, can often lose performance traits (not always, but often)
- Code optimised for a highly efficient algorithm can often suffer from ease of understanding, therefore requires more comments, etc
Many programmers have gone mad, purely in the hunt for the BEST solution for a particular need. Others have stalled in their quest, looking for the RIGHT solution.
The ONLY advice I can truly give is that DELIVERING is the most important need in programming.
Develop code and see if it works! If it works, then great! Then go back and check whether you can read and understand it. Is there a need to do so? I.E. If you are never going to change or maintain the code, move on! If you do have a need, tidy and clean until you can; then move on.
I often find myself writing code three or four times, refining it until it meets a balance between the two important needs of Understanding and Performance. I don't suffer, but understand how somebody inflicted with OCD feels and thinks.
As a professional developer, I always have the obligation of ensuring someone else can pick-up my code and work with it. You might not have that requirement! If you don't, please don't become another victim of chasing the BEST way to do something or the MOST optimal way.
I can be found participating in many forums, continually defending GDScript as a great solution for developing in Godot Engine.
There are a lot of new programmers who ask what is the FASTEST language to use. Often, they have a preconceived idea that they must use C#, Python or some other programming language.
YES, in the right hands, these compiled languages are superior, but that comes at a cost! They are more complex to use, as you need to learn how to compile and link them into Godot. Whereas, GDScript enables a programmer to INSTANTLY do things! It has been specifically designed with ease of adoption.
Furter to this, in capable hands, it can be made to do TRULY amazing things for which these other languages aren't going to provide any additional benefit. After all, a fast-moving sprite will not gain any benefit by using language that executes faster!
I touched on something important above:
- Interpreted language: GDScript is interpreted at execution time, i.e. your code is read and then converted into instructions that the processor understands
- Compiled language: C#, C, Python and other languages are compiled to be ready for the processor, before execution time
Compiled languages will often be significantly faster in operation than Interpreted ones at execution time. However, as in Physics, to gain those efficiencies, there is a cost. That cost is learning how to compile the code, how to interface (connect it) to the Godot Engine and understanding how to trace errors when bugs are found.
By all means, at some stage, you should consider learning to use one or more of these languages. However, GDScript has the amazing benefit of being integrated directly with the entire environment, i.e. it knits well with the Nodes that are available. You can jump straight in and make a Sprite move, or process some textural input in a Text Input control or move the scene based on the user's press of a button.
GDScript has also had optimisation already applied to it! Although it will always be inferior to a compiled language, it will always do what it should, very well.
Don't get caught up in the need to have to highly optimised before learning to walk, run and skip!
Phew! The could all be construed as a rant, but that's not my intention. I need you to understand that programming should be fun, enjoyable and INSTANTLY rewarding; just what kids of today demand!
Create a Node Instance
We are going to jump straight into the new game Project. Please:
- Create a new Project, I've called mine Space Invaders (part 1)
- Create a new Scene
- Add a Node as the Root of the Scene, I've called mine Game
- Save the Scene (I saved mine in a sub-folder named Game)
- Ensure you add Game scene to your Project Settings > Run > Main Scene, so that it will run on execution
You should be looking at the following:
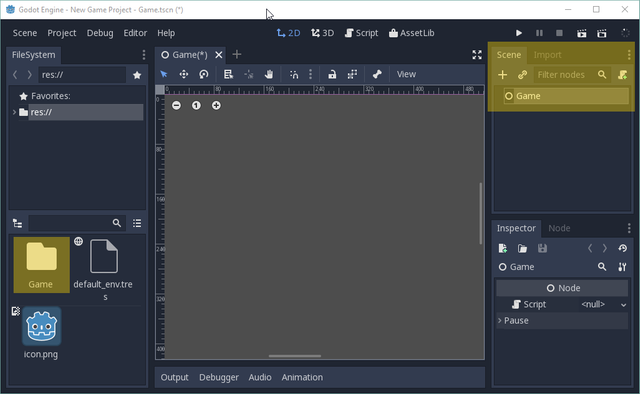
As hinted in the previous article, Scenes can be created and then instanced as nodes into other Scenes; therefore we are going to build the following design:
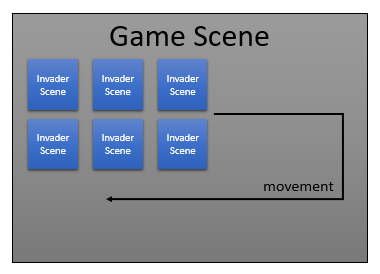
You've already created the Game scene. Our next task is to create the Invader Scene. It is best design to create a Scene for each object of your game, in that way, you can change its appearance, intelligence and properties independently of the Game scene itself.
Please create a new Scene and add a Sprite as the Root Node:

I've added a Sprite as the root rather than as a Node in this Scene because it is the most appropriate type for our purposes. This Scene is going to represent a Space Invader. In it, the Texture shall be assigned, along with logic to instruct it on how to move. The Root maybe any Node type, therefore Sprite is the right choice
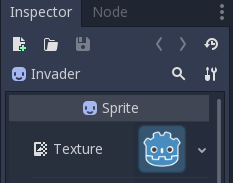
Please rename it as Invader:
Given the previous tutorial has taught you, please:
- Assign the default Godot Engine icon.png as the Sprites texture
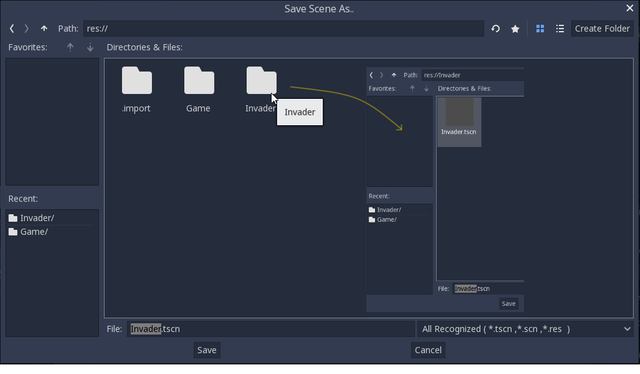
- Save the Scene as Invader into the file system, it would be sensible to save it in a folder called Invader:
By placing the Scene into its own folder, you could copy the entire folder and copy it into a new Project, thereby reusing it. It is a great habit to separate your creations into folder structures.
Leave all other settings as-is and let's return back to our empty Game Scene by clicking the tab:
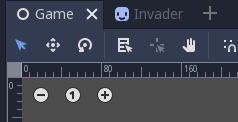
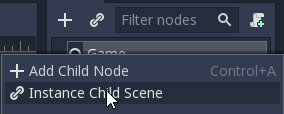
We can now create an Instance of our Invader Scene. This is achieved by either:
In my opinion, the menu is the BEST option, because it forces you to pick the Node to be the parent!
You'll now be presented with the Open a File dialogue window:
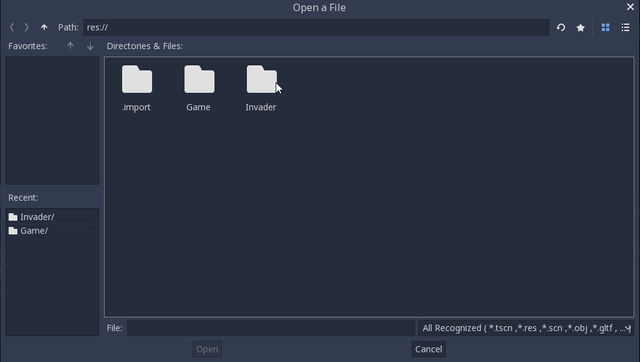
I'm hoping you are thinking ahead of me! Go ahead, select the Invader folder and then your saved Invader.tscn Scene file
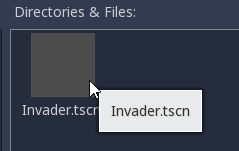
Scenes, Nodes and other object types in Godot may be different file formats, much like images may be JPG, PNG or GIF for example. Just default the types until you need to understand them.
You should now see that your Invader has been added as a child node to the Game Node and your Invader is showing in the 2D screen.

Drag the Invader to an appropriate position on the screen.
Execute the game. What happens?
... nothing particularly special. The Invader is shown in the middle of the screen.
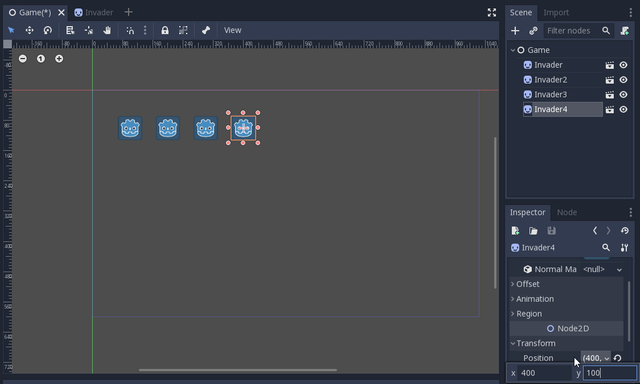
Try duplicating the Invader Node or add more instances. You'll find it is very easy to add more as you require via the editor. I've added four, with positions of (100,100), (200,100), (300,100) and (400,100):
These are starting to look like the traditional Space Invaders cluster; if you squint and pretend the logo images mock them.
Add movement to our Invader Scene
Return, by clicking, the Invader Scene tab.
What we want to do is add movement, via script, to the Invader.
In fact, the script borrows from the last; however, these are our new requirements:
- Move continuously right
- When the right border is reached, reverse direction and drop the height of the image
- Move continuously left
- When the left border is reached, reverse direction and drop the height of the image
- Repeat the last four steps until the bottom of the screen is reached
- Stop movement
Please add a new script to your Invader Sprite and copy in this code (remember to fix those tabs):
extends Sprite
var screenWidth = ProjectSettings.get_setting("display/window/size/width")
var screenHeight = ProjectSettings.get_setting("display/window/size/height")

var move = true

var direction = Vector2(8, 0)

func _process(delta):
    if move:
        position += direction
        checkForBorderHit()
        checkForBottomReached()

func checkForBorderHit():
    if position.x < 0 or position.x >= screenWidth:
        direction = -direction
        position.y += 64

func checkForBottomReached():
    if position.y >= screenHeight:
        move = false
You should see this:
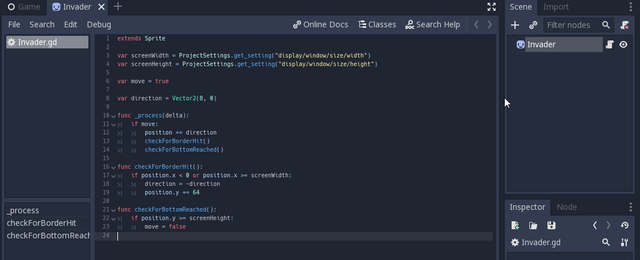
Before I explain the code, try running it. You should see the following:
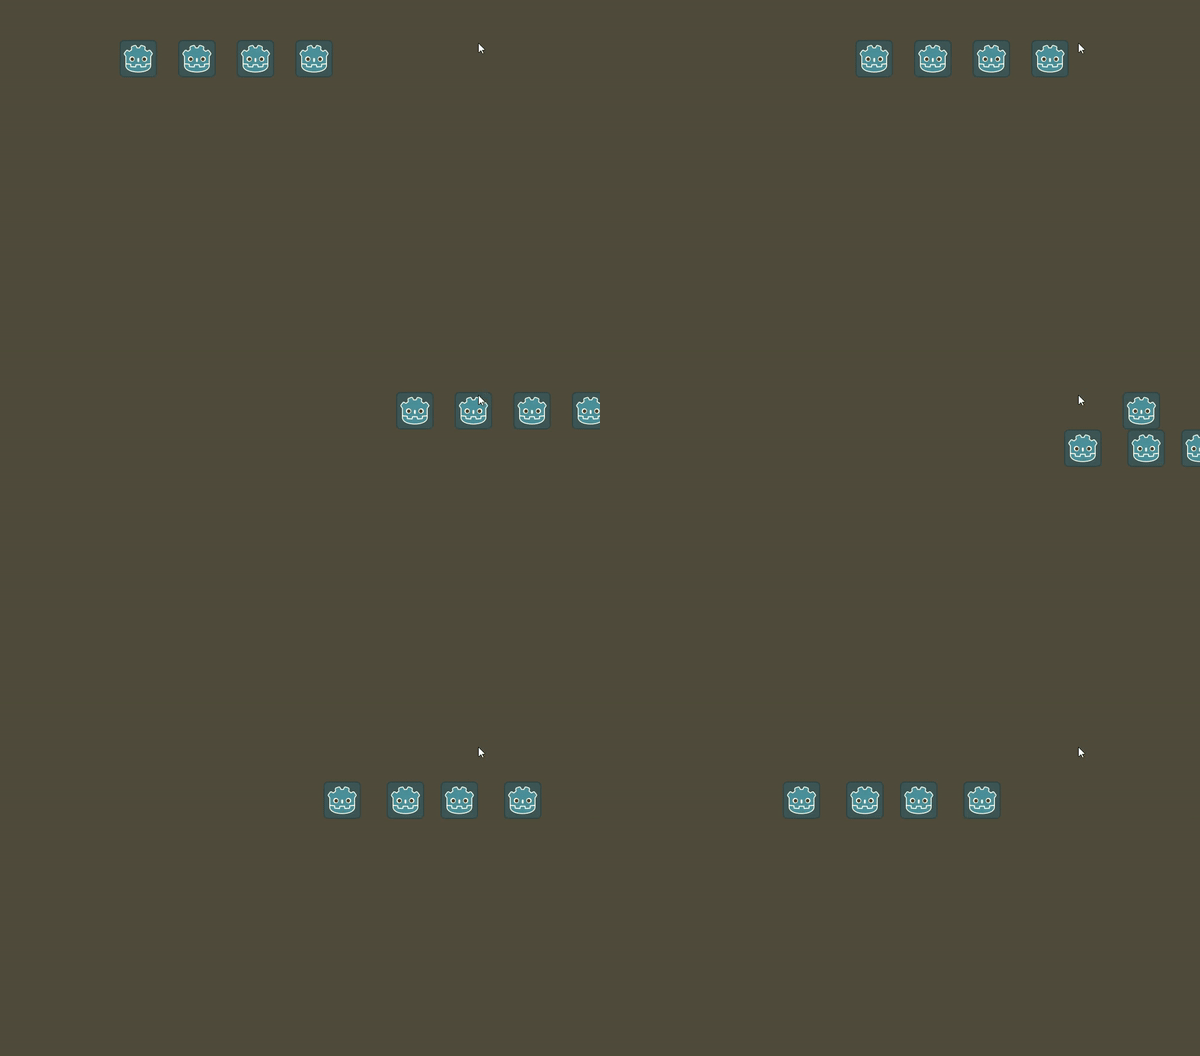
The Invaders aren't moving quite as expected, looking more like the centipede in the old arcade classic rather than the formation of
. However, they are moving as instructed and stop when they get to the bottom of the screen.
Let's analyse the script:
- Line 1 - Extends the Sprite
- Line 3 & 4 - These retrieve the Width and Height from the Project Settings (as per the previous Tutorial)
- Line 6 - A new flag (boolean) variable named move and prepopulated with true. This flag is used to determine whether the Sprite should move on the next process call. When set to false, it stops
- Line 8 - The direction Vector2, as per the previous Tutorial
- Line 10 - All movement is driven by the regular call of the Sprite's process function by the engine
- Line 11 - This checks whether the 'move' is allowed, i.e. has the Invader reached the bottom of the screen yet?
- Line 12 - As per the previous tutorial, simply add the current direction to the Sprite's position. The direction variable will either be (8,0) or (-8,0); i.e. left or right
- Line 13 - Call the function checkForBorderHit (see line 16)
- Line 14 - Call the function checkForBottomReached (See line 21)
- Line 16 - Declaration of the checkForBorderHit function
- Line 17 - Check the Sprite's x position to the left (0) or right (screenWidth) borders
- Line 18 - If the position has crossed a border position, reverse the direction
- Line 19 - As well as reversing the direction, drop the Invader by its height (which is 64 pixels)
- Line 21 - Declaration of the checkForBottomReached function
- Line 22 - Check if the Sprite's y position has reached or gone over the window height
- Line 23 - If it has, set the move flag to stop any further movement
As you can see, a simple script for ONE Invader Scene is all that is required to power an entire fleet of Invaders. By defining your game objects as individual Scenes, you gain control and power of the engine.
Add formations to the Invaders
The original Space Invaders flew in a formation. When any of the pack touched a border, they all reversed in direction as well as dropped their height.
This therefore implies their design provided a way for them confer. In our first version of the code, each Invader is an individual!
Let's give each a voice and an ear to hear! When one touches a border, it will shout to the others to reverse direction.
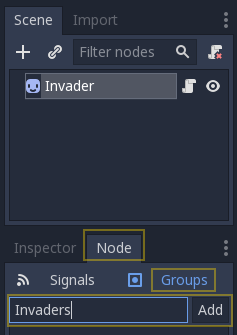
This is easily achieved by adding a Node Group found in the lower Inspector pane.
The Node tab can be found in the lower Inspector panel.
Select the Groups tab, rather than Signals.
Enter an arbitrary (any) name for your group, I called mine Invaders (the name is used in the script, so remember it!)
We need to change the checkForBorderhit function in the Invader script. In fact, we are going to split it into two functions:
func checkForBorderHit():
    if position.x < 0 or position.x >= screenWidth:
        get_tree().call_group("Invaders","reverseDirection")

func reverseDirection():
    direction = -direction
    position.y += 64
In my editor, it looks like this:
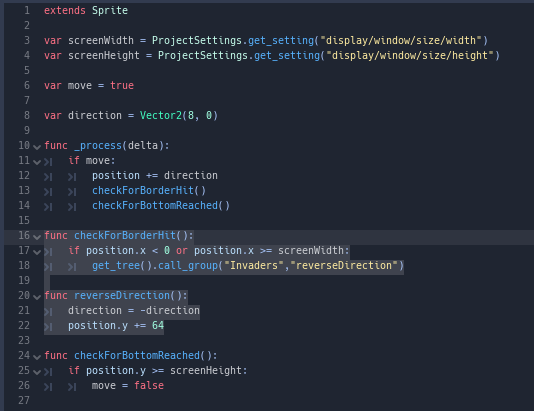
Let's run it now! ...that's much better
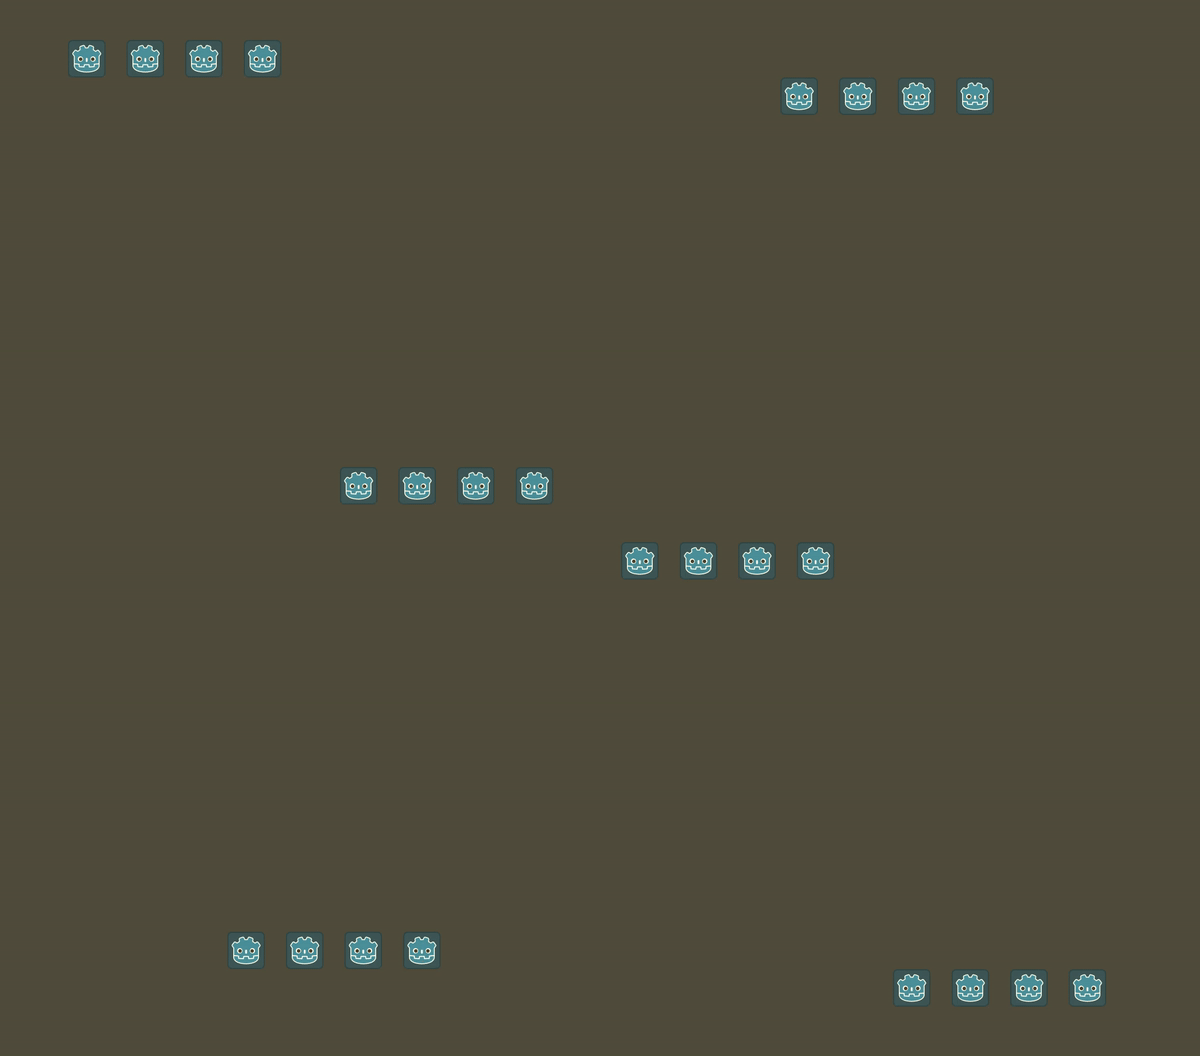
Each time an Invader touches a border, it shouts to all the others to reverse direction and they obey! There's nothing better than a little co-operation. Let's analyse the new code:
- Line 16 - Function declaration for checkForBorderHit
- Line 17 - Check the Sprite's x position for each of the two borders
- Line 18 - If a border is hit, find the top level Tree and then call its function to "call_group". This has two parameters, the first being the group name (which you created in above, so make sure this matches) and secondly the function the Node should call when called.
- Line 20 - A new function declared for reverseDirection as called by the Line 18 invocation
- Line 21 - The standard reversal of the direction value
- Line 22 - Add the height of the Sprite (64 pixels) to the Sprite's current y position (i.e. make it drop)
Again, this should demonstrate the power of GDScript. With just a few additional lines, we now have a co-ordinated formation on our hands! Every Invader is linked to the others. They each move and communicate. If you were to remove one, the rest would continue to function!
In Space Invaders, this is one of the fun parts of the game. If you wipe the left-hand Invaders, it takes the formation longer to reach a border and therefore drop. In that game, they gradually speed up! Hence the difficulty steadily increases.
Add Invader instances by the Game Scene Script
My formation of Invaders were added manually to the Game Scene:

However, we can use the power of GDScript to do the creation of the formation for us!
Please go and remove all Invaders that you have in your Scene panel. I.E. you should just have the Game Node.
Now attach a Script to the Game Node (Remember to select an empty template) and then paste in this new code:
extends Node

const INVADER = preload("res://Invader/Invader.tscn")

const formation = Vector2(8, 4)

func _init():
    for y in range (formation.y):
        var newPos = Vector2(0, y * 70)
        for x in range (formation.x):
            newPos.x = x * 70
            var invader = INVADER.instance()
            invader.position = newPos
            add_child(invader)
As can be seen in my editor:
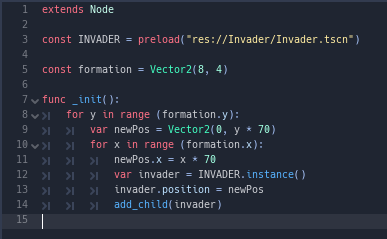
Let me explain what this is doing first:
extends Node
Line 1: Extend the standard Node.
const INVADER = preload("res://Invader/Invader.tscn")
Line 3: Create a constant called INVADER and preload in the Scene. The parameter is the full path to your Invader scene created earlier. Make sure you include or remove the folder. A constant is another variable, but it CANT be altered in anyway, thus internally, the script can optimise its use
const formation = Vector2(8, 4)
Line 5: Create a second constant, which is a Vector2 of 8 horizontal by 4 vertical size, which is 32 sprite positions!
func _init():
Line 7: When any Node or derivative (i.e. Sprite) is created, the init function will be called for initialisation. This function can therefore be used by any Node to initialise important variables or states within its class at execution time.
for y in range (formation.y):
Line 8: Use a for-loop to loop from 0 to the Y-1 value of the formation Vector2 (declared above).
var newPos = Vector2(0, y * 70)
Line 9: Create a new Vector2 variable called newPos and assign a zero X position and take the current loop value for y and multiply it by 70. This results in all positions being created down the screen at 70 pixel intervals.
for x in range (formation.x):
Line 10: Use a for-loop to loop from 0 to X-1 value of the formation Vector2 (declared above).
newPos.x = x * 70
Line 11: Update the newPos vector in the x coordinate, setting it to the loop X * 70, to evenly space horizontally.
var invader = INVADER.instance()
Line 12: Create a new invader variable and using the preloaded scene, create a new Instance.
invader.position = newPos
Line 13: Set the position of the new Invader instance.
add_child(invader)
Line 14: Finally, add the new instance to the Game Node's children, therefore it will be rendered onto the screen. If you remove or comment (place a # at the start of the line) this line out, the Invaders will not appear!
Let's now run it!
.... oh! That didn't go as I expected:
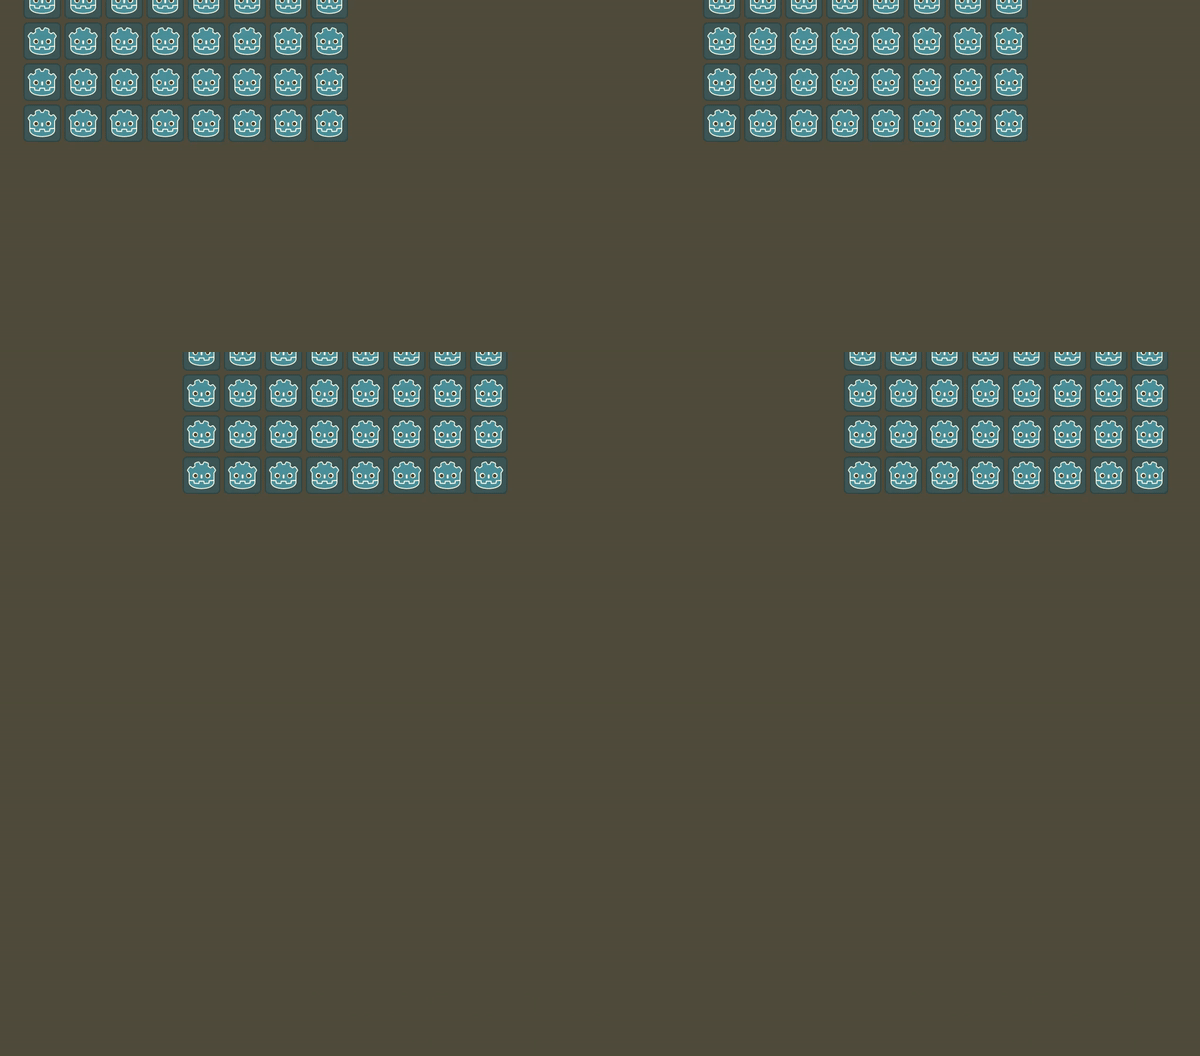
The Invaders move as a formation, but then disappear out of sight!
This is the frustration of programming and a good lesson; hence why I left it in.
Often, you'll sit puzzled. Why did that happen? Why is it broken? ..and most often, you'll think, the engine is BROKEN.
...however, it seldom is. Computers are DUMB. You tell it to do something and it will always do as told (unless you use random events; i.e. like rolling a dice).
In our example, what happens is the first Invader that touches the border shouts to all the others, "Hey reverse direction". They all then drop by the height and switch direction. However, the three Invaders in that same column have ALSO encroached on the border, so they each shout, "Hey reverse direction". We now have CARNAGE! The event of all four touching the border, at the same time, results in four height drops. As you hopefully witnessed, that sees them disappearing off screen, confused, angry and very DEAF :-)
What we need to do is change the logic in the Invaders. Upon receiving an order to 'reverseDirection', they must ignore any more orders until they start moving again.
This change may look complicated, but it is very simple:
Between the move and direction variables, insert line 8:
var recentlyReversed = false
This variable will remember if a reverse order has been ordered recently
Add the last line to the _process function:
func _process(delta):
    if move:
        position += direction
        checkForBorderHit()
        checkForBottomReached()
        recentlyReversed = false
After the Invader completes it move, it resets the recentlyReverse flag to no, therefore it is now ready to receive its first cry of "reverseDirection"
The reverseDirection also needs to be amended:
func reverseDirection():
    if !recentlyReversed:
        recentlyReversed = true
        direction = -direction
        position.y += 64
The condition has been added to check whether recentlyReverse has been set to false. If it is, this is the FIRST call of reverse direction, therefore it should be actioned. The very next step is to record that this was called, thereby BLOCKING any additional calls until the process function has complete.
My editor looks like this:
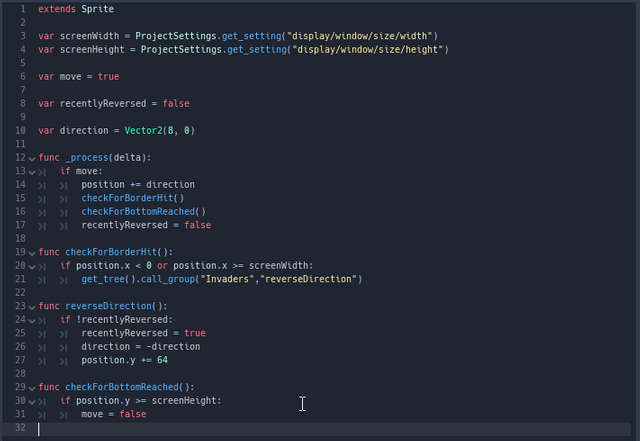
Let's rerun this!

... that's MUCH better. The logic fix has curred our woes... BUT we do find a new issue has cropped up!
The Invaders are falling off the bottom of the screen. Why???? I'm going to leave you to ponder over this and I will address it in the next instalment.
Finally
My next article will fix the issue of the Invaders falling off the bottom of the screen, and will move on to adding some pretty images and introduce EARTH's only defence! You'll learn how to move it about and fire at the pesky invaders.
Please do comment and ask questions! I'm more than happy to interact with you.
Sample Project
I hope you've read through this Tutorial, as it will provide you the hands on skills that you simply can't learn from downloading the sample set of code.
However, for those wanting the code, please download from GitHub.
You should then Import the "Space Invaders (part 1)" folder into Godot Engine.


Thank you for the contribution. It has been approved.
Amazing contribution; an example for everyone writing tutorials! Whenever I see one of your contributions it always puts a smile on my face, it's a pleasure reading them!
You can contact us on Discord.
[utopian-moderator]
Hey @amosbastian, I just gave you a tip for your hard work on moderation. Upvote this comment to support the utopian moderators and increase your future rewards!
Thank you Amos. I try to please.
Updated, because I forgot to detail the Game Node script! Now included
Hey @sp33dy I am @utopian-io. I have just upvoted you!
Achievements
Suggestions
Get Noticed!
Community-Driven Witness!
I am the first and only Steem Community-Driven Witness. Participate on Discord. Lets GROW TOGETHER!
Up-vote this comment to grow my power and help Open Source contributions like this one. Want to chat? Join me on Discord https://discord.gg/Pc8HG9x
Great tutorial! I noticed something odd though, if I duplicate the sprite and change its offset instead of dragging it to its new location, I don't get that initial centipede-like movement. The sprites jump down all at once without the extra group code. It's very strange.
Hi, just about to jump on a plane, so it's going to be a week. I'm not quite sure what your problem is exactly. When you duplicate a sprite, it rememers ALL the details of the last; including position. However, you also have to remember that a top level sprite at (100, 100) will be that on screen (or global 100x100 as it were). If you have a child sprite at (100, 100), it will actually be globally (200, 200) because it is transformed from the first; unless you set its global_position.
The centipede movement requires even more trickery (if you look at the Verlet examples as a starter). I've been working on, but failed to have ready, the 'waves' of invader attack. Once ready, this should help to explain how it all works. But you'll have to wait a few weeks.