Google Assistant on Raspberry | Part 1: Installation process

What Will I Learn?
- How to install Google Assistant on Raspberry
- How to configure USB microphone and speakers on Raspberry
- How to install Raspbian on an SD card
Requirements
- Raspberry Pi 3
- USB microphone
- Speakers
- Power source
- Micro SD card with adapter
- Led diode (optional)
Difficulty
Intermediate
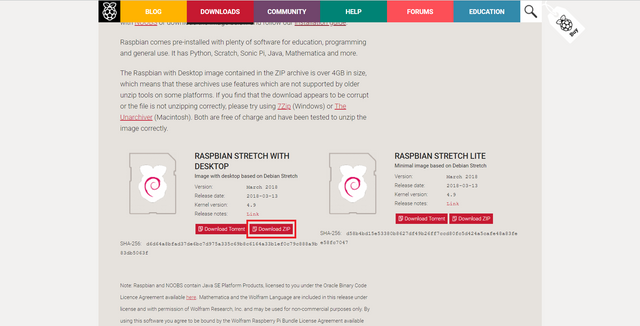
Installing Raspbian
- Download latest Raspbian with desktop (zip version)
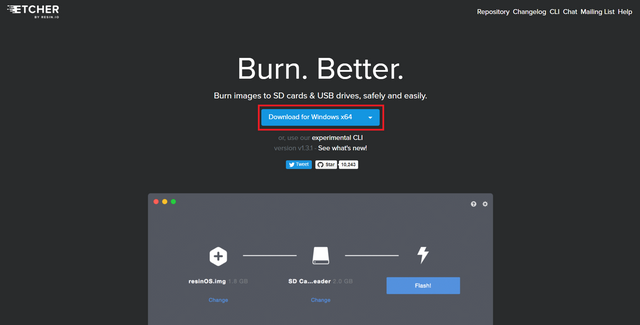
- Download and install Etcher
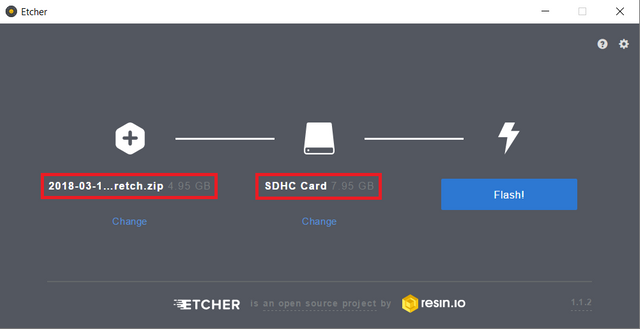
- Connect the SD card to the computer, open Etcher and select the zip image and the card. Then click "Flash"
- When flash is complete, you can disconnect the SD card from the computer and connect it to the Raspberry. Next, connect the mouse, keyboard, monitor and power source to the Raspberry (you can do the whole process via ssh as well)
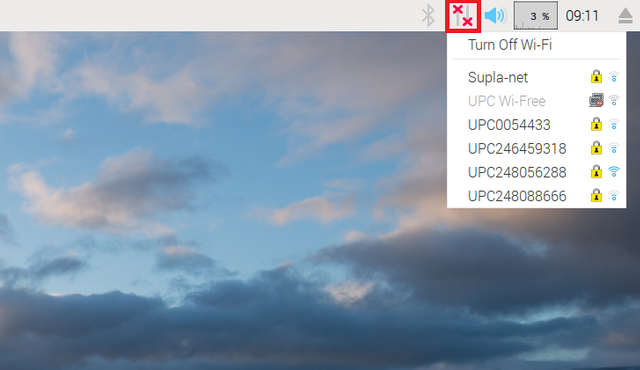
- Set up internet connection on your Raspberry. You can configure it in the upper right corner


Installing Google Assistant
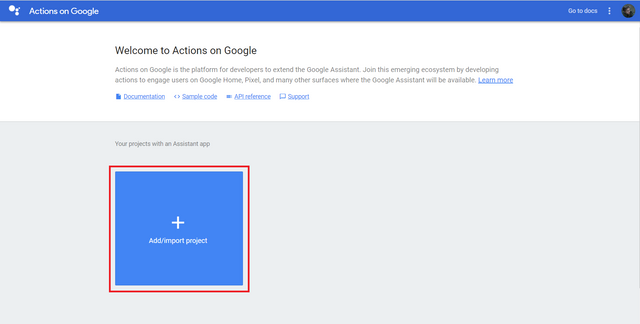
- Go to the Google Actions Console and create a new project
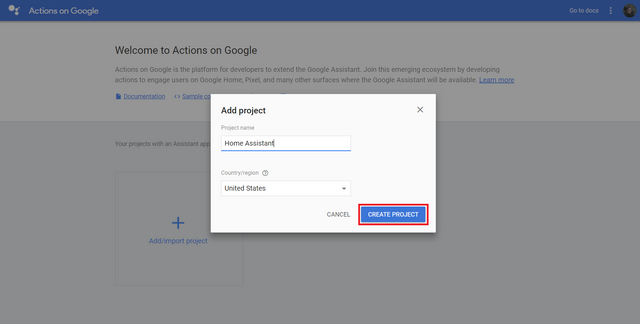
Name your project and click create
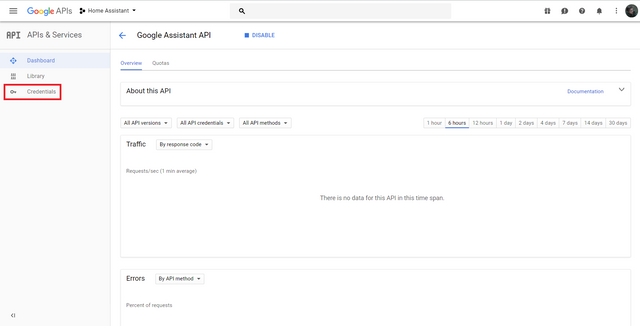
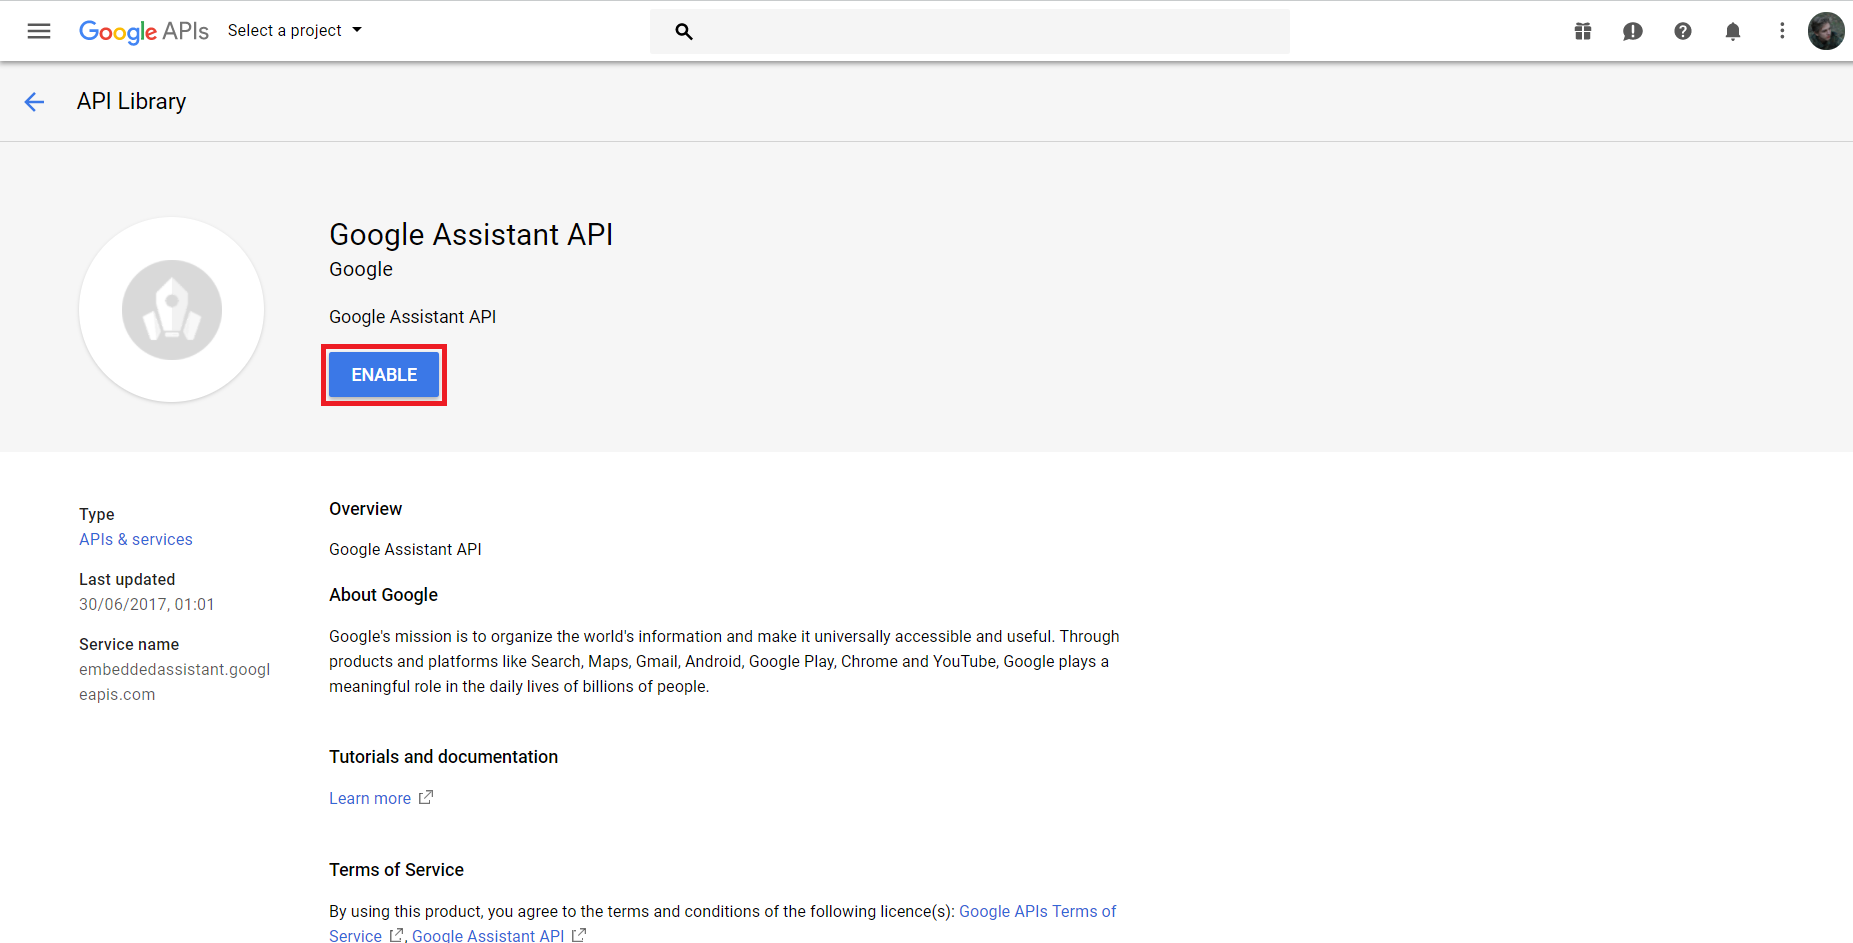
- Enable the Api (you will have to select your project)

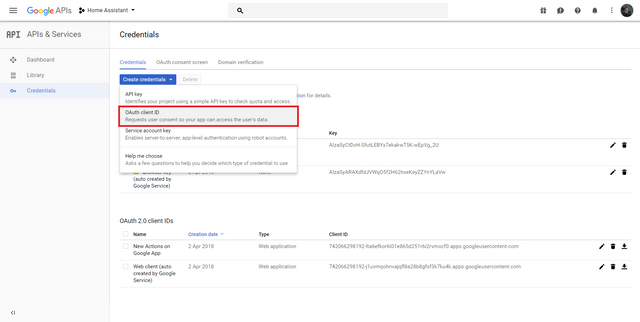
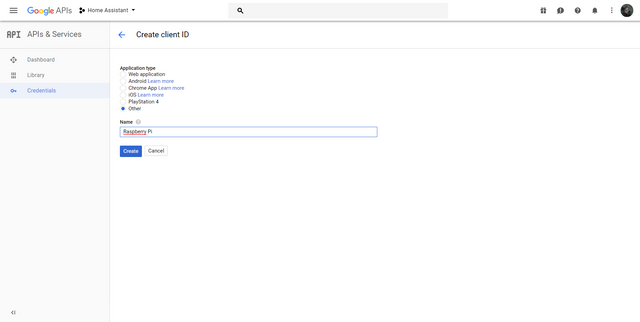
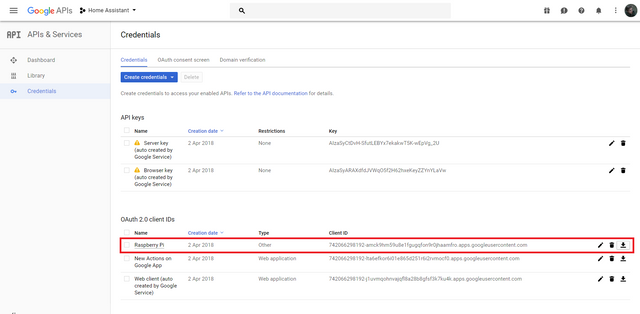
- Go to Credentials and create new OAuth client ID
Select "Other" and name your device
- Download the ID file that you have created
Copy it to the /home/pi directory and rename it to assistant.json

- Open new terminal window and clone required Github repository


git clone -b voicekit https://github.com/google/aiyprojects-raspbian.git ~/voice-recognizer-raspi
- Go into the Assistant folder
cd ~/voice-recognizer-raspi
- Follow these commands one by one to install required software (this may take a while)
scripts/install-deps.sh
sudo scripts/install-services.sh
- Copy Assistant demo file into new “main” file
cp src/assistant_library_with_local_commands_demo.py src/main.py
- Make assistant starting automatically during system startup
sudo systemctl enable voice-recognizer.service
Microphone and speakers configuration
- Open new terminal window and locate your USB microphone. You will need card number and device number
arecord -1
- Locate your speakers. You will need card number and device number
aplay -1

- Create new file named .asoundrc in /home/pi directory
cd /home/pi/.asoundrc
and fill it with below configuration but replace card number and device number for mic and speaker with numbers you got in previous steps. Save and quit file by pressing Ctrl+O and then Ctrl+X
pcm.!default {
  type asym
  capture.pcm "mic"
  playback.pcm "speaker"
}
pcm.mic {
  type plug
  slave {
    pcm "hw:<card number>,<device number>"
  }
}
pcm.speaker {
  type plug
  slave {
    pcm "hw:<card number>,<device number>"
  }
}

- Adjust playback and recording volume
alsamixer
- Check if speakers work properly. To exit the test press Ctrl+C
speaker-test -t wav
- Record audio clip to check if microphone works properly
arecord --format=S16_LE --duration=5 --rate=16000 --file-type=raw out.raw
- Replay your recording
aplay --format=S16_LE --rate=16000 out.raw
If you don’t hear anything make sure you used right card number and device number in .asoundrc file and sound level has been configured properly in alsamixer
Running Google Assistant
- Open new terminal window and go into the Assistant folder
cd ~/voice-recognizer-raspi
- Activate Virtual Python Environment
source env/bin/activate
- Run the Assistant
python3 src/main.py
You should get web link in terminal, click it to grant necessary permissions to the Assistant.


- Now, you should be able to say “Ok Google” and start a conversation. There is possibility that the volume of the Assistant will be very low. Say "Ok Google, set volume to max" to fix it
- Try "Ok Google, reboot" to check if Assistant is still working after reboot
Connecting led indicator diode
You may additionally connect a led diode to GPIO25 to show Assistant status. Here is a circuit diagram:

Here is how it works:
Thank you for reading. Hope this tutorial will be helpful.
Posted on Utopian.io - Rewarding Open Source Contributors
Thank you for the contribution. It has been approved.
You can contact us on Discord.
[utopian-moderator]
Hey @deathwing, I just gave you a tip for your hard work on moderation. Upvote this comment to support the utopian moderators and increase your future rewards!
Thank you very much!
Hey @neavvy I am @utopian-io. I have just upvoted you!
Achievements
Community-Driven Witness!
I am the first and only Steem Community-Driven Witness. Participate on Discord. Lets GROW TOGETHER!
Up-vote this comment to grow my power and help Open Source contributions like this one. Want to chat? Join me on Discord https://discord.gg/Pc8HG9x
nie ukrywam ze nie wiele z tego zrozumialem, ale widac od razu sporo wartosciowej wiedzy. swietna robota. upvoted
Dzięki :D
Thank you for this! I haven't got a spare RaspPi3 at the moment, but when I get my hands on one I'll definitely be giving this a go.
I hope that my tutorial will help you. I am going to make two more tutorials about custom actions and custom wake word so stay tuned ;)
I'll get my RaspPi ordered asap so I can follow along with the next two, I can't wait! I missed out on the AIY project that came with a copy of the RaspPi Mag a while back, so now I get to make up for it.
I was summoned by @neavvy. I have done their bidding and now I will vanish...
A portion of the proceeds from your bid was used in support of youarehope and tarc.
Abuse Policy
Rules
How to use Sneaky Ninja
How it works
Victim of grumpycat?