How to use the Django authentication system - Part 1: logging in and logging out.
@coffeesource.net is a creation of @kit.andres and @ecoinstant, who are building out new tools upon the Steem Blockchain and promoting development through utopian.io within their communities.
Django comes with a users authentication system that allows us to simply implement the basic functionalities of login, password recovery, password update and logout. In this tutorial we will explain how to implement two of these functionalities using this useful module. We will use the django_base repository, that has the basic code to start a new Django project using docker, and whose building process is explained in this link. In this tutorial we'll include the login and logout functionalities and their usage. In the next post, we'll include the password recovery and password update features.
django_base is a repository that includes the basic configurations necessary to start a new Django project. We will use this repository to implement the Django authentication system, so the first thing we must do is to clone it from the terminal:
$ git clone https://github.com/roadhousestudio/django_base.git
After cloning, in the terminal, we'll move to the root of the project:
$ cd django_base/
We build and spin up the Docker container with the following commands (Remember that Docker should be installed and running):
$ docker-compose build
$ docker-compose up
And there it is! We have our Django project ready to start implementing the authentication system.
1. Installation
When we start a new Django project, the authentication system is installed by default. Likewise, we will confirm the configurations that must be set to use this module in the file settings.py.
First, in INSTALLED_APPS we need to add the entries django.contrib.auth and django.contrib.contenttypes:
INSTALLED_APPS = [
    'django.contrib.admin',
    'django.contrib.auth', # Includes the predetermined users modules and the authentication system.
    'django.contrib.contenttypes', # Includes pedetermined permission system.
    'django.contrib.sessions',
    'django.contrib.messages',
    'django.contrib.staticfiles',
    'app',
]
In the MIDDLEWARE, we need to add the entries SessionMiddleware y AuthenticationMiddleware:
MIDDLEWARE = [
    'django.middleware.security.SecurityMiddleware',
    'django.contrib.sessions.middleware.SessionMiddleware', # Manages user sessions in every request.
    'django.middleware.common.CommonMiddleware',
    'django.middleware.csrf.CsrfViewMiddleware',
    'django.contrib.auth.middleware.AuthenticationMiddleware', # Permits us to associate users and requests using sessions.
    'django.contrib.messages.middleware.MessageMiddleware',
    'django.middleware.clickjacking.XFrameOptionsMiddleware',
]
Once we confirm this configuration, we run migrations to create the database. We can run migrations in two ways; by way of the following command:
$ docker exec -it djangobase_web_1 python manage.py migrate
Or by stopping the container with ctrl + c and spinning up another one with the following command:
$ docker-compose up
Everytime we run this command, it will run the pending migrations, because it is defined this way in the docker-compose.yml file.
2. User Model
The django.contrib.auth module that we previously added to the INSTALLED_APPS of our application in the app/settings.py file enables Django's default user model, which we can import in the following way:
from django.contrib.auth.models import User
This model comes with a few basic fields to represent a User in a web platform, such as: username, first_name, last_name, email, password, among others. We will use this model to create our user system.
3. Login form
In the folder app/templates/ we create the folder auth/, in which we will save the templates of our user authentication system. Inside this folder we create the template login.html. Next, we define a url in the app/urls.py file where we can see the login view that the Django authentication system has by default. We edit the file app/urls.py in the following way:
app/urls.py
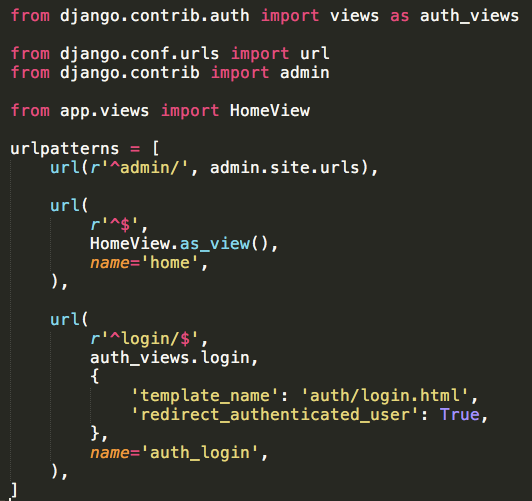
Source Code
As we can see, we define the new view auth_login, in which we will use the pretermined Django view that we import from the module django.contrib.auth, we recommend using the template auth/login.html and that when an authenticated user arrives to this url, they would be redirected to a screen that we define in our app/settings.py file a little further on. If we navigate to the url localhost:8000/login.html, we will only see an empty screen; this is because we have not added content to the app/templates/auth/login.html form. We'll edit it in the following way:
app/templates/auth/login.html
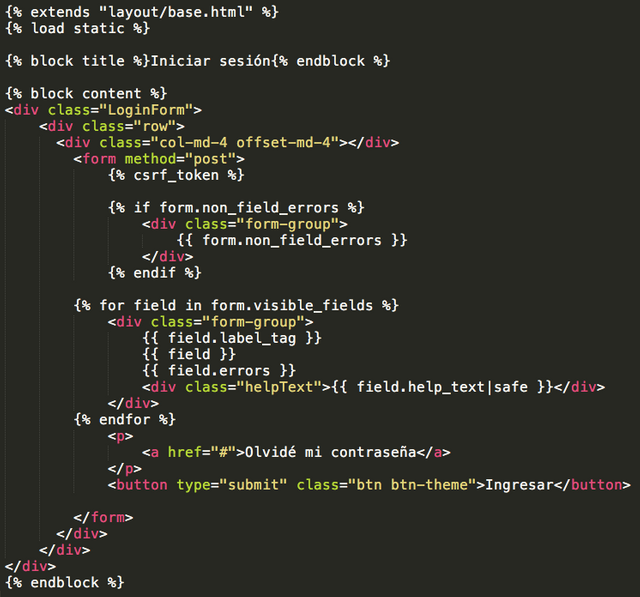
This file that we extended from the file app/templates/layout/base.html, and thanks to the view of login included in Django that we are using, we can obtain an authentication form with the fields username and password.
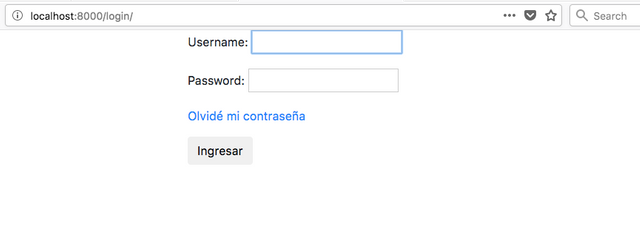
We are also using the predetermined classes from Bootstrap 4, so we can see our form with some basic styles. Now let's go the the settings.py file and add the following configuration, where we will define the authentication url so that when, for example, a user tries to access a url for which authentication is required, they are redirected to this url, and we will also define the url to which users will be redirected once they have completed the authentication form correctly:
LOGIN_URL = 'user:auth_login'
LOGIN_REDIRECT_URL = 'dashboard'
We proceed to create the url for the dashboard and its respective visualization. In this file app/urls.py we define the file path:
from app.views import DashboardView
url(
    r'^dashboard/$',
    DashboardView.as_view(),
    name='dashboard',
),
Keep in mine that we need to import the class DashboardView in app/urls.py, and create the views file app/views.py. This view we can define in the following way:
app/views.py

Then we continue by creating the form app/templates/dashboard.html. Inside of this form we are only going to put the following content:
app/templates/dashboard.html
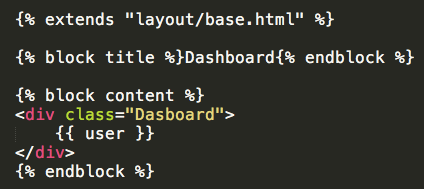
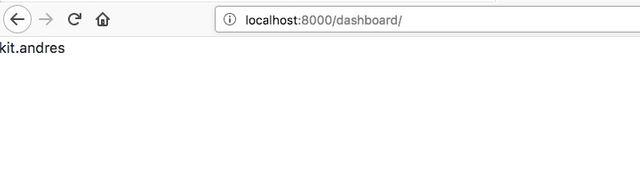
As we can see, in Django's template system, if the user is authenticated we can obtain their instance in the predetermined variable user by calling {{ user }}, so when a user authenticates successfully, what will be shown is the blank dashboard with the username.
As a test, we create a user superuser with the following command:
$ docker exec -it djangobase_web_1 python manage.py createsuperuser
We will be asked for a username, an email, a password, and then we will go to our authentication form and enter the username and password that we just created into the form. If the authentication process was correct, the user will be shown a screen like the following, which represents our empty dashboard with the username of the authenticated user in the upper left corner.
4. Signing Out
Once the user authentication process has been implemented successfully, we will proceed to implement the logout functionality. This is much simpler, because we do not have to define a template; it is enough to indicate which url we want the user to be redirected to when they close session.
We define the logout url in the app/urls.py file in the following way:
app/urls.py
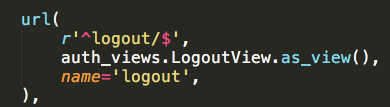
Source Code
Let's eliminate the variable {{ user }} from the file app/templates/dashboard.html and add a navegation bar with predetermined styles from Bootstrap in the app/templates/layout/base.html file, in the following way:
app/templates/layout/base.html
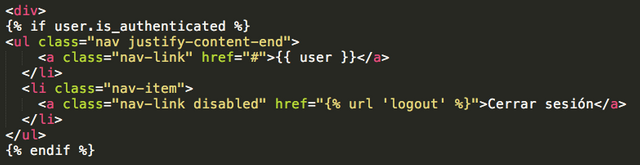
Source Code
Now, when we reload the url localhost:8000/dashboard/ we should see the navegation bar with the username of the authenticated user and the link for Log Out (Cerrar Sessión).

In the app/settings.py file, we will add the following configuration:
LOGOUT_URL = 'logout'
LOGOUT_REDIRECT_URL = 'home'
Where we specify that logout is the url address for logging out, and that when a user logs out, they will be redirected to the url home (localhost:8000). As we did in the app/templates/layout/base.html file, where we defined that the href attribue of the 'log out' link was the url logout, when we click on this link, the user session will be closed and the user will be redirected to the following screen:

And so we have now implemented the first two basic functionalities of the Django authentication system, which enable users of our application to authenticate themselves on the platform and log out. In the next tutorial, we will see how to implement the features to recover password and update password.
Have a great weekend everyone! Love and Light to All!
Posted on Utopian.io - Rewarding Open Source Contributors
Thank you for this post!
Congratulations @coffeesource.net! You have completed the following achievement on the Steem blockchain and have been rewarded with new badge(s) :
Click on the badge to view your Board of Honor.
If you no longer want to receive notifications, reply to this comment with the word
STOPDo not miss the last post from @steemitboard:
Thank you for the contribution. It has been approved.
You can contact us on Discord.
[utopian-moderator]
Hey @coffeesource.net I am @utopian-io. I have just upvoted you!
Achievements
Suggestions
Get Noticed!
Community-Driven Witness!
I am the first and only Steem Community-Driven Witness. Participate on Discord. Lets GROW TOGETHER!
Up-vote this comment to grow my power and help Open Source contributions like this one. Want to chat? Join me on Discord https://discord.gg/Pc8HG9x
Congratulations @coffeesource.net! You have completed some achievement on Steemit and have been rewarded with new badge(s) :
Click on any badge to view your own Board of Honor on SteemitBoard.
For more information about SteemitBoard, click here
If you no longer want to receive notifications, reply to this comment with the word
STOPDo not miss the last announcement from @steemitboard!
@coffeesource.net you were flagged by a worthless gang of trolls, so, I gave you an upvote to counteract it! Enjoy!!
Good document! Expect more!
If you are interested to read some posts about travel, read my blogs:
https://steemit.com/travel/@leftbank/bacelona-the-masterpiece-by-gaudi
https://steemit.com/life/@leftbank/christmas-to-meet-with-the-best-of-new-york-1
https://steemit.com/life/@leftbank/christmas-to-meet-with-the-best-of-new-york-2
Congratulations @coffeesource.net! You have completed the following achievement on the Steem blockchain and have been rewarded with new badge(s) :
Click on the badge to view your Board of Honor.
If you no longer want to receive notifications, reply to this comment with the word
STOPDo not miss the last post from @steemitboard:
Congratulations @coffeesource.net! You have received a personal award!
Click on the badge to view your Board of Honor.
Do not miss the last post from @steemitboard:
Congratulations @coffeesource.net! You have completed the following achievement on the Steem blockchain and have been rewarded with new badge(s) :
Click here to view your Board of Honor
If you no longer want to receive notifications, reply to this comment with the word
STOPDo not miss the last post from @steemitboard: