Swordmaking in details : from bytes to bronze #2 , sand-casting a bronze pommel for a longsword
Swordmaking is not only complicated, it is also time consuming and fraught with risks, both in the sense that you may harm yourself during the process, but also because a small error at a critical point in the process will probably destroy your work.

So to make swords you will have to be both patient, careful, skilled at every part of the process , and knowledgeable about the tools and materials that you work with.
To not make this post far to long, I have chosen to cut it up into two parts. If you want to read the first part about designing and 3d-printing the pommel, look here.
When the master has been printed and readied, it is time to do the actual casting (if you are new to casting a master in this context is just the model from which the mold is made). The master can be reused several times, and usually I will tweak it every time it has been used to make it just that little bit better.
This will be things like sanding or filling problematic places. Sometimes I will reprint the whole thing but more often, I will just modify the existing master.

First I place one half of the master on a flat surface (this is why the master must be made in two halves). I then pour sand over it, I sift the sand to make sure there are no lumps, which may ruin the casting.
The sand I use is something called Delft casting sand. It is a mixture of burned clay and oil. There are numerous other possibilities for casting sand, you can even make your own. I just use this because it is convenient and not too expensive.

When the master is completely covered, I press down the sand and add more until the flask is filled. Flask is another fancy word, it just means the frame that holds the sand. Mine is made from wood, but I want to make one out of steel later on, so it wont burn when I pour in the hot metal.
I use a hammer to compress the sand as hard as possible. The harder it is pressed, the less chance there is of the sand coming loose, when i remove the master.

Then I turn the flask over and put on the other half. I now place the other half of the master exactly on top of the first. I have made holes and pins to guide the two halves. I cover everything with talkum powder and repeat the process of pouring and compacting sand on top.

Now it is time to remove the master and this is delicate work. There is a big chance that I might ruin the mold during this process and have to start over. I very gently lift the upper half of the flask away, and carefully remove the two halves of the master. if all goes well I will end up with something looking like the above.

Here comes the really nice part. There needs to be a hole in the pommel for the swords tang to go through. I could just drill this afterwards , but it would take forever to get the right shape using files afterwards, so instead I make sure it is part of the casting process.
This is where the strange pin in the master comes in.
I have cut a piece of sacrificial scamolex plate in the shape of the tang, and because of the pin, there is a place for it to rest. This means that, as the metal flows into the mold, it wont be able to fill this space, effectively creating a cavity of the exact size and shape as the tang.
This is really nifty and effectively makes this a 3 part mold instead of a 2 part mold.
Scamolex is a heat resistant (but fairly soft) material that is used as liner in high temperature ovens or as cover on your soldering table. I buy it in plates of app 60 X 40 X 3 cm. and it is easy to cut into simple shapes like this one. If i wanted more complex shapes I could cast them in gypsum, but for this, scamolex is just fine.
I also carefully cut grooves for the metal to flow in, and the air to escape.

Again very carefully, I assemble the mold and clamp it shut. I carry it to my smelting table and start to heat up the bronze. I have a graphite crucible the size of a teacup in which I smelt the bronze. Once it is smelted I pour the molten metal into the sandmold as quickly and smoothly as possible. The pour must be done in one fluid motion or the might form cavities in the casting and it will be ruined.
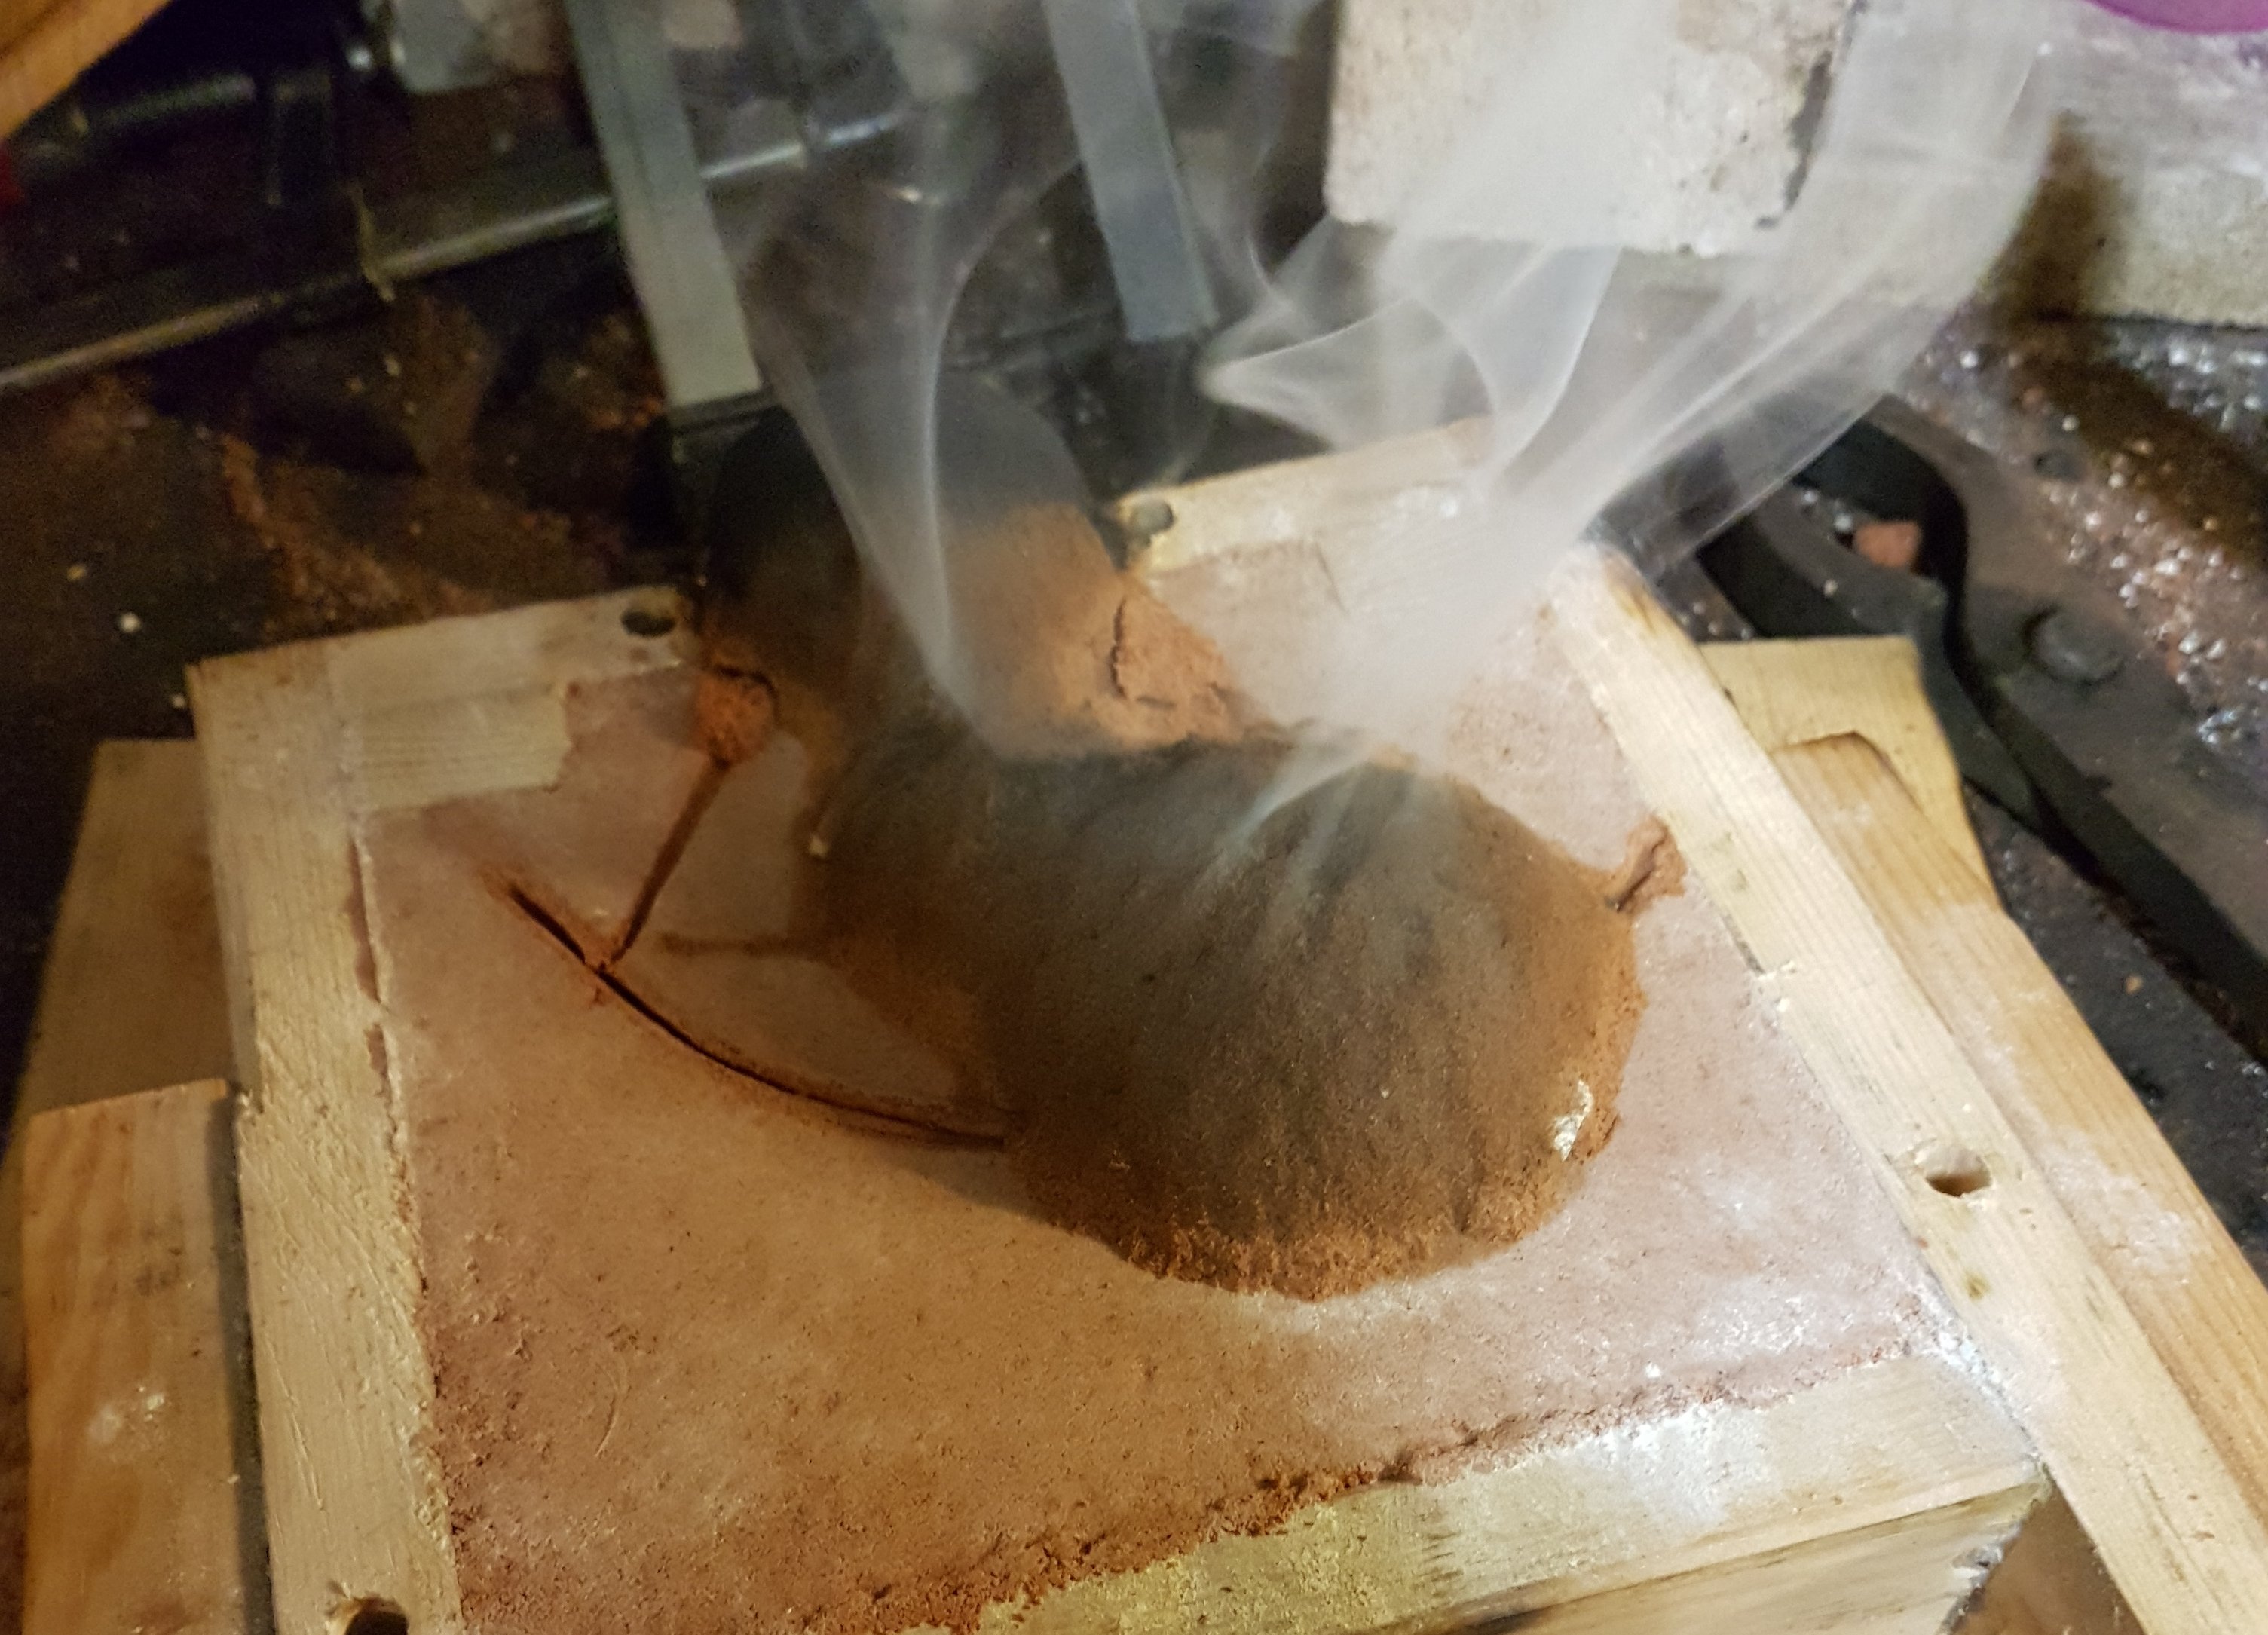
After a few moments , when the visible part of the pour is no longer glowing read, I can gently lift off the top part of the mold. As you can see, the sand around the casting remains in place. That is because it has been burned hard . This part of the sand cannot be reused, and has to be discarded afterwards. The rest of the sand is put back in the bag when it has cooled sufficiently. It gives of a lot of fumes, so adequate ventilation is a must.

A few moments later, I can grab a pair of pliers and lift the casting free of the mold. At this point it is still a few hundred degrees, so I dip it in water to cool it. The hot sand that still surrounds the casting react violently with the cold water and most of the sand simply cracks off, with a lot of sizzling and crackling. It is important to keep the casting under the surface until it stops sizzling or I risk being spattered with very hot mud.
then I give it a scrub with a metal brush and the casting part is done.

I clean the rest of the burned clay of using a combination of brushing, rinsing in water, and leaving it in my ultrasound cleaner (a vat with water and some kind of harsh alkali soap, with an ultrasound vibrator inside). Then I cut off the sprues using a jewelers saw, and grind down any imperfection before polishing and mounting it on the sword.

Im EvilHippie, a compulsive creative and jack o' trades. If you want to know more about me, check out my introduction post here
If you like what you see, feel free to upvote, follow and resteem
or you can check out these recent posts
part 1 of this post
The grind
Male Model
Forging swords
The Draw
Straight
Very nice! I have been thinking a lot about putting together a foundry. One of these days.
Sandcasting is a nice place to start. you basically just need a crucible, a fire(i use gas) and something to use as a fflask for the sand. investment casting is of course more precise and all but you will need much more equipment to started on that.
Indeed. I will probably start out building a little more advanced setup than what you absolutely need. My dad built a pretty great bronze pouring setup that uses dipped shells, and it gave me some ideas I am pretty excited about. I am planning to build the whole thing on a trailer and have it set up with an assembly line style heating and pouring system. I have a propane tube style forge that should be able to double as a furnace for the crucible with a few modifications. I am sure I will make a post about it when I start building. I did investment casting to make a ring once. I had a cobbled together centrifuge and a vacuum chamber and all that. It was an interesting process.
Congratulations! This post has been upvoted by SteemMakers. We are a community based project that aims to support makers and DIYers on the blockchain in every way possible. Find out more about us on our website: www.steemmakers.com.
If you like our work, please consider upvoting this comment to support the growth of our community. Thank you.
Ma che figata!! Scusami ma questa dovevo scriverlo in italiano.
Un saluto, nicola
Thanks , Thats ok, I got it i think :-)
Your post adds insight and knowledge