Gabriella Image Retouching and Editing Workflow Part 1
Introduction
Further to my previous tutorial using a different photo of Gabby here is another tutorial where I am to go from start to finish. In this case I am going to do it in 2 parts since the post length was getting too long. In this first part I will just cover basic adjustments in Lightroom and blemish removal (mainly) in Photoshop. If you are unfamiliar with any of these techniques I would suggest going back to my previous tutorial mentioned above and these other 2 tutorials: Quick Portrait Retouching in Lightroom and How to Fix Damaged Photos in Photoshop.
In the second part I will use some of the techniques I covered in my tutorial on black and white conversion in Nik Silver Efex Pro 2.
Lightroom Edits
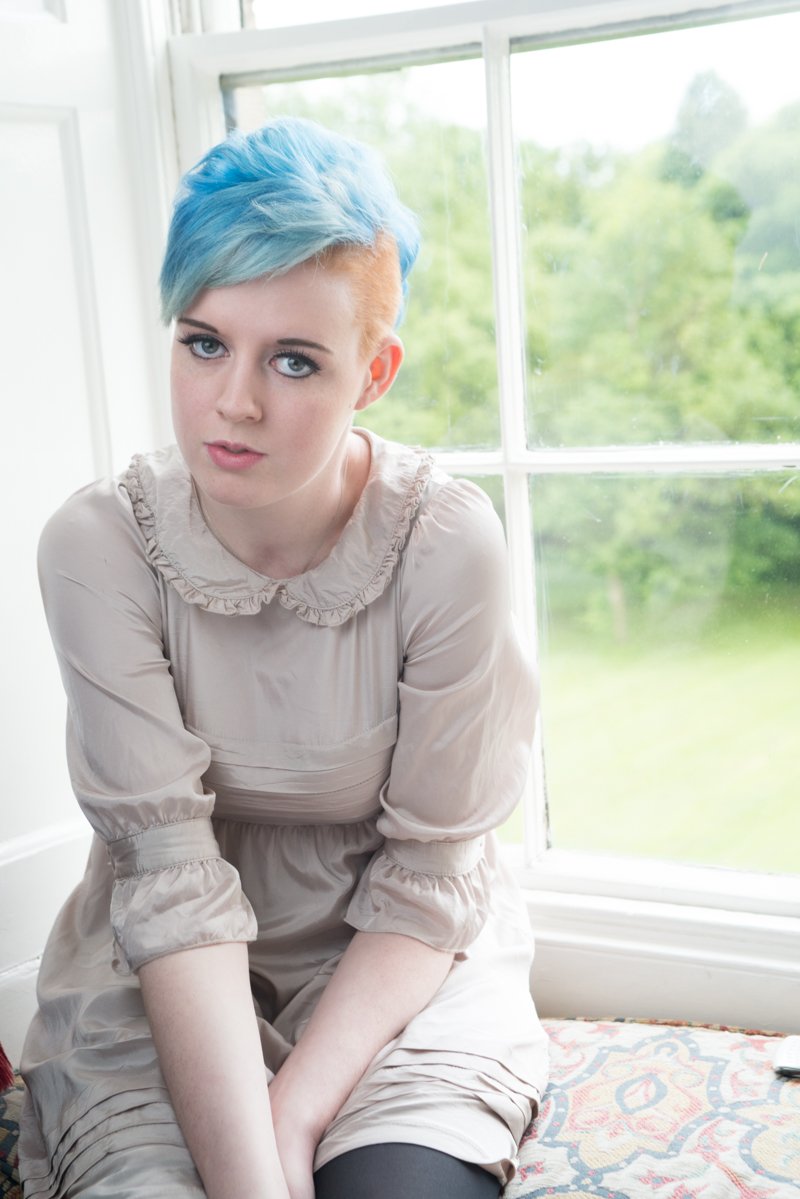
Here is the initial .NEF or RAW image in Lightroom. It looks a bit dull.
Exposure Adjustment

So I am going to increase the exposure a little to + 0.70. There is some mild clipping of whites in the histogram but I am not too concerned about that.

Some Quick Blemish Removal
I'm also going to use the Spot Heal tool to do some basic blemish removal. This isn't absolutely necessary because I'm going to be doing more blemish removal in Photoshop. There are a few things that stand out and are fine to remove using the more basic LR tool. For example the piercing in Gabby's ear stands out because she isn't wearing an earring in this ear. So I've removed that.

The Spot removal tool is the large circle to the right of the crop tool symbol (9 part rectangle).
Now I'm ready to Open the Image in Photoshop. So I right click on it Edit>Edit in Adobe Photoshop CC and that opens it in a new Photoshop window.
Photoshop Editing

The first thing in PS is to create a new layer Cmd(Ctrl in Win)+Shift+N is the shortcut to do this. I am going to name the new layer Skin.


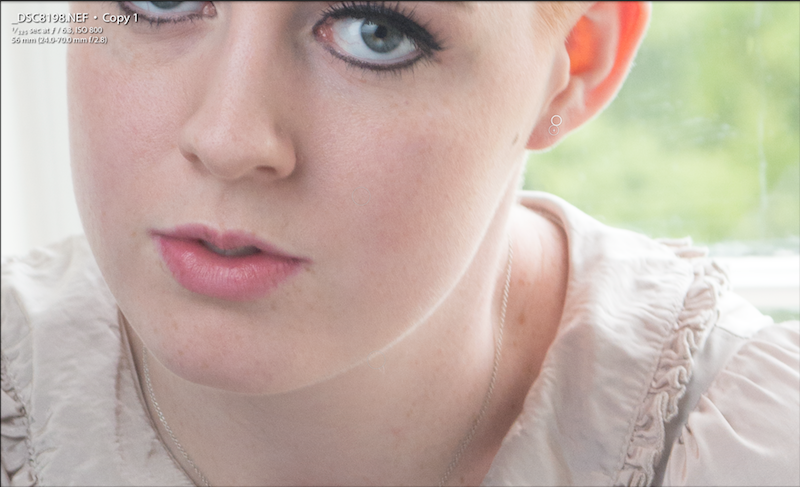
I'm mainly going to use the spot healing brush tool to remove blemishes. This comes down to subjective judgement but as I've said before you don't want to remove too much as you will lose skin detail. It doesn't matter quite as much for a photo like this compared to say an extreme close up shot of the face where overdone retouching will just look plain weird.

One of the ways to do this and decide what to remove and what to keep is to look at the colour of blemishes. I tend to remove large red blemishes as these tend to be signs of inflammation. Leave smaller ones as that is a part of natural skin texture. I also leave any brown marks as these are freckles and moles and tend to add character to the face and skin. Nobody, no matter how great their skin is, is free from these so completely removing them can look odd.

Keep Zooming in and out to get an overall impression of the face.

Here I can see the face doesn't really need any more work.

Normally I wouldn't remove the blemishes on the arms very much but on the zoomed out photo they are distracting from the face.

Due to the distraction that they were creating I've removed more blemishes than I would normally on the arms. If you feel you have gone too far you can always use a layer mask to paint them in or out depending on what you want to do. You can also reduce the opacity of the entire layer. Since this is not a photo where the arms are the main subject it really is not so important. So I will just leave them like this (below).

Save and Reopen in Lightroom

Here is the zoomed out view. The photo looks done to me. So I will save it and close Photoshop. This will take me back to Lightroom. This means that I have a basic copy of the colour photo that has been retouched and I can use as a basis for more creative changes.

If I want to change it again I will either create a virtual copy first (just right click and it is in the main menu) or when using an external editor like PS or SEP2 I will select the option to "Edit a Copy with Lightroom Adjustments". This way I will always have the base retouched version of the colour photo to go back to if I need it.

For part 2 of this I will take this photo and do a black and white conversion in Nik Silver Efex Pro 2.
The Final Photos


Before After
The difference here is quite subtle and difficult to see at this small size. I have added larger versions below so you can see it more clearly.
Large Versions
Original:

Edited and Retouched:
If you like my work please follow me and check out my previous photography work and tutorials @thecryptofiend - hope you enjoy.
Technical Information:
- Nikon D800 Camera
- Sigma 24-70mm/2.8 lens, Natural light with a reflector and window backlighting. Camera Settings image below.
- Adobe Lightroom CC and Photoshop CC for processing.
- Model is Gabriella Kennedy.

(Verification for me here: http://www.aapicture.com/about-me)
Wow, very well done. You have obviously been doing this for awhile.
I'm not much of a photograph editor, but I am certain many folks will find this useful! Thanks for taking the time to share this with our community. :)
Thanks. I've been doing it for a few years with large gaps in between as it is a hobby. I think you will find if you try the editing you will get better really quickly. There are only a few tools you really need Photoshop for. The vast majority of stuff can just been done in Lightroom. Let me know if you need advice or have some things you would like me to write about.
Very interesting, you can see the differences between both pictures, the formatted one is much lighter too making the photo a lot clearer
Yes that's because of the change in exposure.
I like it, I'm not good with things like that but you made the tutorial easy enough for me to underrstand
It's just a matter of trying it out a few times and you'll get the hang of it.
Very useful post. May be I'll try this hard processing sometime (hard for me).
Thanks. It's not that hard just a matter of practise.
Another great tutorial, thank you.
Thank you:)
Again, very informative post. Lovely, too! Your models are so pretty and interesting to look at.
Thank you:)
Very thorough tutorial. Thanks!
@kus-knee (The Old Dog)
Thank you.
excellent tutorial
Thank you:)
Easy to follow, fantastic stock used... nothing bad to say, fantastic Lightroom tutorial. While I'm quite good in Photoshop, Lightroom still gives me some problems. Thanks!
Thanks for reading. Glad you found it useful.
Nicely done. Excellent post.
Thank you:)
Awesome tutorial! It's really cool to see the before and after images. Beautiful!
Thank you:)