Gabriella - Evolution of an Image from Camera to Photoshop
Introduction
Continuing on from the previous tutorial style I though it would be useful to cover how an image evolves from the original RAW file to final finished and corrected file.
TLDR: The Finished Image VS the Original Side by Side

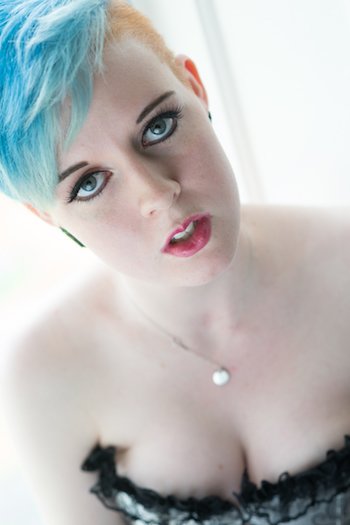
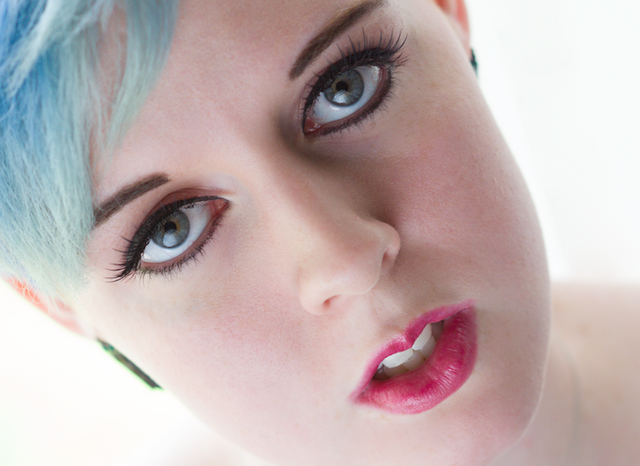
The Final image is on the left and the original image is on the right. You can also see a large version of the final image at the bottom of the post.
The original image is already pretty good and only needs very minor corrections for blemishes, colour balance etc. - using the right kind of lighting and lenses helps with this - as well as the model having good skin and makeup.
The equipment used was my Nikon D800 camera with Nikon 85mm/1.8 lens shooting wide open.
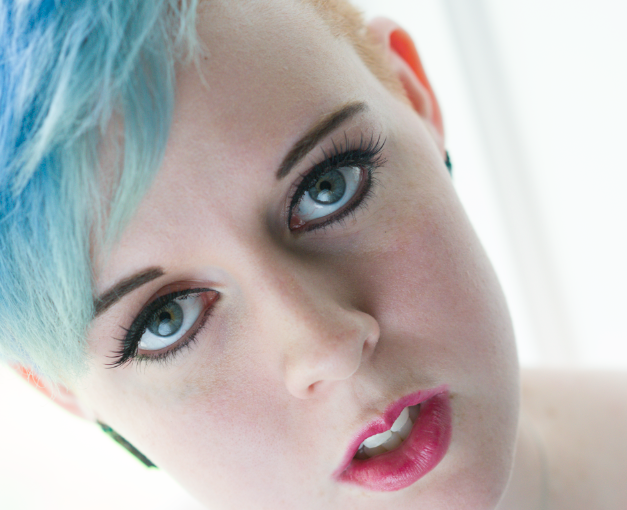
The model here is Gabriella Kennedy. She was backlit using the window behind her and a reflector held in front for front lighting and highlights in the eyes.
Basic Skin Retouching in LR and Photoshop
I have used the spot removal tool in Lightroom to remove some minor blemishes which leaves me with the image below. I have described use of this in more detail in my previous tutorial.
Basic skin retouching to remove blemishes in Photoshop.
Larger version to show this.
The difference is subtle but I don't want to go too far and remove too much skin detail. I'm just using the spot healing brush tool as detailed in my previous photo repair tutorial. This photo is already pretty blemish free so doesn't need anything more advanced.
Temperature Adjustment
Detail to show the difference. The colour seems off. So I'm going to do a colour balance adjustment here.
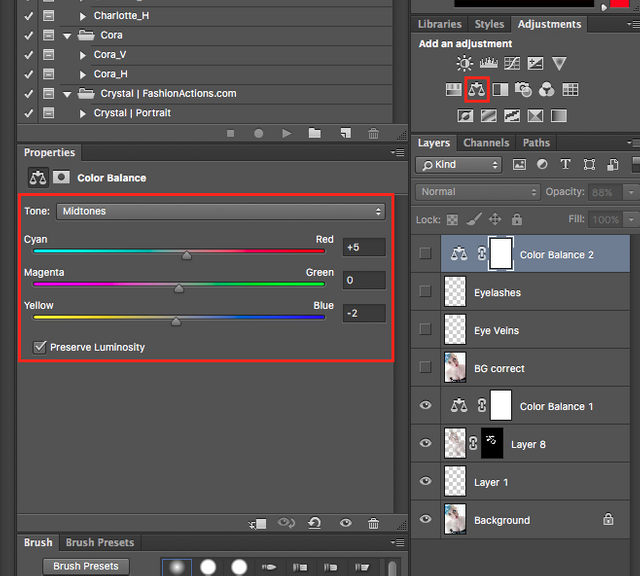
This is an improvement but it's not perfect. I might do more fine adjustment in Lightroom.
Background Fix
I also want to remove the window bar behind her. So on new layer (Cmd/Ctrl+Shift+N). I use the clone stamp tool to copy the background to the right over to bar. The clone stamp tool looks exactly like a stamp and is just below the healing brush. It directly clones an area without any intelligent modifications.
So the bar is now gone.
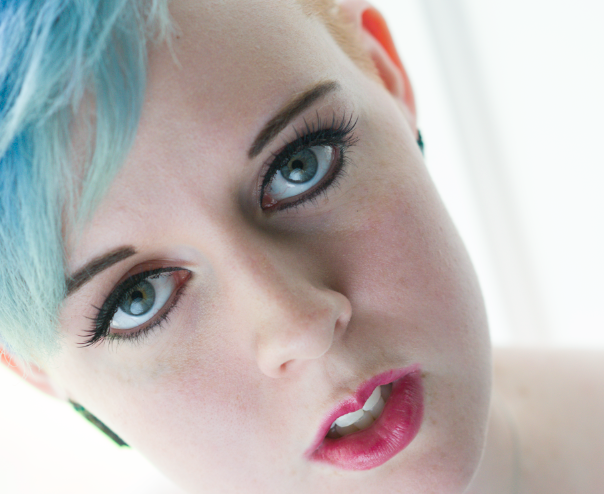
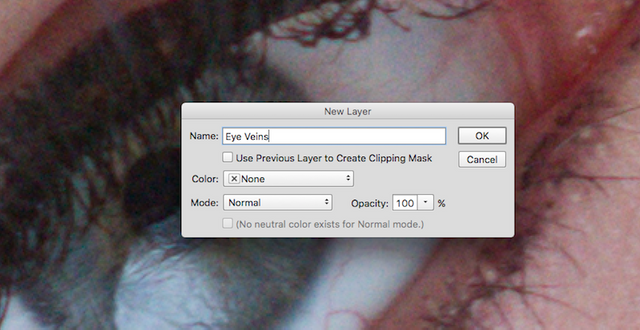
Eye Veins
OK I might do some very subtle work on the eye veins. Again I will create a new layer (Cmd/Ctrl+Shift+N) and zoom in and carefully use the healing brush to erase the veins.
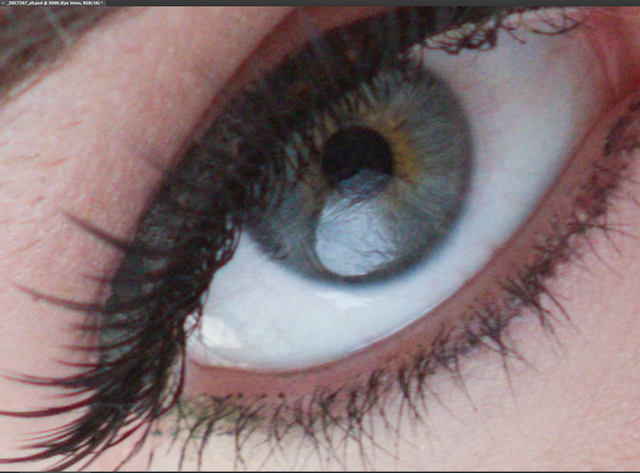
This is to show the difference to one of the eyes. This is a bit too much so I will enlarge the image and reduce the opacity of this layer to 50%.
Here is the full size image. This looks about right.

Final Adjustments in Lightroom
I'll save this and open it up in Lightroom for final adjustments. Just before saving I couldn't resist doing another colour balance change but it is really unnecessary as I will fix the colours in Lightroom.
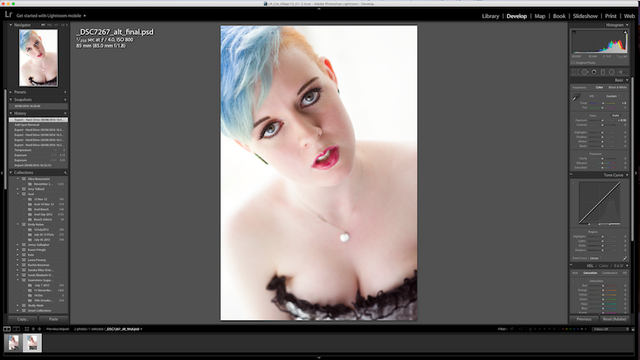
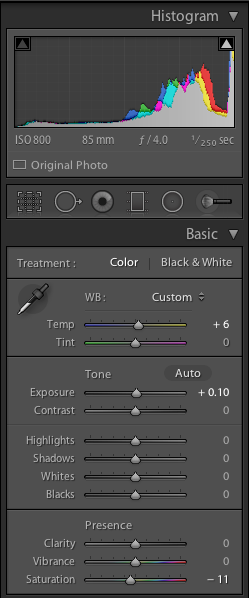
I have basically adjusted the exposure very slightly to +0.10 -
I have also tried auto temperature which gave a more balanced result but the colours didn't look right to me. It set the Blue/Yellow slider to +13, so as a compromise I set it half way to +6 which looked better to my eye.
I also reduced the saturation by -11 as it seemed a bit strong to me. The image is essentially finished apart from cropping.
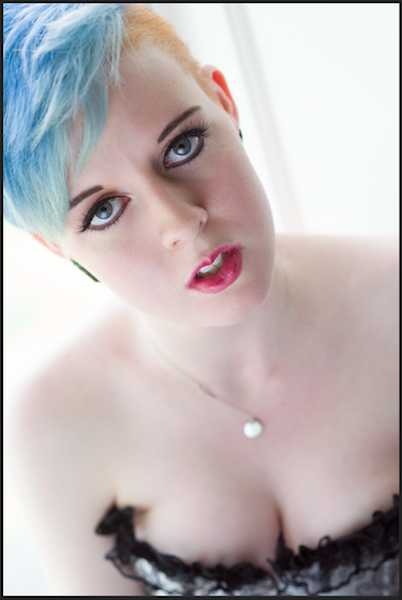
Final Image With and Without Cropping
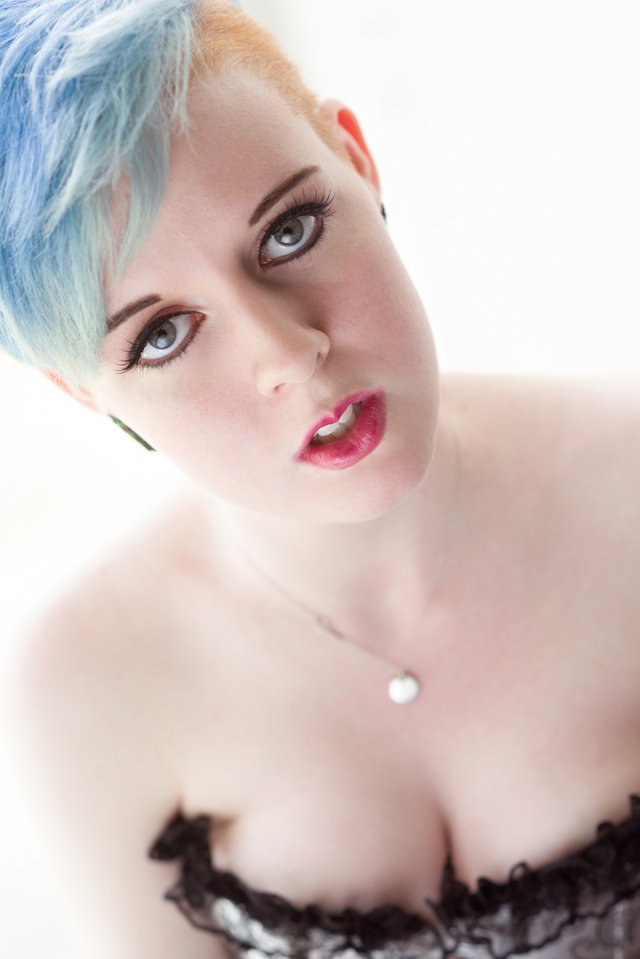
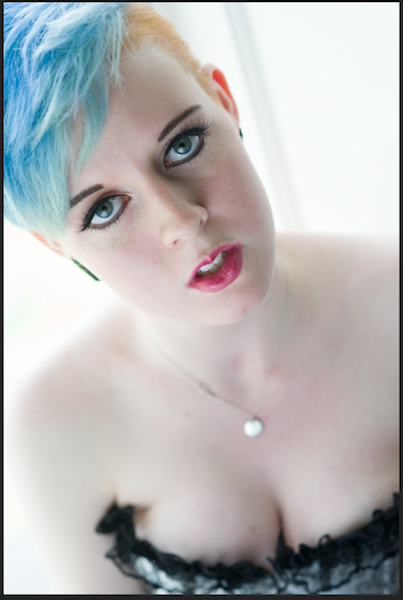
Uncropped
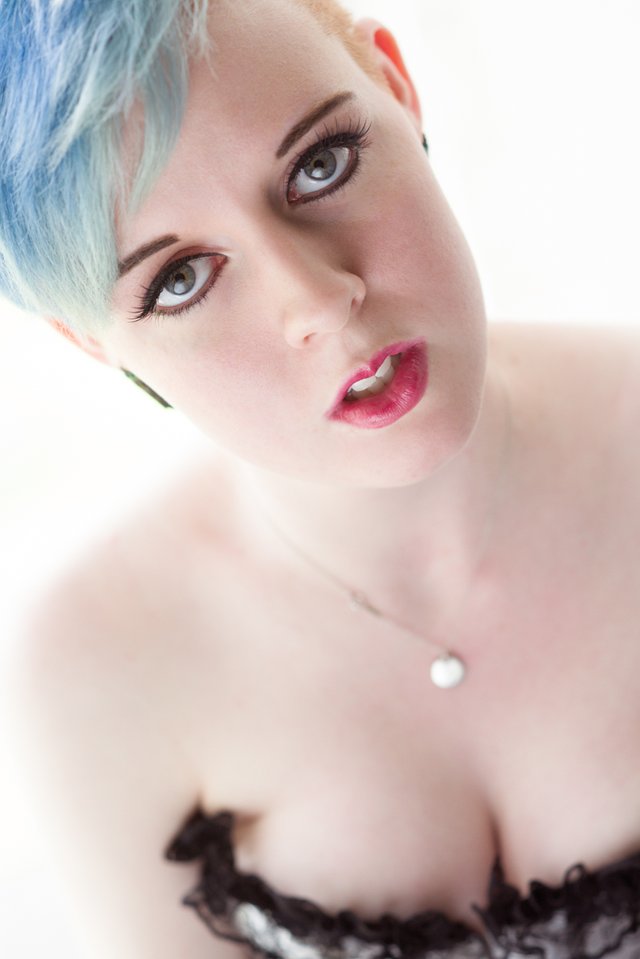
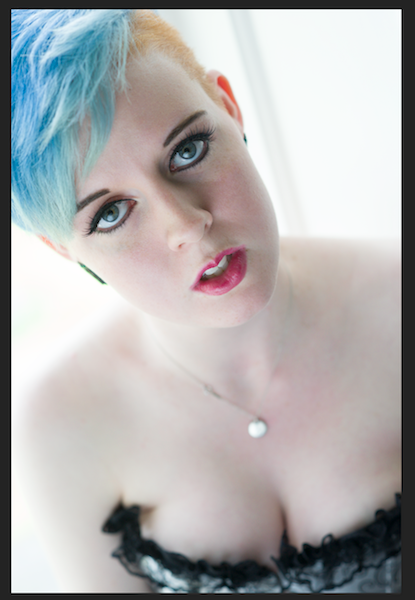
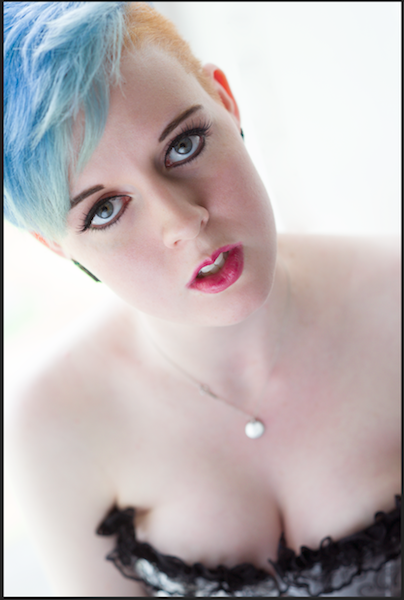
Cropped. The difference is very subtle but I think the crop emphasises the eyes and face more.
THE END
I hope you found this useful. I've tried to keep it short and to the point.
You can see more of my work @thecryptofiend - hope you enjoy.
(Verification for me here: http://www.aapicture.com/about-me)
I didn't notice any blemishes on the original shot to be honest. love the lighting adjustments though.
To be fair there weren't that many and certainly not the kind that show up on web sized images very well. They are a lot easier to see on the original 36 megapixel image but when you shrink it down to 800 pixels wide or less they disappear quite a bit.
I also deliberately used a more simple shot for correction because taking the screenshots and writing down all the steps takes ages in itself! I might do a before and after with a more tricky shot (using the same principles) just to show the difference it makes more prominently.
The other thing is that if a shot needs a lot of retouching it is best to use more advanced methods such as frequency shaping and detailed dodging and burning. I might do a tutorial on those at some point but those are way beyond what most photographers will ever want or need to do. Also these methods can take hours to do.
Oh i didn't mean it to come across as a criticism at all, i understand for a tutorial more noticeable blemishes would be for a much more advanced tutorial.
I meant it more as a compliment to your original shot.
by the way do you plan a tutorial on removing stray hairs that has fallen across a models face? I have a lovely picture of my daughter that i need to do this to.
No problem but you are right. After I'd posted it I couldn't see the blemishes myself even though they were very clear when I was editing it lol!
For stray hairs it can be tricky - I don't normally remove them but if I do I use the healing brush to get rid of them. If you can show me the shot I might be able to help more because sometimes they can be a real pain!
thank you, I will send a link in steemit chat in the morning. I'm steeming at 2am again oops.
@phoenixmaid Me too lol:)
Beautiful
Thank you:)
Useful guide, thanks. I found some new tricks )
Thank you glad you liked it:)
An excellent job my friend and the model is a very beautiful. Greetings and good Tuesday.
Thank you:)
Cool work! Thank you for posting this!
Thanks.
cool post your and very good. good luck
Thank you:)
okey sir
Really excellent. Thanks for the tutorial.
Thank you. I'm never quite sure if I'm striking the right balance between detail and being concise enough for people to read it.
I ask myself that question constantly and fear I have a tendency to be overly verbose. I think you got the balance just right in this post. Quite interesting to see all the steps you go through from start to finish.
Thanks. Yes it is a delicate balance.
you sure do know what you're doing
Thank you:)
Magic! Great job! Nice shot! I like your work! Steem on!
Thank you:) I thought I'd try the promotion on a completely new post to assess if it is worth it or not.
It is defined at you well it turns out on a new post. Councils and tutorials of professionals are always useful to many. Zbrush - artists always do several video about the works and tricks which they use.
Hope so. Thanks.
INteresting. I think the crop really made all the difference, it's perfect. Following you!
Thank you:)