Complete Beginner's Guide to Capturing that Star Trail Photo
Continuing from our tutorial series, we'll now discuss about another aspect of capturing the night sky, star trail photography.
The earth revolves every second and photographing this results in the movement in the stars. These trails in the stars produce fascinating patterns and will give a landscape a different abstract. The process for capturing star trails isn't nearly as difficult as before with the advancement in technology.
Where and When to Shoot
Like any night sky photography, you may want to shoot far away from any city lights or point the camera away from light polluted area. Any ambient light will make stars less visible and we don't want that. It would probably take a bit of a long drive for people living near the city but it would be worth it. A detailed map containing light details can be found at Light Pollution Map.
Also, planning to do your star trail shooting on a moonless night will help produce better result. Similar to what happens with city lights, light coming from the moon will also make the stars less visible. You can check the moon phases from TimeAndDate.com.
As an additional tip, have your shooting on a clear and cloudless sky.
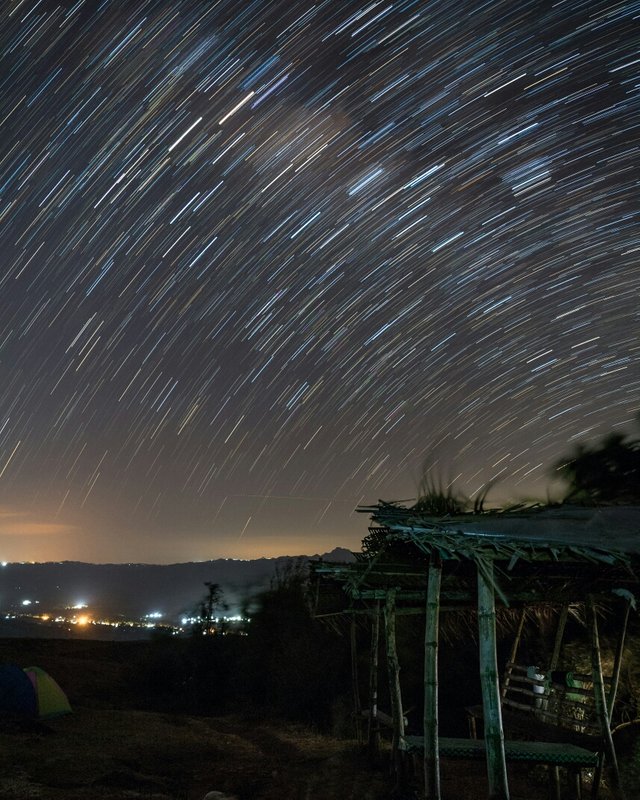
30-minute star trail at 20secs shutter speed, f4, ISO 800 and a total of 90 photos.
Setting up your Equipment
The most important thing you will need is a tripod to stabilize your camera during the long exposures. A good and sturdy tripod will allow your camera to remain still throughout the full capturing process.
Cable release is very handy but not essential. One trick to do when you currently don't have one is to set a set a timer (at least 2 seconds) in your camera before it starts to take a shot and manually press the shutter after every shot for the whole exposure process.
Having an intervalometer will also make the process easier. You can program it to take specific number of shot and the interval through them. It is a bit expensive but will significantly make shooting easier.
You will also want to use the widest lens that you have to include as many star trails in your shot.
Quick Tip: Make sure to have extra batteries when shooting a night. Batteries tend to drain faster on cold temperature and the last thing you want after driving far away from the city is ending up with an empty battery without a decent shot.
Focusing
Set the lens’ focus to infinity. It also helps to focus on a brighter star in order to make sure that the focus is set to infinity. If you don't have that, another way is to turn on your flashlight and point it far enough away from you and try to focus on that.
Composition
Now that our gears are set up, it's now time to frame the shot.
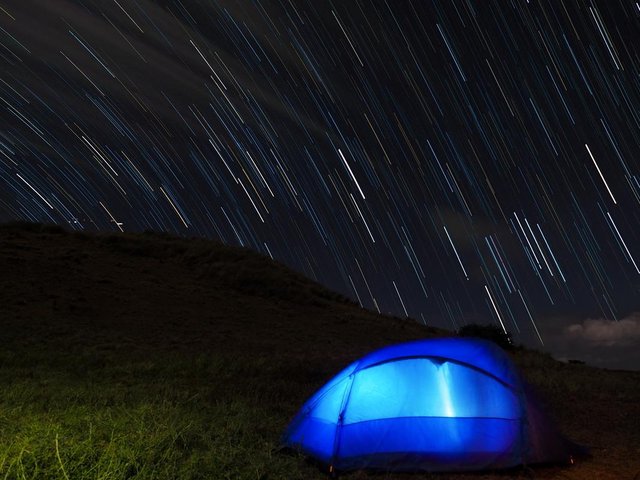
20-minute star trail at 20secs shutter speed, f5.6, ISO 400 and a total of 60photos.
Long exposure star trails make amazing photos on their own. But to actually make the photo stand out or unique, you need to add foreground objects in your composition. Like what great photographers say:
"The image shouldn't only be focus about the night sky, rather how they interact with the landscape".
North Star
As the earth is spinning around the axis, the North Star will not move as much. This means that all star trails will form a circle and the north star will be centered around it. You may want to include this center point with regards to your composition.
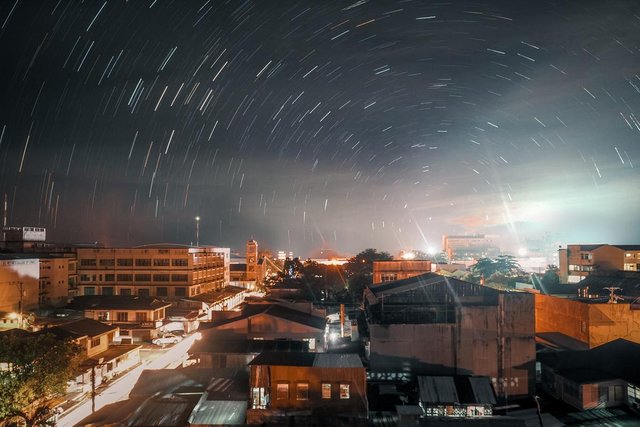
Star trail in the city is not impossible but requires a lot of patience and post-processing. This is a 20-minute star trail at 20secs shutter speed, f8, ISO 100
Method
Shooting star trails could be can be perform using two method. The first one is doing a single long exposure. The second and my preferred way of doing it is through Stacking.
Stacking simply means shooting multiple shots of the night sky then ""stack" them all into one photo in post. I usually take around around 40-100 shots with 20 secs shutter speed. Then stack them all into a final shot in post.
Post-Processing
Okay so now you've taken a hundred of photos, you are ready to combine them into a single output photo. I use StarStax for this process. It is free, easy to use and does the job very well. It also has an advance feature of filling the gaps of star trails for you final image. I usually use the "Blending" mode and just point the location of the folder that contains all the star trail exposure photos that you've captured.
This is the most exciting part of the process because you will be able to finally see the output of your shoot.
You have received a @GrumpyCat flag because you REPETITIVELY send money to buy votes from an irresponsible non-GrumpyCompliant service.
Some bots are acting irresponsibly by selling votes on posts very close to final payout. These votes are sneaky, not promotion and are most of the time placed on low value content.
Sending money to these bots is also financially supporting for-profit only posters (spammers).
To know what voting bot to use, refer to https://steembottracker.com/ and use those that have 3.5 day or less in the "Max Age" column.
@sneaky-ninja (by @michaeldavid) is reporting 6 day but is actually selling votes up until 6.4 days.
Important warning, since @sneaky-ninja has made no effort to improve in more than 4 months, it's vote will still be countered even should he improve his Max Age setting.
Learn more, learn even more...
#introduceyourself/#introducemyself
The “introduceyourself/introducemyself” tag is for creating one introductory post that tells us about you. Users are encouraged to use this tag exclusively for that, and not to reuse it.
Excelente contenido y fotos amigo, saludos!
gracias!
Great post! I love photography! Especially night long exposures!
Indeed! Long exposures at night are really amazing.
beautiful and extraordinary photos of you.with a good camera produces superb photos.
thanks alot!
Beautiful scenery is cool, if there is time to visit my blog, give me suggestions so that I can be like you
thank you! will definitely check it out.
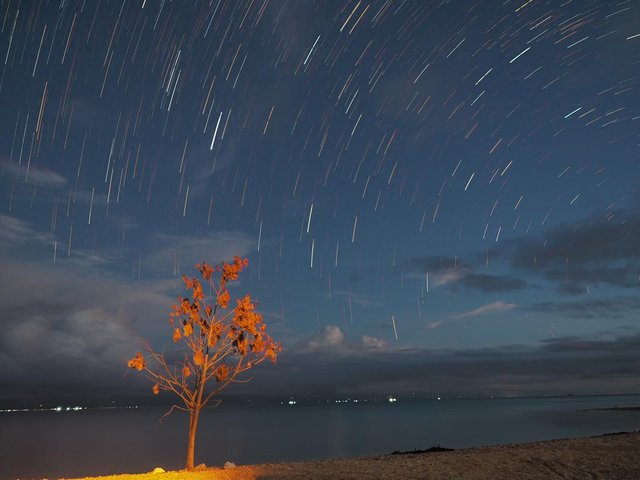
I love the third photo which has a tree, nice pic
thank you That is the lone tree in that island.
Nice tutorial - You've got a new follower :-)
thanks alot. You have an amazing profile too. Followed back
Thanks a lot :-)
I was summoned by @ajcordenete. I have done their bidding and now I will vanish...
A portion of the proceeds from your bid was used in support of youarehope and tarc.
Abuse Policy
Rules
How to use Sneaky Ninja
How it works
Victim of grumpycat?
Hey@ajcordenete, great post! I enjoyed your content. Keep up the good work! It's always nice to see good content here on Steemit! Cheers :)