Huge Homemade Vacuum Tube Light Fixture - How to - Part 3
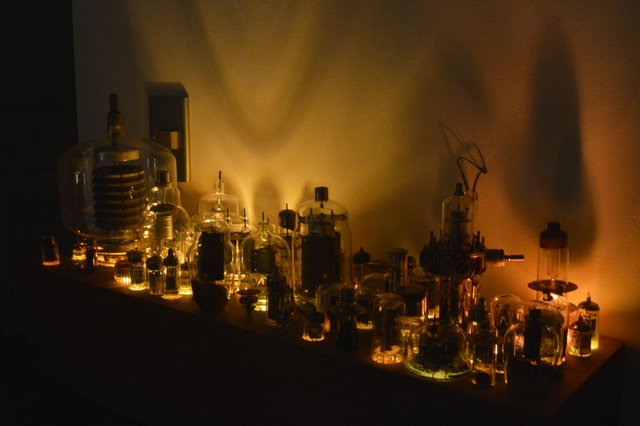
This is Part 3 of a "How To" on making a homemade light fixture, consisting of vacuum tubes.
Step 4: Drill Template and Drilling
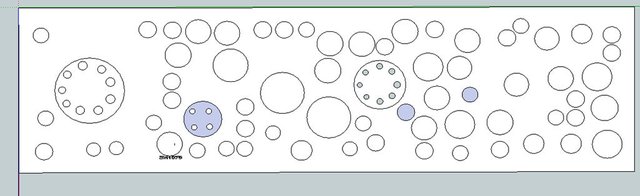
Once I concluded upon the final layout, I exploded the entire SketchUp drawing, and deleted all of the forms of the vacuum tubes, save for the diameters of the bases. I then exported the template to a vector .EPS file, editable in Adobe Illustrator. I opened the template in Illustrator and resized the template until it was the actual size of the base. I then printed the template out (I had to print it across three sheets of paper, then stitch them together.
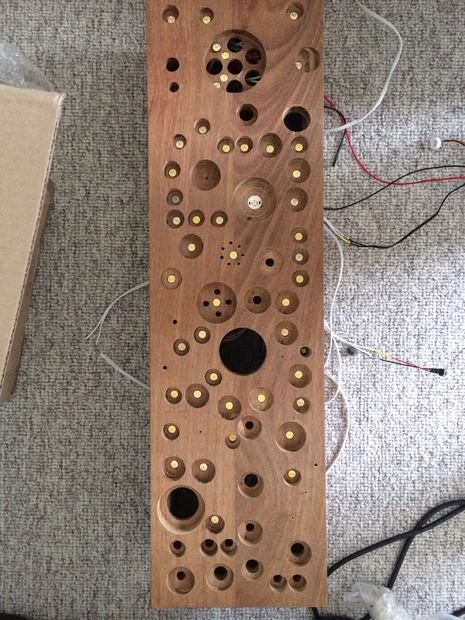
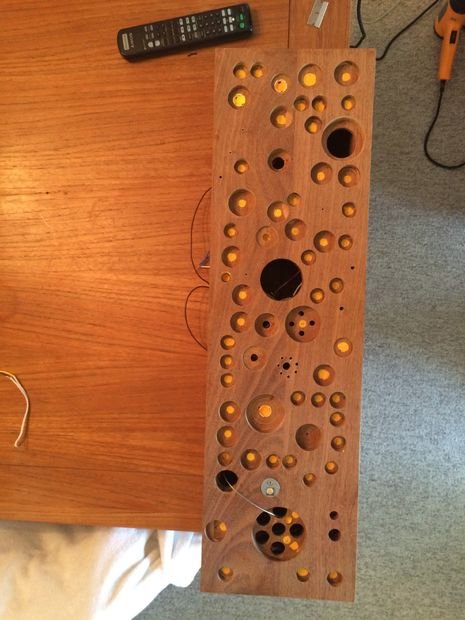
I then set the printed template on top of the wooden base and made center-punch marks, and wrote the diameter for each valve location. I located special woodworking drill bits called Forstner bits for all the diameters that I required. I was able to locate these drill bits on Ebay for an average of USD $3 per drill bit. Forstner bits are excellent for this application because they create perfectly clean, shiny-sided, flat-bottomed holes. With a professional drill-press, set to perfectly plumb, I then drilled each hole to a specific depth that was appropriate for each valve. Most holes were 12mm deep (note that I did not drill all the way through the box material. For the huge ZD1000F Tesla amplifier tube, I had to make geometric measurements to determine not only the diameter of the socket posts, but their relative positions on an arc from center.
Once I had drilled all of the holes, I then took a 3/8-inch diameter drill bit and drilled through the remaining material, in the center of each of the existing holes. These 3/8-inch holes would be for future placement of the LED/Lens modules. Note that some larger valves required that a full-sized hole be drilled all the way through the material, to allow for secure seating of the valves.

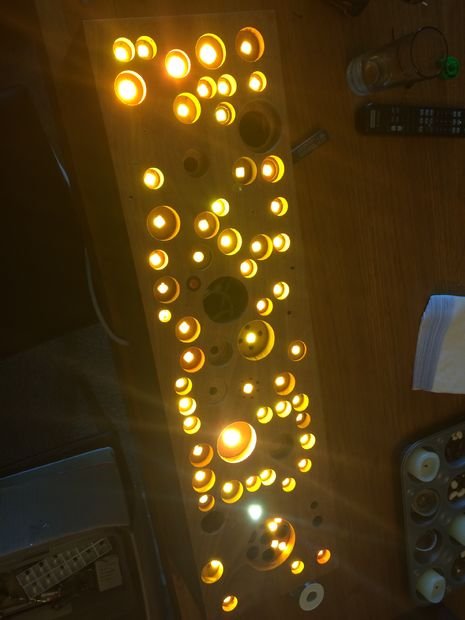
Step 5: Install the LED/Lens Modules, and Wire Them Inside.
I then inserted the LED/Lens modules into the 3/8-inch holes - which turned out to be sixty in total. They were able to be pressed in with a nice friction hold. Once all lights were in place, I turned the box over and wired all of them in parallel scheme to a series of european-style nylon terminal blocks that I had bridged in parallel fashion.
Once the pigtails of the LEDs were properly seated in the terminal blocks, I installed a 12vDC transformer of 100 watts - suitable wattage for the consumption of my sixty 1-watt 0.083 amp LED/lens modules. I located a transformer that was 110v-277v in, enabling this fixture to be operated in any country. I secured the transformer to the inside of the bottom plate of the base. I then spliced a wall-plug pigtail to the transformer and ensured suitable strain-relief.
I installed a small rocker switch on the top of the box, to be hidden by all the valves, once completed. I plugged the transformer to the wall socket and turned the switch on to verify that all LEDs were operating.
I then placed the bottom plate of the box into place, drilled small pilot holes and countersinks, and screwed four wood screws into place, securing the bottom plate to the box.
I then located an acrylic paint of a light, light orange (think something close to the color of a Fritos bag), and hand-painted the lenses of the LED/Lens modules. This color would impart a very warm, low-kelvin color, suitable for the old "heaters" of working valves. I tested on one LED/Lens module, and was delighted to find that I did not need to thin the paint at all; the light transmitted nicely through the acrylic paint.
Stay tuned, next week, for the next installment of this fun and fantastic project. Be sure to follow me, so that you don't miss any new content.
Be sure to follow me for more great content.
Visit some of my other, memorable posts:
- L.A. Short Story (creative writing)
- The Pink Sands of Polynesia.
- Incredible time-lapse of storm and cloud activity in coastal Brazil
- My self-introduction post (introduceyourself)
- How-to make a huge vacuum-tube light fixture (creativity)


Chinese, China, Shenzhen, shanghai, beijing, hong kong
汉语,中国,深圳,上海,北京,香港, 录影

Welcome to Steem Community @texagonia! As a gentle reminder, please keep your master password safe. The best practise is to use your private posting key to login to Steemit when posting; and the private active key for wallet related transactions.
In the New Steemians project, we help new members of steem by education and resteeeming their articles. Get your articles resteemed too for maximum exposure. You can learn more about it here: https://steemit.com/introduceyourself/@gaman/new-steemians-project-launch
Thank you, friend.
very innovative. you doing great and i wish you all the best. thanks for sharing
Thank you @kenhudoy - I'll always be providing fresh and original content. Best, Texagonia
Sure a d this is very educational worthy of good genuine contents. Keep it coming and also do find time to check my blog posts
Welcome to Steem @texagonia.
Do read A thumb rule for steemit minnows - 50:100:200:25 for starter tips.
Spend time reading Steem Blue Paper to know how Steem blockchian works and if you still have any queries ask them on our Ask me anything about Steemit post and we will try to answer that.
All the Best!!!
Transfer 1 SBD or 1 steem to @mrbean1 and put the link of your post in the public memo I GIVE you FOLLOW AND 20 good UPVOT and resteem by @mrbean1
click here to read more about me
This post has received gratitude of 2.15% from @appreciator courtesy of @texagonia!
You got a 2.47% upvote from @buildawhale courtesy of @texagonia!
If you believe this post is spam or abuse, please report it to our Discord #abuse channel.
If you want to support our Curation Digest or our Spam & Abuse prevention efforts, please vote @themarkymark as witness.
You got a 1.15% upvote from @postpromoter courtesy of @texagonia!
Want to promote your posts too? Check out the Steem Bot Tracker website for more info. If you would like to support the development of @postpromoter and the bot tracker please vote for @yabapmatt for witness!
Resteem to 950+ Follower . Send 0.200 SBD or 0,300 STEEM to @music-curation ( URL as memo )
This tuned out lovely, I really wish I could still use power tools safely I would build a whole countertop using this idea ...
Really was a fun project... the culmination of many years of collecting.