Poland 1944 Diorama - PART 7 + VIDEO(ITA/ENG)
Good morning, today we talk about color. Coloring an entire object, soldier or diorama is VERY complicated. Because? Well, I did not do any dedicated school, but what I know I learned it over time, with constancy and, of course, wrong. First you have to give a base (usually gray, but depends on the theme), then begin to give the chosen colors mixing them together and getting the color you want, diluting them with a special Thinner and choose whether to continue with a brush or airbrush.
The details of this diorama have made them all brush directly on the raw plastic because the diorama will have a dirty and ruined effect, so the first-hand colors will be "aged" and soiled. In the video you see above is clear how long it takes only to make a small piece of porch, imagine the effort to color everything. Unfortunately I forgot to make the videos while I was coloring the base of the diorama and the walls, but I promise to show them how some stage effects are created. Meanwhile, we continue with today's appointment: First look at colors.
The other parts of the model can be found here:
Photos, images and videos taken by myself during the construction of the model.
Buongiorno, oggi parliamo del colore. Colorare un oggetto, un soldatino o un diorama intero è MOLTO complicato. Perché? Bhe, io non ho fatto nessuna scuola dedicata, ma quello che so l'ho imparato col tempo, con la costanza e, ovviamente, sbagliando. Prima bisogna dare una base (grigia di solito, ma dipende dal tema), poi cominciare a dare dei colori prescelti mescolandoli tra loro e ottenendo il colore che vuoi, diluendoli con un Thinner apposito e scegliere se proseguire con un pennello o aerografo.
I dettagli di questo diorama li ho fatti tutti a pennello direttamente sulla plastica grezza perché il diorama avrà un effetto sporco e rovinato, quindi i colori di prima mano saranno "invecchiati" e sporcati. Nel video che vedete sopra è ben chiaro quanto tempo ci voglia solo a realizzare un piccolo pezzo di porticato, immaginate la fatica per colorare tutto. Purtroppo ho scordato di fare i video mentre coloravo la base del diorama e i muri, ma prometto di farli mostrandovi come si creano alcuni effetti di scena. Intanto proseguiamo con l'appuntamento di oggi: Prime colorazioni.
Le altre parti del modellino è possibile trovarle qui:
Foto, immagini e video scattate dal sottoscritto durante la realizzazione del modellino.
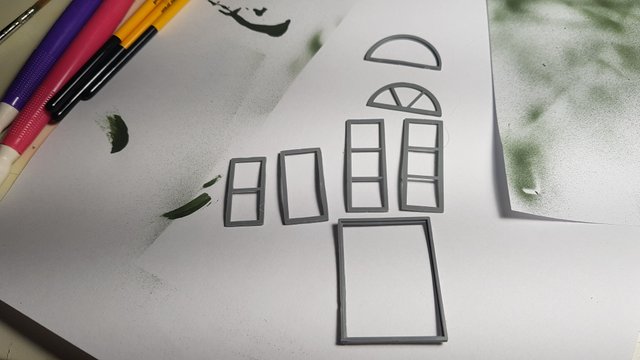
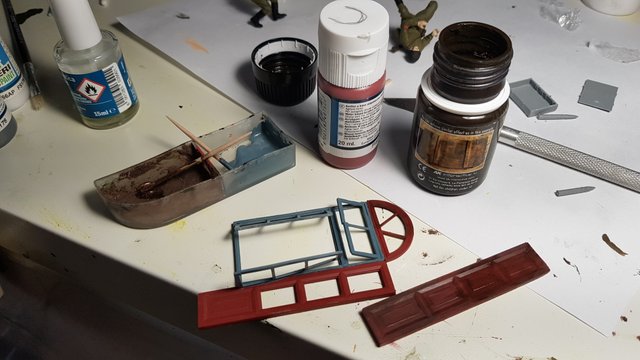
| Here are the porch pieces. There are no instructions to make it happen, so I activated my fantasy. We notice a rosette with the window part (the two semi-circles), two large windows, two small windows and a section bar to hold large windows | Ecco i pezzi del porticato. Non ci sono istruzioni per realizzarlo, quindi ho attivato la mia fantasia. Notiamo un rosone con la parte finestrata (i due semicerchi), due finestre grandi, due piccole e un profilato per contenere le finestre grandi |
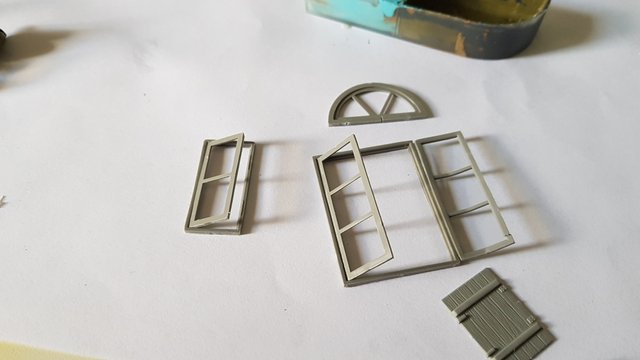
| My imagination has seen beyond the plastic trying to achieve what you see above, then a rose window, a large window and a small window. A broken and bent window on purpose | La mia immaginazione ha visto oltre la plastica provando a realizzare quello che vedete qui sopra, quindi un rosone, un finestrone grande e uno piccolo. Una finestra rotta e piegata di proposito |
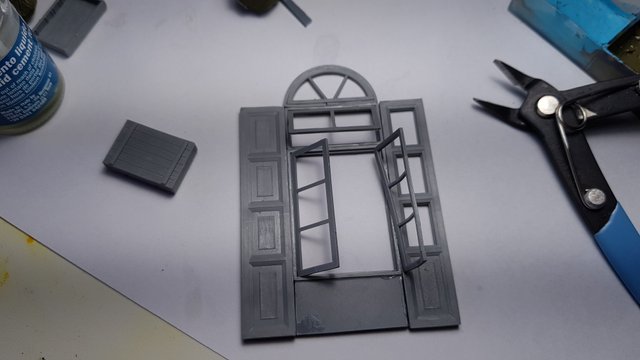
| Initially I wanted to create this large porch that housed two large wooden doors on the sides, the large window in the center and the rose above, adding a piece of scrap plastic at the bottom to cover an empty space. | Inizialmente volevo creare questo porticato grande che ospitava due grandi portoni in legno ai lati, il finestrone al centro e il rosone in alto aggiungendo un pezzo di plastica di scarto in basso per coprire un vuoto |
| Then I chose to divide them by removing the full wooden door and leaving the one with the windows attached to the window. I used an ocher red color for the wood of the doors and the rose window and a very light blue for the windows woods | Poi ho scelto di dividerli staccando il portone di legno pieno e lasciando quello con le vetrate attaccato al finestrone. Ho usato un colore rosso ocra per i legni dei portoni e del rosone e un azzurrino molto chiaro per i legni delle finestre |
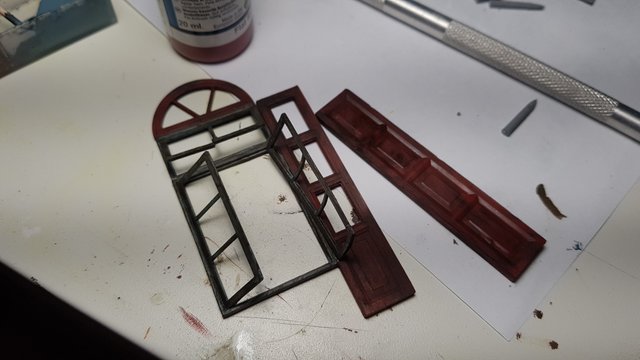
| I aged everything with fract dyes on purpose, giving an effect of "old" to both pieces | Ho invecchiato il tutto con dei coloranti fratti apposta dando appunto un effetto di "vecchio" a entrambi i pezzi |
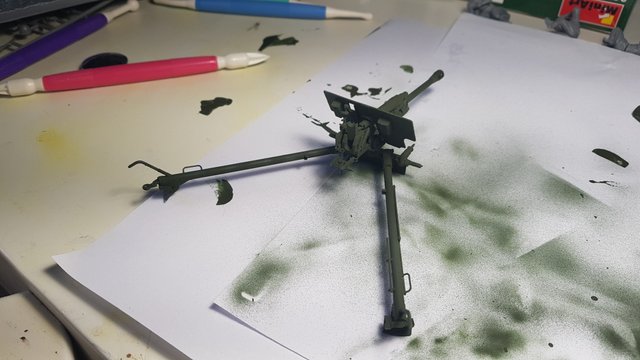
| With the airbrush instead those the ZIS-3 of dark green. The problem of the airbrush is that it needs very diluted color for an optimal delivery, so there is a need to mix the color a lot using a thinner to lengthen it. Then, once the coloring is complete, you must immediately clean the spray gun to avoid color deposits that are difficult to remove. So you have to disassemble it in all its 8 main pieces (without disassembling to the detail) and first clean the coarse residues with warm water, and then with a little bit of diluent the rest of the residues; then rinse with warm water, dry to avoid rust and if you have to use another color repeat the procedure from the beginning. Now, it is true that I am quite annoying about cleaning the material, but it is also true that if you do not pay attention the material itself wastes after a short time and since it costs (hundreds of euro) it is good to take care of it. | Con l'aerografo invece coloro lo ZIS-3 di verde scuro. Il problema dell'aerografo è che ha bisogno di colore molto diluito per una erogazione ottimale, quindi c'è bisogno di mescolare il colore molto utilizzando un thinner per allungarlo. Poi una volta conclusa la colorazione bisogna immediatamente pulire l'aerografo per evitare incrostazioni di colore poi difficoltose da rimuovere. Quindi bisogna smontarlo in tutti i suoi 8 pezzi principali (senza smontare al dettaglio) e pulire prima con acqua calda i residui grossolani, e poi aiutandosi con un po' di diluente il resto dei residui; risciacquare poi con acqua calda, asciugare per evitare ruggine e se si deve utilizzare un altro colore ripetere il procedimento da capo. Ora, è vero che io sono abbastanza rompiscatole sulla pulizia del materiale, ma è anche vero che se non si presta attenzione il materiale stesso deperisce dopo poco tempo e dato che costa (centinaia di euro) è bene averne cura maniacale. |
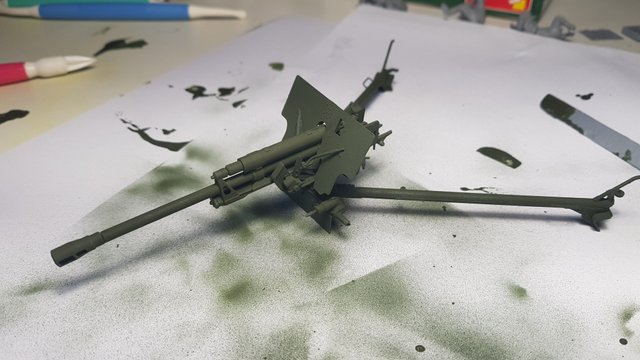
| Finished the cannon apart from the wheels that I do apart from the brush. That's all for today, have agood day from your @demiro86 | Finito il cannone a parte le ruote che faccio a parte a pennello. Per oggi è tutto, buona giornata dal vostro @demiro86 |
thats amazing bro...first time i m watching such type of art...and thanks for the vedio this time
Thanks
You are welcome
Troppo forte.
Bravo come sempre
Grazie mille mio caro @palaia
Lo chiameremo "Lo scienzato dei soldatini e delle riproduzioni", ci hai passato un elenco di nozioni anche oggi su come realizzi in maniera favolosa i tuoi piccoli capolavori in miniatura, e cosa dirti??
A volte può sembrare retorica, ma sei realmente bravo, e non è sbagliato continuare a dirtelo!!
Grazie infinite