Graphic Design made Simple (G101) #lesson 10 - Hands-on Practical session.
 |
|---|
Hello friends, welcome once again to our graphic design beginners class. I trust you have been enjoying every bit of the lessons. In today's lesson we will yet again be having a practical lecture.
Just last week a client friend of mine asked me to help her with a design for her business. She own a saloon and would like to get a simple flier to appreciate and wish her customers a happy new year.
I did that of last year, am glad she reached out again for my service.
To me it a clear message, if the one I did the last time wasn't okay, she wouldn't ask me to do another for her this year, she would have looked for alternatives.
So...that's a thumbs up for me, lol.
So below is the simple design I made.
 |
|---|
Wait a minute, have you observed that when it comes to my design, simplicity has always being my goal? Smiles... You won't catch me design a flier with too many unnecessarily elements... I believe in simplicity, at least I've learn that from many of the successful and renouned brand we see around us today. Just keep it simple friends.
Anyways I will be showing you how I arrived at my design as usual, So just get a cup of juice or something, relax and enjoy the ride with me. Shall we?
So as usual I will be building from the scratch, get your template and wipe it clean then follow the steps I will be showing below.
Step 1.
Click on the "+" purple button, by now I believe you'ld have gotten use to that button. Go for shape under Elements and then click on the circle shape.
 |  |
|---|
Step 2:
The circle appears on our workspace after selecting. I resize afterwards by dragging the tip of our circle shape and then position to the right just as seen in the image below.
 |  |
|---|
Step 3.
We will be needing a frame for our image. To do that click on the "+" purple button and then search for frame. Select the circle frame just as seen in the image.
 |  |  |
|---|
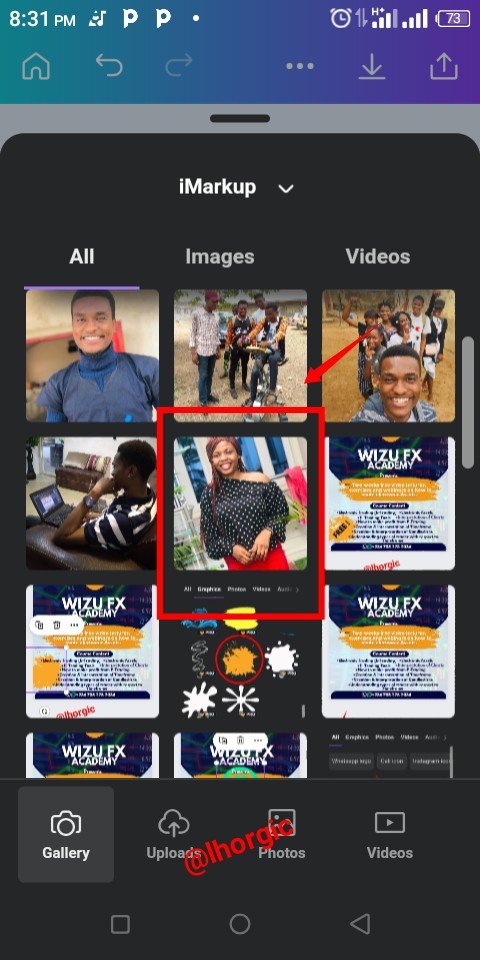
Step 4
Resize the frame then click on replace to bring in our image. Be sure to have your images ready in your gallery , select it and then carefully position when it appears, just as seen below.
 |  |  |
|---|
Step 5.
Click on the "+" plus button and then locate the text icon denoted with "T". Click on Add text box. This command automatically brings in a sample text on our workspace. You can then edit it to your desired text
 |  |  |
|---|
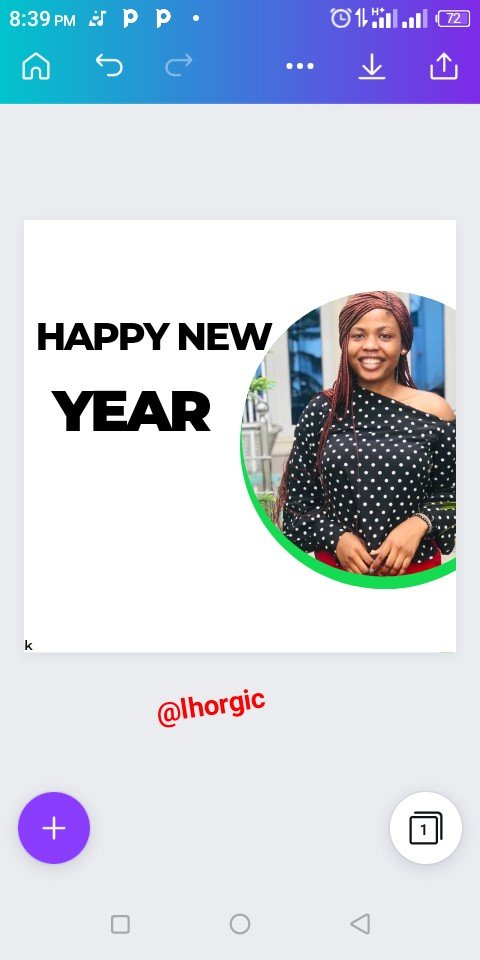
Step 6.
I edited the sample text (imputed "Happy New year") and resized. I also changed the font for Happy new. I used a stylish font called Amsterdam one just as seen in the images below.
 |  |  |
|---|
Step 7.
After changing the font, we can see that it looks odd, that because stylish font don't appear well when your text are all in capital letter. I had to adjust the text by clicking the "B". I went further to click the "Aa" to change our text from it complete capital form. The result is also as seen in the images below.
 |  |  |
|---|
Step 8.
I needed a brush effect and then clicked on the "+" purple button to fetch the effect. You can search for it under Elements if it's your first time attempting our practicals.
 |  |  |
|---|
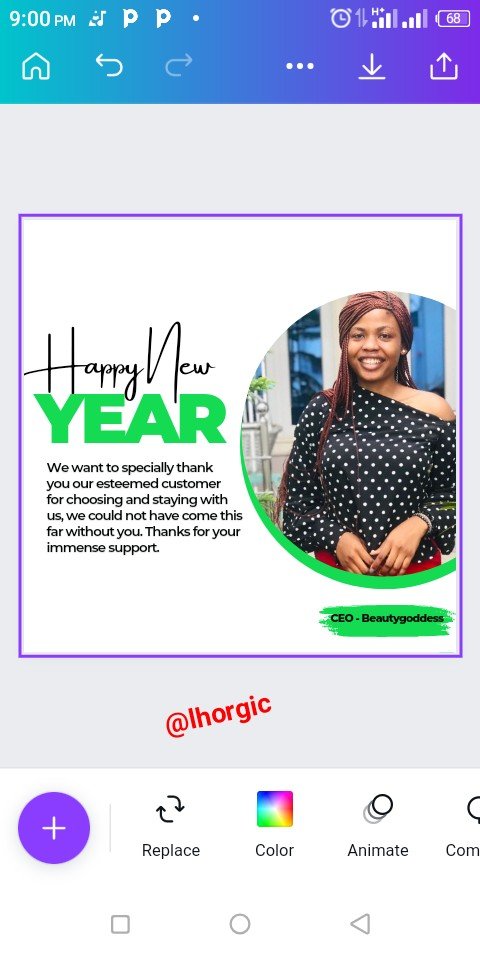
Step 9.
When our brush effect appeared, I resized and positioned, I also brought in the copy ( main message ) of the design work. I also duplicated that message (using the highlighted + icon) to write CEO - Beutygoddess and then place it on our brush effect just as seen in the images below.
 |  |  |
|---|
Step 10.
I added her contact to the design and also introduced the WhatsApp icon and resized it,by now you should know how to get that. I positioned all of these and the result is as seen in the images below.
 |  |  |
|---|
Step 11.
I noticed my Client doesn't have a logo, I had to work a way around that. I duplicated the Happy New text to write Beautygoddess, the name of the business,I then resized and positioned it at the top right corner.
 |  |  |
|---|
Step 12.
To make my logo idea complete, I had to bring in a cropped icon of a lady's hair. I resized it and then positioned it just as seen in the images below. You can crop or remove any image background by visiting remove.bg using your browser.
 |  |  |
|---|
Step 13.
I wanted my usual background effect, so I brought in the image of the CEO again, I used the "position button" to send it backward just as seen in the images below.
 |  |
|---|
Step 14.
The next thing is to resize the image by enlarging it and then causing it to fade into the background using the "Transparent button". Do well to set the parameter at 5%. The final output is as seen below.
 |  |  |
|---|
|
|---|
This is where I will be wrapping up our lecture for today. I really appreciate you for coming this far with me. I trust you got value from this post. Feel free to share your thought on today's lesson. If there is anything you would love me to add to improve the lesson, be free to share.
If you missed the previous posts on this beginners class, kindly check them out here.
G101 introduction post.Lesson 1.Lesson 2.Lesson 3.Lesson 4.Lesson 5.Lesson 6.Lesson 7.Lesson 8.Lesson 9
Graphic Instructor
@lhorgic♥️
Cc: @ubongudofot.
We support quality posts, and good comments anywhere, with any tags.
Thanks @harferri for the support. It's much appreciated.
Saludos y bendiciones. Me encanta sus clases de diseño. Son muy fáciles de comprender. gracias gracias gracias
Thanks for the nice comment. I really appreciate. I hope you continue the lessons.
Simplicity is the goal as always..
Thank you for sharing with us, the design is beautiful, I commend you.
Thank you dear, am glad you love the design. I really appreciate your nice comment.
Boss you are sure welcome any day..