Back Acres: How to Make Beeswax Candles - with Citronella
Over the winter my wife traded two wreaths - that she had crafted - for two jars of honey and a plateful of Beeswax. The trade was detailed in this post: Barter System: Scored Two Large Jars of Ontario Honey and a Plate Full of Beeswax. After a recent successful trade with another one of her wreaths for a small bottle of citronella essential oil - my wife made five candles with the beeswax and citronella oil - while I carefully documented the process.

I do enjoy the beeswax and citronella combined - a sweet and fresh scent. Citronella essential oil is said to have bug repelling properties. I did burn a store bought citronella candle on my breezy patio this past summer and it didn't seem to help with the swarm of bugs. I'm curious see if these hand crafted candles with citronella added will be more repelling. Beeswax burns slower than paraffin wax and with no drips if there is no breeze. Beeswax candles also burn clean with no smoke. Paraffin wax comes from the dregs of petroleum processing. It's extracted after asphalt, then bleached and treated with chemicals to make it ready to burn inside your home. I prefer beeswax. Paraffin Information Source: Beeswax Candles and Allergies: An Effective Solution.
The Candle Ingredients:
- 450 grams (1 lbs) of Beeswax
- 1/2 cup of coconut oil - this is what allows the citronella to combine with the beeswax
- 10 drops of citronella essential oil
- 5 small Jars for the candles (only 3 in the picture)
- 5 candle wicks and sticks

The Candle Making Tools
- Large Sauce Pan - filled half way with water after the melting can has been placed in the center of the pan.
- Melting Can - a large soup can to melt the ingredients. The wax is hard to clean off afterwards, so it is best to have a dedicated melting can.
- Stir Stick - for stirring the melting ingredients. We used a stick that had fallen off of a tree. The stir stick should also be dedicated for this purpose - it's hard to clean the wax off.
- Heating Element or Stove Top - to boil the water in the large sauce pan.
- Oven Mitts or Gloves - to handle the warm melting can while pouring the candles.
Double Boiler Melting
A double boiler is needed for a consistent and not too hot temperature. Beeswax has a low temperature burning point. Without the double boiler the beeswax can be easily over heated and burn. The sauce pan goes on the stove top. The melting can with half of the bees wax goes in the center of the sauce pan. The sauce pan is half way filled with water and brought to a boil.

- Add Half of the beeswax to the soup can, stir occasionally until melted.
- Add the other half of the beeswax, stir occasionally until melted.

- 1/2 cup of coconut oil goes in the soup can after the beeswax has melted
Beeswax by itself does not mix well with citronella, this is why the coconut oil is added. It will hold the scent of the citronella - and combine with the beeswax.

- 10 drops of citronella essential oil is added after the coconut oil has melted
Watch the video below of the candle ingredients being added to the double boiler.
After the beeswax, coconut oil, and citronella oil have been melted together in the melting can, the candles are ready to pour. In the picture below you can see the candle jars and the sticks with the wicks tied to them. We added another jar and stick with wick after we realized we had enough wax for five candles.

Candle Pouring and Wick Adding
In the pair of pictures below you can see the candle pouring and wick adding process. The picture on the left shows the first half of the candle pour and wick adding process:
- A small amount of wax is poured into the jar.
- The wick bottom is put at the bottom and center the jar, in the wax.
- 8 seconds later the bottom of the wick is anchored in the small amount of quickly dried wax.

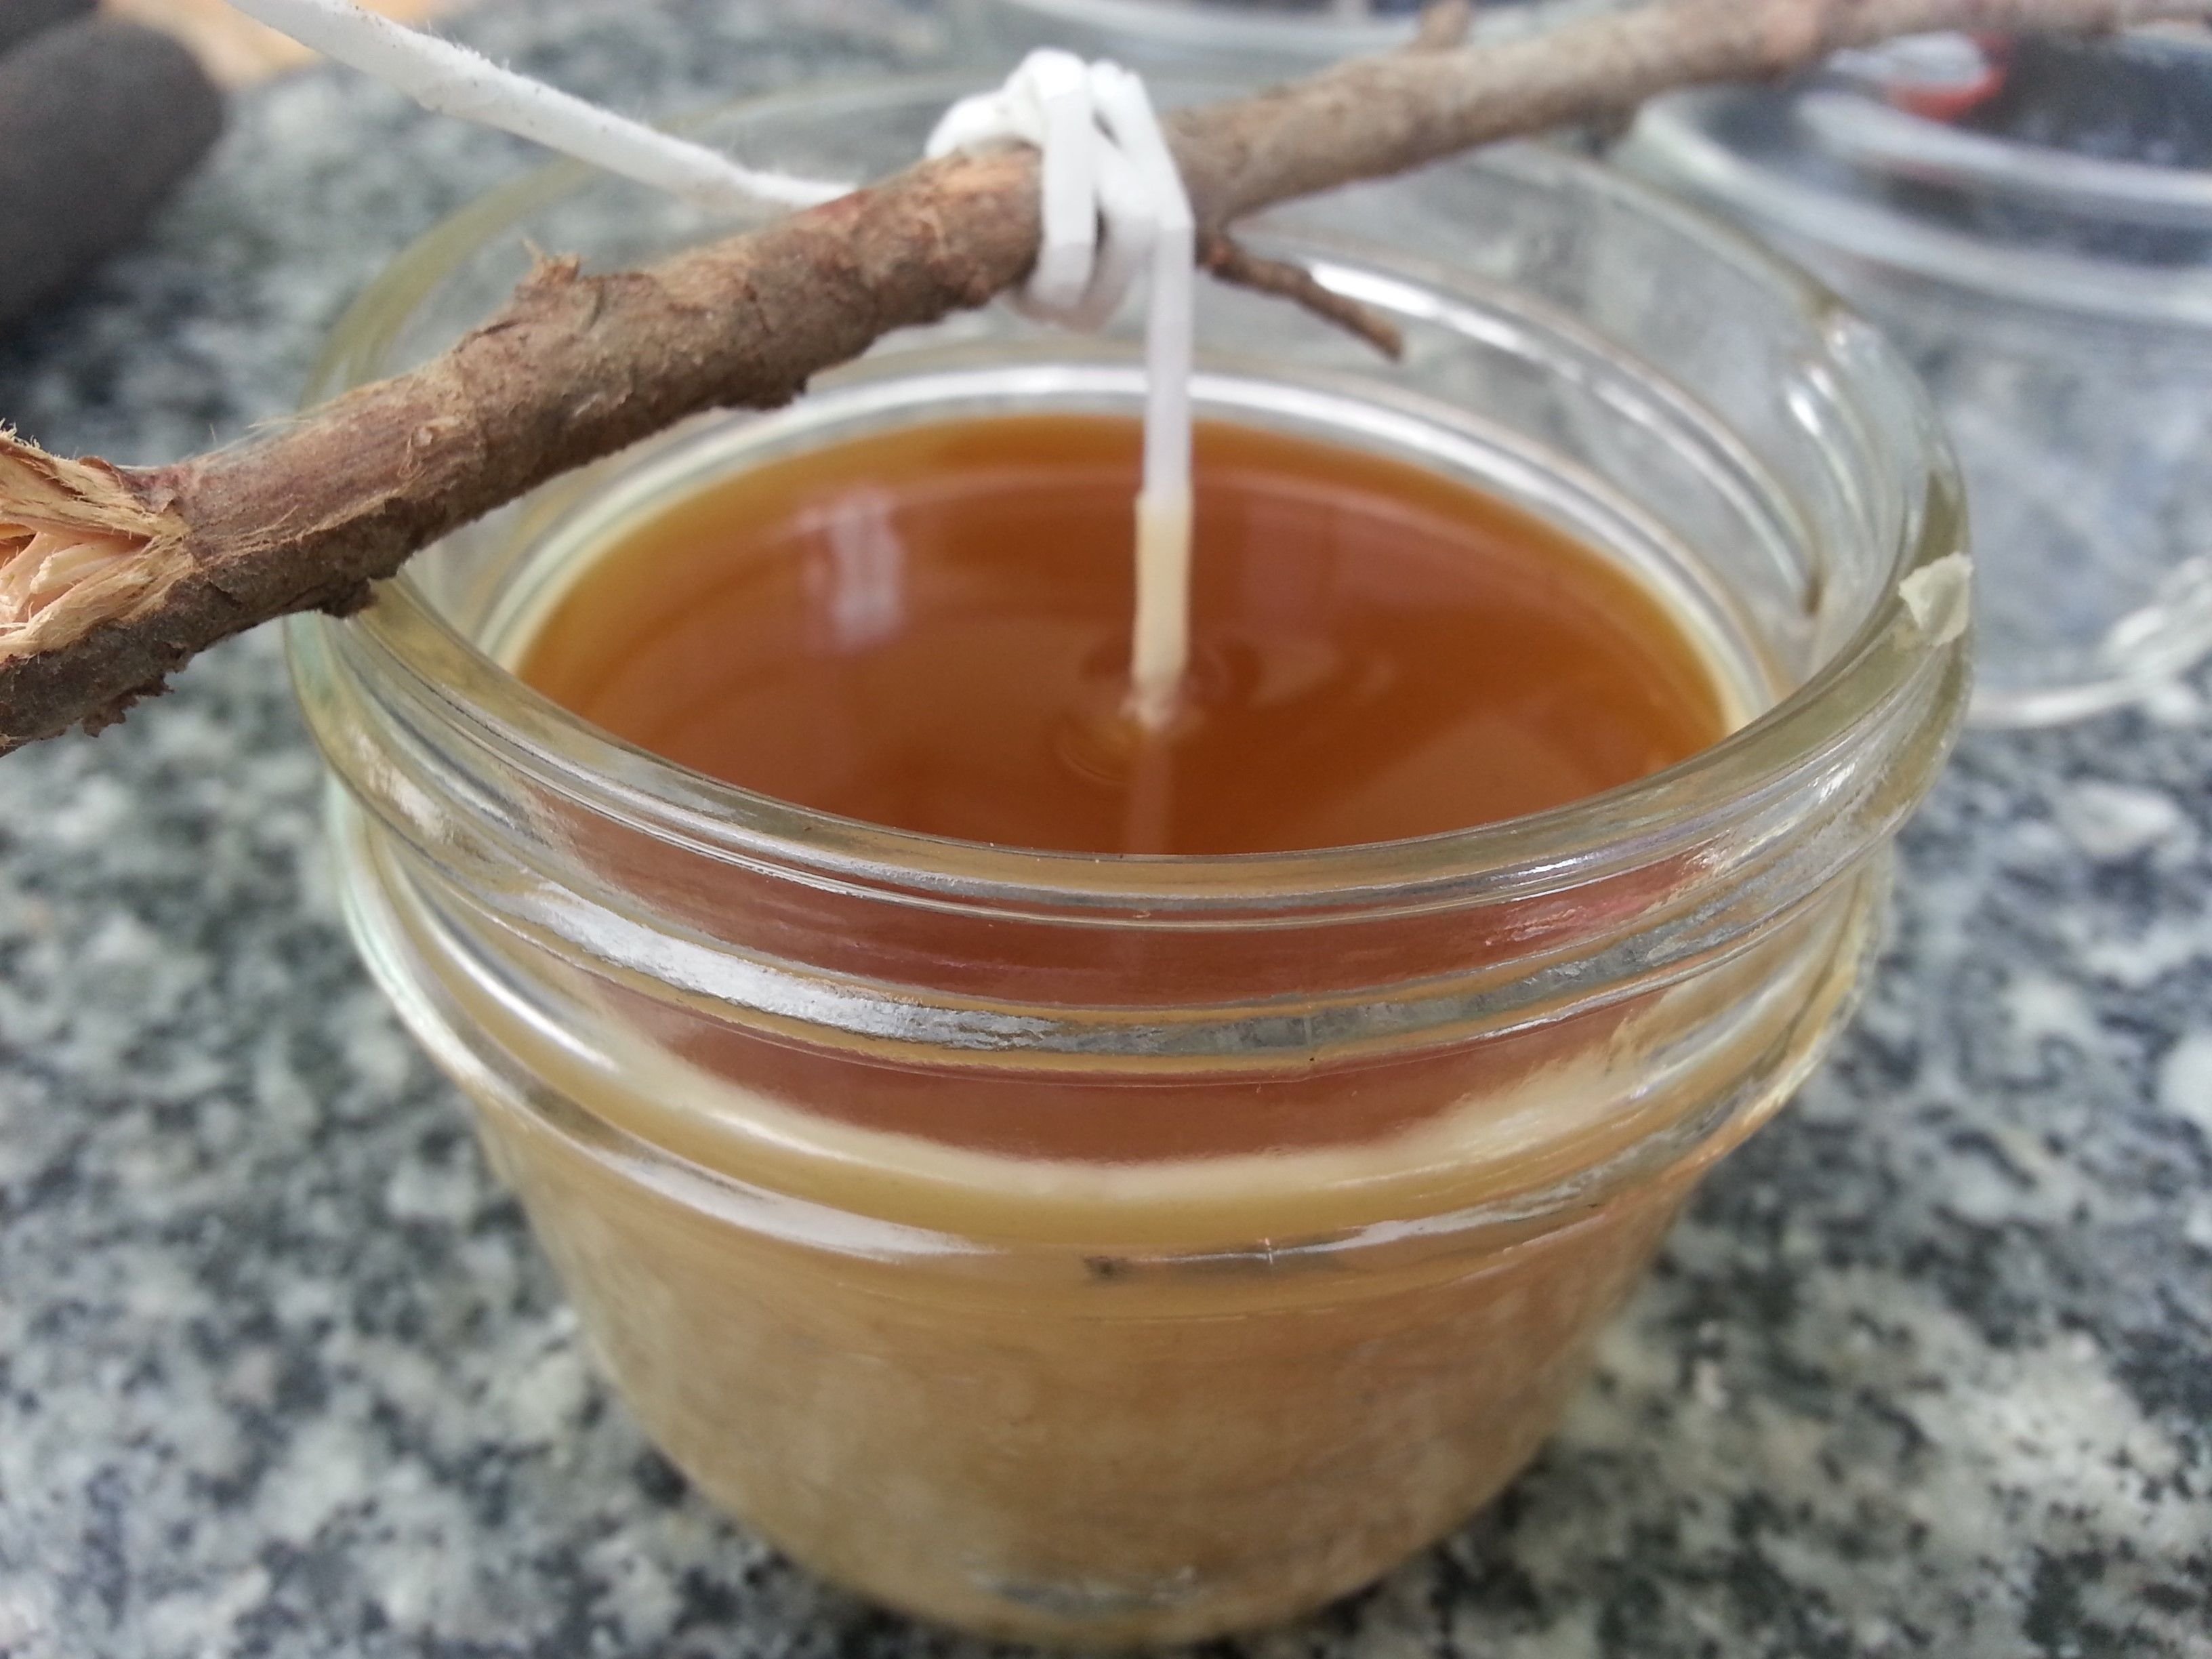
- In the picture above-right you can see that the wick is pulled gently straight up while the remaining wax for the candle is poured.
- After the all wax for the candle has been poured into the jar, gently roll the wick onto the stick until the wick is straight and centered - the stick rolls down to rest on the rim of the jar.
Click below to watch to beeswax candle pour and wick straightening demonstration video.
In the pictures below you can see the freshly poured beeswax candles with a nice citronella and beeswax scent. The lighter color candles were poured first.


After 24 hours the candles have completely hardened and are ready use.

- Snip the excess candle wicks down to the desired length.

The beeswax candles with citronella are complete.

Beeswax Candle Burn Test
We burned one of the candles for about 7-1/2 hours collectively - smells very nice - the candle is almost half burned down. According to our calculations, we have estimated these to be 15-hour-burn candles :)

Have a great day!
Excellent tutorial, may I link this article and feature your username in the next issue of the Weekly Homesteading Newsletter? It would be perfect for the DIY section so please let me know, thank you!
Thanks - for sure, that sounds good to me :)
Happy Sunday! This comment is to inform you that your article has been linked and featured in the most recent Weekly Homesteading Newsletter! Thanks and have a great day!
Curious to know if the homemade citronella candles kept away the bugs. I've also found store bought doesn't work for our super-bugs. We have bees on our homestead and I use the beeswax in natural skin care products, but I'm going to try your recipe to make some candles. Thanks for this! Your mosaic table is very pretty
Thanks, I'm always reaching for that mosaic table for small item photo shoots - very cheerful variety of colors :) I've made lip balm with beeswax too - just beeswax and coconut oil - the coconut oil making the combination soft enough to spread, you most likely know that from making the skin care products. I hope you post about making the candles, I like to see how other people do things a little differently (or the same) :)
Will do. I was actually taking photos of making my beeswax lip balm when I saw your post! Funny. I add carrot oil and vit E. Plus a dash of either lemon or peppermint essential oils. Moisturising, healing and a zesty flavour
AWESOME!!! This was one of the "recipes" I have on my to-do and to-learn lists.
Very nice - as you can see it's not a difficult process - after sourcing the ingredients :)
I never made any candles. Can you tell me what is a difference between those candles in the shops and bee wax? Can we make the same thing with them?
I have re-melted paraffin was and re-poured it before and the process was the same. I admit I don't know much about candle wax, but if there are other types of candle wax out there, then I assume they would melt down and re-pour with this same double-boiler melting process.
Some people use crayons to melt down for candles or just a bunch of the end left over pieces of old candles. I have been looking at goats milk candles recently since we have 7 nannies in milk right now. Still need to use some type of wax with the goats milk but it works like the coconut oil to hold oils and scents but the good thing is it cuts back on the amount of your wax need allowing you to make more candles out of the same amount.
Thanks for the clarification and information @liberyworms :)
Amazing post! I love it. Checkout my new post: http://bit.ly/upmyvoteand and let me know if you like it :)
Please Stop
In your your last 100 comments you used 93 phrases considered to be spam and you made this exact same comment 93 times. You've received 4 flags and you may see more on comments like these. These comments are the reason why your Steem Sincerity API classification scores are Spam: 62.50% and Bot: 10.60%
Please stop making comments like this and read the ways to avoid @pleasestop and earn the support of the community.
Very nice! I witnessed the whole process some time ago, but you put it so simply and detailed. It looks so easy and enjoyable. :)
Was there any setbacks and have you tried different essential oils?
It all went pretty smooth. I could see there being difficulties without the double boil. A couple miss calculations that were easily recovered from. We only had 4 sticks with wicks and we ended up having enough beeswax for 5, but we had extra wicks so just grabbed a stick. The first pour was tricky because it was a full can, but after that it was easier for her. This was her first try at making candles with essential oils. It went as smooth as the videos :)
wow, this truly is very innovative. I really do not have the materials. But I hope to try it out one of these days
Thank you for sharing your knowledge! This post has been added to our growing directory of Steemit "how to" posts for the Homesteading/Survival/Foraging/Prepper communities. Your post is helping people learn to survive and thrive now and in the future!
Thanks @soltall - you post quality curations - I'm proud to be on any of them :)
Nice that they burn for so long and great that they smell good! I hope that they work for keeping bugs away. This gives me a great idea for a homeschool coop activity! :)
That would be a very nice homeschool coop activity - I've already given one to my aunt, that was one of the most fun parts of the candle making :)
That is so nice! I recently made some jelly and gave some of the tiny jars away and it was a lot of fun to do that as well. I always think the best gifts (like my quilts) are the ones I don't really want to give away!
Now this is SUPER cool!