Tutorial Part 2 | How To Vectorize Doodle Using A Free Online Tool And Create A Transparent PNG In GIMP (and use that doodle on Redbubble products)

This is the second part of my two parts tutorial on how I clean my doodle digitally using a free image editing software, GIMP and other free tools. You can read the first part of the tutorial here: Tutorial Part 1 | How I Clean My Doodle In GIMP (Free Software Alternative to Photoshop.
In part two we will continue from where we left off. In part one, I finished cleaning the doodle, mirrored it and saved it as a raster image. In this tutorial, I will show you how I vectorize my doodle using a free tool available online.
However, I will not use the previous doodle (the lion's head) in this tutorial but a cat doodle instead. I cleaned this doodle using the exact same steps in tutorial 1. In the following steps, I will teach you how to create a clear and sharp image that you can use on products to sell.
So without further ado, let's continue!
Step 1
I mentioned in tutorial 1 that I can't afford the Adobe Illustrator subscription fee. And this forced me to look for a cheaper alternative. I found vectorization.org after an (equally broke 😂) artist friend recommended it. Vectorization.org is a free online tool to create vector images from raster images.
Open your browser and go to http://www.vectorization.org/.
Click on the Choose File button and locate the raster image you want to vectorize. However, before you proceed, please note the requirements: the maximum file size is 5MB, the supported file types are jpg, png, pdf, jpeg, and the maximum dimension for images are 3000 x 3000 px.

Step 2
Vectorization.org offers five different output files - Scalable Vector Gaphics, Encapsulated Postscript Vector graphics, PostScript, Portable Document Format, and Drawing Interchange Format. I am not going to explain those formats here but if you want to learn further feel free to check out those links. I usually use SVG or EPS format but for the purpose of this tutorial we will use PDF. Click on the Start button.

Step 3
Processing the file...

Step 4
Download the converted file by clicking the link as shown in the red box below. The converted file is in a PDF document.

Step 5
Open the PDF file, and voila! A clear and sharp image of the cat! Still can't spot the difference between a raster image vs a vector image? Move on to the next step.

Step 6
Let's enlarge a portion of the raster image of the cat. As you can see the image is badly pixelated and blurred. Now let's compare it to the vector version of it in the following step.

Step 7
The vectorized image. This is the exact same portion of that image but notice how clear and sharp it is compared to the previous raster version? The reason why it is clear and sharp is because a vector image retains its crispness at any magnification. Meaning to say I can print this image on an A4 size paper OR I can print it as a large advertisement billboard, and it will maintain its quality.

Step 8
Now let's say I want to use this doodle on Redbubble products. However, Redbubble only accepts JPG or PNG images and doesn't accept vector graphics. How do I convert this vector back to raster so that I can use the design on Redbubble's products? Easy, we will use another free online tool to do this. Open you browser and go to http://pdf2png.com/. This is a free online tool that allows you to save a PDF document as a set of separate PNG images. Click on the Upload Files button and upload the PDF document that contains the vectorized image.

Step 9
The PDF document has been converted to a PNG file (a raster image). Download the file.

Step 10
The file will be in ZIP.

Step 11
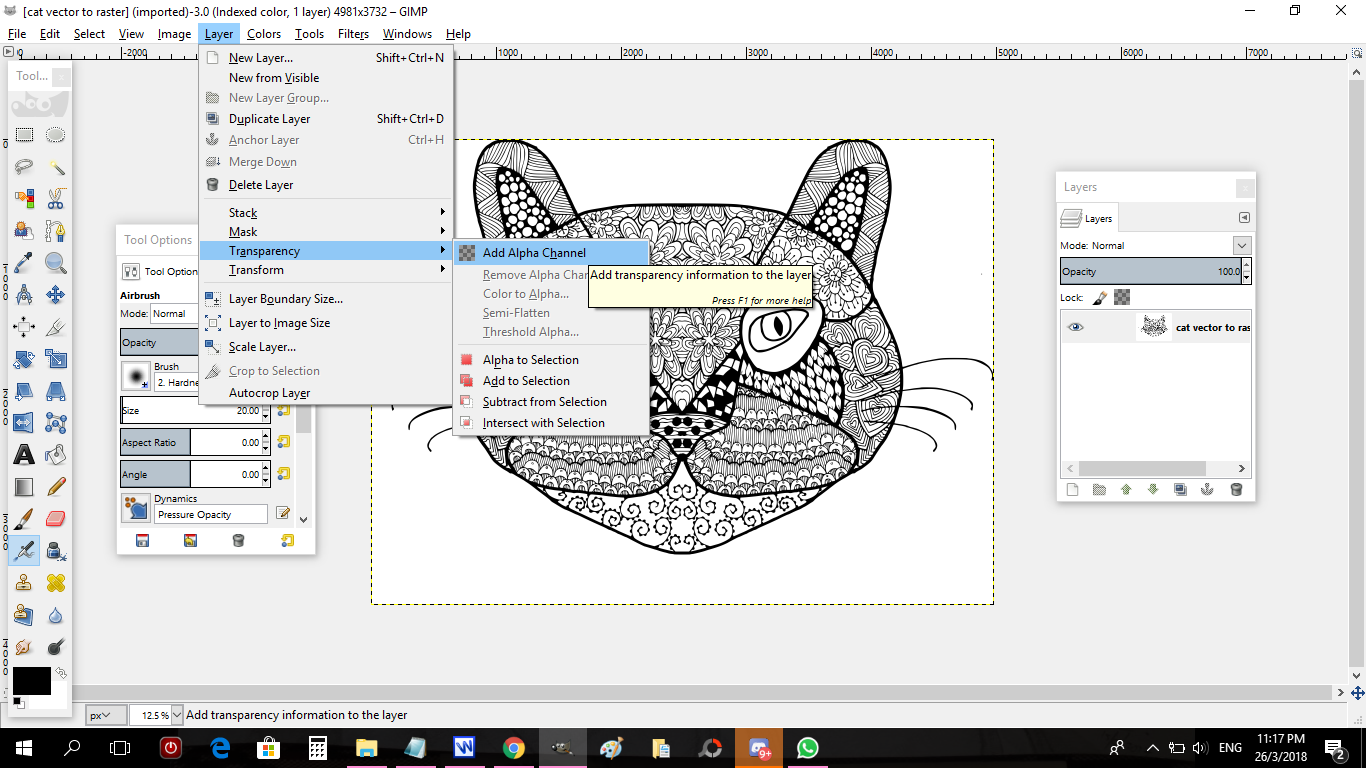
Open that PNG file in GIMP. One of Redbubble's (and majority of the POD sites) requirements is to use transparent PNG images. Transparent PNG means you need to remove the image background. In this case, we need to remove the white background in the image. So how do I do this? Easy. We use GIMP's Alpha Channel.

Step 12
Go to Layer menu, click on Transparency, and click on Add Alpha Channel.
Step 13
Click on the Fuzzy Select Tool (refer the red box).

Step 14
Click on a section of the background. In this case, I clicked on the section at the top left corner. That corner will be highlighted.

Step 15
Now click the Delete key on your keyboard. That background section will be deleted (gray section)!

Step 16
Repeat step 13 to 15. (Continue to use the Fuzzy Select Tool to highlight the sections of the background and delete them all accordingly). I choose not to delete the white area within the cat's face but if I want to do it I have to repeat the same steps for each tiny sections. Yes, it is a tedious process...

Step 17
Next I enlarge the image to check if the edges are crisp or if there is any tiny leftover background that I need to get rid off.

Step 18
If everything looks fine, I export (and save) the file as a transparent PNG. Go to File, click on Export As.

Step 19
Finally, I open the file one last time and as you can see the white background is gone. This image is ready to be uploaded to my Redbubble products!

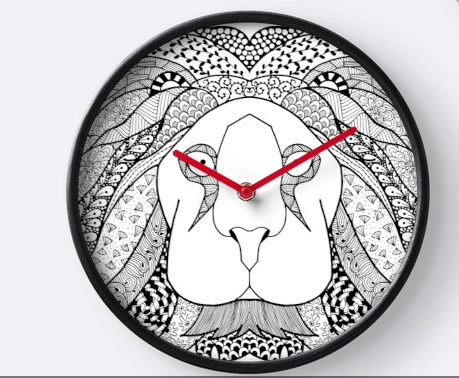
And here is a sample of my doodle on a clock and a baby onesie.

So that's it! Lots of steps but it's not that hard. However, you probably want to read a bit on the differences between raster image vs vector image to get a clear idea about the whole process. There are other ways to accomplish this but like I said this the way I did it (using free online tools). This method probably wouldn't work for complicated and colored images.
Thank you for checking out my post! What do you think of this tutorial?
My previous posts:
My Family | Fun Time At The Local Recreational Park
My Recent W-I-P | Who Is Your Favorite Contest?
Lion Doodle Finally Available At My Redbubble Store
Tutorial Part 1 | How I Clean My Doodle In GIMP (Free Software Alternative to Photoshop
Team Malaysia Babes & Steem Sugars | A Doodle Inspired By Steemit Women Communities
Winner Announcement | Weekly Doodle Contest Week #1 WINNER
I am selling some of my paintings over on Artfinder. Shipping is FREE worldwide. You can check them out here: ARTFINDER.
My gifts & merchandise available at REDBUBBLE (international), Printcious & CreativeUnited (Malaysia).
Thank you!

My avatar was illustrated by @pinstory

This is the BEST thing ever! This is exactly what I needed but I didn't know it or what it was called to figure it out on my own. Thank you so much for making these tutorials! I kept working on my images thinking I wasn't using a good enough scan quality because the lines were always pixelated, but I knew there must be a way! Thanks for showing me :-) This is awesome and so well explained! I didn't have a bit of trouble. My aunt will love this too!
I am glad you found it's useful @orangina. However bear in mind that the final image has been converted back to a raster image so it can get pixelated if your resolution is too small. I intentionally left out some information like the differences between PPI vs DPI, resolution and image size because every POD sites have different requirements.
I used 300 dpi...should I use something bigger? I did notice that when I added color, darker colors have a tiny white line between the color and the outline...maybe that is why?
You've been upvoted by TeamMalaysia Community :-
To support the growth of TeamMalaysia Follow our upvotes by using steemauto.com and follow trail of @myach
Vote TeamMalaysia witness bitrocker2020 using this link vote for witness