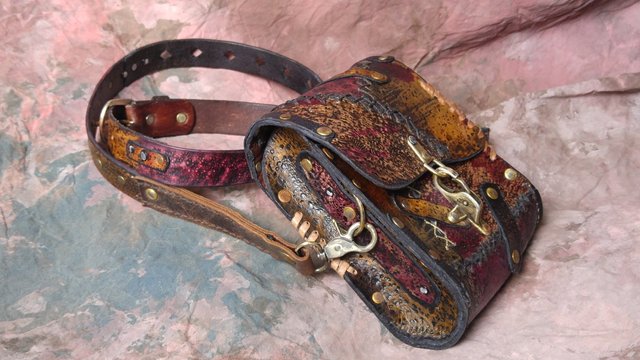
Leather Is My Art Medium -- The Great Bag of the Apocalypse Part 2-- An Armadilloman Photo Blog
Hey you Wasteland Weekenders...Where does the post-apocalyptic guy or gal carry their phone, cigarettes, wallet and stuff? Well in a post-apocalyptic belt/shoulder bag of course! Here is the part 1 post gallery of pictures of the finished bag and an explanation of the project.
I promised in part 1 to post a part 2 with the process pictures when I had the chance to sort through my snapshots. It took me about a month to get to that but here they finally are.
Behold... the process pictures of the making of "The Great Bag of the Apocalypse."
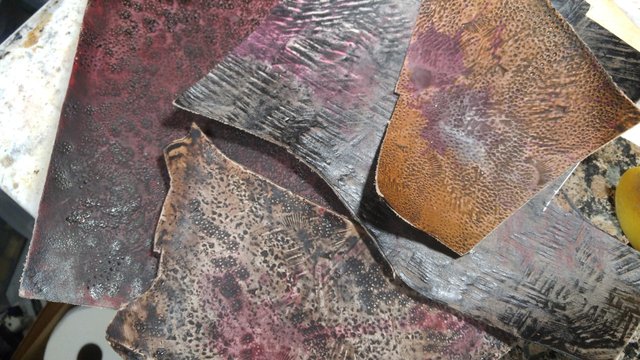
It all starts with a plain piece of 3 or 4 oz vegetable tanned tooling cowhide. I take this piece of leather and abuse it by stomping on it, hitting it against textured items in nature like weathered wood, tree stumps, run over it with the truck in the gravel driveway, etc. I just work that leather over. Here I am stomping on the piece on a rough sidewalk. I you have been following my blog you probably realize by now that a lot of my projects start with me stomping or beating on a piece of leather
Next I channel my inner expressionist and dribble, smack, dab and drool several shades of brown and red on the distressed leather.

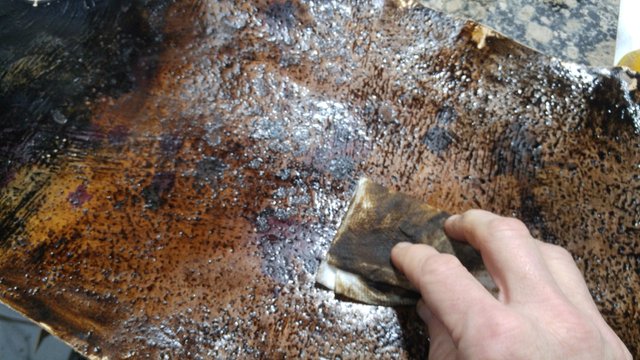
The leather piece is then coated with a Hi Lite stain which settles into all the divets and depressions I have beat into the leather.

When dry I take a wet cloth and rub off the stain from the tops of the bumps and ridges of the distressed cowhide piece. I will take a piece of sandpaper and rub lightly on the piece to make the highlights pop as well.
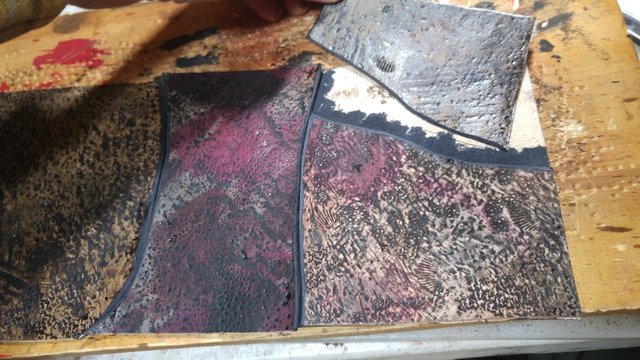
When I have distressed and dyed enough cowhide in various colors and textures, I am ready to start cutting out the pieces assembling the project. I sometimes make a pattern before I start, sometimes not. For this bag I just dove in with the measurements I wanted in mind and start cutting pieces.
Here I have cut a piece of 1 to 2 oz pigskin the shape and size of the bag to serve as a lining and the base to hang everything on. In this shot I am sponge painting the leather with 3 different shades of brown and some black.

I start cutting puzzle pieces from the prepared distressed and colored leather...

...fitting them together and gluing them...

...down the length of the lining.
Then I have to mark the stitching spacing along the edge of each piece ...
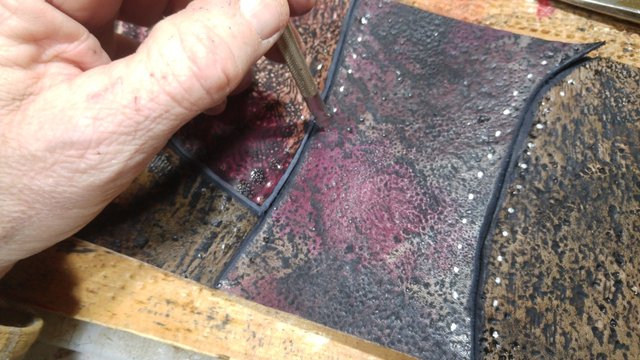
...and punch the stitching holes.

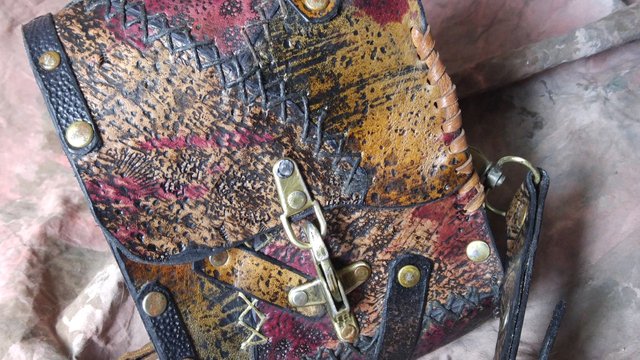
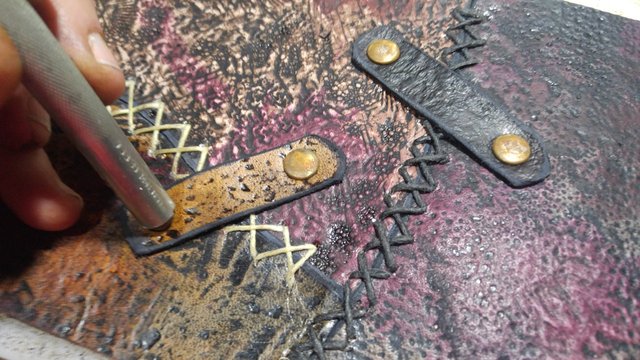
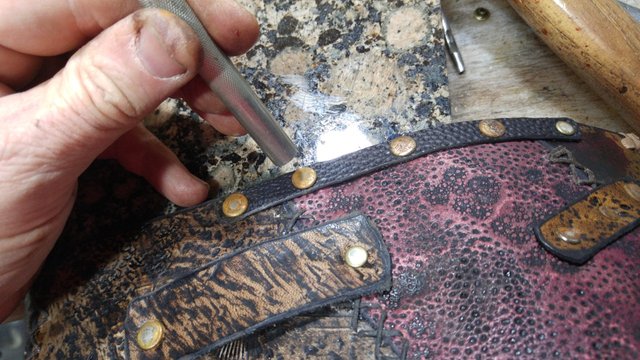
I "X" stitch along the seams and when done I rivet on leather "bandages" for decoration. Check the rusted rivets. All the rivets in this bag are hand distressed (which means sanding off the plating) and rusted. On my workbench I have a glass of water with rivets corroding in it pretty much all the time.
The rusted and distressed "D" rings are attached to both bag gussets (the side pieces).
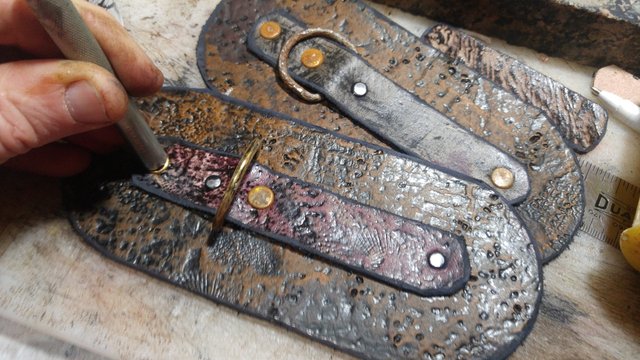
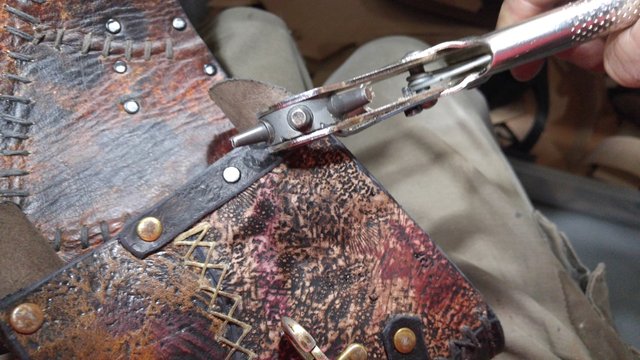
Next the belt loops are riveted to the bag using a belt blank for spacing.
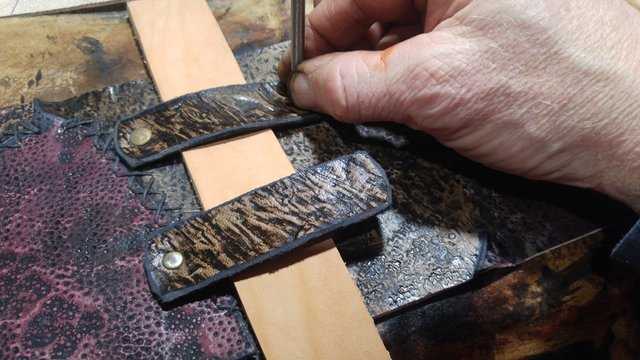
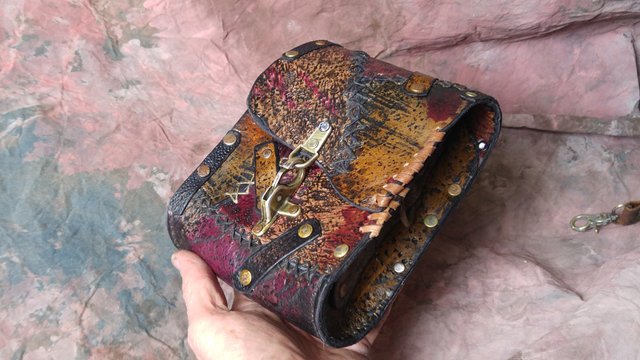
And there you have the completion of the major piece of the bag body, ready to stitch together.
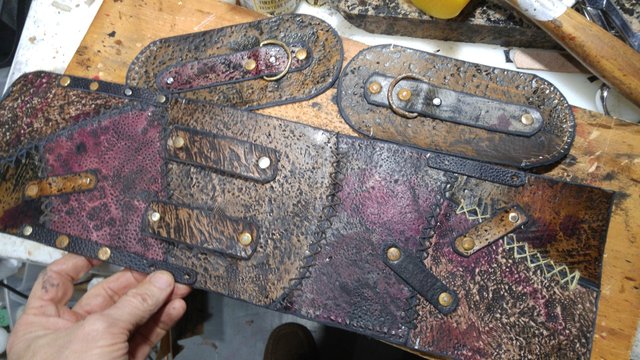
The gussets are hand sewn in around the bottoms.
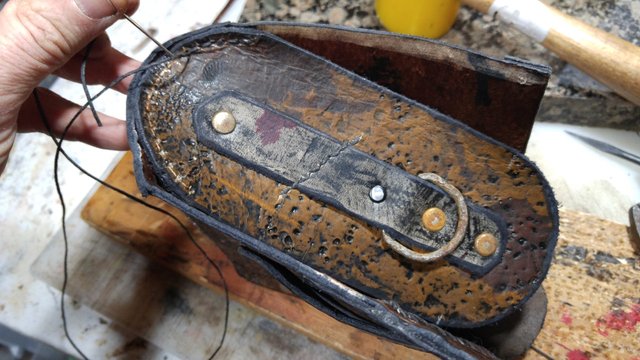
The clasp is mounted and

...the gussets, which were sewn on at the bag bottom are glued along the edges to the bag body. Rivet holes are made with a rotary punch and then the gussets are riveted together with the front of the bag.
Decorative whip stitching and rivets are mounted on the flap edge.
The strap pieces are cut and riveted together, a buckle added and the snap swivel ends mounted.

Touch up some spots with the dye and then the whole thing given several coats of acrylic finish and we are done.
If you would like to see more leather art and craft photo blogs, please upvote, resteem and give the ol' Armadilloman a follow!

To maximize my time, I do most of my upvoting and following through Steem Engine. You should too!

Hey, this is marvelous. You've made something great, man. A friend of mine also works with leather and I'm kinda jelaous of you guys.
Thanks @nameless-berk. I got addicted to creating things from leather when I had a section on it in Jr High shop class. Been doing it for a long time.
That's it, I'm calling the Spanish Inquisition on you !
You are most definitely magic, to be able to create such interesting things ! ;)
No one expects the Spanish Inquisition!
Your post was featured in today's @ARTzone!
courtesy of @web-gnar!
You've received an upvote from @slothicorn! Click Here to Read our New Curation Policy And Updated Rules
(@justatouchfey) ((.)ω(.))
Resteemed to over 18100 followers and 100% upvoted. Thank you for using my service!
Send 0.200 Steem or 0.200 Steem Dollars and the URL in the memo to use the bot.
Read here how the bot from Berlin works.
Feel free to join our partner crypto exchange: https://www.binance.com/?ref=10230705.
@resteem.bot
Resteemed by @resteembot! Good Luck!
Check @resteembot's introduction post or the other great posts I already resteemed.
true craftmanship. Salute!
Thank you @anomt!
wow mega post. awesome step by step photos. good work !!
Thanks a lot @web-gnar! I now take pictures through the whole process every time I make something interesting, so follow along and you will see more "how I did that" photo blogs. I also give away a handmade leather item every other week, so stay tuned.
Your Post Has Been Featured on @Resteemable!
Feature any Steemit post using resteemit.com!
How It Works:
1. Take Any Steemit URL
2. Erase
https://3. Type
reGet Featured Instantly & Featured Posts are voted every 2.4hrs
Join the Curation Team Here | Vote Resteemable for Witness
I admire all your work. These are masterpieces!
Thank you @voronenka! Coming from a talent like you, that really means something.