Setting Up A Linux VPS Securely (Pt.1) - Join Me On My Journey to Become a Witness

Along with a a goal to get to Level 70 Reputation, I also wanted to host a node for the blockchain, and see about becoming a Steem Witness. That was after getting the rep level first, that I now have. So, I am continuing with the vision I had months ago, and am going to document or journal my journey to setup a Steem Witness Node.
This can also serve as a guide for anyone who doesn't even know Linux. I will show what to do to set things up, and by that time they should also have a decent understanding to take the reigns in their own troubleshooting.
So, please join me on this journey ;)
Purchase a VPS or Dedicated Server
I ordered a VPS from OVH.com on Black Friday. I may have to upgrade, I don't know if it will be enough, I shall see.
You will get an email with the server IP, usually a host provided subdomain as well, and the root password.
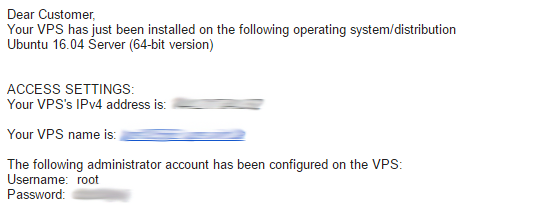
As you can see, I have Ubuntu Server 16.04. Maybe you have a similar Debian OS, or something based on Redhat like CentOS. The commands may vary slightly in structure or syntax, so if they don't work you will have to do some research of your own.
I'm doing this from Windows as my local OS. If you have Mac, then things will be slightly different in terms of what apps to download and use.
SSH Remote Connect
The first thing to do is connect to your VPS. You can test out if your VPS works in the first place from the control panel after you login to the VPS host's site. At OVH, you click on KVM to access the console. If that works, then it's time to test out a better way to interface with the computer than the browser.
Putty is the usual program used to connect via SSH. Click that previous link, and download the "Windows MSI installer package" for the easy installer.
Get that installed, and then open up Putty to see this:

Put your IP or VPS domain name in the Host Name field.
Or you can put "root@" in front first (recommended). If you don't you have to specify "root" when you login each time.
Click Open.
Enter the password provided in the email mentioned above with all your info.
Change root password
So you should change the password to something more complex for the root. The host of your server may not have generated a strong one for you.
type:
passwd
Then enter your password at each prompt requesting it. Done.

Create a user for yourself
This is important for security. You don't want to be using the root to do changes to your system unless you really know what you're doing. Regular users can be given the sudo command access to be a "super user" (su) and execute commands at root access without having all of the root access to modify system files. Another important security aspect is for SSH, as you don't want to leave root access through SSH, so another user is required.
type:
adduser yourName
Fill in yourName with the name you want to use to login instead of root. Then repeat the password twice, and you can skip the other parts by just hitting enter.
then do:
adduser yourName sudo
or I later learned usermod -aG sudo yourName is the proper way.

Logout and back in as the new user
type:
logout
Re-open Putty and log into SSH again, but this time, don't use "root@111..." to login, user your new username instead. You can also "Save" this configuration, and "Load" it each time you open Putty, rather than retype everything.
Click open.
Enter your password for this new user.
Now you are logged in.
There are a few more security things to do.
Disable root login
This is to prevent root logins to SSH, which can leave your computer vulerable to brute force login attempts to the root account.
type:
sudo nano /etc/ssh/sshd_config
Scroll down (with your keyboard down arrow key) until you see "PermitRootLogin yes", or hit "Page Down" once to get there.
Go to the end of the line after the "s", the hit Backspace 3 times, and replace the "yes" with "no". No quotes.

PermitRootLogin no
That's what you need to have. Press ctrl+o on your keyboard to save the file, hit enter to confirm the name. Then ctrl+x to exit.
Now restart SSH with:
sudo service ssh restart
If you are using CentOS instead of Ubuntu, try:
sudo systemctl restart sshd
They both work on Ubuntu, I tried.
Now if you try to log into your server with root via SSH, it won't work. Don't forget you just changed the password above too. You need to remember the root password to have access.
Optional, change the default port from 22 to something else
If you want to really prevent people from trying to get in through the default way and make it harder to find your SSH access port, change it. Use the command from above to edit the sshd file and change the port to something below 65535, like 35545 or something, as long as it's not a reserved port, which is lower than 100 most of the time, so stick above 1000 and you're good.
You can also optionally restrict only certain users to have access to SSH login by adding the line AllowUsers followed by your username. This is if you plant o create more users and really want to restrict things.
After you save the file, exit, as was done above earlier (ctrl+o, ctrl+x), then restart the service sudo service ssh restart, and logout.
If you try to login without changing your default port 22, it won't work. You need to put in the new port, like for example 35545, and then it will work. Change your "Saved" Putty config if you need to.

Now you can login to your new VPS server through SSH, with a new user, a new port, and your root can no longer login, making it that less vulnerable. There is another thing to do to make SSH even more secure with RSA keys and disable password logins, which will be for next time (Pt.2).
Done!
I just did this, and so can you if you want to. I'm not a Linux noob, nor am I a pro either, but all the steps have been laid out if you want to try this out in the future. As I post more of the steps, it might make more sense where this is all heading to. If you want to go ahead, there are Linux tutorial you can find on google on how to maneuver the OS. Try out an installation with VirtualBox, a Desktop version that is, and you can still do command line to learn some basics while still watch youtube, or go online and do whatever.
Stay tuned for more posts in my journey to setup a node and be a Steem Witness.
Thank you for your time and attention! I appreciate the knowledge reaching more people. Take care. Peace.

 Payout Selected
If you appreciate and value the content, please consider:
Upvoting  , Sharing
  and Reblogging
  below.
 me for more content to come!
@krnel
2016-11-27, 7:32am
This post has been ranked within the top 50 most undervalued posts in the second half of Nov 27. We estimate that this post is undervalued by $6.58 as compared to a scenario in which every voter had an equal say.
See the full rankings and details in The Daily Tribune: Nov 27 - Part II. You can also read about some of our methodology, data analysis and technical details in our initial post.
If you are the author and would prefer not to receive these comments, simply reply "Stop" to this comment.
Hey mate,
I just want to point out that changing an SSH port won't do anything for the security of your access. It's trivial to find what ports are open and what they are used for.
I'm just saying that so people won't think that now they are safe from hackers. It's way more dangerous to think you are safe than to be on your toes.
I didn't say they would be safe just by changing their ports. All it does it make it less obvious by not using the default port 22. An extra step.
I know you didn't. But some people might think that so I just wanted to point it out :).
Hehe, ok. But I also said it was optional, since it's not that big of a deal. The other steps are not optional in my opinion.
I still do not fully understand the witness thing still. When I started learning about OpenBazaar and using it I ended up learning how to start a VPS using Digital Ocean. Guide is similar and a cool thing for a tech nerd to know, I hope someone uses this guide you made and learns something new, learning the set up steps and having them down to memory is important.
Thanks. There are some posts on steemit from various ppl explaining it. Try a google search on steemit.com if you want to learn more.
Shared on twitter
Disclaimer: I am just a bot trying to be helpful.
Thanks ;)
Thanks for writing this guide! I'm sure it will be useful for a lot of people :) And good luck on your journey to become a witness! Best of luck.
Thanks :) And you're welcome, I hope it does help some people in the future, as I will be laying out pretty much everything to do hehe for anyone to see what needs to be done to make a secure witness node. Peace.
Very interesting. Good luck with your witness journey :-)
Thank you :)
great guide
Good luck. What are the specs of your server?
Thanks, sorry for missing your comment. I have the minimum to see how it goes, and that's the minimum from 2 months ago before the new hardfork RAM improvements which is the one I will be testing and launching on eventually. From @klye's great post, which unfrounately can't be reblogged or commented on:
CPU Cores / Speed RAM Hard Drive Operating System
2 cores @ +2.2ghz 8GB 40GB SSD Ubuntu 16.04 server
I have 2x2.4Ghz, and the rest is the same. The immediate issue I see is for the SSD of 40, since there is the shared-db in the new fork as well. Ready to upgrade when needed. Peace.
This post has been linked to from another place on Steem.
Advanced Steem Metrics Report for 27th November 2016 by @ontofractal
Additional Considerations for Becoming a Steemit Witness by @full-steem-ahead
Learn more about and upvote to support linkback bot v0.5. Flag this comment if you don't want the bot to continue posting linkbacks for your posts.
Built by @ontofractal
I'm so grateful for this, It's so educational.