Build A Blog Site With React, Redux Firebase And MaterializeCSS (Part 13)
Repository
React
https://github.com/facebook/react
Material-ui
https://github.com/mui-org/material-ui
My Github Address
This Project Github Address
https://github.com/pckurdu/Build-A-Blog-Site-With-React-Redux-Firebase-And-MaterializeCSS-Part-13
What Will I Learn?
- You will learn how to write firestore security codes.
- You will learn to setup the cloud function and hosting in the application.
- You will learn how to create a cloud function.
- You will learn https functions in cloud function.
- You will learn onRequest() function in cloud function.
- You will learn send method in cloud function
Requirements
- text editor (I used visual studio code editor)
- Basic javascript information
- Basic react information
Difficulty
- Basic
Tutorial Contents
In this tutorial we will learn how to do security rules in firestore and see how to create cloud function in application. You will be able to see how to install cloud functions and how to create the first cloud function.
You can view the topics in the following sections:
- Firebase-Firestore Security Rules
- Setting The App For Cloud Function
- Create The First Cloud Function
Let’s start and enjoy
1- Firebase-Firestore Security Rules
In this section we will learn how to define security rules on firestore.
We have created the database in test mode while activating firestore on firebase. This process is not a secure process and anyone who knows the address of our database can perform read and write operations in the database. In order not to be exposed to external attacks, we must establish security rules in firestore.
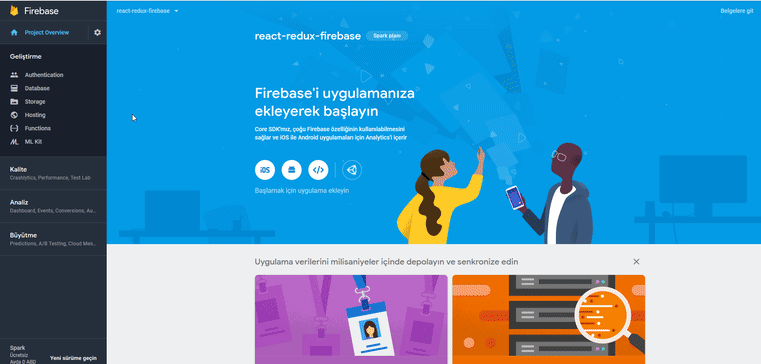
To change the security rules, we must go to the firestore section in the firebase and open the Rules tab. We can add rules to firestore with this tab.
{
//all document
match /{document=**} {
   allow read, write;// read and write authority
}
When the firestore is created with the test mode, all documents in the firestore are authorized to read and write on all users. We added users and projects colections to firestore. We must define the safety rule in these two collections so that only the authorized users can access the documents in the collection.
Let's start with the projects collection.
We require only authorized users to access each project document within the projects collection. We can check the user's request with request.auth. If request.auth.uid is present the user is authenticate and can read and write in project documents. Then we can give the user the ability to read and write very easily.
match /projects/{project}{
    allow read,write: if request.auth.uid!=null
}
The picture below will help you to write the code above correctly.
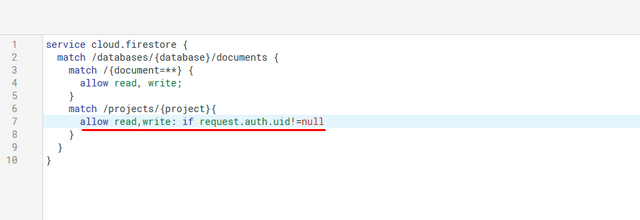
Thus we only authorize users to log on read and write project documents on firestore.
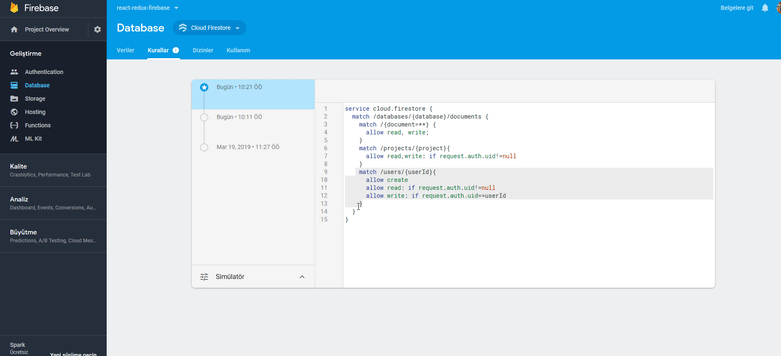
Let's give permission to create permission in the users collection, we will give read permission only to users who login and we will give the write permission only the specific user.
We must use the userId parameter when matching in the collection to create a specific user.
match /users/{userId}{
   allow create
   allow read: if request.auth.uid!=null
   allow write: if request.auth.uid==userId
}
Again the picture below will help you to write the code above correctly.

So we made the firestore safer. In order for the security rules we write to work properly, we must delete the read and write permissions on all documents and publish the changes we make. If we do not publish the changes we make, the rules will not work.
2- Setting The App For Cloud Function
Now that we have defined the firestore security rules, we can now create a cloud function for the notification.
In this section we will learn how to setup the cloud functions. Let's start with what cloud functions do.
With its cloud functions structure, firebase allows us to create a trigger in a cloud environment. In other words, we are producing functions in internet environment and these functions can work in internet environment.
We need firebase-tools packages to install cloud functions. So that we can open the project we created in our own terminal, and functions,hosting etc. can be done with the terminal.
npm install -g firebase-tools
After installing firebase-tools globally, we have to login to firebase so we can choose the firebase project where we will create cloud functions.
firebase login
After writing this code, firebase will open a screen where you can login. After typing the user name and password, you are logged in.
We can start the installation with firebase init code.
We must say yes to the first question because we are ready to move forward.
In the second question we are asked to choose which features of firebase to use. We will use them for functions and hosting.

In the third question, we are asked which project to use. We choose react-redux-firebase-49b2f because our project is it.

If we want we can create a new project here.
In the fourth question, we are asked to choose the software language we will use. Since we developed the application with react, we should select the JavaScript language.

The fifth question is whether we want to use ESLint. In applicaiton we will not use ESLint so let's answer no this question.
With the sixth question asks whether we want npm dependencies.Let’s say yes.
After answering this question, we can proceed to the installation phase.
After the functions are installed in our application, we will be asked to set the project home directory in the hosting process. Since we will use the dist folder as our general directory, let's answer the question dist and we configure as single page configuration.
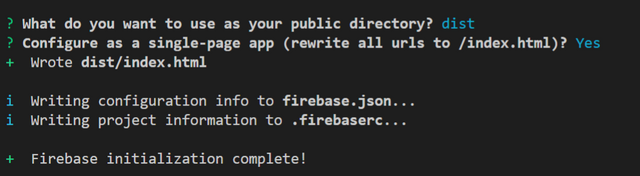
So we have also implemented the hosting installation. We created the files that are necessary for functions and hosting between our application's folders.
3-Create The First Cloud Function
In this section we will create the first cloud function and send it to the firebase for publication.
In the previous section we have created the files that we will write cloud functions. We can write our code in the index.js file in the functions folder.
In fuctions/index.js
//Generate function with firebase-functions packages
const functions = require('firebase-functions');
We produce function object using firebase-functions packages.
//generate a function indicating a message
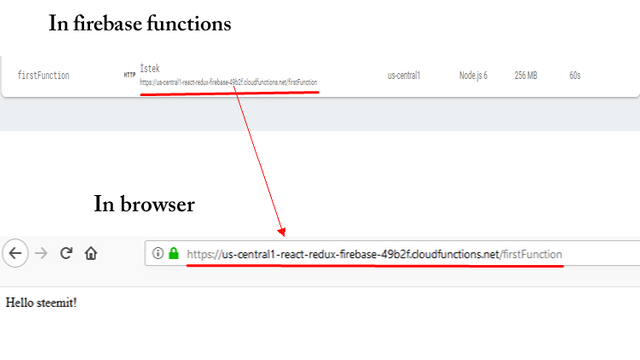
exports.firstFunction = functions.https.onRequest((request, response) => {
response.send("Hello steemit!");
});
We must use the https object to generate a function that performs https. With the onRequest() function in the https object, we can perform the request-response operation and we can forward the message we want to forward with the send() function.
Now all we have to do is publish this function.
firebase deploy --only functions
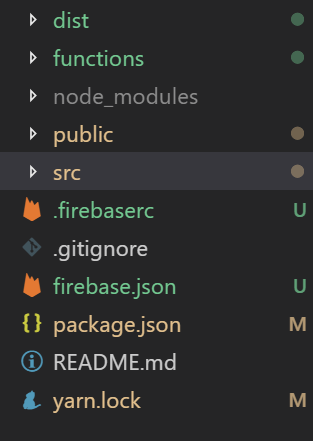
With the above code, we can only publish the functions we have created. This function will appear in the functions section of the firebase website. We can examine the results of this function in detail.
We can see the result of the function that is in a browser.
Curriculum
Part 1 - Part 2 - Part 3 - Part 4 - Part 5 - Part 6 - Part 7 - Part 8 - Part 9 - Part 10 - Part 11 - Part 12
Proof of Work Done
https://github.com/pckurdu/Build-A-Blog-Site-With-React-Redux-Firebase-And-MaterializeCSS-Part-13
Thank you for your contribution @pckurdu.
After reviewing your tutorial we suggest the following points listed below:
Again an excellent tutorial and well explained. The subject is very interesting and of great use for those who want to create a cloud function in the firebase. Good Job!
Thanks for putting GIFs back in your tutorials. Your contribution becomes more perceptible.
Thank you for your work in developing this tutorial.
We are waiting for the next tutorial.
Your contribution has been evaluated according to Utopian policies and guidelines, as well as a predefined set of questions pertaining to the category.
To view those questions and the relevant answers related to your post, click here.
Need help? Chat with us on Discord.
[utopian-moderator]
Thank you for your review, @portugalcoin! Keep up the good work!
Congratulations! Your post has been selected as a daily Steemit truffle! It is listed on rank 2 of all contributions awarded today. You can find the TOP DAILY TRUFFLE PICKS HERE.
I upvoted your contribution because to my mind your post is at least 11 SBD worth and should receive 174 votes. It's now up to the lovely Steemit community to make this come true.
I am
TrufflePig, an Artificial Intelligence Bot that helps minnows and content curators using Machine Learning. If you are curious how I select content, you can find an explanation here!Have a nice day and sincerely yours,

TrufflePigHi @pckurdu!
Your post was upvoted by @steem-ua, new Steem dApp, using UserAuthority for algorithmic post curation!
Your post is eligible for our upvote, thanks to our collaboration with @utopian-io!
Feel free to join our @steem-ua Discord server
Hey, @pckurdu!
Thanks for contributing on Utopian.
We’re already looking forward to your next contribution!
Get higher incentives and support Utopian.io!
Simply set @utopian.pay as a 5% (or higher) payout beneficiary on your contribution post (via SteemPlus or Steeditor).
Want to chat? Join us on Discord https://discord.gg/h52nFrV.
Vote for Utopian Witness!