Build A Blog Site With React, Redux Firebase And MaterializeCSS (Part 8)
Repository
React
https://github.com/facebook/react
Material-ui
https://github.com/mui-org/material-ui
My Github Address
This Project Github Address
https://github.com/pckurdu/Build-A-Blog-Site-With-React-Redux-Firebase-And-MaterializeCSS-Part-8-
What Will I Learn?
- You will learn how to perform firebase auth operations using the redux.
- You will learn the callback functions of signInWithEmailAndPassword ().
- You will learn to access redux action in react component.
- You will learn to process the reducer operations and store data to the props in the react component.
- You will learn to update the state's unknown object with the setState () function
Requirements
- text editor (I used visual studio code editor)
- Basic javascript information
- Basic react information
Difficulty
- Basic
Tutorial Contents
In this tutorial we will perform sign in and sign out operations using redux.
We will create a action for the user to login. In action, we will create the necessary control environment and communicate with the reducer.When exporting the reducer to the store, we will provide the login control from the firebase with the action.
As a result of these transactions we will have information that the user is logged in or not but first we need to activate the component in which the user can enter their information. We created the signIn component in the previous tutorials. In this tutorial we will learn how to access the user-entered inputs.
After getting the user's login information, we will communicate with reducer and action in the signIn component. We will examine which values are coming to the signIn component and we will complete our code according to the information.
We will perform the sign out process after performing the login process. For the sign out process, we will define another action and in this action we will perform the firebase exit with the firebase function. We will do the action control with the reducer and forward the sign out information to the store.
This tutorial is divided into headings as follows:
- Create Login Action
- Activate SignIn Component
- Access Actions From SignIn Component
- Access Reducer and Store From SignIn Component
- Control of Login Processes
Let’ start and enjoy.
1-Create Login Action
We created the projectActions.js file to add data to firestore. Since we will perform authentication, we create another file. Under the actions folder, we will create the authActions.js file.
We will define a function in this file and use this function as action on the reducer side. Since this function will check the user information, it should take the input information with a parameter.
In authActions.js
//An action called logIn
export const logIn=(information)=>{
    return (dispatch,getState,{getFirebase})=>{
        //We're accessing the firebase
        const firebase = getFirebase();

        //Email and Password method to check the login.
        firebase.auth().signInWithEmailAndPassword(
            information.email,
            information.password
        )
    }
}
We defined getFirebase() in index.js.Using getFirebase(), we can access the firebase and use the functions in it.
The auth () function in the firebase contains functions to perform authentication operations. We'll use the signInWithEmailAndPassword() function because we're activating the Email / Password login method.
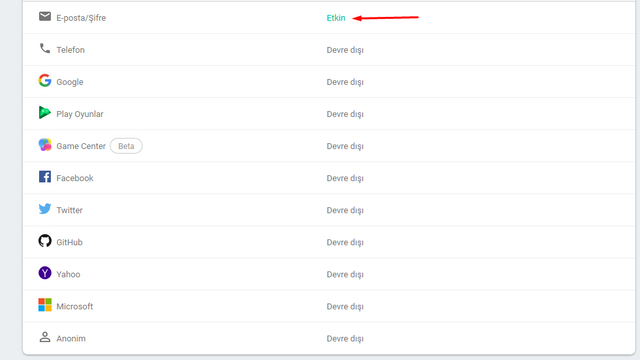
signInWithEmailAndPassword () returns whether the user is logged on by email or password. If the operation is successful, we can catch it with the then() function. If the login process is wrong or if the error occurred during the connection to the firebase, we will be notified by the catch() function.
In authActions.js
//Email and Password method to check the login.
        firebase.auth().signInWithEmailAndPassword(
            information.email,
            information.password
            //if login is successful
        ).then(()=>{
            dispatch({type:'LOGIN_SUCCESS'});
            //if login fails
        }).catch((err)=>{
            dispatch({type:'LOGIN_ERROR',err});
        });
As we complete the logIn action, we can switch to the reducer control.
We have created the authReducer.js file before. In this reducer, we will check the type of action and keep a variable with the help of error.
In authReducer.js
//default data is used if no state data is assigned.
const initState={
    //error variable
    authError:null
}
We will do according to the action type of the state and authError variable.
//create reducer with state and action parameters
const authReducer=(state=initState,action)=>{
    switch (action.type){
        case 'LOGIN_ERROR':
        console.log('login error');
        //Importing authError in state
        return{
            ...state,
            authError:'login failed'
        }
        case 'LOGIN_SUCCESS':
        console.log('login success');
        return{
            ...state,
            authError:null
        }
        default:
        return state;

    }

}
The reducer does not know which action is running and controls all actions. We can use action according to the type of action.
Now the reducer knows the result of the firebase signIn process. Using the components reducer, we can learn the result of the signIn process and do the operations accordingly.
Then let's prepare to use this reducer in the signIn component.
2- Activate SignIn Component
We have previously designed this page.
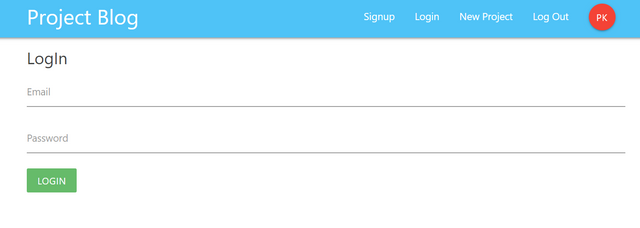
Let's enter the values entered into the input and push the button into the state of this component.
For these operations, we must first define the state.This state must be created to keep the state email and password.
In SignIn.js
class SignIn extends Component {
  //for inputs
  state = {
    email: '',
    password: ''
  }
As input values change, we must update these state values. For this we must trigger the input onChange event and define a function to run when triggered.
//will work when the input is changed.
  handleChange = (e) => {
    this.setState({
      [e.target.id]: e.target.value
    })
  }
…
   {/* for email */}
   <div className="input-field">
      <label htmlFor="email">Email</label>
      <input type="email" id='email' onChange={this.handleChange} />
   </div>
   {/* for password */}
    <div className="input-field">
       <label htmlFor="password">Password</label>
       <input type="password" id='password' onChange={this.handleChange} />
    </div>
We used the setState() function to perform the state update. On this page we have defined two inputs and we used e.target.value to detect which input has changed. Thus the values in the inputs will be equal to the state.
When the submit event of the form is triggered, it will be retaining the final state of the state inputs. Let's create a function to trigger when the submit event occurs.
//will work when the form is submit.
  handleSubmit = (e) => {
    e.preventDefault();
    console.log(this.state);
  }
…
<form className="white" onSubmit={this.handleSubmit}>
So we can access the input values.
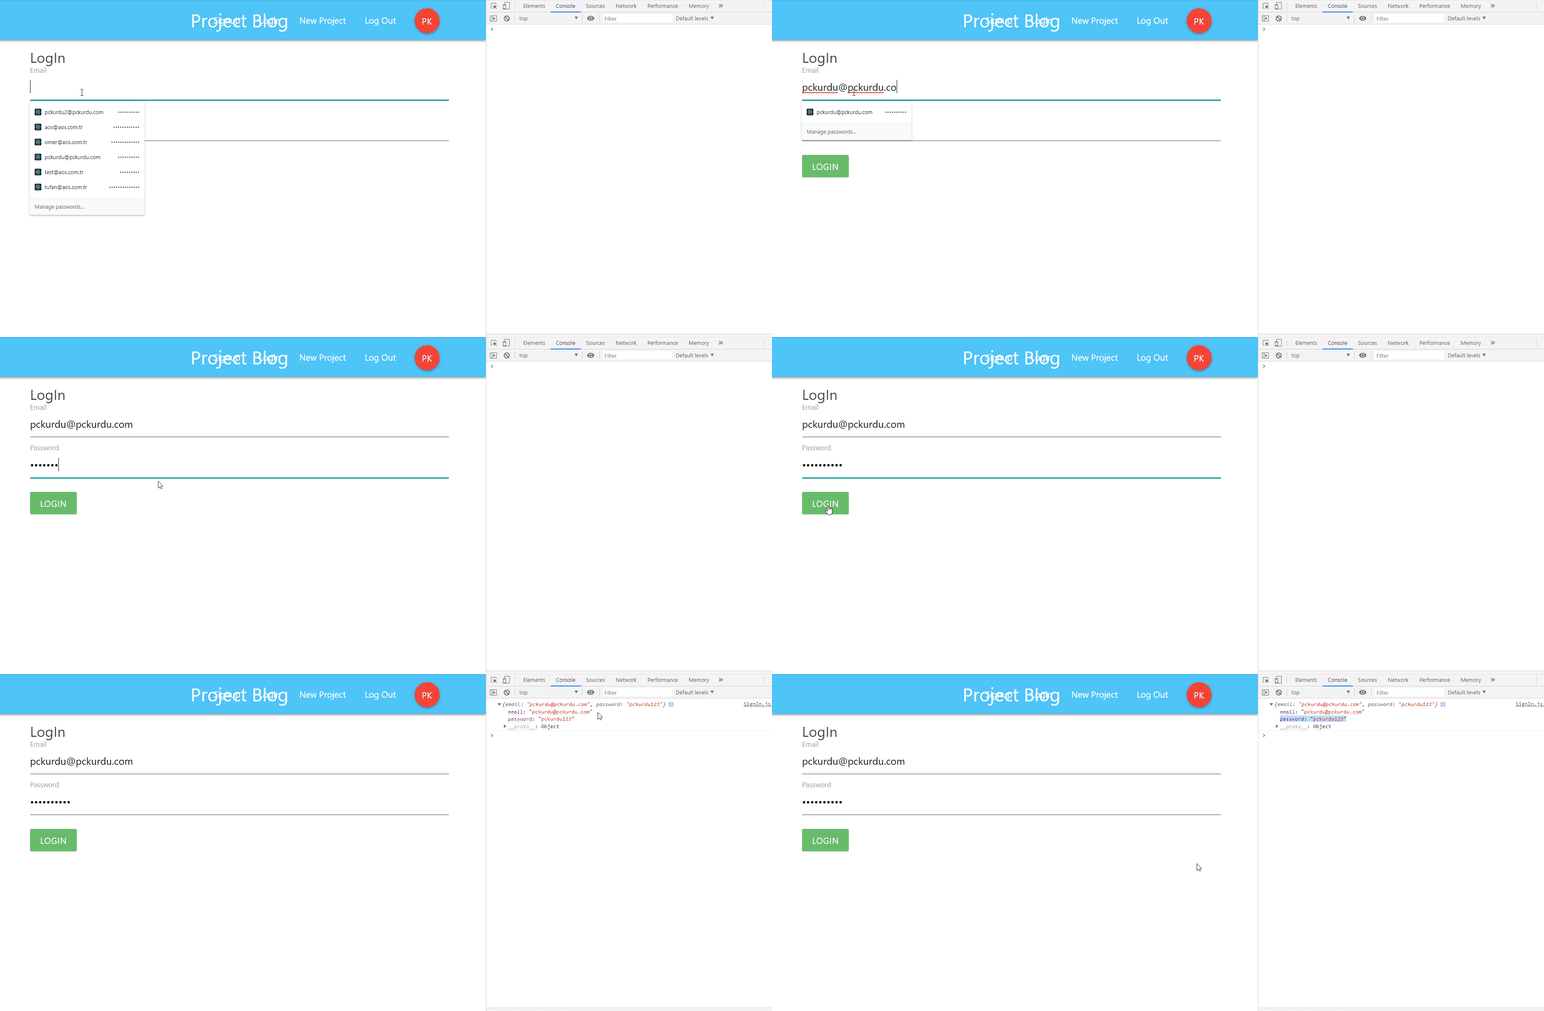
The input information appears on the console screen.

Now signIn component reducer is ready for use.
3- Access Actions From SignIn Component
Since we are going to connect to the reducer and store within the signIn component, we must use the connect module.
We must access the logIn action we created at the moment of connection. So we can run this action and control the firebase auth.
In SignIn.js
//To access store and reducer
import {connect} from 'react-redux';
//To access action
import {logIn} from '../../store/actions/authActions';
Let's create a function to access action from component. We should use this function for the second parameter of the connect function. The first parameter of the connect module accesses the store and we access the action with the second parameter.
//Function to access action
const mapDispatchToProps=(dispatch)=>{
  return{
    signIn:(info)=>dispatch(logIn(info))
  }
}
export default connect(null,mapDispatchToProps)(SignIn)
The generated sigIn represents the logIn function in action. With this function we can access this signIn with component props.
Then when we submit it, we can run this action with the information in the state.
//will work when the form is submit.
  handleSubmit = (e) => {
    e.preventDefault();
    //action function
    this.props.signIn(this.state);
  }
So the logIn function in action will work but the component does not know the result of the transaction.
4- Access Reducer and Store From SignIn Component
We have defined a variable called authError so that we can know the result of the process. We were keeping this variable in store. Then let's access the store in the signIn component and edit the page according to the authError variable.
//Function to access store
const mapStateToProps=(state)=>{
  return {
    authError:state.auth.authError
  }
}
export default connect(mapStateToProps,mapDispatchToProps)(SignIn)
With the help of such a function, we have received the authError data from the store on the props of the page.
render() {
    const {authError}=this.props;
  return (
We can now give a warning if we are making an incorrect entry at the bottom of the page.
{/* for submit */}
          <div className="input-field">
            <button className="btn green lighten-1 z-depth-0">Login</button>
            <div className="red-text center">
            {/* If there is data in authError, it means that it has received an error. */}
              {authError ? <p>{authError}</p>: null}
            </div>
          </div>
We can control the operations as we finished coding.
5- Control of Login Processes
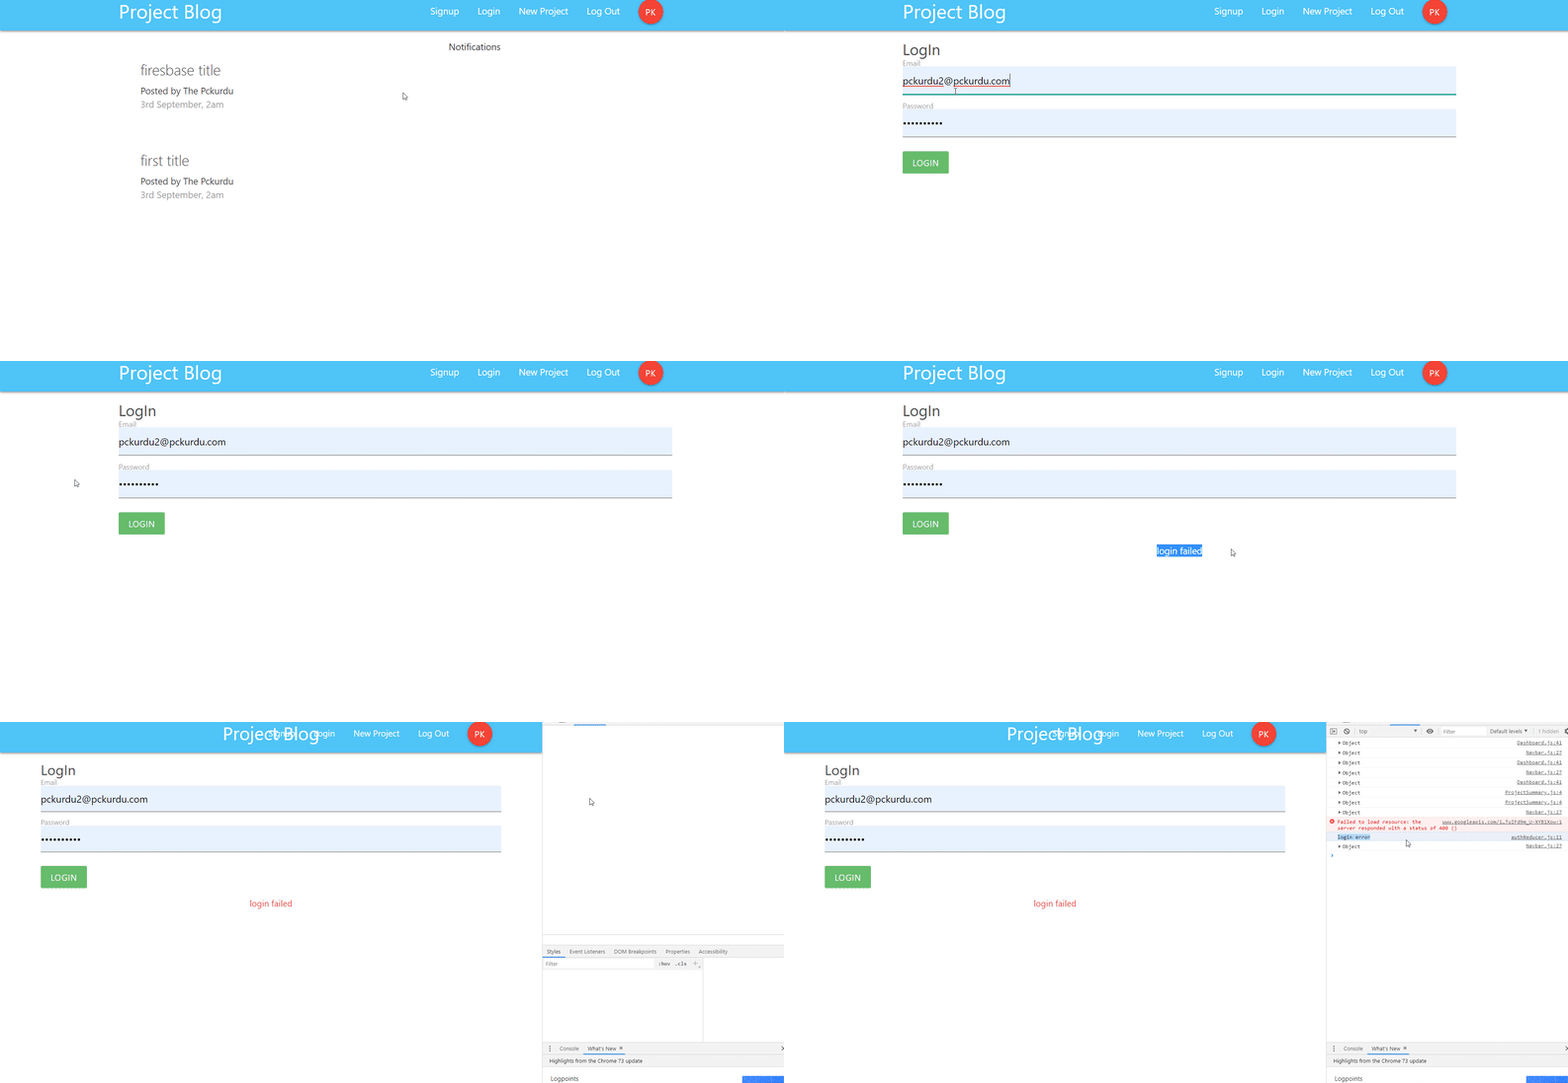
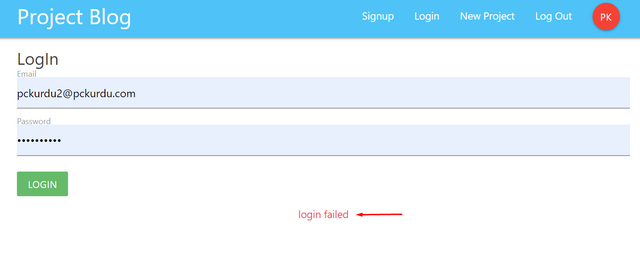
If you enter the wrong user name or password on the login screen, the authError value will appear on the screen.
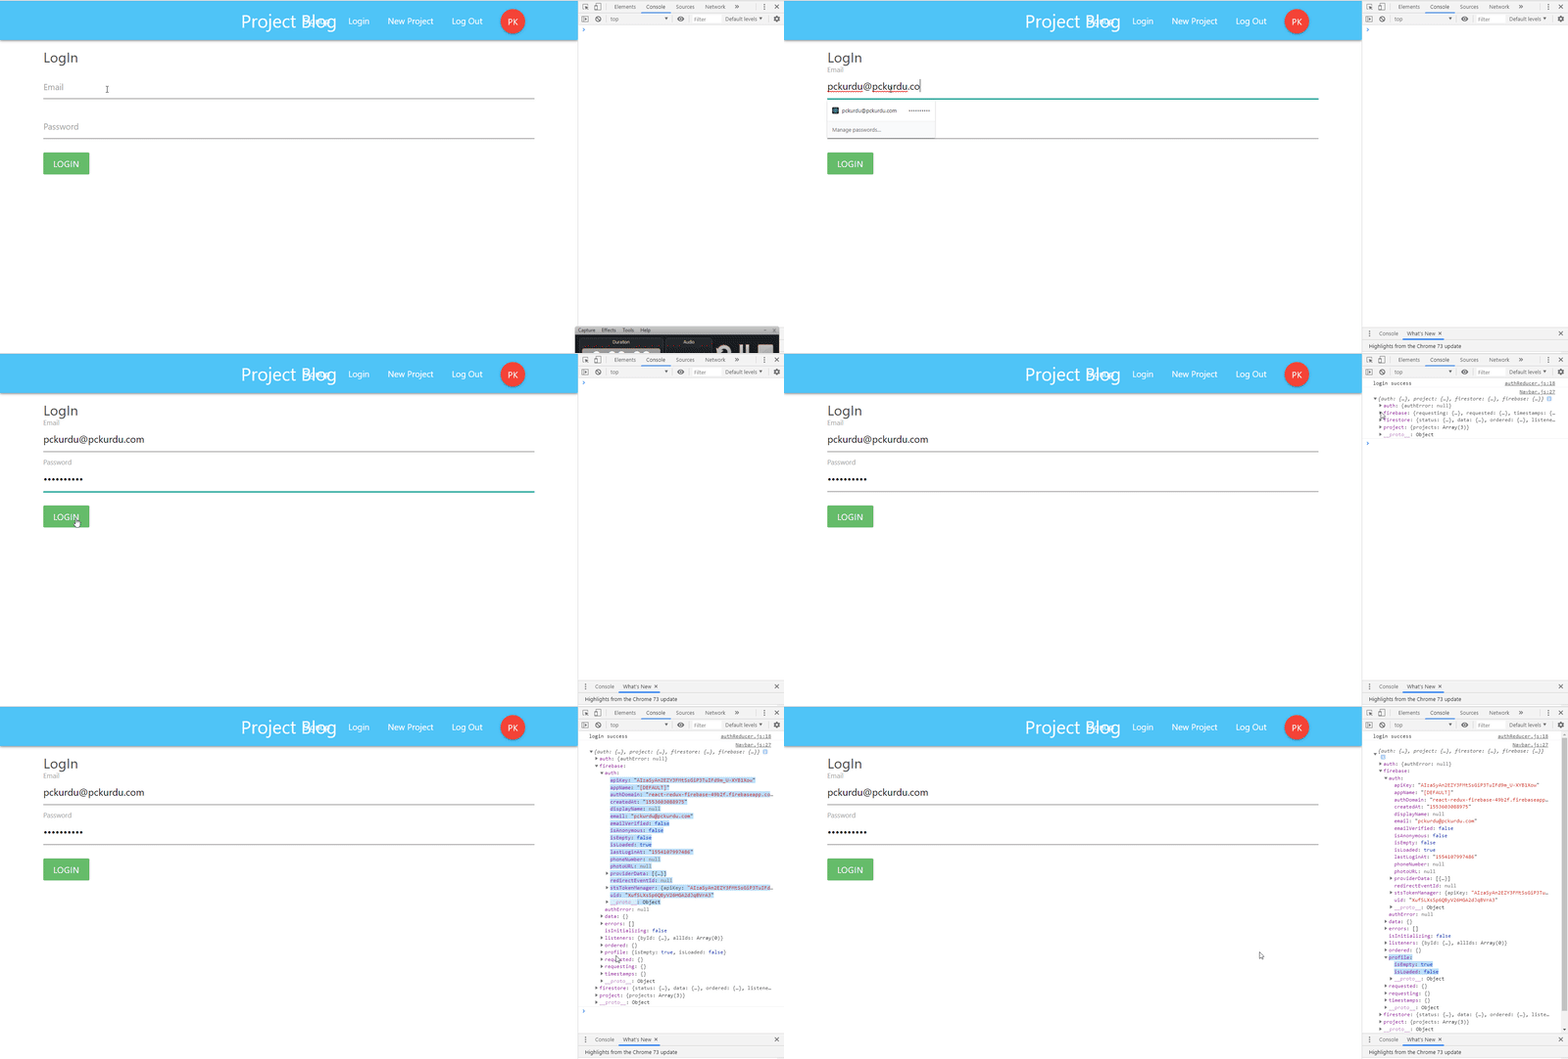
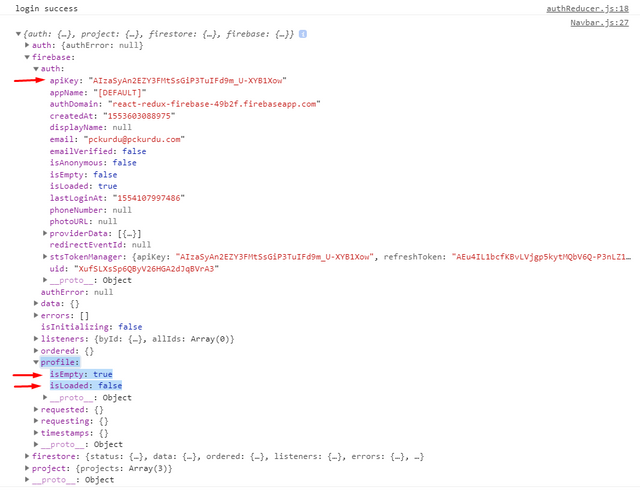
We will not include user information in the firebase value in the store that we wrote to the console.
If you type the user name and password correctly, the user information will be filled in the firebase value.
and
Curriculum
Proof of Work Done
https://github.com/pckurdu/Build-A-Blog-Site-With-React-Redux-Firebase-And-MaterializeCSS-Part-8-

Thank you for your contribution @pckurdu.
Your tutorials are getting better and better. Excellent work in structuring the tutorial and explaining the code, with several GIFs with the demonstration of their results throughout the contribution.
The section of your curriculum begins to get big in the contribution, could put for example:
Curriculum: Part1, Part2...
Thank you for your work in developing this tutorial.
Looking forward to your upcoming tutorials.
Your contribution has been evaluated according to Utopian policies and guidelines, as well as a predefined set of questions pertaining to the category.
To view those questions and the relevant answers related to your post, click here.
Need help? Chat with us on Discord.
[utopian-moderator]
Thank you for your review, @portugalcoin! Keep up the good work!
Hi @pckurdu!
Your post was upvoted by @steem-ua, new Steem dApp, using UserAuthority for algorithmic post curation!
Your post is eligible for our upvote, thanks to our collaboration with @utopian-io!
Feel free to join our @steem-ua Discord server
Congratulations @pckurdu! You have completed the following achievement on the Steem blockchain and have been rewarded with new badge(s) :
You can view your badges on your Steem Board and compare to others on the Steem Ranking
If you no longer want to receive notifications, reply to this comment with the word
STOPVote for @Steemitboard as a witness to get one more award and increased upvotes!
Hey, @pckurdu!
Thanks for contributing on Utopian.
We’re already looking forward to your next contribution!
Get higher incentives and support Utopian.io!
Simply set @utopian.pay as a 5% (or higher) payout beneficiary on your contribution post (via SteemPlus or Steeditor).
Want to chat? Join us on Discord https://discord.gg/h52nFrV.
Vote for Utopian Witness!