Build A Blog Site With React, Redux Firebase And MaterializeCSS (Part 4)
Repository
React
https://github.com/facebook/react
Material-ui
https://github.com/mui-org/material-ui
My Github Address
This Project Github Address
https://github.com/pckurdu/Build-A-Blog-Site-With-React-Redux-Firebase-And-MaterializeCSS-Part-4
What Will I Learn?
- You will learn how to create
actionin redux - You will learn how to create asynchronous function with redux.
- You will learn
thunkandapplyMiddlewarestructures. - You will learn
dispatchstructure and usage places. - You will learn to move the data in the components to the
storewithactionandreducer.
Requirements
- text editor (I used visual studio code editor)
- Basic javascript information
- Basic react information
Difficulty
- Basic
Tutorial Contents
In the previous tutorial, we established the redux structure and created our store and reducers in project.
We will continue to create the redux structure in this tutorial. We will define the actions of redux and create the project creation component. We will rearrange the action result reducer that uses the state that occurs in the CreateProject component.
If you need to explain the steps of this tutorial:
Firstly, we will create project creation action using thunk structure. We will learn what is thunk structure and how to use it.
We will then create CreateProject component and capture the data entered here and we will place the entered data in the action we create and update the reducer to make sure that the action is working correctly.
The headings of the sections are listed below:
- Creating Action Using Thunk
- Create the CreateProject Component
- Accessing CreateProject Data
- Using Action
That we're talking about what happened in this tutorial, we can now begin to explain these content.
Let’s start.
1- Creating Action Using Thunk
Before starting to code, let's explain what the action and thunk structures are.
Action is a tool that triggers them by accessing the reducers and transmits the data that needs to be updated to the store. We need to specify what type to update with the type object and it carries the data that need to be replaced with payloads.
Thunk is a middleware. We can keep our functions pure while performing asynchronous operations in redux structure with thunk. So our functions always give the same result. Since we will perform database operations with firebase-firestore, we can expect firebase for a certain period of time. we must define this as asynchronous in order not to cause the application to wait.
In order to use thunk structure in react applications, we need to download redux-thunk packages.
yarn add redux-thunk
We should use thunk structure in middleware. We can use middleware with applyMiddleware in redux.
In index.js
//to use the middleware structure
import {createStore,applyMiddleware} from 'redux';
//to use the thunk structure
import thunk from 'redux-thunk';
…
//store, thunk will be used to provide information
const store=createStore(rootReducer,applyMiddleware(thunk));
Now we can create action for the data to be triggered. We keep the action files in a separate file. In the store folder, create the actions folder and create the projectActions.js file in the actions folder.
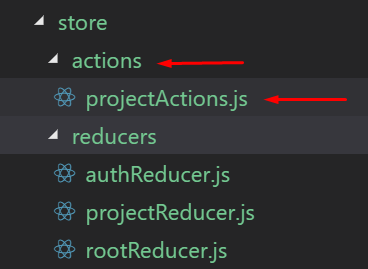
We create the action function to create project.
In projectActions.js
//We create action called createProject
export const createProject=(project)=>{
    return (dispatch,getState)=>{
        //asynchronous operation with dispatch.
        dispatch({type:'CREATE_PROJECT',project});
    }
}
So we created our first action. This action will work asynchronously if it gets the correct type and as an asynchronous operation that allows the structure is dispatch.
In this section, we have performed an asynchronous action generation process. Action will forward the project to the store.
Let we go the action trigger operations.
2-Create the CreateProject Component
The title and content fields of the data will be added as a project. This component must have these data entry fields.
In CreateProject.js
import React, { Component } from 'react'

class CreateProject extends Component {

  render() {
    return (
      <div className="container">
        <form className="white">
          <h5 className="grey-text text-darken-3">Create a New Project</h5>
          <div className="input-field">
            <input type="text" id='title'  />
            <label htmlFor="title">Project Title</label>
          </div>
          <div className="input-field">
            <textarea id="content" className="materialize-textarea"></textarea>
            <label htmlFor="content">Project Content</label>
          </div>
          <div className="input-field">
            <button className="btn pink lighten-1">Create</button>
          </div>
        </form>
      </div>
    )
  }
}

export default CreateProject
So we create a form field and place two inputs in it. This is the page that we created when we clicked navlink because we had previously set up the routing.
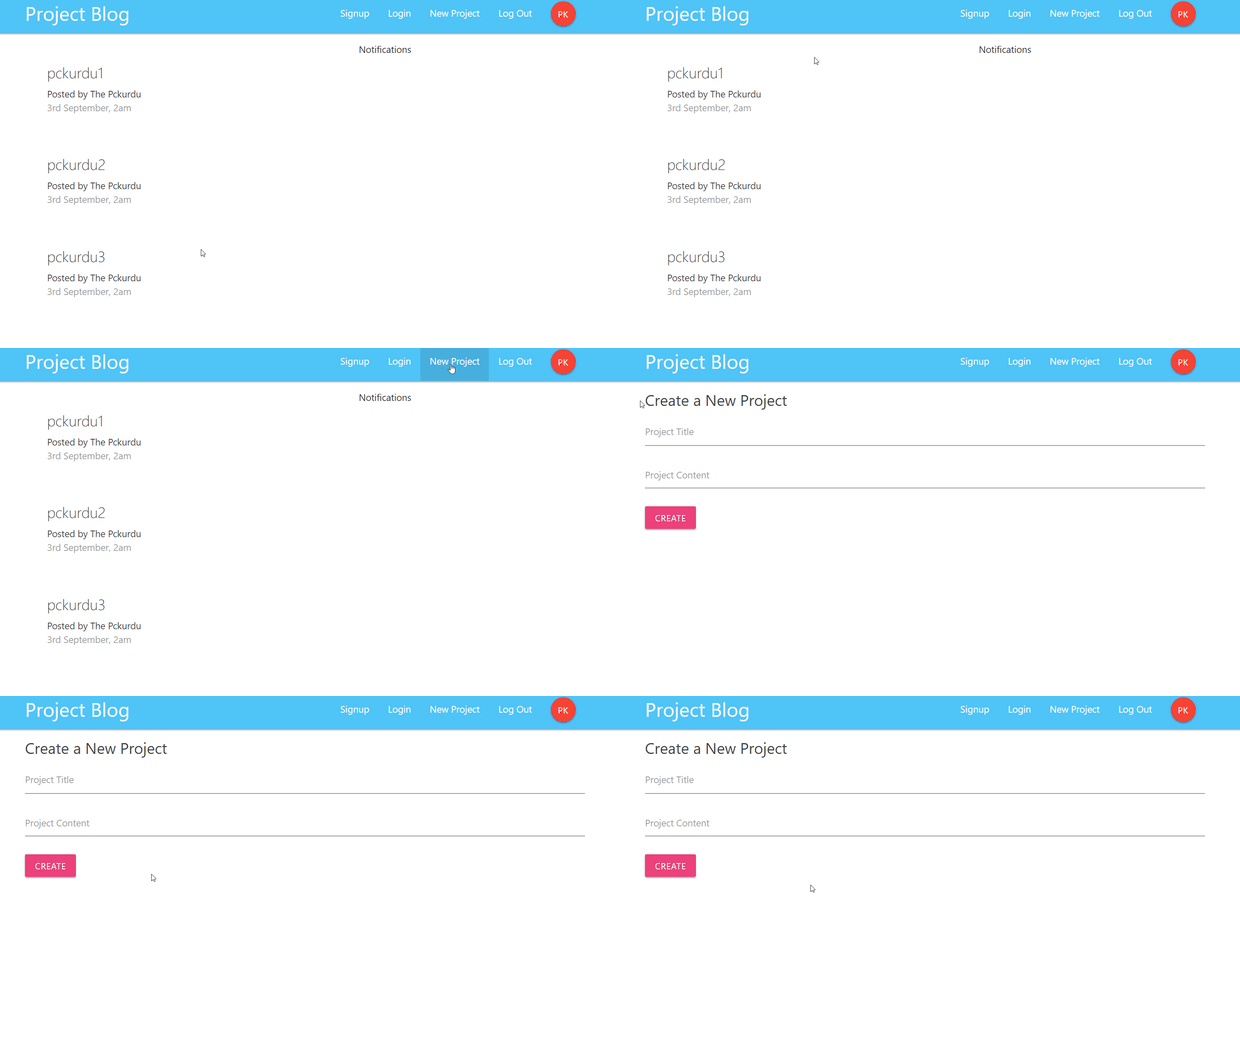
3-Accessing CreateProject Data
Now that we create our component, we can now capture the input data.
We will capture each change in the input and update the state values to capture the entered data. Thus we will have access to the latest data in the input when the form is submitted.
Let's create the state first.
In CreateProject.js
//We keep the title and contetn fields of the project.
  state = {
    title: '',
    content: ''
  }
Let's create the function that will run when the input data changes.
In CreateProject.js
  //will be triggered when the inputs change.
  handleChange = (e) => {
    this.setState({
      [e.target.id]: e.target.value
    })
}
We can update the state we created with the setState() function. With e.target we can find out which input has changed and change that area of state.
We use this function in the onChange property of the inputs.
<div className="input-field">
            <input type="text" id='title' onChange={this.handleChange} />
            <label htmlFor="title">Project Title</label>
          </div>
          <div className="input-field">
            <textarea id="content" className="materialize-textarea" onChange={this.handleChange}></textarea>
            <label htmlFor="content">Project Content</label>
          </div>
Let's create the function that will now run in the submit event of the form.
//It will work when the form is submitted.
handleSubmit = (e) => {
  e.preventDefault();
  console.log(this.state);

}
…
<form className="white"  onSubmit={this.handleSubmit}>
Let's print the resulting state object to the console.
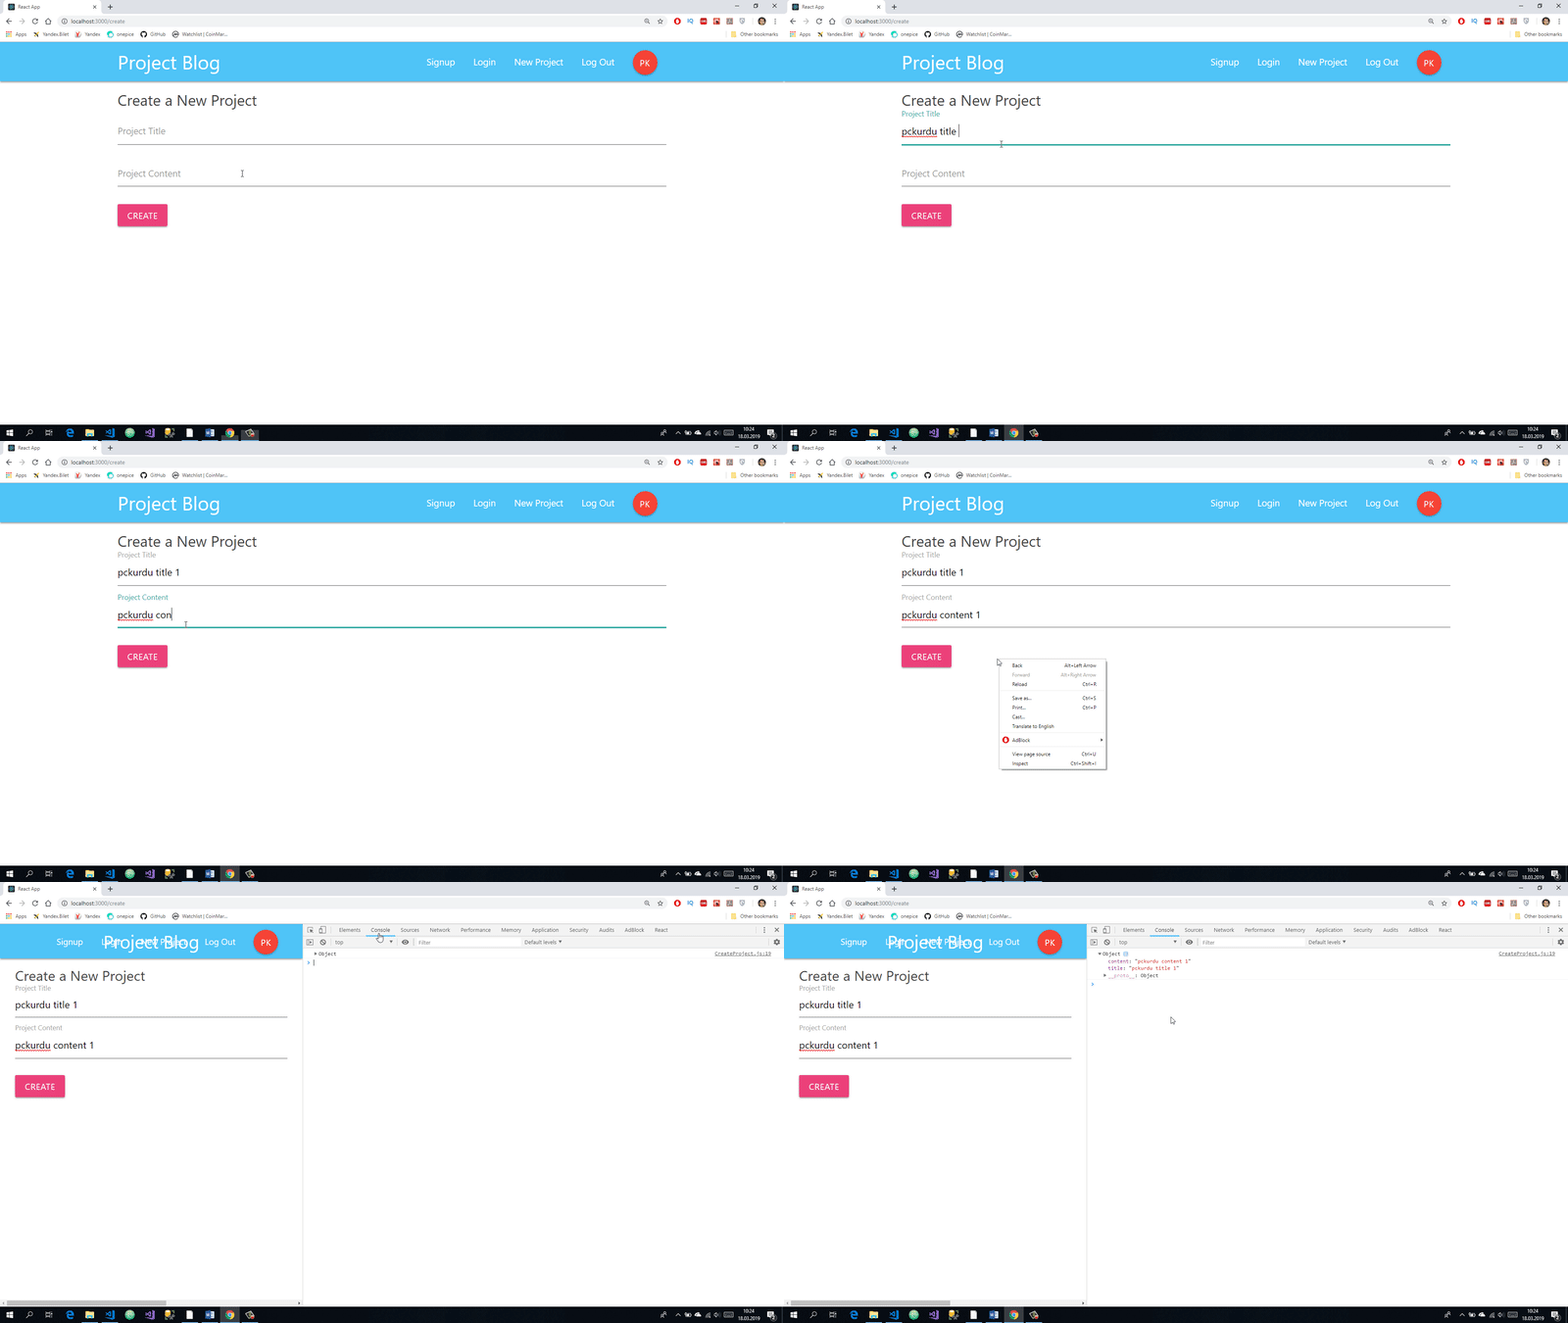
4-Using Action
In this section, we will be able to place the state in action and move to the stora with reducer.
We will define a function in the CreateProject.js file. This function will connect with the help of connect module with action. When the form is submitted, we will load the state object into action with this function.
We need to import the action and connect module to use.
In CreateProject.js
//connect
import { connect } from 'react-redux'
//action
import { createProject } from '../../store/actions/projectActions'
We access project creation action using dispatch.
//We create a function by accessing the action.
const mapDispatchToProps = dispatch => {
  return {
    createProject: (project) => dispatch(createProject(project))
  }
}

export default connect(null, mapDispatchToProps)(CreateProject)
This function has to be dispatch because we use dispatch for asynchronous operation in action. The createProject object in this function is filled with the action's properties. Because we use the connect() module, we make the createProject object accessible by the component's props.
We can capture the state in the handleSubmit function within the createProject object.
//It will work when the form is submitted.
handleSubmit = (e) => {
  e.preventDefault();
  //console.log(this.state);
  //state transferred in action.
  this.props.createProject(this.state);
}
We've imported state objects into action, so we can update the reducer and send the data to store.
In projectReducer.js
//create reducer with state and action parameters
const projectReducer = (state = initState, action) => {
    //Set reducer by action type
    switch (action.type) {
      case 'CREATE_PROJECT':
        console.log('create project', action.project);
    }
    return state;
  };
So we've arranged the reducer according to action.
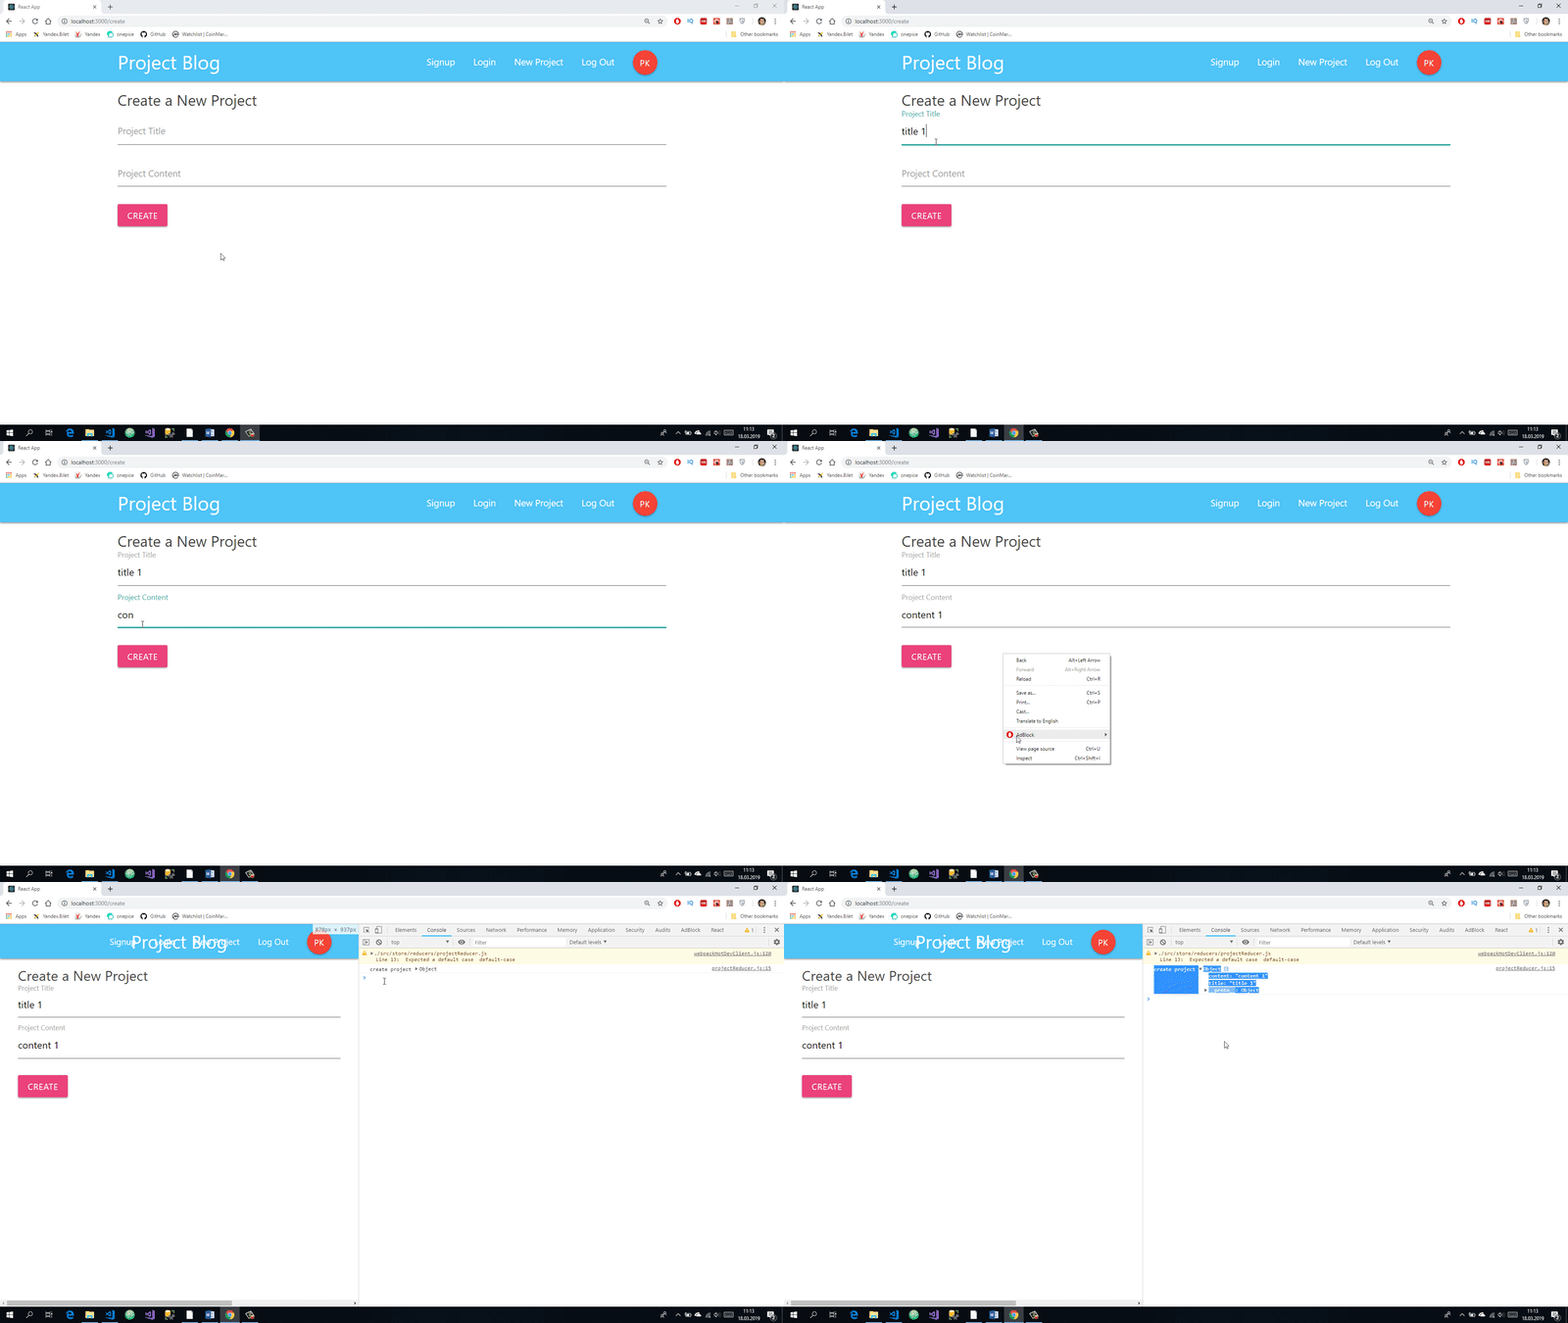
Curriculum
Proof of Work Done
https://github.com/pckurdu/Build-A-Blog-Site-With-React-Redux-Firebase-And-MaterializeCSS-Part-4
Thank you for your contribution @pckurdu.
After analyzing your tutorial we suggest the following points:
In some sections your code isn't well indented. We suggest you to be careful at this point because the code that is displayed makes it easier to read your code.
We really like how you present your results. Thanks for the elaboration of the GIFs.
Your tutorial is very well structured and explained, thanks for your work in preparing this contribution.
Looking forward to your upcoming tutorials.
Your contribution has been evaluated according to Utopian policies and guidelines, as well as a predefined set of questions pertaining to the category.
To view those questions and the relevant answers related to your post, click here.
Need help? Chat with us on Discord.
[utopian-moderator]
Thank you for your review, @portugalcoin! Keep up the good work!
Hey, @pckurdu!
Thanks for contributing on Utopian.
We’re already looking forward to your next contribution!
Get higher incentives and support Utopian.io!
Simply set @utopian.pay as a 5% (or higher) payout beneficiary on your contribution post (via SteemPlus or Steeditor).
Want to chat? Join us on Discord https://discord.gg/h52nFrV.
Vote for Utopian Witness!
Hi @pckurdu!
Your post was upvoted by @steem-ua, new Steem dApp, using UserAuthority for algorithmic post curation!
Your post is eligible for our upvote, thanks to our collaboration with @utopian-io!
Feel free to join our @steem-ua Discord server