SwiftNode Setup Guide

In order to setup a SwiftNode, the first thing you need is a virtual server or VPS. You can get one for only $5 USD per month on vultr. After signing up, and logging in, you go to Servers and click the plus icon on the top right of the screen. Then you choose the location of your server - it can be anywhere. For Server Type, we recommend Ubuntu 16.04 x64. For Server Size, we recommend the currently $5 USD per month option which offers you 1 CPU, 1024 MB RAM, and 1000 GB bandwidth. You can leave everything else unchanged and then scroll down and click Deploy Now. Deploying the server can take a few minutes. In the meantime, you can setup your hot wallet.

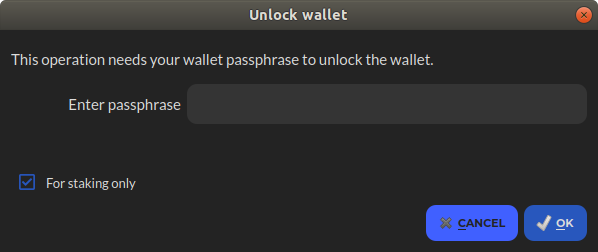
SwiftNodes are secured with a 50K SWIFT collateral. You need to send exactly 50K SWIFT to an address you have the keys to. If you do not have an address, you can make one in the debug console of the wallet by typing getnewaddress. You can then get the private key of the address and save it somewhere safe by typing dumpprivkey yourswiftaddress. Keep in mind that if your wallet is encrypted which it should be, you first need to unlock your wallet before you can use the previous command. To unlock your wallet, you can click on Tools > Unlock Wallet, and then enter your passphrase. Make sure you uncheck For staking only before you click Ok.

After you send 50K SWIFT to an address you have the private key to, you can then get the output transaction id and number by typing swiftnode outputs in the console and pressing Enter. This should give you a long hash with an output number possibly 0 or 1 or greater than 1. You also need a genkey for your node which you can grab from the console by typing swiftnode genkey and then Enter. You then need to put this information along with the static IP address of your server into swiftnode.conf file. You can open this file from Tools > Open Swiftnode Configuration file. You need to add a line in this file that has the following parameters separated by space:
- Your SwiftNode name - This can be anything you want
- Your server's IP address - The IPv4 address of your server
- Your SwiftNode Key - From
swiftnode genkeyvia console - Your collateral transaction id - From
swiftnode outputsvia console - Your collateral output number - From
swiftnode outputsvia console
Example(should all be in one line):
MySwiftNode 88.10.8.12:8544 73HaYBVUCYjEMeeH1Y4sBGLALQZE1Yc1K637tGBDQL8Xg 2bcd3c84c84f87eaa86e4e56834c92927a078718810b92e0d0324456a67c 0
You can now go ahead and add this line in your local swiftnode.conf file just like shown in an example in that file. Make sure you also put :8544 after the IP address of your server. Once you add this line, make sure you restart your wallet by closing it and then re-opening it. Now you can go back to the server you created on vultr or any other vps provider of your choice. You should be able to connect to the server via ssh. If you're on Windows, you can use puTTY. On Mac and Linux, you can simply open the Terminal and use the ssh command. Once you connect to the server, you need to run the following two commands:
wget https://raw.githubusercontent.com/swiftcashproject/swiftnode-installer/master/install.sh
bash ./install.sh
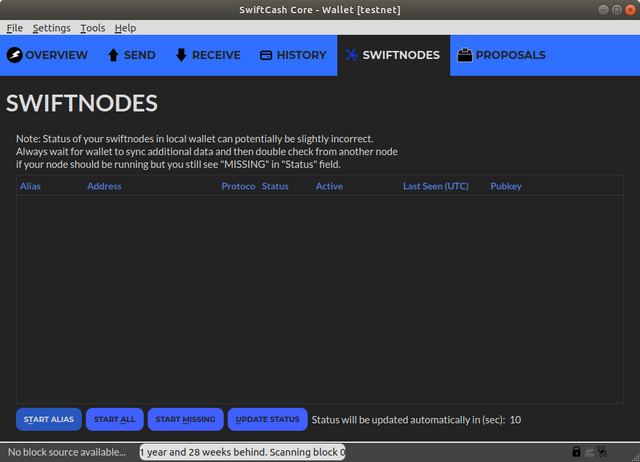
Then the server will ask you to enter the genkey. This key must be exactly the same genkey you have generated previously and added to swiftnode.conf. Once you enter the genkey, press Enter and our swiftnode installer should do all the heavy lifting for you on the server. Once it's over, you should see something like swiftcash server started on the server. You can now close the terminal or puTTY and then go back to your local wallet to start the node. Click on SwiftNodes tab and then after selecting your node, click on Start alias or Start MISSING. Your SwiftNode's status should change to PRE_ENABLED. It roughly takes about half an hour for a swiftnode to become ENABLED after this. That's it! You're all set and ready afterwards! You can close your local wallet after your SwiftNode's status changes to ENABLED.

Congratulations @swiftcash! You have completed the following achievement on the Steem blockchain and have been rewarded with new badge(s) :
Click here to view your Board of Honor
If you no longer want to receive notifications, reply to this comment with the word
STOPDo not miss the last post from @steemitboard:
Is SwiftCash being traded on any exchanges yet?
Not yet, but you can trade for SMART on discord
https://wallet.escodex.com/market/ESCODEX.SWIFT_ESCODEX.BTC
Congratulations @swiftcash! You have completed the following achievement on the Steem blockchain and have been rewarded with new badge(s) :
Click here to view your Board of Honor
If you no longer want to receive notifications, reply to this comment with the word
STOPTo support your work, I also upvoted your post!
Do not miss the last post from @steemitboard: