Who Says You Cannot Make your Own Airplane? Series #7: Understanding The Aerodynamics; Spin, Spiral, Slip And The Concept Of Take-Off
Wanna be receiving those treats and respect the pilots get? Then buckle down! You have got a lot to learn.
Welcome back to this page. So without wasting much of your time because actually you have got a hell of a read to catch up to in this series, I will be taking a cup of coffee as usual and head straight to the real stuff.
A brief recap of the previous series below:
Slow flight is the range of airspeed between the maximum endurance speed for an aircraft and a point just about its stalling speed. Stall occurs when an aircraft cannot find enough lift to keep it at loft. We have different types of Stall, ranging from Power-Off, Power-On stall, Acceleration, High-speed, Secondary stalls to Stalls during turns and Take-Offs. When an aircraft stalls, the nose will come with one wing below and the other above because it loses lift
Just joining us for the first time? I strongly request you check out our previous series: Series 1 | Series 2 | Series 3 | Series 4 | Series 5 | Series 6.
On this series, we will continue right fro where we stopped and so we will be looking at Spins, Spirals, Slips and then Take-Off.
Pixabay image - (CCO Licensed)
Spinning
Spinning occurs after an aggravated stall and it is the rotation of the aircraft as it loses its height. There is no practical application for the spin in normal flight. We are going to understand how to understand it, avoid it, and how we can recover from it should we go into a spin.
Firstly, let us take a look at some safety considerations before attempting to spin over during flight. The procedures we are about to list below apply to most light aircraft. But some aircraft have their own procedure that may be slightly different from these. However, these are the standard procedures but you are expected to follow the operating procedures given in your aircraft handbook. Now here they are:
- Use only an aircraft that has been certified for an intentional spin. This will be indicated by a certificate in the pilot operating handbook or cockpit placard.
- Be familiar with entry and exit procedures outlined in the operating handbook.
- Follow the handbook instructions carefully.
Now let us look at what happens when an aircraft goes into a spin. In this situation, after the aircraft has stalled, a roll, yaw, side slip or turbulence causes one wing to produce one lift than the other. The aircraft then rolls or yaws in the direction of the down-going wing. As this happens, the wing that drops hit the relative airflow with a greater angle of attack becoming more stalled. At the same time, the upward wing meet the smaller angle of attack bringing more lift. This increases the roll. While this is happening, the drag on the downward wing has increased which stalls it further. at this point, the nose drops because of the loss of lift and the aircraft goes into a spin. Following a path towards the earth. While spinning, the aircraft is simultaneously rolling, yawing and pitching. As it spins, the vertical and forward speeds are relatively low. Load forces are somehow greater but relatively steady. And pitch attitude may vary from flat to steep.
Spin Maneuvers
The spin maneuvers has three stages. The incipient stage, the developed stage and the recovery stage.
The Incipient Stage takes place from the time the aircraft stalls and rotation starts until the spin axis becomes vertical or nearly vertical. In light aircraft, this stage occurs very quickly in about 4 to 6 seconds. It consists of approximately the first two turns. Typically, Incipient Stage motion begins during a stall as one wing drops. As the nose drops, there is an increase in the yawing motion. about the half turning turning point, the aircraft points straight down. Because of the inclined flight path, the angle of attack is generally greater than that of a stall. Near the end of the first turn, the angle of attack continues to increase and the nose of the aircraft may come up. Going into the second turn, the flight path becomes more vertical. As the aircraft enters the fully Developed Stage, the spinning motion becomes more repetitious and stabilized from turn to turn. And the flight path is now nearly vertical.
The third stage of the spin is recover and we will deal with that later. First, let us look at entry into the Incipient Stage. There are several ways you can an aircraft into a spin whether deliberate or accidental.Keep in mind that the angle of attack, not attitude is the key factor. You can enter a spin while level, climbing or descending. A spin may also occur after a high speed stall.
Exercising a spin maneuver
Here is one way to enter a spin. Keep in mind that the aircraft must be fully stalled or it might not spin. Before you begin this procedure, make sure you comply with all safety precautions.
- Do the cockpit checks.
- Make sure you are over an unpopulated area.
- Ensure that you have achieved the minimum altitude for this maneuver.
- We cannot stress enough that the aircraft used for this spin exercise is certified for this maneuver and is properly loaded.
Failure to heed this advice have resulted in several fatalities. Read the certificate, pilot operating handbook or cockpit placard so you know under what conditions if any, spin practice may be undertaken in an aircraft. The minimum altitude for recovering from a spin is 2000ft or the height recommended by the manufacturer whichever is greater. Also keep in mind, unless the aircraft is equipped with gyral instruments that can caged or withstand certain changes in attitude, instrument damage may result from this exercise.
Exercising a spin maneuver
Pixabay image - (CCO Licensed)
Now, reduce power to minimum and stall the aircraft. You do this by gradually applying fall half control column while maintaining a new height altitude. Just before the stall, apply full rudder in the direction of the desired spin. Other rotation will occur as you maintain full rudder and hold the control column fully back. Ignore the instinct of tendency to release pressure. Allow the spin to continue through the desired number of turns but never go more than six turns. Approved aircraft are not normally tested beyond this limit.
Spin Recovery
Now we will deal with recovering from a spin. Again techniques may vary between aircraft. So make yourself familiar with the pilot operating handbook. The procedure we will discuss here are suitable for most light aircraft and may be used in the absence of manufacturer's data. They may be used to recover from either the Incipient or fully Developed Stages. Remember, spin recovery practice must never be attempted at an altitude of less than 2000ft or the manufacturer's recommended height whichever is greater. The objective of recovering from a spin is to upset the balance between the aerodynamic and the movement that makes the spin possible. Here they are:
- First, set the power to idle and neutralise the ailerons.
- Now apply and hold full rudder in the direction opposite to the rotation.
- As the rudder reaches full deflection, push the control column forward far enough to break the stall.
- You may have to have the elevators full down.
- Hold the flight controls in this position until the rotation stops.
- As the rotation stops, neutralise the rudder, level the wings and return smoothly from the resulting dive.
Recovery time is shorter in the Incipient Stage and somehow lesser control input is needed in this stage. In the fully developed stage, the aircraft may go through one or more turns after the recovery procedures are carried out before the rotation stops. Be sure to apply the recovery controls in the appropriate sequence and hold them until rotation stops. Prematurely easing off the controls may extend the recovery time.
There are other factors that will affect recovery time. These include:
- Aircraft loading and distribution that is weight and balance.
- The center of gravity.
- Altitude.
- Ailerons, flaps and power.
If the aircraft is out of the way far from the center of gravity, the initial moment is increased causing a more shallow spin attitude and more sluggish recoveries. Forward location of the center of gravity makes it more difficult to get into a pure spin. This is because the elevators are less effective. The further back the center of gravity and the more weight well distributed along, the flatter and the faster the spin will become.
Weight also have effect on spin behavior. Higher weights cause slightly longer recoveries. In higher altitude, recovery may take longer since the air is less dense, reducing the effectiveness of the flight controls.
There is no set rules on the effect of ailerons on spin recovery. This varies from aircraft to aircraft. Keep the ailerons neutral until the aircraft is unstalled. Using flaps may cause one of three reactions. They may induce a flatter spin, prolonging the other rotation at a lower spin rate. They may reduce the effectiveness of the rudder because of effectiveness of the airflow. Or they may be damaged from the high speed or high loading above during the recovery. If an aircraft enters a spin with the flaps extended, they should be retracted at the first opportunity after initial recovery action has been taken. Leaving the power on lengthens recovery in some aircraft as well as causing increased airspeed and height lost during recovery.
There is a possibility of the aircraft entering a secondary spin. This may happen when you inappropriately or prematurely pull out from the recovery. It also may occur if yaw is present from an inadvertent intention of anti-spin rudder.
Now, we re going to take a look at conditions that may lead you into a Spiral Dive*, how to recognise a Spiral Dive and the correct recovery actions.
Spiral Dive
A Spiral Dive is a steep descending turn in which an aircraft has an excessive nose-down attitude. It has three characteristics. These characteristics are:
- An excessive angle of bank.
- Rapidly increasing airspeed and
- A rapidly increasing rate of descent.
This is neither a normal nor useful maneuver and should never be practiced. It is extremely hazardous especially at low altitudes. a high speed stall could result if the elevators is used incorrectly to stop the rapid loss of height. As well, the aircraft may sustain structural damage in the pull-pull if the loading becomes excessive. During a spiral dive,the increase in airspeed may result in structural damage to the aircraft. The sudden loss of height can also be deadly especially at lower altitudes. There is a danger of pilot blackout or a secondary high speed stall.
A Spiral Dive somehow resemble a spin. While practicing spins, it is possible to become disoriented so that so that what appears to be a spin is in fact a spiral.
How do the two differ?
You recall (like I said earlier), in a spin, the airspeed is at or about stalling speed. In another word, constant and low. The airspeed in Spiral Dive is high and rapidly increasing. You can find youself in a spiral dive by attempting to force the aircraft into spin too soon before stall occurs. A spiral may also result if the elevator controls are relaxed once a spin has started.
As well, you can go into a Spiral Dive during a steep turn in which the controls are mismanaged and the nose is allowed to drop. When doing this, make sure the engine throttle is closed to bring the rapidly increasing airspeed under control. This will also reduce the load built up when recovering from a dive.
Spiral Dive Recovery
Recovering from a Spiral Dive is not difficult but the actions must be taken properly and in this sequence. Let us get on them guys.
- First, close the throttle and almost simultaneously, level the wings.
- Keep the aircraft straight.
- Finally, apply power to maintain height.
We cannot stress enough that the Spiral is not a maneuver to be practiced. Your flight instruction will demonstrate for you from an incorrectly entered spin or a poorly executed steep turns. During this exercise, you should notice a sudden increase in airspeed and wing loading. It will be obvious how any attempt to pull out of the dive without first leveling the wings only aggravate the situation.
Now we are going to discuss the entry, practical use and recovery from a side slip.
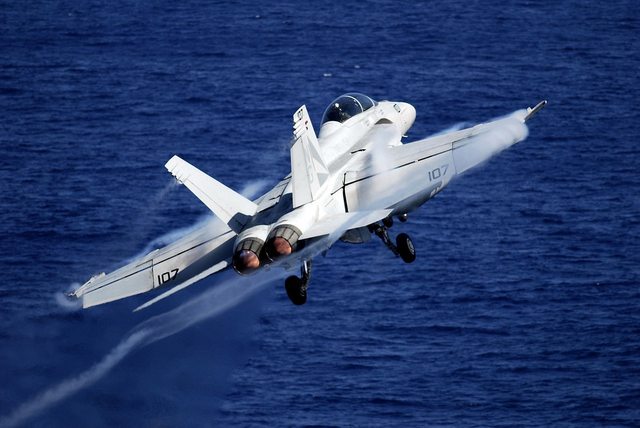
An aircraft performing a Side Slip
Pixabay image -(CCO Licensed)
Side Slips
Side Slip is a maneuver in which an aircraft is in a bank attitude but its tendency to yaw is reduced or prevented by the rudder control. You can use Side Slip to loose height without increasing forward speed, increase the rate of descent while turning, or drift while landing in a cross wind. The last is probably the common use of this maneuver today. With the advent of flaps, Side Slips are used to loose height or to steep in the angle of descent. However, the maneuver can prove to be of great value in a case where the flaps are not working or should you be flying an aircraft without them.
There are three types of Slide Slips. They are:
- The Forward Side Slip
- The Regular Side Slip
- The Slipping Turn
Forward Side Slip
Use the Forward Side Slip to loose height or steep in the glide slope on approach to landing while maintaining the center line of the runway. To get into this maneuver, bank the aircraft in the desired direction and simultaneously apply rudder in the opposite direction to control the degree of yawing to maintain direction. Airspeed is maintained by the elevators. The angle of longitudinal axis must be constantly adjusted to compensate for changes in wind velocity during landing. This is done by rudder control.
There are three ways to recover from a forward Side Slip. You can release the rudder pressure and allow the aircraft to return to its original heading. Recovery can also be achieved by leveling the wings or adjusting the pitch attitude to resume normal descend and airspeed.
Regular Side Slip
In a Regular Side Slip, the longitudinal axis of the aircraft remains parallel to the original heading but the flight path is moved to the left or the right. The amount of movement is dependent of the steepness of the bank which in turn is affected by the wind velocity. A Regular Side Slip is executed by banking the aircraft in the desired direction of movement. At the same time, opposite rudder is applied to old the original heading. To prevent an increase in airspeed, make sure the nose is raised above the normal gliding altitude. This maneuver has limited uses and steepness in an approach to landing but is essential when trying to land in a cross wind.
Recovery is achieved by leveling the wings while maintaining your heading. Simultaneously adjust the pitch attitude to resume the desired angle and airspeed to avoid stalling.
Slipping Turn
In a Slipping Turn, the yaw induced by bank is only partially opposed by applying opposite rudder. It differs from the other two types of Side Slips because the aircraft is changes heading while loosing altitude. You will find it useful if you have to loose height during the turn onto the final approach.
Before leaving here, are are some cautionary notes:
- If during a side slip the airspeed gets too low, the aircraft will seem like it will recover from the maneuver on its own but it will not recover because of the reduced airflow over the flight control surfaces especially the rudder.
- Should you find yourself in this position, recover from the Side Slip and increase the airspeed before trying it again.
- The airspeed indicator on most aircraft are prone to errors during Side Slip. This is because the Pitot Tube and the Static Air vent are not properly aligned with the relative airflow.
- Because of the possibility of error, it is important you recognise the correct Slipping attitude by the attitude of the aircraft and the feel of the controls.
- Be careful during recovery. An extreme nose-up attitude could result in a stall.
- And lastly, Slide Slip should not be used to counter cross wind during the climb following take-off. Instead, make a coordinated turn into the wind to eliminate threat and maintain a straight path over the runway.
That is that by Slips and now we are going straight to another exceptional aspect of flight; Take-Offs! Here you will be instructed with the correct procedures for getting your aircraft safely in the sky under various conditions. We will also discuss how to apply these information to make appropriate decisions on which type of take-off to use giving existing flight conditions.
Take-Offs
Generally, unless there is a special reason, you will take off into the wind. Taking off into the wind makes sense for several reasons. First, it allows you to use the least amount of runway and a lower ground speed. Second, it eliminate drift, which means no additional strain on the landing gear. Third, taking off into the wind gives you a better directional control. This take-off allows you to use a steeper climb angle which gives you better obstacle clearance. And a take-off into the wind establishes a circuit pattern at uncontrolled airports.
Now let us take a look at a normal take-off under ideally conditions.
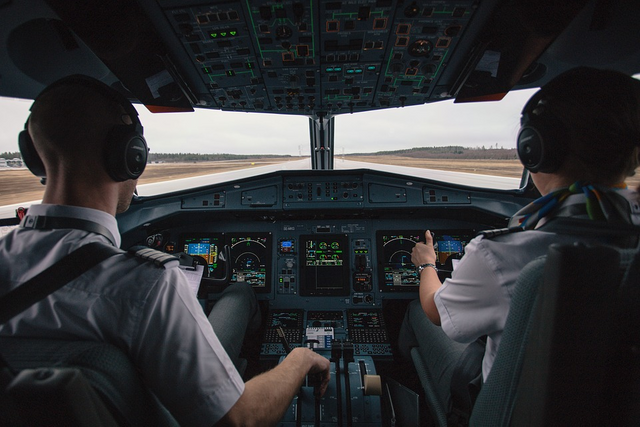
A straight well controlled start is essential. Trying out to use the breaks as this slows you down and increases the length of runway you will need. As you propel down the runway, the engine and propeller thrust line should be parallel to the ground. This will give you a maximum thrust and less aerodynamic drag up to the point of rotation. You must rotate the aircraft above the lateral axis in order to increase the angle of attack and fly off the runway. With the nose wheel aircraft, as you travel down the runway, pull back on the control column to lighten the weight on the nose wheel. When the elevators become effective, raise the nose for take-off attitude. Do not raise the nose too soon or you would delay take-off due to increased drag. Keep the wings level with the aileron control.
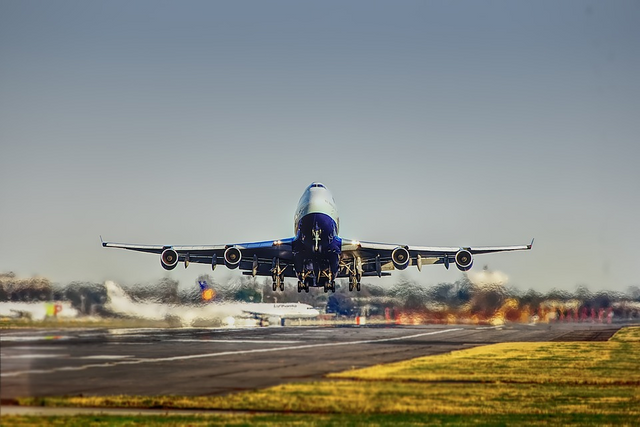
An aircraft performing a take-off
Pixabay image - (CCO Licensed)
With a tail wheel aircraft, lower the nose to take-off attitude as the elevators become effective. Do not force the aircraft into the air prematurely or the tail wheel will drop back to the ground. Use the rudder to maintain directional control and keep the aircraft level by using the ailerons. As you reach Rotation Speed, slowly pull back on the control column to get airborne. When you leave the ground, the aircraft should be above the altitude of its Best Rate Of Climb speed.
You will generally find it necessary to put some pressure on the elevator control to hold this attitude until the Proper Climb Speed has been attained. Note that if you relax the back pressure on the control column before establishing a climb, the aircraft could loose height or drop on the runway again. Maintain the best rate of climb, attitude and speed until you reach a safe height unless of course, there are obstacles in the flight path. In that case, use the Best Angle Of Climb speed. Unless stated otherwise, continue climbing with full power until you reach a height of at least 500ft.
You might notice the tendency of the aircraft to yaw to the left during take-off. This is mainly due to the effective forces produced by the propeller. Tail wheel aircraft are more prone to yaw from the propeller. Since you started flying in the conditions we just outlined, it is important to know what to do in less than ideal conditions. These would include crosswind, the need for short run take-off, tail wind after take-off, the ground effect, wheel bearing and weight turbulence.
To take-off into a crosswind, pull the control column fully into the wind. As the ailerons take effect, use only enough deflection to counteract the effect of the crosswind. When you reach take-off speed, leave the ground cleanly and control the bank. It is essential that you do not drop back to the ground as this puts excessive strain on the landing gear. Once you reach the appropriate height, make a coordinated turn into the wind to compensate for drift, the retract the flaps if you used them.
The effect of the crosswind on take-off depends upon the speed and the angle it approaches the runway. It is a certification requirement that the aircraft is capable of operating safely in 90 degree crosswind which is not exceed 20% of the aircraft's stalling speed. Using a crosswind component graph, you will be able to calculate the effect of crosswind on take-off and whether it is safe to attempt to do so. You will sometime find the case when it is necessary to take-off in the shortest distance possible. This may be due to a shot runway or runway hazards. Obstacles on the runway or soft and rough surface fields may also necessitate a short take-off run.
Before attempting this procedure, consult the take-off distance table in the flight manual. Also take into account, the effect of wind conditions.
On a hard surfaced runway, keep the aircraft at an angle which will give you a minimum of aerodynamic drag during take-off run. Be careful you do not try to lift the aircraft off the ground too soon or you might stall at a critical point during take-off. Allow the aircraft to reach the minimum take-off speed before lifting off the ground and then accelerate to the best angle of climb speed.
If you are taking off from a soft or rough field, it is important that the weight of the aircraft is transferred to the wings from the wheel as soon as possible. You do this by maintaining a nose-up attitude during the take-off run. This maneuver reduces rolling drag from the wheels. Once off the ground, lower the nose to stay off the ground effect and gain proper flying speed. As well, you have to take into account, the ground effect which will be discussed separately in this series.
It is possible to have a situation where there is no wind on the ground but enough wind on the ground to affect your climb. Whenever you have a no wind condition on the ground, use a take-off procedure that makes allowance for a tail wind shortly after take-off. If you are taking off on a wet runway, be aware of the danger of Hydroplaning. This occurs when tires of the landing gear flow on the thin top of water on the runway. In this condition, the aircraft may slip sideways and the breaks will be virtually useless. If you see raindrops appearing on the runway, it is a good indication that Hydroplaning will be a problem. Should you have to take-off under these conditions, be prepared to control the aircraft without breaks when the ground speed is about 30m/h.
Ground Effect
Ground Effect refers to the interference of the airflow patterns around the wing by the runway surface. Ground effect increases lift. When the wing is flown very near the ground, there is a substantial reduction in the induced drag. The air flowing from the trailing axis of the wing is forced parallel to the ground. The wing tail vertices that also contribute to induced drag are substantially reduced. Ground effect can be detected at a height equals to one wing span of an aircraft above the surface.
Ground effect is not a factor to be ignored. You may find yourself in a situation where the aircraft lifts off the ground and has not enough power to climb off the ground effect.
Wheelbarrowing
Wheelbarrowing occurs in a nose wheel aircraft. This condition occurs when the main wheels of the landing gear are lightly loaded or clear off the runway. During take-off, wheelbarrowing occurs at low speed when the slipstream increases the lift on the stabilizer. It may also be caused if you use excessive forward elevator pressure during take-off while trying to hold the aircraft on the ground at speeds above normal take-off speed. If this situation is not controlled, you may end up in a maneuver similar to ` Ground Loop in a tail wheel aircraft.
To overcome Wheelbarrowing, use one of the two following procedures:
- Ease back on the control column as this will take weight off the nose wheel. Then continue to take-off and climb procedures.
- Relax the forward elevator control return straight to normal.
Another hazard to watch for is Wake Turbulence.
Wake Turbulence
This is caused by the wing tail vertices in departing and arriving aircraft especially large ones. It is important to avoid flying into the core of wing tail vertex. It is possible that the vertex will cause a roll greater than one you can recover from. Wake Turbulence is greatest just before the point at touch down for a landing aircraft and just after the point of take-off for a departing aircraft. If you take-off behind a large aircraft, plan your take-off so you will leave the ground before the point of take-off of the proceeding aircraft. In order words, use the new end of the runway. If a large aircraft has landed, make sure your take-off is beyond the point of touchdown of the proceeding aircraft. That is use the far end of the runway.
Should you have any concern about Wake Turbulence, delay take-off for up to 2 minutes for a landing aircraft and up to 4 minutes for a proceeding aircraft. This will allow the vertices to get off.
Air Density
There is one other certain condition related to take-off that pilots should be familiar with. this factor affect the Density of the Air. Remember as we discussed in one of the previous serious abut the principles of light where we were taught that the denser the air, the better the take-off performance of an aircraft. Air Density varies according to Elevation, Temperature and Relative Humidity. These three factors combined have a key effect. The higher the elevation, the lower the density resulting in reduced performance. Likewise, Warmer Temperature means Less Dense Air. A higher Relative Humidity also reduces the density of the air, again reducing performance. And as Barometric Pressure drops, so also does Density.
Worst Case Scenario for Take-Off
The worst case scenario for take-off will be a high Temperature of above 15 degrees C with a high Relative Humidity, a Barometric Pressure of below 29.92 and high elevation. To help you compensate for these conditions, refer to the Density Altitude. This is the altitude corresponding to a given density in a standard atmosphere. The aircraft manual will give you a valuable information showing the changes in performance of various elevation and temperatures.
Some other factors to consider with take-off include whether to apply take-off power before releasing the breaks, the use of flaps (whether to extend the flaps before the take-off begins or after it starts. The amount of fuel in tanks may also determine how you handle the take-off. The answers to many of these questions can be found in the flight manual of the aircraft. as you gain more experience, you will handle different take-offs with more confidence.
Airmanship
Pixabay image - (CCO Licensed)
Airmanship
As mentioned before, if you have been cleared for take-off and you need to delay, request it. The air traffic control is concerned with safety but may not be aware of all the circumstances especially a pilot level of competence when usual conditions prevail. At uncontrolled airport, a landing aircraft has priority on runway and under no circumstances should a departing aircraft usage this priority. Use good judgment and courtesy when deciding to take-off behind a landing plane. And never think that the landing aircraft can abort the landing in your favor.
Before taking off in an uncontrolled field, search the sky for other aircraft that may that may affect your plans. And even if another aircraft is landing downwind, it still has priority over the departing one. Remember, an aircraft downwind may have some reasons for landing.
Finally, do not create traffic. The runway is not the place to finish off preflight checks. Do not delay the taxiing aircraft behind you because you have finished off procedure that should have been done at the stand or hanger. If you have to delay your take-off, get out of the way so others may pass. And before doing the engine warm-up, check all directions to make sure that no other aircraft will be affected by your slipstream.
Conclusion
Spinning looks like stall, but it is different from it. Most maneuvers; spin, spiral dive, slips, etc begin with stalling. While some maneuvers are necessary to be practiced so as to understand what they look like and how to recover from them when they occur accidentally, many are not advised to be practiced. Before exercising a maneuver, first check the flight instruction manual on procedure highlighted for such maneuver in the manual. There are lots of factors to be considered before going on take-off. The aircraft must be in good condition and other factors should be considered.
We will have to take a break right here. As usual, I do not want to get you confused with too many complicated stuffs in here. In the next series, we are going to continue exactly where we stopped here. In the mean time, take your time to go back to the top and recheck this series. You may ask me any question regarding this series and flight concept in general.
References
- Spin
- Aerodynamics of Spin
- Steps of Spin recovery
- Difference between spin and spiral dive
- Spiral dive recovery
- Slip
- How to side slip and aircraft
- Take-off
- How does an aircraft take-off
Previous Lessons In The Series
- Series #6: Understanding The Concept Of Slow Flight and Stall
- Series #5: Understanding The Flight Maneuvers; Climbing, Descending & Turns
- Series #4: You've Got Attitudes, Aircraft Got Some Too
- Series #3: Understanding How Jet Engines Work And Effect Of Atmosphere In Flight
- Series #2: Understanding The Thrust Mechanism And How The Engine Works
- Series #1: Understanding The Mechanism Behind Airplanes And The Misconceptions

Hey! Do you write posts that are related to Science, Technology, Engineering, and Mathematics (STEM)?
Then join #steemstem on on discord. Click here.
Check this blog post by @steemstem to understand the guidelines on how to become a member of @steemstem.
Also check on this post by @steemstem to understand the use of images so as to avoid copyright infringement.
And in case you are writing from Nigeria, you can include #stemng tag in your posts. Details on @stemng blog.
Thinking of delegating SP to @steemstem to support this great initiative? All you have to do is to use the links below:
50 SP | 100SP | 500SP | 1,000SP | 5,000SP | 10,000SP | 50,000SP
However, ensure you have at least 50 SP left in your wallet.
I am @teekingtv, the no.1 Global Meetup analyst

upvote for me please? https://steemit.com/news/@bible.com/6h36cq
Hello! I find your post valuable for the wafrica community! Thanks for the great post! @wafrica is now following you! ALWAYs follow @wafrica and use the wafrica tag!
Wow brother wow call it success
Many thanks bro
Yes you are right some factor has to be consider with take off process
This post has been voted on by the steemstem curation team and voting trail.
There is more to SteemSTEM than just writing posts, check here for some more tips on being a community member. You can also join our discord here to get to know the rest of the community!
The engineer, absolutely some process need to take before taking off. Sorry, what did you study in school?
Computer Science
The process is really complex, but very informative and detailed. Thanks for sharing.
Im speechless