Who Says You Cannot Make your Own Airplane? Series #5: Understanding The Flight Maneuvers; Climbing, Descending & Turns
Welcome back dear readers! You think I am in a good mood today? Well you could be right. Babe spent the night with me! Oh c'mon that is not why we are here. But well, I am in a good mood today and then you are free to joke about that. How about I quickly give a brief recap of our previous lesson?
An aircraft is said to be in an equilibrium state when it is in a constant speed. Plane's movement above its Longitudinal Axis is called Roll, controlled by ailerons while its movement around its lateral axis is referred to as Pitching and that is controlled by elevators. Among the devices used to control the aircraft during flight are Trim Tabs, flaps, Slots and Slats. Attitude indicator and heading indicator are based upon a principle called Gyroscopic effect
Disturbances such as turbulence are subjected by aircraft and when the plane returns to its original position, it is said to be stable
The basic aircraft attitudes are Pitch attitude and Bank attitude.
Full post here.
Just joining us for the first time? I strongly request you check out our previous series: Series 1 | Series 2 | Series 3 | series 4.
So on this series, we are going to discuss the concept of Maneuvers in flight. With regards to that, we have the followings to discuss about: Straight and Level Flight, *Climbing, Descents and Turns. As usual, I am going to break these concepts to the absolute basics so we can all understand them pretty well pretty quick.

Aircraft are pretty. Flying them is more beautiful. But building one brings the best feelings
Pixabay Image - (CCO Licensed)
Straight and level flight
An aircraft is on straight and level flight when it is holding a steady direction with the wings on a lateral level at a constant attitude. You attain a straight and level flight by the coordinate use of all three flight controls. These controls are Ailerons, Elevators and Rudder. The amount of coordination to keep the aircraft level varied according to how rough the flying conditions are. The aircraft should be in a cruise attitude which can be established by usually fixing the relationship of the wings nodes with the horizon.
Cruise attitude means the wings are level with the horizon. To maintain straight and level flight, the wings of the aircraft must be kept laterally level by using the ailerons. Remember, if the aircraft banks or turns in the direction of the lower wing, use the rudder to control yaw because yaw created by the bank attitude makes the power changes. Increasing the power yaw the aircraft to the left, decreasing it yaws it to right. Anticipate yaw and immediately correct it with the appropriate use of the rudder. To maintain a constant heading, turn the aircraft in the direction you want it to go. Then you may use the heading indicator as a cross reference.
As always, keep a vigilant lookout for other aircraft. To maintain a level flight, use the elevators to compensate for any changes in pitch and maintain a constant attitude. Here, if the power is increased, the nose will pitch up and conversely, a decrease in power causes the nose to pitch down. Therefore, to stay in level, you must lower the nose when you increase the power and raise it if you decrease the power.
It is important to realise early in your flight training, the interdependence of the cockpit controls. Understand this: attitude + power = aircraft performance. Yaw at cruise attitude, changes in power settings affect both the speed and attitude as does pressure on the control column. Therefore, if you are changing airspeed, it is necessary to simultaneously adjust the throttle and elevator controls. If you want to reduce the airspeed while on straight and level flight, decrease the power and smoothly, and at the the same time, apply back pressure on the control column to maintain your attitude. You must keep the wings leveled. You will notice that as airspeed decreases, maneuver pressure on the back column increases. Once you reach your desired airspeed, adjust the power settings as necessary and then retrim the aircraft. To increase airspeed while on straight and level flight, smoothly advance the throttle or pushing forward on the control column to maintain level flight.
Increasing and decreasing airspeed while on straight and level flight has important application. It will help you maintain correct space in the aircraft traffic circuit.
Climbing
When an aircraft climbs or change in attitude, airspeed, rate of climb indications and generally its power settings, the forward visibility reduces. From some definitions, climb may be carried out in different speeds. These are specified in the aircraft's operating manual. One is the recommended normal climb speed better still called cruise speed. This is the speed you climb on normal circumstances. It is higher than the best rate of climb which will be defined in a moment. Its advantages are better visibility and adequate cooling of the engine. The recommended best rate of climb speed will give you the greatest altitude at a shortest time. You will use this when you must reach the given altitude in a shortest possible time. You will use the recommended best angle of climb speed in a situation where there are obstacles in the take-off path. It gives you the greatest clearance altitude in a given distance. Keep in mind that during the best angle of climb and best rate of climb speeds, it is possible to overheat the engine. So, proceed to normal climb speed as soon as possible. Finally, there are on-route climb speeds. These are carried out at various speeds between the normal climb and normal cruise speeds. Convenience and comfort are the main reason for using this type of climb as there are more time and distance limitations to continue your climb.
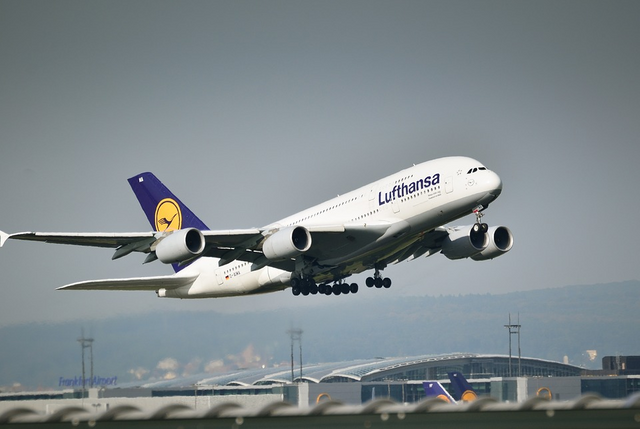
An aircraft climbing.
Pixabay image - (CCO Licensed)
Before going into the procedures for climb, here are some points to consider. Earlier on this series, we have talked about the tendency of the aircraft to yaw at high power settings due to the propeller strict trim. Keep the wings leveled and the rudder to control yaw. And before you begin to climb, lookout for other aircraft in the area especially, ahead of you. As you begin to climb with forward visibility, you may not see another aircraft at the same altitude or below. Lower the nose slightly to give you a better lookout for traffic ahead. On normal climb, put the aircraft in a nose-up attitude but also maintain the normal airspeed attitude, increase power and trim your aircraft to maintain the climb.
As you gain experience flying aircraft, you will find yourself operating the flight power controls in simultaneous coordinating manner. Adjust the attitude to achieve the desired airspeed. Return to power setting and make the necessary adjustment so you can maintain the climb attitude before having to put pressure on the column. Look at the instruments balance and study the increase in height on the altimeter. Study the rate of climb on the and the vertical airspeed. Again, ensure you lookout for other aircraft as you climb. Once you have reached the desired altitude, you will return to a straight and level flight. Put the aircraft on the normal cruising altitude. Accelerate to normal cruising speed but be careful not to exceed the maximum. Reduce the engine power to cruise setting. While adjusting attitude to maintain level flight, recheck the power setting and trim the aircraft.
Air density will affect the climb performance of your aircraft. As well as affecting the engine performance, it affects the operation of the airspeed indicator. As you gain altitude, the density of the air decreases. This causes the airspeed indicator to occur at lower than actual airspeed of the aircraft. Maintain a relative rate of climb, use the following rule:
- Decrease the recommended indicator sea level climb speed by 1.75% or about 2 mph for every 1000ft increase in altitude above sea level.
Now, apply the rule in the following example.
You are flying an aircraft with a recommended normal climb speed of 90 mph. At an indicator altitude of 2000ft, adjust the indicator climb speed to 88 mph. It will be adjusted to 85 mph at 3000ft. As mentioned, the density will affect the performance of the aircraft during the climb. Hot air is less dense than cold air. An air at lower elevations have less density than the one at lower elevations. To calculate a climb performance, you use the density altitude.
This is the altitude corresponding to a given density at a standard atmosphere.
Flaps are used on some aircraft to shorten the take-off runs and stick the angle of angle of climb. Consult the aircraft manual for correct usage. If you use flaps, do not retract them until your aircraft is in proper nose-up attitude for a climb and well above any obstacle. Use CARB HEAT if there is a risk of icing during the climb. This will reduce the available power in a case of full throttle climbs. On a normal circumstance should you allow the engine to fall below the normal climb speed for the aircraft. If you have to, reduce the rate of climb to maintain the airspeed.
Climb performances is also affected by the weight of the aircraft. Ground effect may allow the aircraft to leave the runway when fully loaded but once out of ground effect, the ability of the aircraft to climb may be seriously affected. Climb performance data in the manual of the aircraft should be fully reviewed.
Occasionally, you may find yourself having to back or pull up from an approach to landing. To enter a climb on the aircraft using the landing configuration, apply power take-off properly and smoothly by putting the aircraft on a nose-up attitude. You will have to visually estimate this attitude before the flaps are fully extended. Since the trim was set for landing, it is likely the application of power will raise the nose. Be prepared to put forward pressure on the column and readjust the trim for the desired attitude. Retract the flaps slowly as soon as possible. Each time the flaps setting is changed, the trim will have to be readjusted. If you are flying an aircraft with mechanically defined flaps settings, retract them one other time.
The next procedure we will be discussing is descending. Let us keep going guys.
Descents
There are two major groups of descent, they are power on descent and power off descent. These can be categorised further. There are four types of Power On Descent. They are:
- Descent at cruise power settings.
- Descent at cruise airspeed with power reduced to maintain the rate of descent.
- Descent at reduced airspeed and reduced power settings to maintain the rate of descent of an airspeed.
- Descent at reduced airspeed and reduced power setting with flaps extended to maintain the angle of descent.
Power Off Descent also have sub-categories. They are:
- Glides without flaps.
- Glides with flaps extended.
You can use Power On or Power Off descent to meet the requirement of just about any situation. However, Power On Descents allow you of more flexibility and makes it easier to correct any errors in judgment. Gliding is the procedure used to keep an aircraft in the air for as long as possible without power.
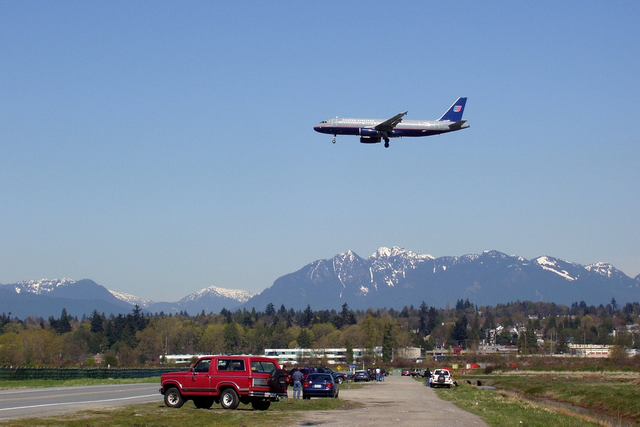
An aircraft descending.
Pixabay image - (CCO Licensed)
Practically, the distance covered is more important than the time the aircraft used. That means establishing an airspeed that gives you the optimum lift drag ratio or attitude of the aircraft. Most aircraft flight manuals include the best climb speed and maximum glide chart. Commit these airspeed to memory, since the glide type of descent is used in approaches to first landing.
Wind will either increase or decrease the distance you are able to cover at a given attitude. When gliding into the wind, distances increase by using a higher than normal airspeed. In a tail wind, use a slower than normal airspeed to cover more distance. in a emergency situation, us the recommended best climb speed, then estimate the range you have. This may be done visually. First, find the reference point on the wind panel. This may be a point so many inches up from the instrument panel, adjust it to the magnetic compass mark or a mark made by yourself with a marker. Make sure everything is in relation to this mark. Now, stabilise the aircraft to a constant Power Off or Power On descent. Keep a steady rate of descent at constant attitude. Now, compare observations on the ground with the mark on your wind shield. Positions which appear to move down from the mark are ground positions you can reach and fly over with high despair. the position on ground which remains stationary with the mark is what aircraft should reach. Positions that move above the mark are out of range.
Now we shall discuss how to begin up a Power Off Descent from a straight and level flight.
Power Off Descent from a straight and level flight
First, complete all cockpit checks and note the altimeter reading. Check the sky above and below for other aircraft. Reduce power. Keep straight by using the radar counter the tendency of the aircraft to yaw right as the power decreases. Allow the airspeed to decrease. Now, assume the appropriate altitude for the best climb airspeed and trim. Adjust the altitude to reach the proper airspeed and retrim. You should notice a steady decrease in your altimeter. The rate of descend will be displayed on the Vertical Airspeed Indicator (VSI). If you should want to return to a straight and level flight from a Power Off Descent, use the following procedure:
- Check the sky ahead and above for other aircraft and note the altimeter reading.
- Bring the power level to settings for cruise flight.
- Get in to the cruise attitude and maintain it until the aircraft accelerate to cruise speed.
- Use the radar to counter the left yaw produced by the increased power.
- Now, trim the aircraft.
- The adjust the power and flight controls to maintain the desired airspeed and altitude.
- Retrim as necessary.
Here are some points to keep in mind for Power Off Descents:
- Do not allow the engine to cool off too much or it may not respond when the throttle is used.
- Apply cruising power at appropriate interval to keep the engine temperature near normal.
- check the flight manual to see if your aircraft requires carbrator heat for Power Off Descents.
Power Off Descent
If you want to precisely control your rate of descent and the distance obtained, use a Power on Descent. This type of descent is used in routine descents in approaches to landing. It also help you to acquire the speed and space requirement of airport traffic circuit.
To enter a Power on descent, follow these steps:
- First, reduce the engine power to the settings that will give you the desired airspeed and rate of descend.
- Allow the airspeed to decrease to that level.
- Lower the nose to the attitude that gives you the desired rate of descend.
- Now, trim the aircraft to maintain this attitude.
- Check the instruments to make sure that you have the proper airspeed and rate of descend. If not, adjust power accordingly and retrim.
- If you want to decrease the rate of descend, increase the power to give you the desired rate.
- Adjust the attitude to give you the best ascend speed and the retrim.
- You may use any combination of attitude and rate of descend to attain effect desired.
On route descents are made by reducing the power to give the suitable descend while maintaining a cruising airspeed. Flaps may be used to alter the angle of descend. A good descend gives you a better visibility. A high angle of descent usually require a full extension of flaps at recommended flap settings. Flap settings are included on the aircraft flight manual. Because flaps increase lift and drag, it is possible to descend at lower airspeed when they are extended.
If you are flying an aircraft with retractable landing gear, you may steepen the angle of descend by extending the landing gear. The angle of descend may also be steepen by descending at a very high or at low airspeed, however, this is not desirable under normal circumstances.
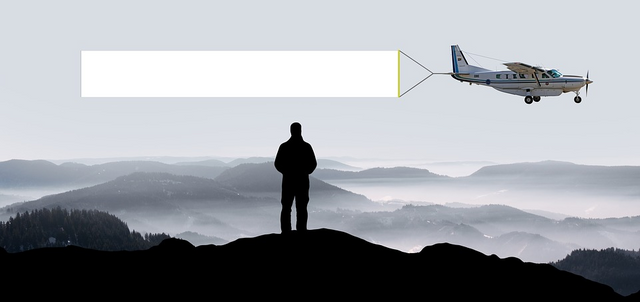
Turning
Turns are probably the most aerodynamically complicated of basic flying maneuvers. In actual practice for the pilot, the procedure is relatively simple. A umber of forces are coming to play in a turn. The weight of the aircraft and centrifugal force push the plane away from the radius of turn and balance by two other forces. They are lift of the wings and centripetal force which pulls the plane into the radius of the turn.

An aircraft turning.
Pixabay image - (CCO Licensed)
Turns can be class as gentle, medium or steep. As well as level turns, there climbing and descending turns. Normally, climbing turns are gentle, descending and level turns may be gentle, medium or steep. A gentle turn is the one with bank angle of less than 14 degrees. Medium turns have bank angle of 15 to 30 degrees. Steep turns have bank angle greater than 30 degrees.
Now, you are going to understand what happens when an aircraft is turned.
The aircraft is putting towards the bank attitude to in-climb the lift. As well as keeping the aircraft at loft, the bank also supplies the necessary centripetal force at the center of the turn. The upper wing creates more drag than the lower wing. This causes the plane to yaw towards the raised wing. Left unchecked, the aircraft will attempt to turn in the wrong direction at first. Use the rudder to control the yaw.
Here are some basic principles of turn:
- At any given airspeed, the greater the bank, the greater the rate of turn and the smaller the radius of turn.
- An increased bank also raises the stalling speed and increases the load factor.
- At a given angle of bank, increasing the airspeed lower the rate of turn and increases the radius of the turn.
- To get the greatest rate of turn and smallest radius for a given bank angle, use the lowest possible airspeed for that angle of bank.
As you turn, the stalling speed increases with the steepness of the bank. At 30 degrees, the stalling speed will increase by 8% of that of level flight. At 45 degrees, bank angle increases by 18% and at 60 degrees, it increases by 40%. The stalling speed increases by 100% at 75 degrees and by 200% at 83 degrees. Keep in mind that the load factor also increases with the increase in bank angles.
Now let us go to under a level turn.
Level turn
First, check the sky for any other aircraft. You need more than just a casual glance. Check both directions as well as above and below your aircraft. While making a turn, make sure you are seating upright. Do not allow your body to lean away to the direction of the turn. Make sure the plane is flying straight and level before turning. Now, use the ailerons to roll the plane to the desired attitude. Maintain this attitude and at the same time, control the yaw with the rudder. Avoid the temptation to use too much rudder, remember, only use the rudder to counter adverse yaw. To maintain the correct pitch, use the elevators. And keep an eyes out for other aircraft throughout the turn.
Now, a word about pitch. A gently turn pitch means almost the same with straight and level flight. But as you increase a bank attitude, you will find it necessary to pull back on the control column to increase the lift. You will also note a loss of airspeed and need for more power as the bank angle increases. As your aircraft progresses to an accurate turn, you should notice the followings:
- The nose moves steadily around the horizon.
- The airspeed will remain constant.
- The instruments will read the following way: The turning indicator will show a constant rate of turn and the ball will be centered in the glass tube. Your altimeter will show a constant altitude.
Aileron control will vary according to the bank attitude on gentle turns because most aircraft are designed with lateral stability, the plane will attempt to return to a straight and level flight. You will find a need for light aileron pressure. But as the aircraft steepens, the ailerons will be needed to maintain the bank angle and prevent the aircraft from rolling.
To recover from a turn:
- First look out for other aircraft.
- Next, use the ailerons to return the aircraft to a level flight.
- Control adverse yaw with the rudder
- Maintain your pitch with the elevator.
- Keep your aircraft straight and look out for other traffic.
- Now trim the aircraft.
Climbing and descending turns
Climbing and descending turns are made in similar manner with level turn but there are some differences. Obviously instead of maintaining a constant altitude, you will be climbing or descending. There are also differences in power requirements and attitude control. When you make a climbing turn, you will need additional power to reach higher altitude. Refer to the previous series on this lesson on climbing for information on attitudes.
In descending turns, power can be reduced from the cruise level. Again, check out on the previous series for information on descending attitude.
Returning from climbing and descending turns is the same as from level turns. Power Off Descending turns are important because you may find yourself having to execute one in the first landing situation. The controls are less responsive. When recovering from a power of descent, decrease the pressure on the elevator to avoid pitching up and loosing too much airspeed. As well, you will have to sacrifice more altitude in Power Off Descents in order to keep up the airspeed.
Steep turns
Steep turns require you to coordinate all three flight controls and the power control. This gives you a means of turning quickly in a relatively small area and are generally only used in emergency situations. As the bank increases beyond 30 degrees, you will need more power to maintain airspeed. That is because the greater the angle of the bank, the more lift required to maintain a constant altitude. Increased lift also produces more drag, thus the need for more power to maintain a constant airspeed. The bank angle that can be maintained in a steep turn depends on the available engine power. It requires the simultaneous coordination of all of the controls. And because you are turning faster, you look out for other aircraft and this is more important than ever. As your angle of bank increases beyond 30 degrees, pull back on the control column to maintain pitch. You will need to increase power to keep your airspeed up. o
Once you have reached the desired bank angle, maintain it with the ailerons. The rudder is used to control any yaw that develops and you will notice that the elevators loses its effectiveness as the bank angle increases. To recover from a steep turn, follow the steps outlined for a level turn. The only difference is that you must reduce the power simultaneously as you return to a straight and level flight.
To get into a minimum radius turn:
- Check the sky for any other traffic.
- Then, keep your aircraft in the attitude and airspeed for endurance and straight and level flight.
- Now, enter the turn as before.
Some things to watch out for: If the bank becomes too steep, the plane steeps towards the center of the turn while the nose pitches down. If this is not quickly corrected, the turn can develop into a spiral and the consequences could be fatal. If the nose pitches too far down, roll over and pull back on the control column to raise the nose. In this maneuver, the yaw created by the bank is prevented by using the opposite rudder.
A standard turn is made at the rate of 3 degrees per second. The rate at which aircraft turn is determined by the airspeed and bank angle.
Here is a simple formula to estimate the angle of bank required for a standard rate of turn. Take 10% of the airspeed, then add 7 to the remainder. If your airspeed is 130knots, 15 is 13. Add 7 to that and the total is 20. Therefore you will need 20 degrees of bank for a standard rate turn at 130knots.
The last concept we are going to take a look at on this series is range and endurance. Let us see what they are all about.
Range and Endurance
When an aircraft is flown from range, you are trying to get the greatest distance per unit of fuel. That means the aircraft must be flown at optimum lift-drag ratio. This is the airspeed which gives you the most lift with the least drag. The flight manual of your aircraft should have cruise performance chart which gives the airspeed for optimum range. Keep in mind these figures are for air, so you still have to account for wind. When flying into the wind, use a higher range power settings than recommended.
Pixabay image - (CCO Licensed)
When you are flying from endurance, you are trying to keep the aircraft in the air for as long as possible time per unit of fuel consumed. The distance covered is of no importance. You will fly from endurance if you have runway to be cleared of snow or if you are waiting for the weather to clear. Most light aircraft can double their time in the air per unit of fuel consumed. The power level for endurance is the lowest settings of sustained level of flight. To find it, reduce the power to a small amount to maintain the altitude. The angle of attack will have to be increased to reduce the airspeed. You will reach a level where power must be increased to maintain flight. The power settings you noticed just before this point is for settings for best endurance. Immediately increase the power and then reduces it in small increment until it reaches the RPM necessary to keep the aircraft in level flight.
Conclusion
It is necessary for you as an aircraft engineer to understand every concept related to flight. Like I have said severally, you need to know how what you want to build works so as to know what you need to do. You ill be the manufacturer of your aircraft and hence, you need to at least be able to fly it. This series covers many areas of flight starting from climbing to descending. As time goes on, we will cover every depth of the mechanism behind flight and we will commence a project where we will build one from scratch. Just stay with this blog and follow these series.
References
- Straight and level flight
- Straight and level
- Climb
- Climbing and descending
- Aircraft climb performance
- How airplanes turn
- Climbing and descending turn
Previous Lessons In The Series
- Series #4: You've Got Attitudes, Aircraft Got Some Too
- Series #3: Understanding How Jet Engines Work And Effect Of Atmosphere In Flight
- Series #2: Understanding The Thrust Mechanism And How The Engine Works
- Series #1: Understanding The Mechanism Behind Airplanes And The Misconceptions

Hey! Do you write posts that are related to Science, Technology, Engineering, and Mathematics (STEM)?
Then join #steemstem on on discord. Click here.
Check this blog post by @steemstem to understand the guidelines on how to become a member of @steemstem.
Also check on this post by @steemstem to understand the use of images so as to avoid copyright infringement.
And in case you are writing from Nigeria, you can include #stemng tag in your posts. Details on @stemng blog.
Thinking of delegating SP to @steemstem to support this great initiative? All you have to do is to use the links below:
50 SP | 100SP | 500SP | 1,000SP | 5,000SP | 10,000SP | 50,000SP
However, ensure you have at least 50 SP left in your wallet.
I am @teekingtv, the no.1 Global Meetup analyst

good post like it and upvoted!!
kindly visit my profile thanks!
Many thanks!
Great article! I work at Boeing and see how hard it is to make the airplane. Resteemed!
Thanks so much. This is o humbling.
I'm grateful.
Congratulations! This post has been upvoted from the communal account, @minnowsupport, by teekingtv from the Minnow Support Project. It's a witness project run by aggroed, ausbitbank, teamsteem, theprophet0, someguy123, neoxian, followbtcnews, and netuoso. The goal is to help Steemit grow by supporting Minnows. Please find us at the Peace, Abundance, and Liberty Network (PALnet) Discord Channel. It's a completely public and open space to all members of the Steemit community who voluntarily choose to be there.
If you would like to delegate to the Minnow Support Project you can do so by clicking on the following links: 50SP, 100SP, 250SP, 500SP, 1000SP, 5000SP.
Be sure to leave at least 50SP undelegated on your account.
My engineer. I always love your lecture on how to make your airplane. Thanks for the post.
Thanks so much boss. God bless you for me.
very informative. You are really good at this.
Thanks a bunch boss. So good to see you here.
Wow this a great article, I love this. Are you an engineer ?
I am a computer engineer and software developer. But I'm working on building an airplane currently.
Love to read science post like this
That's so good to hear. Science is life.
Hi @teekingtv!
Your post was upvoted by utopian.io in cooperation with steemstem - supporting knowledge, innovation and technological advancement on the Steem Blockchain.
Contribute to Open Source with utopian.io
Learn how to contribute on our website and join the new open source economy.
Want to chat? Join the Utopian Community on Discord https://discord.gg/h52nFrV
Airplanes involve a lot of physics in their flying process, and since I love physics, I love this post and the way you wrote it !
Thanks a bunch for checking out on this @marcosdm
Complete the following task of being active at BlockGators Army Advertising Network for recognition as an active member of the steembloggers community.
Want more views to reach your posts? Try BlockGators Army Advertising Network