drawing for the first time aioria de saint seiya
Hello everyone I am drawartgp or better known introducing myself formally as Gabriel, I hope you like my first post because I will start with one of my favorites in all the topics that there is which is the illustration because I love the illustration, as a child it is something that I was surprised that human ability to capture an image and put it on a sheet creating a great illustration, because I am a 20 year old guy who never did an illustration course and for inspiration I could learn to draw by myself , what brings me to what has been said above is amazing as humans are born with that beautiful ability that some say - they can not !, I do not know how to do that! , It is very difficult! Nothing is difficult if you do not see that it is difficult because it is not, just merit time and some leaves and pencils and practice a lot of practice, because with practice we will always improve with time , in my case I feel that I have improved a bit I do not know because I always like to see an image and recreate it to my liking for inspiration or because I like it so much that I get excited to draw it, but now after starting this introduction of who I am more forward I will make one that is only about me ..................... well here we go ...
How to illustrate (Aiora) of the house of leo
SAINT SEIYA
materials
Pencils 2H, HB, 6B, 3B
Ballpoint pen or whatever your country is called "pen"
White sheet or white card Draft
Markers or fast fine-tipped
Sharpener
or something to sharpen the pencil XD
A reference image preferably several that are necessary
You blur, although you can do it with the tip of your finger to give shadows to the illustration
AND A LOT OF PASSION WIIIIIIIIIIIII YEAH!
PART I
I First things first we go and take our drawing pencils of any brand that is, although not necessarily we should use several types of pencils because even with one we can create an incredible illustration because we will use several because it is what is most advisable in the field of we will use a very thin pencil and when we make a stroke we do not mark a lot of coal that preferably is very little to see the line very dark and then we can erase it, we will start using a 2H pencil which I commonly use for my illustrations when I first make the lines that will serve as a guide because we will make geometric figures.
Surely you will say -What, geometric figures? Well friends is the circles, triangles, squares or rectangles that are easier for you to use because we will start making a circle gently to make the face of our character then we will make a line that will guide the neck, then we will make other lines that will be guided up to the shoulders, "eye" when we get to the shoulders we will make two small circles that would mean for us the guidance of the shoulder, -what is that good for? Well friends that helps us when making the curve that gives the shoulder with the arm that helps us to guide us and help us make that curve to make the illustration have more resemblance or reality to what we want to draw real faces " portraits "or simply drawings with a high level of detail or little detail but that has much similarity to reality, then we will make a line that will guide us but not too long because another circle will come that will be a guide for the elbow because all have elbows or not hahaha, because we will do the following is the pose or movement that has our character or person to draw will make the other line that will become the last step of the arm and there we will make the last circle that will be the hand of our character draw if our person can have legs or does not have them because you only see up to the torso do not worry because it is the same step to do the legs, knees and feet, for the waist and chest p ues we will use a circle or almost a circle to make the chest and another circle to make the hips or waist of the image or illustration that we want to draw, "eye can do it in another way" but of course the more you feel comfortable because that is what it is about feeling at ease, because here we will see an example of the aforementioned.
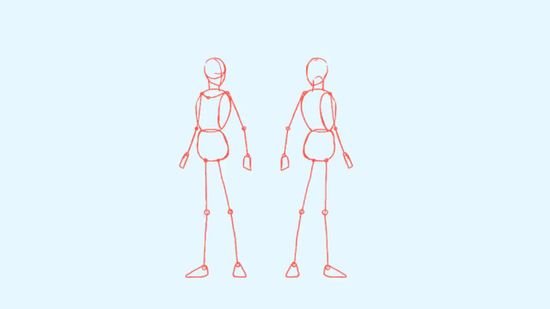
Come is easy is not difficult what if it is that practice a lot of practice and do not despair if they do not go as they think because to make it look better requires practice.
PART II
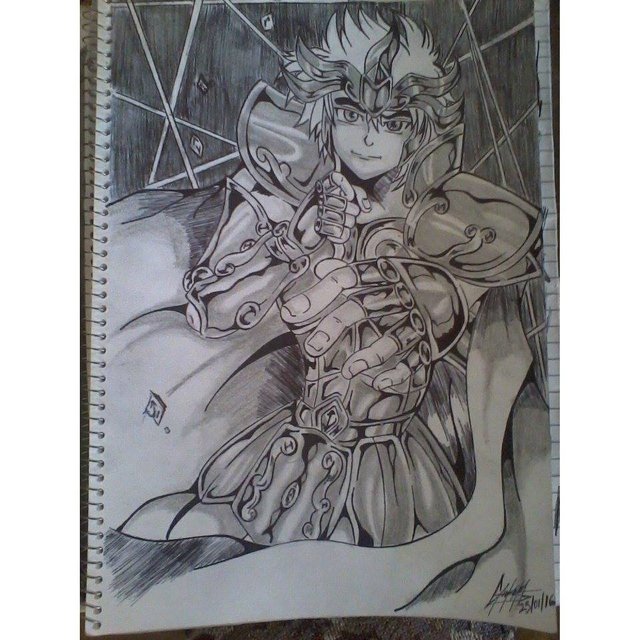
Now we will do the illustration of Aioria(アイオリア) of the house of Leo of the acclaimed manga of Masami Kurumada - SAINT SEIYA
Sorry but I did not find the image I used as a reference but it looks a lot like the pose and style I used
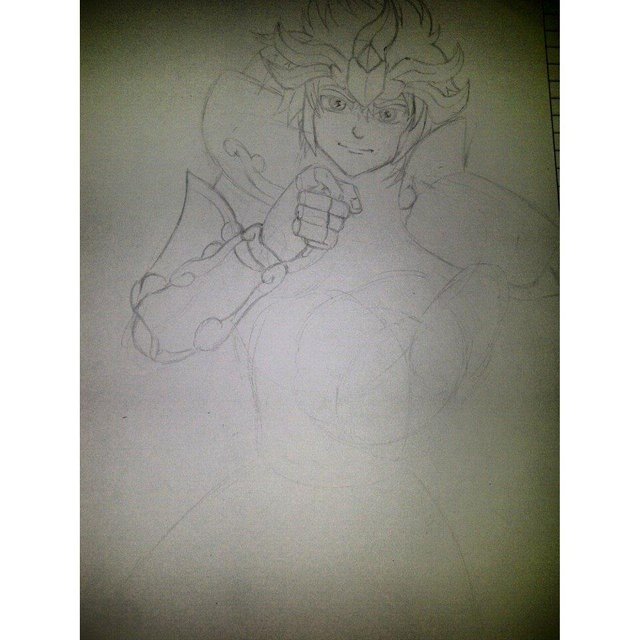
We will use an HB to make the outline lines always looking at the image giving the details of the armor smoothly until we get to have the outline of the illustration, for the eyes there is a technique that we can all use and is to make a line in the middle of the face vertically and another horizontally and there we will have a kind of cross that will serve as a guide for where the middle of the face is another line below where it will be for the guide of the nose and one last lower where the mouth will go , where is the connection of the said cross we will make a horizontal line also only a little eye not so high because between that and the cross the eyes will go like this
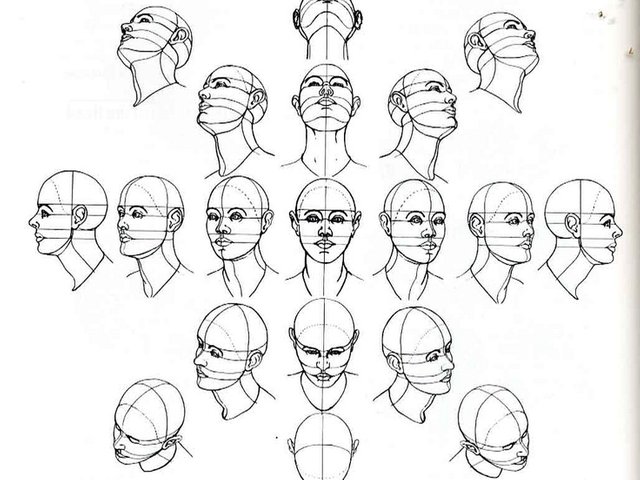
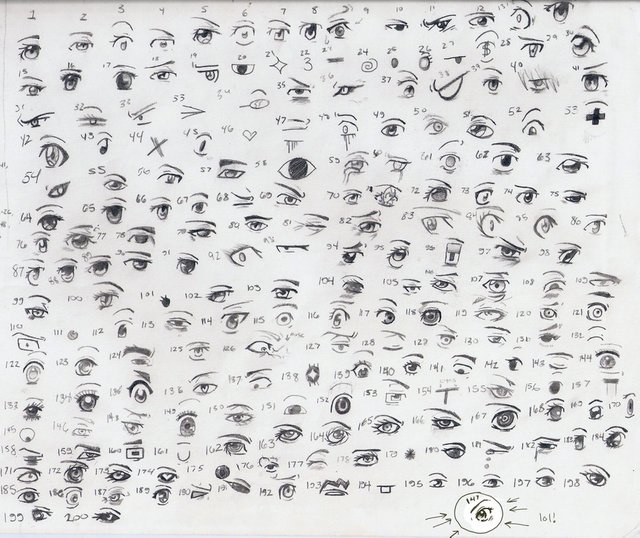
Then we will continue doing it to create the nose and mouth and the eyes remember in the field of manga there are several styles of eyes as it is in real life as it is in the nose, mouth and eyes, "eye where the two go lines where the eyes will go there is the guide to where the ears will go and the size in proportion to it "
PART III
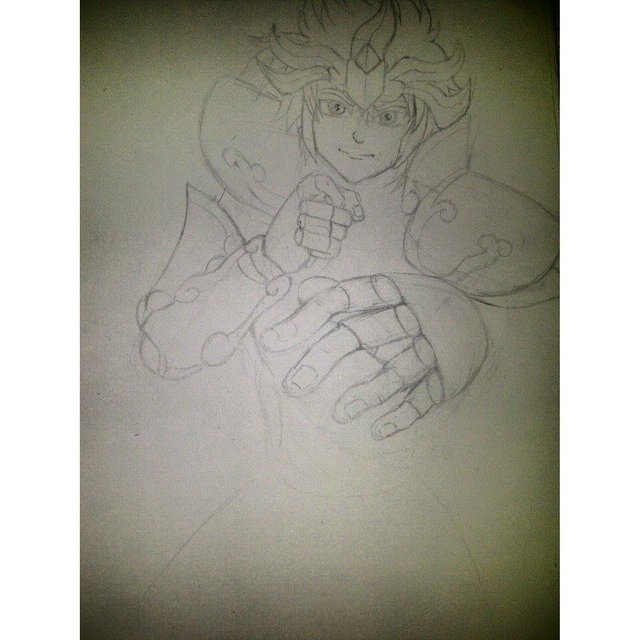
We will try to recreate the same eyes of the character that is only an explanation that there are several types of eyes and that we can use them to practice, continuing with our previous explanation, we will make the helmet of the leopard armor and we will make some small strokes the shoulder pads of the armor then we will make the other shoulder pads and we will make the hand of open or closed airas as it is easier for one way to make the hand is the next, we will make a square where the palm of the hand will hear do not worry about the circle as it serves guide how big will be the hand do not worry and we'll do five lines that will guide the fingers well
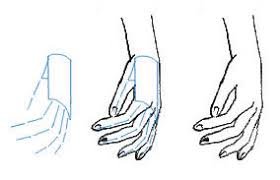
Now to know how fingers are made then we will make the fingers of the character as seen in the image that we chose clearly "the technique of the illustrator is to see the image and try or to make it look as close to the original because that is what try ", because using the HB pencil we will make the fingers and the part that go over the palm that is part of Aioria's armor.
PART IV
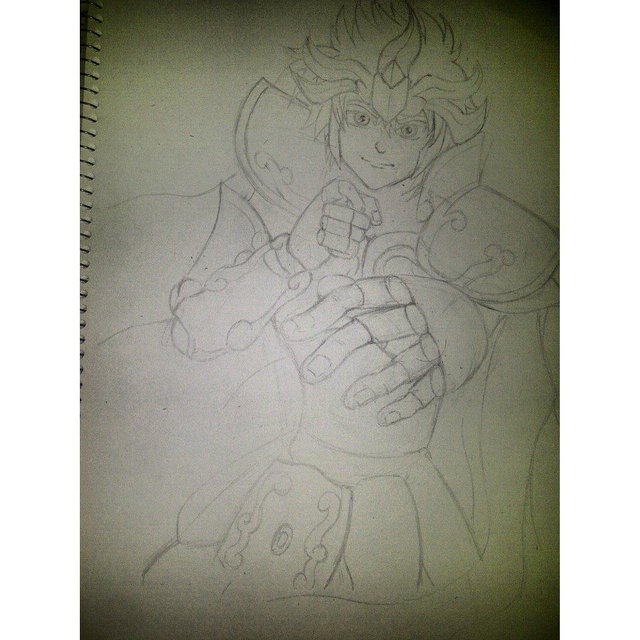
Now we will make the waist of our person and finalizing the part of what is the sketch, sketch ?, Is it just a sketch ?, Is not it finished ?, Well no gentlemen has not yet finished because we will do the last details of what is the sketch because they think I told them we will use a marker or fast Graf, now we will do the final part what is the waist and the cape because all the knights of the golden armor zodiac use a white cape. And we will do so
PART V
Highlight the lines and erase
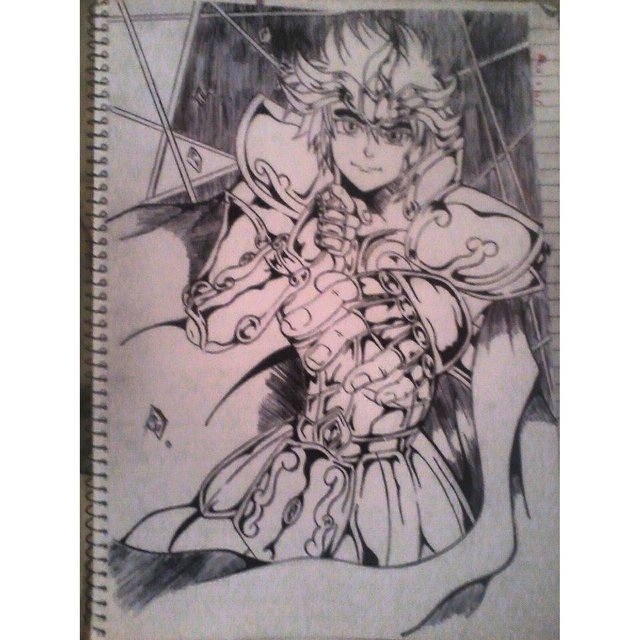
Now we will do the following, highlight the lines of the contours with our fast graf or extra fine marker, and we will give them just highlighting the outside and very little inside not so much preferably, with the pencil you will make small flashes of brightness according to where let's see that the armor has brightness because they remember that always but always shone as if they were freshly polished, then we will remark those lines until we stay like this, sorry for the picture that looks so bad

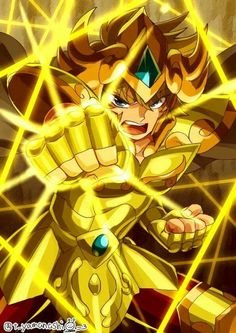
Now after having the lines all highlighted we will use the eraser or eraser and we will erase all the guidelines passed by pencil and we will make the flashes of lights back because we make aioria using its power which will have as background rays
So, and we will do the other details with the pen.
PART VI
HIGHLIGHT WITH THE BALLAGRAPH
Now with the ballpoint pen we will make small straight lines behind the aioria and a lightning effect to give more life to the illustration in this step you have to have a lot of patience because you need this step just like that.
PART VII
WE ARE ALREADY FINISHING
SHADOWS AND DIFFUSION
Now that we have reached the final phase that stage where you have done all of everything, now you will do the last step using the 6B pencil, you can apply shadows where it will give the effect of shine careless if you pass remember that you can erase using the pencil without setting much the pencil just a little, do not afinques enter much the pencil with pass it smoothly enough, after having the shadows remember to take into account something the shadows you can do them to your liking where you think it is better to make a shadow, but remember that if the character already has the shadows you can guide you where it is, now you give the last ones of some stones or some little things that you want to add at the end and then apply the blur or you can use your fingertips to give the shadows you can gently give it in circles very gently until the whole area is in total black shadow then to finish with the pencil eraser you can pass some lines to the drawing where they made the shadows to make a brightness effect which looks very good at first glance, you just have to erase a bit and they are ready to create the line and something like that will remain.
Now if we finish this little tutorial and remember patience is the key, the desire and encouragement and love for illustration also influence remember that the essential thing is to practice as long as they can not stop practicing, keep drawing and do works and beautiful illustrations to the world I say goodbye to you and remember to continue drawing
THANK YOU FOR SEEING MY FIRST POST!
I'm DRAWARTGP
(GABRIEL)
WE WILL SEE YOU IN THE FOLLOWING POST
SEE YOU SOON
Keep drawing

Your post was upvoted by the @art-venture account after manual review and included in Art-Venture magazine. The upvote and support of Art-venture magazine would greatly appreciated!
Congratulations @drawartgp! You have completed the following achievement on the Steem blockchain and have been rewarded with new badge(s) :
Click here to view your Board of Honor
If you no longer want to receive notifications, reply to this comment with the word
STOPDo not miss the last post from @steemitboard:
Congratulations @drawartgp! You received a personal award!
You can view your badges on your Steem Board and compare to others on the Steem Ranking
Vote for @Steemitboard as a witness to get one more award and increased upvotes!